Categories
Projectors Informational

How To Connect a Chromecast To A Projector

How To Connect a Chromecast To A Projector | Step-by-Step Guide

Streaming content from your Chromecast to a projector offers a fantastic home entertainment experience, but the process might present challenges, especially when it comes to audio connectivity. In this guide, we’ll walk you through the simple steps to connect your Chromecast to a projector and address potential audio issues, ensuring a smooth and immersive streaming experience.

Challenges When Connect Chromecast with a Projector

The main problem that users encounter when connecting a Google Chromecast (on Amazon) to a projector lies in the audio aspect of the setup. While the Chromecast’s HDMI signal carries both video and audio, challenges arise when attempting to seamlessly route the audio signal to the projector or another audio component.

This issue is particularly pronounced when projectors lack built-in speakers, requiring users to explore alternative methods to ensure a synchronized and high-quality audio experience. The primary complications can be summarized as follows:

Audio Challenges:

  • Projectors Without Built-in Speakers: Not all projectors come equipped with onboard speakers, creating a hurdle for audio output. In such cases, users need to find alternative solutions to ensure clear and synchronized audio during streaming.
  • Mismatched Audio Support: Some newer Chromecast devices support advanced audio technologies like Dolby Atmos. However, not all projectors are designed to accommodate these features, leading to potential compatibility issues and audio disruptions.
  • Lag in Audio or Disruptions: Attempting to connect the Chromecast directly to the projector and then wirelessly connecting to external speakers via Bluetooth can introduce audio lag or disruptions in the streaming experience. This can result in an unsatisfactory user experience with delayed audio.

How To Connect a Chromecast To A Projector

How To Connect A Chromecast To A Projector by hometheaterjournal.com

Bluetooth Connectivity:

  1. Access Chromecast Menu: Begin by accessing the menu on your Chromecast device. This can usually be done through the settings or options menu on your TV screen.
  2. Navigate to Bluetooth Pairing: Look for the Bluetooth pairing option within the Chromecast menu. This is where you initiate the process of connecting your Chromecast to Bluetooth-enabled speakers.
  3. Activate Bluetooth on Speakers: Turn on the Bluetooth feature on your speakers. Refer to the speaker’s manual for specific instructions on how to activate Bluetooth pairing mode.
  4. Sync Speakers with Chromecast: Once Bluetooth is activated on both the Chromecast and the speakers, the devices will search for each other. Follow on-screen prompts to sync the Chromecast with the Bluetooth speakers.
  5. Confirm Connection: After a successful sync, confirm that the Chromecast and Bluetooth speakers are connected. You may see a confirmation message on the TV screen or within the Chromecast menu.

Advantages:

  • Simplicity and Speed: Bluetooth connectivity is a quick and straightforward solution, requiring minimal setup time.
  • Wireless Experience: Eliminates the need for additional cables, providing a clean and wireless audio connection.
  • Compatibility: Ideal for users with Bluetooth-enabled speakers or AV receivers.

HDMI Connectivity:

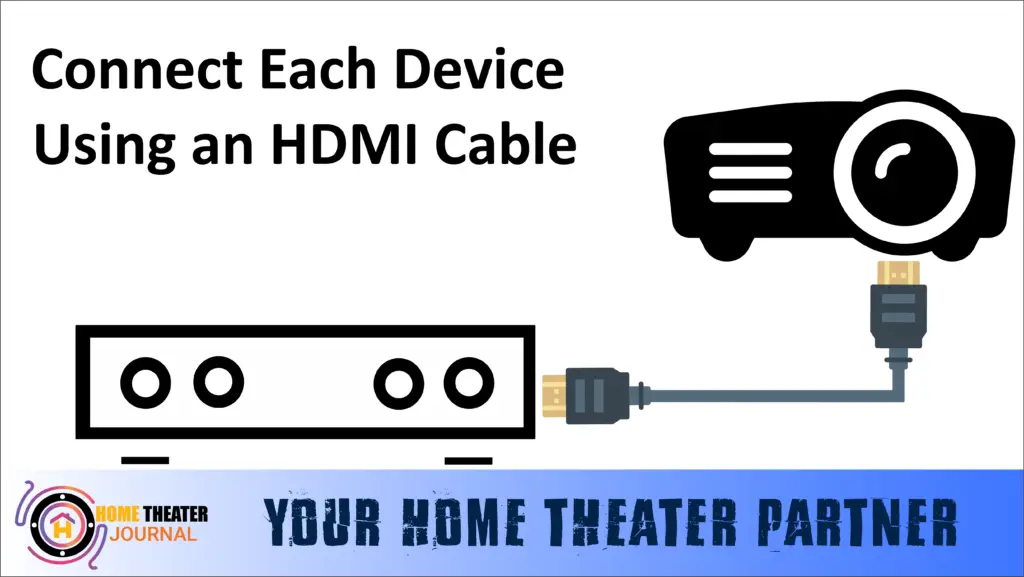
  • Locate HDMI Port on Projector: Identify the HDMI port on your projector. Typically, this is labeled as “HDMI” and may be accompanied by a number indicating the HDMI input.
  • Plug in Chromecast: Take the HDMI end of your Chromecast device and plug it into the identified HDMI port on the projector. Ensure a secure connection.
  • Select HDMI Input on Projector: Using the projector’s remote control or onboard controls, navigate to the input/source selection menu. Choose the HDMI input to which your Chromecast is connected.
  • Power On Chromecast: Power on your Chromecast device. This can usually be done through a dedicated power button on the device or via the Chromecast remote.
  • Ensure Proper Display: Confirm that the content from the Chromecast is displayed on the projector screen. Adjust the projector settings if necessary to optimize the display.

Advantages:

  • Simplicity and Reliability: HDMI connectivity is a straightforward and reliable method, providing both audio and video signals through a single cable.
  • High-Quality Transmission: HDMI cables support high-definition audio and video, ensuring a superior streaming experience.
  • Universal Compatibility: Virtually all projectors and Chromecast devices are equipped with HDMI ports, ensuring broad compatibility.

Wireless HDMI Kit Connectivity:

  • Connect Chromecast to HDMI Transmitter: Plug your Chromecast device into the HDMI transmitter that comes with the wireless HDMI kit. This transmitter is typically a compact device with an HDMI input.
  • Position Wireless HDMI Transmitter: Place the wireless HDMI transmitter in a location within your entertainment setup. It does not need a direct connection to the projector.
  • Connect HDMI Receiver to Projector: Use an HDMI cable to connect the HDMI receiver, provided with the wireless HDMI kit, to the HDMI port on your projector.
  • Power On Chromecast and HDMI Kit: Power on your Chromecast device and the HDMI transmitter. The HDMI transmitter will wirelessly send the Chromecast’s audio and video signals to the HDMI receiver.
  • Confirm Connection: Check the projector’s input/source settings and ensure it’s set to the HDMI port where the wireless HDMI receiver is connected. Confirm that the content from the Chromecast is displayed on the projector screen.

Advantages:

  • Wireless Convenience: Eliminates the need for a physical connection between the Chromecast and the projector, reducing cable clutter.
  • Flexibility in Placement: The wireless HDMI transmitter can be positioned anywhere within the range of the kit, providing flexibility in arranging your entertainment setup.
  • Supports Audio and Video Wirelessly: Both audio and video signals are transmitted wirelessly, offering a comprehensive solution.

How to Connect Your HDMI Kit to Your Projector

How To Connect A Chromecast To A Projector by hometheaterjournal.com

Setting up an HDMI kit (on Amazon) with your projector involves a few straightforward steps to establish a wireless connection between your Chromecast and the projector. Here’s a detailed guide on how to set up an HDMI kit for optimal streaming:

Steps to Set Up an HDMI Kit with Your Projector:

  1. Gather Your Equipment: Ensure you have all the necessary components: the HDMI transmitter, HDMI receiver, HDMI cable, power adapters for both transmitter and receiver and your Chromecast device.
  2. Connect Chromecast to HDMI Transmitter: Plug your Chromecast into the HDMI transmitter. This is usually a compact device that comes with the HDMI kit.
  3. Position the HDMI Transmitter: Place the HDMI transmitter in a location within your entertainment setup. It doesn’t need a direct line of sight to the projector but ensure it’s within the specified wireless range.
  4. Connect HDMI Receiver to Projector: Use an HDMI cable to connect the HDMI receiver, which comes with the HDMI kit, to the HDMI port on your projector.
  5. Power On Devices: Power on your Chromecast device, the HDMI transmitter, and the HDMI receiver. Ensure each device is connected to a power source using the provided adapters.
  6. Configure Projector Input: Access the input/source settings on your projector and select the HDMI port to which the HDMI receiver is connected. This establishes the connection between the projector and the wireless HDMI kit.
  7. Check Chromecast Display: Confirm that the content from your Chromecast is being displayed on the projector screen. This verifies the successful wireless transmission of both audio and video signals.

Tips for Optimal Setup:

  • Wireless Range: Be mindful of the wireless range specified by the HDMI kit manufacturer. Ensure the transmitter and receiver are within this range for optimal performance.
  • Power Management: Ensure all devices are adequately powered. Use reliable power adapters to prevent interruptions during streaming.
  • Line of Sight: While not always necessary, maintaining a clear line of sight between the HDMI transmitter and receiver can enhance signal stability.
  • Firmware Updates: Check for firmware updates for both the Chromecast device and the HDMI kit components to ensure compatibility and optimal performance.

By following these steps, you can set up an HDMI kit seamlessly, creating a wireless connection between your Chromecast and projector. This not only reduces cable clutter but also provides flexibility in positioning your entertainment components for an enhanced streaming experience.

Conclusion:

Connecting a Chromecast to a projector is a straightforward endeavor, yet addressing potential audio challenges can significantly enhance your streaming experience. Whether opting for Bluetooth connectivity, leveraging an HDMI audio extractor, or embracing the wireless convenience of an HDMI kit, you can tailor the solution to suit your specific setup.

Choose the method that suits your preferences and enjoy seamless streaming with both crystal-clear video and high-quality audio. Explore these options to unlock the full potential of your home entertainment setup, making the most of your Chromecast and projector combination.

FAQs


1. How do I connect Chromecast to a projector without built-in speakers?

Answer: If your projector lacks built-in speakers, you can use alternative audio solutions. Options include connecting Chromecast to external speakers via Bluetooth, using an HDMI audio extractor, or employing a wireless HDMI kit for a comprehensive audio and video streaming experience.

2. Can I connect Chromecast to a projector wirelessly?

Answer: Yes, you can establish a wireless connection between Chromecast and a projector using a wireless HDMI kit. This kit typically includes a transmitter connected to the Chromecast and a receiver linked to the projector, eliminating the need for physical cables between the devices.

3. What should I do if there is a delay in audio when connecting Chromecast to a projector?

Answer: Audio delays can occur when wirelessly connecting Chromecast to a projector, especially via Bluetooth. To address this, consider using an HDMI audio extractor or a wireless HDMI kit. These solutions help synchronize audio and video signals, providing a seamless streaming experience without noticeable delays.

4. Are all projectors compatible with Chromecast?

Answer: In general, most projectors equipped with HDMI ports are compatible with Chromecast. Ensure your projector has an available HDMI port, and you can connect Chromecast directly or through a wireless HDMI kit for a versatile streaming setup.

5. Can I use a wireless HDMI kit with other devices besides Chromecast?

Answer: Yes, a wireless HDMI kit is not exclusive to Chromecast and can be used with various HDMI-enabled devices. This versatile solution allows you to wirelessly transmit both audio and video signals, providing flexibility for expanding your entertainment system to include other HDMI sources, such as gaming consoles or Blu-ray players.


Categories
Projectors Informational

Silver Projector Screen Vs White Screen

Silver Projector Screen Vs White Screen | Choosing the Perfect Canvas

When creating the ultimate cinematic experience in your home theater, one crucial decision can make or break the show: choosing between a silver projector screen and a white screen. Both options have their advantages and drawbacks, so it’s essential to understand the nuances before you hit play on your favorite film.

In this article, we’ll take a deep dive into the silver projector screen and the white screen, comparing their features, pros, and cons to help you decide which canvas for your visual masterpiece.

Silver Projector Screen Vs White Screen

FeatureSilver Projector ScreenWhite Screen
Brightness & ContrastEnhancedNatural
Ambient Light PerformanceExcellentChallenging
3D ProjectionExcellentReduced Brilliance
Viewing AngleLimitedWide
CostHigherBudget-Friendly

The Silver Screen: Unveiling Its Brilliance

Shimmering Brilliance

Imagine the allure of a silver screen that adds a touch of elegance to your home theater. Silver projector screens are known for their remarkable ability to enhance the brightness and contrast of your projected images. Thanks to their reflective properties, they can make even the darkest scenes pop with clarity and brilliance.

Ambient Light Friendliness

Silver screens also have an edge when it comes to handling ambient light. They maintain picture quality, even in rooms with less-than-ideal lighting conditions. This means you can enjoy your favorite movies or sports events without drawing the curtains or turning off every light in the house.

Optimal for 3D Projection

If you’re a fan of 3D movies, a silver projector screen is your best friend. It ensures that the 3D effects appear sharp and immersive, elevating your movie-watching experience to a whole new dimension.

However, silver screens are not without their drawbacks:

Limited Viewing Angle

One of the primary drawbacks of silver screens is their limited viewing angle. If your seating arrangement varies widely in angle or distance from the screen, some viewers might experience color shifts or reduced image quality.

Higher Cost

Silver projector screens tend to be more expensive than their white counterparts. If you’re on a budget, you might need to think twice before choosing the silver option.

The White Screen: A Timeless Classic

Natural Colors

White projector screens have been a staple in home theaters for a long time and for a good reason. They deliver natural and accurate colors, making them an excellent choice for purists who value color fidelity. If you’re a cinephile who prefers the director’s vision to be presented without any enhancements, a white screen may be your go-to choice.

Wide Viewing Angle

White screens offer a wider viewing angle, ensuring everyone in your home theater gets a consistent and enjoyable viewing experience. Whether you’re sitting dead center or on the periphery, you’ll still enjoy vibrant colors and sharp images.

Budget-Friendly Options

Compared to silver screens, white screens are generally more budget-friendly. This makes them a practical choice for those who want a quality screen without breaking the bank.

However, white screens do have their limitations:

Challenging with Ambient Light

White screens might struggle to maintain picture quality in rooms with ambient light. They are more susceptible to washout and glare, which can be distracting during your movie nights.

Reduced 3D Brilliance

If you’re a 3D enthusiast, white screens may not provide the same level of brilliance and depth as silver screens. You might miss out on the full 3D experience.

Conclusion

There’s no one-size-fits-all answer in the battle between the silver projector screen and the white screen. Your choice ultimately depends on your preferences, budget, and the characteristics of your home theater room.

If you crave the wow factor, have a penchant for 3D, and don’t mind investing a bit more, the silver projector screen might be your ticket to a dazzling cinematic experience. On the other hand, if you prioritize color accuracy, have a limited budget, or need a screen for a room with controlled lighting, the classic white screen is a reliable choice.

So, whether you opt for the shimmering brilliance of silver or the timeless charm of white, your home theater will be your oasis of cinematic delight. It’s all about creating the perfect canvas for your visual masterpiece, so sit back, relax, and enjoy the show!

Choose your screen wisely, and let the movie magic begin!

FAQs


Q1: Which type of screen is better for watching movies in a well-lit room with windows?

A1: A Silver Projector Screen is the better choice if your home theater room has windows or is prone to ambient light. Silver screens handle ambient light, ensuring you can enjoy your movies without compromising on picture quality.

Q2: Do Silver Projector Screens work well for 3D movies?

A2: Yes, Silver Projector Screens are excellent for 3D projection. They enhance the brightness and contrast of 3D images, providing a more immersive and vibrant 3D viewing experience.

Q3: Are White Screens more budget-friendly than Silver Screens?

A3: Generally, yes. White Screens tend to be more budget-friendly compared to Silver Screens. A White Screen might be the better choice if you’re looking for a cost-effective option without sacrificing quality.

Q4: Do Silver Screens have a limited viewing angle?

A4: Yes, Silver Projector Screens tend to have a limited viewing angle. If you have a home theater with seating arrangements that vary widely in angle or distance from the screen, some viewers may experience color shifts or reduced image quality.

Q5: Which screen type provides a more accurate color representation?

A5: White Screens are known for delivering more natural and accurate colors. If color fidelity is your top priority, a White Screen is the preferred option, as it presents the director’s vision without any enhancements.


Categories
TV's Informational

Hisense Universal Remote Codes

Hisense Universal Remote Codes and TV Programming Guide


In the smart TVs and streaming services, managing multiple remotes can become a cumbersome task. Universal remotes offer a solution by consolidating control into a single device but programming them to work seamlessly with your Hisense TV can be challenging due to the plethora of unique codes.

Fear not! In this in-depth guide, we’ll delve into the intricacies of Hisense TV remote codes and provide step-by-step instructions for flawless programming, ensuring a clutter-free and convenient entertainment experience.

Understanding Hisense TV Remote Codes:

Hisense TV remote (On Amazon) codes come in various formats, including 3-digit, 4-digit, and 5-digit sequences, tailored to different remote models and brands. Let’s explore each format in detail:

3-Digit Codes

Remote3-Digit Codes
Hisense759
RCA042, 237
GE073, 081, 182, 216
Spectrum004, 021, 031, 072, 198, 236, 251, 268, 363, 387, 419, 442, 619, 630, 631, 705, 752

4-Digit Codes

Remote4-Digit Codes
Hisense0009, 0073, 0145, 0156, 0182, 0208, 0216, 0227, 0508, 0696, 0748, 0753, 0780, 0821, 0848, 1170
RCA0178, 0706, 0748, 0818, 0885, 1042, 1138, 1204, 1237, 1314, 1602, 1660, 1756, 2049, 2098, 2183, 2355, 2360, 2419, 2434, 3519, 3183, 3382, 4029, 4149, 4398
Philips0001, 0036, 0115, 0223, 0535, 0583, 0671, 0708, 0819, 0908, 1203, 1219, 1651, 1718, 1741, 2081, 2141, 2211, 2891, 3671, 4381, 4391, 5331, 5341, 6001, 6161, 6171, 6251, and more
GE0001, 0073, 0081, 0182, 0216, 0671, 1176, 1651, 1741, 2081, 2141, 2211, 2891, 3671, 4381, 4391, 4671, 5078, 5319, 5209, 5284, 5331, 5345, 5341, 6001, 6161, 6171, 6251, and more
One For All0009, 0208, 0508, 0556, 0698, 0753, 0780, 0860, 0891, 1208, 1363
Magnavox0016, 0069, 0097, 0133
Comcast0748, 0178, 1756
Spectrum0021, 0041, 0178, 0341, 0411, 0706, 0871, 0885, 1041, 1098, 1228, 1279, 1314, 1564, 1660, 1756, 2049, 2098, 2131, 2183, 2355, 2360, 2434, 2511, 2801, 2971, 3382

5-Digit Codes

Remote5-Digit Codes
Hisense10748, 11758, 12183
RCA10178, 10818, 10885, 11314, 11756, 12049, 12098, 12183, 12360, 12419, 12434, 12355, 13183, 13382, 13519, 14398
Philips10005, 10065, 10071, 10179, 10258, 10277, 10375, 10473, 10571, 10679, 10777, 10821, 10875, 10973, 11071, 11179, 11277, 11375, 11476, 11574, 11672, 11422, 11666, 11764, 11862, 11960, 12074, 12128, 12561, 12846, 12859, 13450, 13359, 13846, 13944, 14564, 14643, 14662, 14972, 15532, 15972, 16070, 16178, 16513, 16551, 16703, 16738, 16744, 16969, 17206, 17231, 17415, 17440, 18247, 18437, 18459, 18557, 18655, 18924, 18962, 19351, 19367, 19715
One For All21262, 24344, 24525, 25612, 26146, 34243, 35254, 42224, 43155, 44631
Comcast10178, 10706, 10748, 10885, 11314, 11602, 11660, 11756, 11993, 12049, 12089, 12098, 12183, 12296, 12360, 12434, 13118, 13382
DirecTV10178, 10706, 10748, 10818, 10885, 11314, 11602, 11660, 11756, 12049, 12098, 12183, 12355, 12360, 12419, 12434
Spectrum10178, 10748, 10885, 11314, 11564,

Hisense Universal Remote Codes and TV Programming Guide

Here’s a step-by-step guide to programming your Hisense TV remote:

Step 1: Turn on Your TV

The first step is simple. Make sure your Hisense TV is turned on using its power button.

Step 2: Hold the Device Key

Locate the “device key” on your remote control. This key might be labeled differently depending on your remote, such as “Code Search,” “Setup,” “Magic,” or simply “TV.” Hold down this key until you see the LED indicator light up on your remote.

Step 3: Enter the Code

Once you’ve selected the appropriate mode for your TV (usually “TV”), it’s time to enter the code. Refer to the list of Hisense TV remote codes provided earlier in this guide. Enter the code using the numeric keypad on your remote. If the code is correct, you’ll notice the LED indicator blink, indicating successful entry. Sometimes, the TV might even turn off, confirming that the correct code has been entered.

Step 4: Test Your Remote

After entering the code, it’s essential to test whether your remote is working correctly with your Hisense TV. Try using various functions like changing channels, adjusting the volume, and accessing the menu. If everything works smoothly, congratulations! Your remote is successfully programmed. However, if some functions don’t respond as expected, you might need to try a different code and repeat the process.

Troubleshooting Tips:

Sometimes, despite following the steps carefully, you might encounter issues with programming your remote. Here are some troubleshooting tips:

  • Ensure you’re holding down the correct device key throughout the programming process. Failure to do so might result in incorrect code entry.
  • Check the batteries in your remote. Low or depleted batteries can affect the performance of your remote. Replace them if necessary.
  • Make sure there’s a clear line of sight between your remote and the TV. Any obstructions could interfere with the signal, preventing proper communication.
  • Verify that your Hisense TV is functioning correctly by testing it with its manual controls. If the TV doesn’t respond to manual commands, there might be an issue with the TV itself rather than the remote.

By following these steps and troubleshooting tips, you’ll be able to program your Hisense TV remote with ease, ensuring hassle-free control over your entertainment system.


Conclusion:

Mastering the programming of your Hisense TV remote doesn’t have to be daunting. With the provided codes and the step-by-step guide outlined in this comprehensive article, you can effortlessly integrate your remote with your TV, simplifying your entertainment setup and enhancing your viewing experience.

By following the instructions meticulously and troubleshooting any potential issues, you’ll soon enjoy the convenience of controlling your Hisense TV with ease, all with just a single remote.

FAQs


What is a Hisense TV remote code?

A Hisense TV remote code is a unique sequence of numbers used to program a universal remote control to operate a Hisense television. These codes vary in length and format, such as 3-digit, 4-digit, or 5-digit codes, and are specific to different brands and models of remotes.

What is the remote code for Hisense Roku TV?

The remote code for a Hisense Roku TV can vary depending on the model of the universal remote control being used. Common codes for Hisense Roku TVs include 10748, 11758, and 12183, among others. Refer to the instruction manual of your remote or consult online resources for the specific code applicable to your remote model.

How to enter DishNet remote codes for Hisense TV?

To enter DishNet remote codes for a Hisense TV, follow these steps:

Turn on your Hisense TV and the DishNet remote control.

Press and hold the “TV” button on the remote until the LED indicator lights up.

Enter the appropriate remote code for your Hisense TV using the numeric keypad.

If the code is correct, the LED indicator will blink, confirming successful entry. Test the remote to ensure it’s working correctly with your TV.

How do I find the remote code for my specific Hisense TV model?

To find the remote code for your specific Hisense TV model, consult the instruction manual that came with your universal remote control. Alternatively, visit the manufacturer’s website or online forums for a list of compatible remote codes. You can also try using code search functions available on some remotes to automatically find the correct code for your TV model.

Can I use the same remote code for different Hisense TV models?

While some remote codes may work for multiple Hisense TV models, it’s not guaranteed. It’s recommended to use the specific remote code provided for your TV model to ensure compatibility and optimal performance. If the provided code doesn’t work, try experimenting with other codes or consult the manufacturer for assistance.


Categories
Projectors Informational

Best Movies to Watch on Projector

Top 12 Best Movies to Watch on Projector

You’ve finally done it! After months of saving and anticipation, you’ve got your hands on a shiny new projector. You’ve set it up in the perfect spot, secured it on the ideal mount, and now you’re ready to turn your space into a cinematic haven. But wait, you’re missing one crucial element – the list of movies! Installation was a breeze, and now it’s time to dive into the world of larger-than-life entertainment.

Here’s a selection of the 12 best movies to watch on your projector and you can also watch the movie on your own choice, ensuring that your investment is put to the best use possible:

Best Movies to Watch on Projector

  • The Dark Knight
  • Despicable me
  • Terminator 2: Judgement Day
  • Five Feet apart
  • Star Wars
  • Guardians of the Galaxy
  • La La Land
  • Extraction
  • Blair Witch Project
  • Jurassic Park
  • Interstellar

The Dark Knight: 

When it comes to superhero movies, “The Dark Knight” stands out as an absolute must-watch. This film combines remarkable graphics, outstanding performances, and an unexpected storyline. 

The visual spectacle and the gripping narrative are a treat for viewers of all ages and interests. To create the best home movie theater experience, dim the lights, and don’t forget to have some buttery movie theater popcorn to snack on.

Despicable Me: 

While “Despicable Me” might seem like a familiar choice, watching this adorable and funny animated film on a projector can be a whole new experience. Gather your family and relive the antics of Gru and the Minions on the big screen. The humor and heartwarming moments are even more enchanting when projected.

Terminator 2: Judgment Day: 

The Terminator franchise has some great movies, but “Terminator 2: Judgment Day” is often recommended for projector viewing. 

This classic film, known for its well-crafted storyline and action sequences, looks even more impressive on a large projector screen. Give the trailer a try, and you’ll see why it’s a projector favorite.

Five Feet Apart: 

If you’re drawn to romance films, “Five Feet Apart” is a hidden gem that deserves more attention. This movie offers a unique blend of romance, drama, and adventure, making it stand out from typical romantic films. Don’t let the ratings deter you; watching it on your projector with your loved one will make you appreciate its charm.

Star Wars: 

The Star Wars franchise is a cinematic classic that transcends generations. Even if you’ve seen the movies before, watching them in your home theater can be a nostalgic and immersive experience. 

Consider titles like “Star Wars: The Force Awakens,” “Star Wars: The Last Jedi,” “Return of the Jedi,” and “Rogue One” for an epic movie marathon on your projector.

Guardians of the Galaxy: 

If you’re in the mood for a light-hearted and fun movie, “Guardians of the Galaxy” is a great choice. This film seamlessly blends action with humor and will keep you thrilled and smiling. It’s ideal for a family movie night, so be sure to enjoy it with your kids or save it for the upcoming Christmas holidays.

La La Land: 

“La La Land” is a mesmerizing musical that has captivated audiences worldwide. While it’s a visual and auditory delight, remember to invest in additional speakers to fully appreciate the music. 

Watching this on a projector with high-quality audio is an experience that will deepen your love for musicals.

Extraction: 

“Extraction” is a relatively new action movie that’s perfect for projector viewing. Whether you’ve seen it or not, the adrenaline-pumping action and suspense are enhanced when projected on a big screen. 

Gather your friends for an action-packed movie night, as this film is especially appealing to the adventurous side.

Blair Witch Project: 

If you’re a horror enthusiast, the projector can take your viewing experience to another level. Start with “Blair Witch Project,” a groundbreaking found-footage horror film. Watching it in an outdoor setting can add an extra layer of spookiness to the experience. The immersive darkness and eerie atmosphere will have you on the edge of your seat.

Jurassic Park: 

“Jurassic Park” is a cinematic masterpiece that brings dinosaurs back to life with groundbreaking special effects. The sheer scale and suspense of this film are truly appreciated on a projector. You’ll feel like you’re right there on Isla Nublar, surrounded by towering prehistoric creatures.

Interstellar: 

“Interstellar” is a mind-bending science fiction film that explores the cosmos and the human spirit. Its stunning visuals and complex storytelling are ideal for projector viewing. The vastness of space and the emotional depth of the characters come to life in a way that’s impossible to replicate on a smaller screen.

So, there you have it, a well-rounded list of movies to enjoy on your new projector. Whether you prefer action, romance, or horror, these films are sure to deliver a memorable home theater experience. Grab some popcorn, dim the lights, and let the magic of the projector transport you into the world of cinema like never before. Happy viewing!

FAQs


Q: What type of projector is best for home theater use?

Answer: The best projector for home theater use typically depends on your specific needs and budget. However, for a great home theater experience, you should consider a Full HD (1080p) or 4K projector with a high lumen rating for brighter images.

Look for projectors with good contrast ratios and consider whether you want a DLP or LCD projector based on your preference for image quality. It’s also essential to choose a projector that suits your room size and layout.

Q: How can I optimize the image and sound quality of my projector for a better home theater experience?

Answer: To optimize image quality, ensure your projector is correctly aligned and focused. Use a high-quality screen or a smooth, white wall. Adjust the lighting in your room to reduce ambient light, and choose appropriate color settings on the projector.

For sound quality, invest in external speakers or a soundbar, as projector built-in speakers may not provide the best audio experience. Properly calibrate your audio system to create a balanced and immersive sound environment.

Q: What is the ideal screen size and viewing distance for a home theater projector setup?

Answer: The ideal screen size and viewing distance can vary based on personal preference and the projector’s specifications. However, a general rule of thumb is that your screen size should be around 100-120 inches for an immersive home theater experience. The viewing distance depends on screen size and resolution, but a distance of approximately 1.5 to 2.5 times the screen width usually works well for Full HD and 4K projectors.

Q: Can I connect streaming devices or gaming consoles to my home theater projector?

Answer: Yes, you can connect streaming devices and gaming consoles to your home theater projector. Most projectors have multiple input options, including HDMI, which is compatible with various devices like Blu-ray players, gaming consoles, streaming devices, and laptops. Simply connect your device using the appropriate cable, and you can enjoy streaming content or gaming on the big screen.

Q: Are there any maintenance tips to prolong the life of my home theater projector?

Answer: To extend the life of your home theater projector, it’s essential to keep it clean and well-ventilated. Regularly clean the projector’s filter or air intake to prevent overheating. Avoid blocking the ventilation, and ensure it’s placed in a dust-free environment.

Additionally, replace the projector lamp when it reaches the end of its lifespan, and handle the projector carefully to avoid physical damage during installation or maintenance. Regular maintenance and responsible usage can significantly prolong your projector’s life.


Categories
Projectors Informational

Get Rid of Vertical Lines on Projector

How to Get Rid of Vertical Lines on Projector | 8-Methods

Vertical lines on your projector can be a frustrating issue for anyone who enjoys watching movies or giving presentations. However, the good news is that you can often resolve this problem on your own without needing to call in a professional technician.

In this comprehensive guide, we’ll take you through a step-by-step process to help you get rid of those pesky vertical lines and get your projector working perfectly again.

How to Get Rid of Vertical Lines on Projector | step-by-step process

1. Secure the Projector: 

To begin addressing the issue of vertical lines on your projector, the first step is to ensure that the projector is securely positioned. This is important because loose or unstable placement can sometimes lead to image problems.

Hold the projector firmly in place and place your thumb on the top, about 2.5 to 3 inches behind the screen size dial. By gently pressing the projector from the top and simultaneously placing your hand at the bottom to apply pressure, you can help resolve the issue.

2. Observe Line Changes:

While you’re applying pressure to the projector, pay close attention to the vertical lines on the screen. This is a critical step because the lines may change or shift as pressure is applied. Observing these changes will help you determine if pressure can alleviate the issue.

3. Check Cable Connections: 

Vertical lines can sometimes result from poorly connected cables. Before delving deeper into the troubleshooting process, unplug the cables connected to your projector and then securely plug them back in. This simple step can resolve the issue if loose or damaged cable connections were the problem.

4. Press from Top to Bottom: 

Continuing to press the projector from top to bottom is often a key step in eliminating vertical lines. While applying pressure, closely monitor the lines on the screen. If you notice changes such as lines changing color, becoming fainter, or getting farther apart, it’s an indication that this method might solve the problem.

5. Reach the Main Board: 

If the vertical lines persist after applying pressure and securing cable connections, it’s time to explore the main board. The main board is a critical component of the projector that controls various functions.

To access it, you may need to open up the projector and remove the main board cover. Be extremely cautious during this process as the main board is a sensitive and intricate component.

6. Gently Press the Main Board: 

With the main board exposed, gently press it down. The main board can sometimes become loose, leading to display issues. By gently reseating it, you may eliminate any potential connectivity problems. It’s essential to exercise great care and precision during this step, as any mishandling could worsen the issue.

7. Check for Line Elimination: 

After pressing the main board down, observe the screen to check if the vertical lines have disappeared. If there are no major issues with the main board, this step should help confirm whether it was the source of the problem.

8. Cleaning, Repair, or Replacement: 

If the vertical lines persist despite your efforts, it’s time to consider cleaning, repairing, or replacing the main board. Cleaning the main board is a straightforward task and can help remove dust or debris that may be causing the problem.

However, for more complex issues or if the main board is damaged, it’s advisable to consult a professional technician who can diagnose and address the problem effectively. They may either repair the board or replace it with a new one, depending on the severity of the issue.

Conclusion

In summary, resolving the issue of vertical lines on your projector can often be a DIY task with the right approach. By applying pressure to the projector, securing cable connections, and inspecting the main board, you can eliminate those frustrating lines on your screen.

Remember to handle the main board with care and consult a professional if the problem persists. With these steps, you can get back to enjoying your movies and presentations hassle-free.

FAQs


Q: Why do vertical lines appear on my projector’s display?

 A: Vertical lines on a projector’s display can result from various factors, including loose cable connections, pressure-related issues, or problems with the main board. It’s essential to troubleshoot each potential cause to determine the source of the problem.

Q: Is it safe to apply pressure to the projector to fix the vertical lines? 

A: Yes, applying gentle pressure to the projector is often a safe and effective troubleshooting step. When done correctly, it can help reseat internal components or connectors that may be causing the issue. However, always exercise caution and avoid excessive force to prevent any damage.

Q: Can cleaning the main board resolve vertical lines on a projector? 

A: Yes, cleaning the main board can help if the issue is caused by dust or debris interfering with the connections. Dust can accumulate over time and affect the performance of the main board. Cleaning it carefully may eliminate the problem.

Q: What should I do if vertical lines persist after trying the troubleshooting steps? 

A: If the vertical lines on your projector’s display persist despite attempting the suggested troubleshooting steps, it’s advisable to contact a professional technician. They can diagnose the issue more comprehensively, perform repairs if necessary, or replace the main board if it’s damaged beyond repair.

Q: Can vertical lines be a symptom of a more serious projector problem? 

A: Vertical lines can sometimes indicate underlying issues with your projector’s hardware. While the troubleshooting steps mentioned in the guide should resolve most cases, persistent lines may be a sign of a more significant problem. It’s crucial to address this promptly to ensure the longevity of your projector and the quality of your projections.


Categories
Subwoofer Informational

How To Fix A Subwoofer With No Sound

How To Fix A Subwoofer With No Sound | Troubleshooting Guide

Need help fixing your subwoofer with no sound?

You will find a lot of helpful information in this article. 

The bass frequencies produced by subwoofers can be heard in home theaters, game rooms, and recreational areas not available to regular speakers. 

There are two types of subwoofers: low-frequency loudspeakers and high-frequency loudspeakers. Sound systems can incorporate subwoofers as part of the system or as stand-alone components.

The following instructions will help you fix a home theater subwoofer that doesn’t work. You should inspect each subwoofer part very carefully before you start. Before you start, pay more attention to every aspect of your subwoofer! Subwoofers connected to TVs or audio systems are connected to their subwoofer outputs. A working power outlet must be connected to the subwoofer’s power cord to allow the subwoofer to receive power.

If you looking for the best subwoofer in the specific budget range we have the best review guides under $500. Explore top-rated subwoofers that offer excellent performance without breaking the bank, ensuring a powerful and immersive sound experience for your home theater setup.

Sometimes, you might only need to consult a professional if your subwoofer is working. Many sound system problems can be solved by changing the signal source. Here are some things you can check to see if the subwoofer or amplifier is the problem:

Does every speaker have a secure connection? 

Make sure all cables are disconnected and then reconnected.

Has the power been turned on?

An LED light indicating that the subwoofer is powered should be on your subwoofer.

Check your amplifier’s setup menu if it has a crossover control (most integrated amplifiers have this in the setup menu if there is no power or a receiver without a subwoofer output). If that is the case, you must ensure that the crossover frequency control is switched to the “off” position.

Can you hear anything from your subwoofer?

Ensure your stereo system or TV speaker settings are correct before using the subwoofer. It is impossible to use a subwoofer with incorrect speaker settings. If your speaker settings need to be changed, you may need to do so. You can find more information on your stereo system or TV instructions. Depending on your stereo receiver, you can choose a different sound field.  

Your amplifier may have a crossover control (found in the setup menu of most integrated amplifiers) if no sound or distorted sound is coming from the speaker. Set the crossover frequency control to “off” if so.

Plugging in and securing all cables is a must. Make sure your speaker cables are connected correctly.

What is the status of the subwoofer? Switch on your power by checking the power switch. Ensure that a button isn’t connected to the extension cord if you’re using one.

For a more in-depth understanding of subwoofer types and their functionalities, explore the comparison between passive and active subwoofers. This guide will provide valuable insights into the differences between these two subwoofer types, helping you troubleshoot and optimize your audio setup for the best performance.

Why Does A Subwoofer Stop Working?

Subwoofers stop working when no signal is received at the speaker.

Voltage surges can damage electronic components, including amplifiers and power supplies. If this occurs, fuses can blow, or capacitors can fail to provide the sound system with the necessary voltage.

The sound system contains several parts that are connected by loose cables. Your amplifier or subwoofer could have a damaged connection. A damaged speaker plug end could also cause the problem.

It is possible to produce sound from a system with only one speaker without drawing much power from the power supply. On the other hand, multi-speaker sound systems require more power because they draw more current. An overworked or undersized power supply can prevent a capacitor from failing.

You’ll need an external amplifier if you want your passive subwoofer to work. Home theater setups can use passive subwoofers with an external amplifier connected to the receiver’s preamp outputs. With this configuration, the amplifier power for the subwoofer does not have to be provided by the receiver.

What Does A Subwoofer Cost?

1) The manufacturer should be contacted if there is a problem with electronics that you cannot resolve on your own.

A new subwoofer may be better if the old one is over five years old.

A unit may need more repairs or replacements than it is worth if its electronic components are old or have a limited life span.

2) consult a professional electrician if you need a new power supply.

3) Contact your manufacturer to find an electrician in your area.

Can you build your own subwoofer?

1) It is important to note that a subwoofer is the most suitable type of DIY speaker because it is easy to make and demands only moderate materials.

2) A reasonably suitable speaker enclosure and an amp are The basic components of your DIY subwoofers.

Wood, screws, glue, paint/stain, drill bits, and an amplifier are just some materials you will need to build an essential subwoofer.

3) You will need some fairly basic woodworking and electrical skills to build one for yourself besides understanding how subwoofers work.

Choosing a material for your enclosure is the next step.

5) Placing your speaker in an unguarded and ungrounded location will cause the speaker to cause damage to nearby electronics.

6) A DIY subwoofer can also be created by buying a subwoofer and amplifier separately and attaching them.

When you decide to take this route, you will find cheap models.

7) As soon as your DIY subwoofer has been assembled, verify that it works properly with a separate amplifier from any other electronics or speakers in your system.

Make sure you don’t get any interference or feedback.

8) Ensure that the subwoofer you build for your DIY system matches the rest of your speakers for maximum performance.

How Do You Repair A Subwoofer? Subwoofer with No Sound

If the speaker cone is torn, you might find a tear there. Here are instructions for repairing your subwoofer at home.

1) Speakers generally contain two parts: woofers and woofer amplifiers.

2) If the woofer works but the amplifier does not, you can consult your local electronic repair shop about fixing and replacing it.

3) blown subwoofers and amplifiers should be tested with an ohmmeter.

4) A blown fuse can indicate that the amplifier is defective or that the amp is not receiving power from the subwoofer’s power supply.

5) If the amp has a problem, like a blown fuse in the subwoofer, you can use an ohmmeter.

6) Two speaker cables attached to your subwoofer’s amplifier are labelled “power” on their backs. To find this speaker wire, connect it to one of the ohm meter’s probes.

To test your subwoofer, touch the other probe to any screws or bolts that are not part of your amplifier.

7) You should not see a reading when you touch the probes together. This is because the amp does not have enough power for the subwoofer to work.

8) If the amp is busted, you might be able to get it repaired or replaced by a local shop.

9) Sometimes, when an amplifier is fine, but power isn’t getting to the subwoofer, the problem may be the outlet itself.

10) If the power speaker cables are damaged, replace them with a new one.

How to fix a car subwoofer with no sound

How To Fix A Subwoofer With No Sound by hometheaterjournal.com

If your car subwoofer is not producing any sound, it can be frustrating, but there are several steps you can take to diagnose and fix the issue. Follow these troubleshooting tips to get your car subwoofer back to delivering those deep bass notes:

1. Check Connections:

Ensure that all the cables and wires connected to the subwoofer are secure and properly plugged in. Sometimes, loose connections can lead to no sound output.

2. Examine Power Supply:

Confirm that the subwoofer is receiving power. Check the power cable and fuse to ensure they are not blown or damaged. If needed, replace the fuse and ensure the power source functions correctly.

3. Amplifier Settings:

Review the settings on your car’s amplifier. Ensure that the amplifier is turned on, and its settings are adjusted correctly for the subwoofer to produce sound. Verify that the gain, crossover frequency, and phase settings are appropriately configured.

4. Audio Source and Settings:

Check the audio source (e.g., car stereo, infotainment system) and its settings. Ensure the volume is turned up, the audio source sends signals to the subwoofer, and the balance and fade settings are properly adjusted.

5. Test the Subwoofer Independently:

Disconnect the subwoofer from the car’s audio system and connect it to a different audio source, like a home stereo system. This helps determine whether the issue lies with the subwoofer or the car’s audio system.

6. Inspect Subwoofer Wiring:

Examine the wiring of the subwoofer for any visible damage, such as cuts, frays, or exposed wires. Damaged wiring can lead to a loss of sound.

7. Check for Blown Speaker:

Listen carefully for any rattling or distorted sound coming from the subwoofer. This might indicate a blown speaker. If the speaker is blown, it will need to be replaced.

8. Phase and Polarity:

Check the phase and polarity of the subwoofer. Incorrect phase or polarity settings can lead to sound cancellation or poor bass response. Ensure the subwoofer’s phase switch is set correctly and the subwoofer’s positive and negative terminals are connected properly.

9. Consult Professional Help:

If you have gone through these steps and cannot get sound from your car subwoofer, it might be time to seek assistance from a professional car audio technician. They can diagnose and repair more complex issues.

Conclusion

In conclusion, troubleshooting and repairing a subwoofer with no sound can often be a straightforward process that requires careful inspection and attention to detail. Following the steps outlined above, you can diagnose and resolve common issues that might prevent your subwoofer from producing sound. 

Remember to check connections, power supply, amplifier settings, and speaker settings to pinpoint the problem. In some cases, seeking professional assistance or considering replacement might be necessary for older or severely damaged components.

FAQs


1. Why is my subwoofer not producing any sound?

Check the connections, power supply, and amplifier settings to ensure everything is properly configured. Ensure the crossover frequency control is set correctly, and the power indicator light is on.

2. How do I know if my subwoofer’s amplifier is damaged?

You can use an ohmmeter to test the amplifier and subwoofer for continuity. If the amp has blown fuses or no power, it might need repair or replacement.

3. Can I fix a torn speaker cone at home?

Repairing a torn speaker cone can be challenging and might require professional help. If the woofer is damaged, consult a local electronic repair shop for advice on fixing or replacing it.

4. Should I consider building my subwoofer?

Building a DIY subwoofer is possible with basic woodworking and electrical skills. You’ll need suitable materials, an enclosure, an amplifier, and an understanding of subwoofer principles.

5. When should I consider replacing my subwoofer?

If your subwoofer is old, has extensive electronic component issues or the cost of repairs outweighs its value, consider replacing it. Contact the manufacturer or a professional for guidance.

Remember that safety is paramount when dealing with electronics. If you’re unsure about any repair process, it’s always best to seek professional help to avoid causing further damage or harm.


Categories
Projectors Informational

Why is My Projector Green

Why is My Projector Green | Expert Solutions for a Clear Display

If you’re a proud owner of a projector, you’ve probably experienced the joys of large-screen entertainment. However, like any other electronic device, projectors can develop issues over time.

One common frustration for users is when their projector starts displaying an annoying green tint. But fear not, because in this post, we’ll delve into the reasons behind this issue and provide you with practical solutions to get your projector back to its original glory.

Reasons Why Projectors Show Green Tint

Several factors can lead to your projector displaying an annoying green tint. Let’s explore these reasons:

Improperly Connected Cables: 

Projectors rely on cables to carry video signals in three primary colors: red, green, and blue (RGB). If these cables are faulty or not correctly connected, they won’t transmit the signal properly, resulting in a greenish hue. Check for any damaged VGA and AV cables and ensure they are securely connected.

Incorrect Input Signal Setting: 

Misconfigured input signals can be a culprit. Ensure that your projector’s settings match the input signal. Setting the projector to Auto or component mode in the signal menu can help resolve the issue. Sometimes, the green tint arises when the projector is set to RGB processing while receiving YPbPr or vice versa.

Stuck Color Wheel: 

Projectors use a rotating color wheel to display various colors. When this wheel gets stuck on the green segment, your projector will stubbornly project everything in green. To fix this, you may need to open up your projector and replace the malfunctioning color wheel.

Aging Projector: 

Over time, the internal components of your projector may begin to wear out. If your projector is quite old and changing the bulb doesn’t resolve the green screen issue, it might be time to consider investing in a new one.

Fixing Green Tint in LCD and DLP Projectors

For LCD and DLP projectors, proper maintenance is essential to avoid problems like green screens. Here are some steps to help you maintain these projectors:

Disassemble and Clean: 

Carefully disassemble the projector, making sure to disconnect any wires. Avoid touching sensitive components like lenses and mirrors. Use a soft cloth and an air compressor with 15 to 20 PSI to clean the projector’s internals. After cleaning, your projector should work like new.

Seek Professional Help: 

If you’re unsure about cleaning the projector, it’s advisable to consult a professional. Cleaning the projector without the necessary expertise can result in damage to other components.

Try Different Video Sources: 

Test your projector with different video sources, such as computers, laptops, and smartphones, to see if the green tint issue persists. This can help you identify whether the problem lies with the projector or the input source.

Reset to Factory Default: 

If you’re experiencing green tint issues, try resetting your projector to its factory default settings. This can often resolve configuration-related problems.

Prevent Overheating: 

Overheating can lead to discoloration in LCD panels and DLP color wheels. Make sure the projector is adequately ventilated and the settings are configured to prevent overheating.

Check the Color Wheel: 

If your projector is still displaying a green tint, inspect the color wheel to ensure it’s not stuck on one of the primary colors, like green. If it is, address the issue to restore the color balance.

Causes of Green Projector Screen

Now, let’s briefly recap the possible causes of a green projector screen:

1. Improperly Connected Cables:

Projectors use cables to transmit video signals in three primary colors: red, green, and blue (RGB). When these cables are not correctly connected or are damaged, they can’t transmit the signal effectively. As a result, the projector may display a greenish tint on the screen.

Solution: To address this issue, check all the cables connected to your projector. Ensure that they are securely plugged in and not damaged. If any cable is damaged, consider replacing it with a new one to restore proper signal transmission.

2. Faulty VGA Cord:

VGA (Video Graphics Array) cords are commonly used to connect projectors, especially portable ones. Over time, these cords can become damaged, bent, or loosened at the plug, leading to signal interference and a green tint on the screen.

Solution: To address this issue, inspect the VGA cord for any visible damage, especially at the plug ends. If you find any damage, consider replacing the VGA cord. Using a high-quality and well-maintained VGA cord can prevent this problem in the future.

3. Incorrect Input Signal Setting:

Many projectors have different input settings for various types of video signals, such as RGB and YPbPr. When the projector’s input signal setting doesn’t match the actual input signal, it can result in a greenish display. For instance, if the projector is set to RGB processing while receiving a YPbPr signal, it may produce a green tint.

Solution: Check your projector’s input signal settings and make sure they match the type of signal you are using. Setting the projector to Auto or component mode can often resolve this issue, as it allows the projector to automatically adjust to the incoming signal.

4. Stuck Color Wheel:

Some projectors use a rotating color wheel to display different colors. This wheel contains segments of red, blue, and green that are displayed sequentially. If the color wheel gets stuck on the green segment, your projector will continuously display everything in green, causing the green tint issue.

Solution: To address this problem, you may need to open up your projector (which should be done carefully) and inspect the color wheel. If you find it stuck on green, you may need to repair or replace the color wheel to restore the balance of colors in your projector’s display.

5. Old Projector:

Over time, projectors experience wear and tear, and their internal components may begin to lose functionality. This aging process can result in various issues, including a persistent green tint on the screen.

Solution: If your projector is considerably old and other troubleshooting steps, such as changing the bulb, haven’t resolved the green screen problem, it may be time to consider investing in a new projector. Newer models are likely to offer improved performance and reliability.

Tips:

To help you deal with a green projector screen effectively, here are some additional tips:

  • Regular Maintenance: Perform routine cleaning and maintenance to ensure your projector’s longevity and optimal performance.
  • Use Quality Cables: Invest in high-quality video cables to prevent issues related to cable connections.
  • Consult the Manual: Always refer to your projector’s user manual for specific troubleshooting and maintenance instructions.
  • Avoid Overheating: Ensure proper ventilation and avoid running your projector in extremely hot conditions.
  • Professional Assistance: If you’re unsure about any repair or maintenance procedure, seek professional help to avoid further damage.

Conclusion Why is My Projector Green

In conclusion, when faced with a green projector screen, don’t immediately assume it’s a major internal issue. Start by checking external components like cables and input settings.

With the right troubleshooting and maintenance, you can enjoy crisp, vibrant projections once again. Happy viewing!

FAQs


Q 1: Why is my projector screen suddenly displaying a green tint?

Answer: A sudden green tint on your projector screen can be attributed to various factors. It’s essential to check the following:

  • Ensure that your video cables (RGB) are correctly connected and not damaged.
  • Verify that your projector’s input signal settings match the type of signal you are using (e.g., RGB or YPbPr).
  • Check for any issues with the color wheel in your projector, which may be stuck on the green segment.
  • If your projector is old and has undergone significant wear and tear, it might be time to consider replacing it.

Q 2: How can I fix the green tint on my projector screen?

Answer: To resolve the green tint issue on your projector screen, consider these steps:

  • Check and ensure that all video cables are properly connected and in good condition.
  • Adjust the input signal settings on your projector to match the actual signal type.
  • Inspect the color wheel in your projector; if it’s stuck on the green segment, it might need repair or replacement.
  • If your projector is old and experiencing multiple issues, investing in a new one may be the most practical solution.

Q 3: Can I clean the color wheel to fix the green tint on my projector screen?

Answer: Cleaning the color wheel can be a delicate task and is typically not recommended for users without the necessary expertise. It’s easy to damage sensitive components when attempting to clean it. If the green tint is due to a stuck color wheel, it’s safer to consult a professional technician who can properly address the issue without causing further damage.

Q 4: How can I prevent my projector screen from turning green in the future?

Answer: To prevent a green projector screen in the future, you can take these precautions:

  • Regularly inspect and maintain your projector’s cables to ensure they are in good condition.
  • Use high-quality video cables to minimize the risk of cable-related issues.
  • Always check and configure your projector’s input signal settings to match the type of signal you are using.
  • Ensure that your projector is adequately ventilated and does not overheat, as overheating can lead to discoloration.

Q 5: What should I do if my projector is old and constantly displaying a green tint?

Answer: If your projector is old and persistently displays a green tint despite troubleshooting and maintenance efforts, it may be time to consider an upgrade. Projectors have a finite lifespan, and aging internal components can lead to multiple issues. Investing in a new projector will likely provide better performance and reliability for your projection needs.


Categories
Soundbars Informational

Can You Use a Soundbar Without a TV

Can You Use a Soundbar Without a TV | 6-Methods

Using a stereo system or a record player, a speaker may be all you need. This is because you want to hear movie-quality sound while using your computer or laptop. You may also want one for a dance party. No matter the reason, soundbars are a convenient way to get all kinds of audio without dealing with other speaker systems.

Is it possible to use a soundbar without a TV? Using a soundbar without a TV is possible, provided you have an input option other than HDMI. In addition to the multiple-input types available on most soundbars, your speaker can also be connected to various devices via the inputs.

What are the best methods for connecting your other devices to the soundbar, and which one is the quickest and easiest method? The following will disclose the typical inputs you can expect on your soundbar, the necessary wires to connect them, and the best way to connect various devices. There are plenty of ways to use your soundbar with your phone, laptop, computer, or record player, and you can do it with these options.

Can You Use a Soundbar Without a TV: How to use them

You’ll find these ports most often on soundbars, even though not all of them have the same number or type of ports. Before connecting your sound bar, identify your connection type and any equipment you need. Some cables or converters will be more readily available than others, so look for those first.

Bluetooth

Can You Use a Soundbar Without a TV by hometheaterjournal.com

The Bluetooth connection, while not standard, is becoming more common on all devices and is typically the fastest and most convenient when paired. Another perk is that no wires are required. However, since there is no plug-and-play option, you may need to consult your user manual or online instructions to ensure the device is paired correctly.

Related: Best Soundbar With Google Assistant

You can boost the sound of your phone, laptop, and other small devices by using Bluetooth. However, the compression of data that allows wireless transmission makes it inferior to wired connections (more about wireless connections in our guide). However, convenience comes at a price.

AUX

Can You Use a Soundbar Without a TV by hometheaterjournal.com

AUX ports or 3.5mm audio jack cables are commonly found on audio devices. They are an efficient and convenient way to connect many devices. This cord is readily available at many locations, including pharmacies and gas stations, with a simple wire and small pins on each end. It will allow you to quickly and easily connect to any soundbar with this port.

PCs, laptops, some phones, and gaming consoles that feature 3.5mm ‘line-out’ jacks can utilize this connection type. Even devices without an AUX port can be turned into your DJ station with inexpensive Bluetooth devices with AUX connections.

RCA

There are usually three RCA ports on older TVs: the yellow (composite video), the white (left audio channel), and the red (right audio channel). This is the same type of port to which you might have previously connected a DVD player or a console of an earlier generation to. Since the white and red RCA audio ports are so widely used, you will often find them on soundbars and other similar products.

Stereos and record players often come with these attached cords, which make these ports ideal for them. It is identical to connecting to the AUX section with an AUX to RCA cable. Aside from that, both RCA and AUX connections are equal in quality since they are both analog audio connections.

RCA ports could plug in permanent fixtures (usually on the back of devices), while AUX ports could plug in other devices (generally near the face or somewhere more accessible).

USB

Can You Use a Soundbar Without a TV by hometheaterjournal.com

Several soundbars have rectangular USB ports. In newer soundbars, the USB port is becoming more and more common for connecting quickly and easily. It’s ideal for charging smartphones since you often end your charging cord with a USB port. It’s possible that even your phone can be set as well.

We have listed USB and the remaining choice as digital audio cables, which transmit the audio as information, and, therefore, can transfer large quantities of more complex data. Audio cables are becoming more popular as they are efficient and easy to use.

Digital Optical

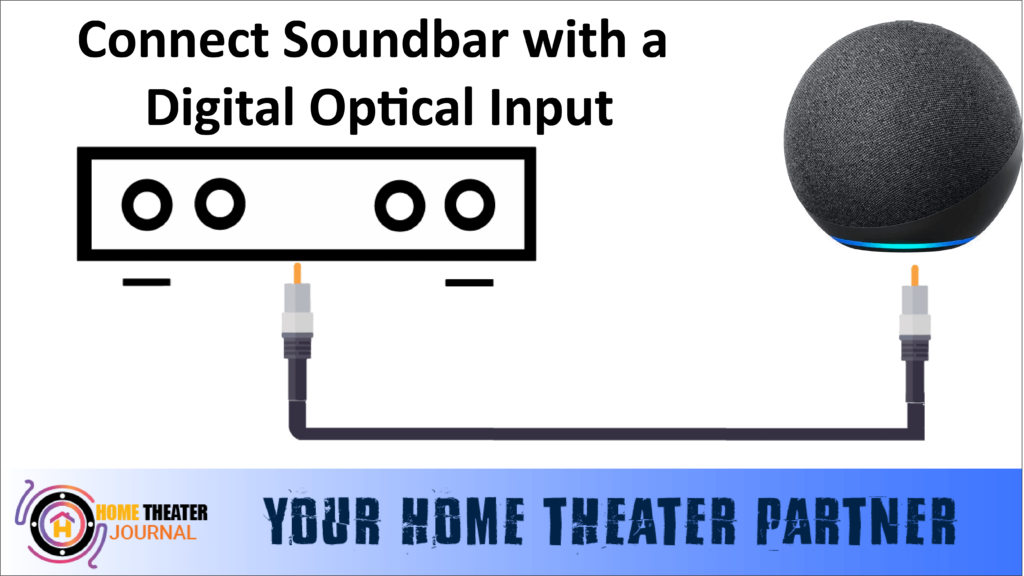
The TOSLINK cable has a hexagonal head and a protruding pin. It is also known as a TOSLINK link, optical audio cable, or optical link. A lot of soundbars come with 5.1 channel sound as an option, but many don’t have this option. The port can deliver sound to your soundbar and, therefore, has some advantages over HDMI (you can check out the complete comparison here). But for now, you should be able to use the port to get sound to your soundbar.

The PROZOR 192KHz RCA analog to digital Toslink adapter (on Amazon) is an excellent converter that makes digital optical possible, even if it’s not the most commonly available method. If your input options are limited, this is not ideal for most devices other than TVs, stereos, and CD players.

HDMI

Can You Use a Soundbar Without a TV by hometheaterjournal.com

HDMI was developed in the early 2000s, replacing an optical standard that had existed for about 50 years. It carries video and audio streams as a connector, making it a preferred choice for home theater equipment.

A few HDMI to USB-C adapters can be found online, some for as much as $50, but they are listed explicitly for connecting to a TV, and even that comes with a whole host of compatibility questions. It might be better to stick with another connection method rather than trying to learn the specs for the phone port, the sound bar port, the cable, and the adapter.

What’s the point? It is because HDMI has been the best way of communicating audio and more complex audio types to date, so your soundbar’s inputs may be limited to HDMI and perhaps one other option.

Conclusion

Even though soundbars offer better audio amplification and clarity than stock speakers on today’s flat screens, the best-sounding, and most dynamic audio will come from more than one speaker system, furthermore, you can connect these systems to other sources and devices so that you receive high-quality audio no matter what device you are using or what media you are listening to. 

There are a few ways to fill a room with sound from your phone, laptop, or another device if you’re trying to connect your soundbar to a different device than your TV.

FAQ’s


Is it possible to use a soundbar without a TV?

Yes, it is possible to use a soundbar without a TV as long as you have an input option other than HDMI. Most soundbars have multiple input types available, allowing you to connect various devices through the inputs.

What are the best methods for connecting other devices to a soundbar, and which method is the quickest and easiest?

The best method for connecting other devices to a soundbar depends on the device and the soundbar’s available ports. Some commonly available methods include Bluetooth, AUX, RCA, USB, and digital optical connections. Bluetooth is typically the quickest and easiest method, as no wires are required.

What is an AUX port, and what devices can utilize this connection type?

An AUX port is a 3.5mm audio jack commonly found on audio devices. Devices such as PCs, laptops, some phones, and gaming consoles that feature 3.5mm ‘line-out’ jacks can utilize this connection type. Even devices without an AUX port can be turned into your DJ station with inexpensive Bluetooth devices with AUX connections.

What is a TOSLINK cable, and what is its advantage over HDMI?

A TOSLINK cable, also known as an optical audio cable or optical link, is a hexagonal cable that can deliver sound to your soundbar. It has some advantages over HDMI, such as providing sound to soundbars with 5.1 channel sound as an option. It is also an efficient and easy-to-use audio cable.

Why might HDMI be the best way to communicate audio?

HDMI carries video and audio streams as a connector, making it a preferred choice for home theater equipment. HDMI has been the best way of communicating audio and more complex audio types to date, so your soundbar’s inputs may be limited to HDMI.


Categories
Soundbars Informational

How To Mount Soundbar To Tv

How To Mount Soundbar To Tv | Step-By-Step Guide

A soundbar is an excellent choice for a home theater. The quality is better than ever, and they are compact and stylish. The good thing about them is that they do not have a specific position – they can be placed just like the TV on the mantle or bolted to the wall, but why not go one step further and mount it to your TV as well? Here is how you can do it:

  1. Buy a universal bracket for soundbars and TVs
  2. The TV should be removed from the wall if it is mounted.
  3. Once you’ve removed the TV mount (if necessary) and eyeballed the bracket placement, you’ll need to place the bracket wherever it seems best.
  4. The TV wall mount bracket and soundbar bracket must be attached to the TV.
  5. Remount the TV on the wall after you have double-checked that your Soundbar fits the brackets
  6. Make sure the bracket is attached to the Soundbar and test it.

It is easy to mount a soundbar to a TV, but it’s essential to do it correctly from the outset to succeed. Ensure your bracket fits your components properly by purchasing an excellent soundbar-to-TV bracket.

A Complete Guide: How To Mount Soundbar To Tv

A soundbar mounted directly to your TV might seem like an excellent choice, but you might need clarification on the pros and cons. Starting with an overview of how the mounting process works, we’ll go over all these details:

Buy a TV bracket for your Soundbar.

Mounting brackets for soundbars to TVs can be found on Amazon and in electronics stores. Other brackets for connecting soundbars to TVs are available but are usually too expensive and unnecessary.

You can mount most soundbars and TVs using the Mounting Dream Soundbar Mount (on Amazon). The Soundbar must be mounted to the TV before it can be mounted to the wall.

Unmount the TV if it is mounted.

Adding a soundbar to an existing TV may be your only concern; if that’s the case, don’t worry about it. Getting the Soundbar installed and removing it may seem like a hassle, but it won’t happen again if you do it right.

You can skip this step if your TV is not mounted. The soundbar mounting bracket placement is based on the location of the wall mount if you still need to mount your new TV. Get the wall-mounting bracket ready if your TV still needs to be mounted.

Disconnect the TV mount and check the position of the bracket.

As mentioned, the wall mounting bracket may already be attached to your TV. You need to figure out how the Soundbar mounting bracket lays with the wall mounting bracket so that they will work together. That’s okay. It’s crucial.

Taking the television to the wall should be as simple as placing the TV wall mount on top of the TV in the exact spot where the TV wall mount must be placed for the TV to be mounted correctly on the wall with the TV laying flat. The best way to determine which holes your TV mount needs is to test it on the wall first.

As a next step, you’ll need to lay the soundbar bracket on top of the wall mounting bracket so that you’ll be able to identify the holes that you will be using on the soundbar bracket based on where you will be mounting the Soundbar. If you want to be sure, you should have the Soundbar nearby to check it out. Use some painter’s tape to mark the holes if you have some. If you do not have any, feel free to use something else.

If there are buttons on top of the Soundbar, ensure enough space between the bottom of the TV and the top of the Soundbar.

Mount the TV to the wall and attach the soundbar bracket.

Now that the mount and underbar bracket have been attached attaching the mount and bracket should be no problem. You will need to use the hardware to secure your mount and bracket. Use the holes you’ve marked to make sure everything is in the right place.

If the original screws are no longer long enough, you must get new ones from the hardware store. A bold screw threaded through the TV wall mount, the soundbar bracket, and the wall mount may not have enough depth to fit the TV.

Investing in something like this is not something to skimp on. Your TV is attached to the wall by these screws.

Remount the TV and check if the Soundbar fits the bracket.

Check that the Soundbar fits the brackets after everything has been fastened. When the Soundbar still isn’t connected, you need to take the TV back to the wall and remount it on the wall without attaching the Soundbar. While remounting the TV, it’s a good idea to make sure that you don’t put any extra weight on the two devices or take any risk of dropping them together.

Test the Soundbar after attaching it.

Attach your Soundbar to the bracket and fasten it using the hardware with the bracket. You can connect to your TV or media device using HDMI/HCMI Arc, Optical, RCA, or Bluetooth.

Keep that in mind: if the Soundbar has buttons on top, make sure there’s enough space to operate it. Depending on the space, you may have to take the TV off the wall and mount it differently.

How Should a Soundbar Be Mounted to a TV?

Soundbars can be mounted to TVs in several ways, such as above or below the TV. Depending on your situation, above or below mounting has pros and cons, as do surround sound options, which we discuss more deeply below.

Nevertheless, let’s look at how a soundbar mounted on a television alters your experience for now.

Soundbar Mounting By Itself

Soundbars, almost always connected to your LCD TV, are mounted separately, so your front speakers’ sound will remain the same when your TV moves.

IF YOU HAVE A LARGE ROOM, your TV might be on an articulating mount. If it is on a fixed mount, this is not a big deal; if it is on an articulating mount, it may not be. TV-mounted soundbars are crucial in that case.

Mount Soundbar To TV

TVs that are mounted to soundbars have many advantages. TVs move with the sound. Your TV will always deliver sound to the person watching it, whether you tilt it or move it.

The sound quality of a mounted soundbar will also be improved as the wall’s surface does not absorb the sound vibrations as with a mounted soundbar mounted vertically. With this technology, the sound travels further away from the front of the room, giving your home theater a new level of enjoyment.

Soundbars not mounted

You risk your Soundbar getting damaged if you leave it in your entertainment center because dust collects and gets dirty faster. In addition, it can give the impression that the space is cluttered. As mentioned, certain configurations are better than others when mounting your Soundbar and tidying your home theater room.

The question of whether you should mount your TV generally deserves some consideration. Choosing between an upright TV and an eye-level TV might not be an option in some cases due to room configurations that only allow for a TV to be elevated. However, if you do have a choice, you should choose an eye-level TV.

Soundbar-to-TV mount recommendations

There are many options for soundbar-to-TV mounts now that they have become popular. A high-quality product will last for many years, and you should ensure you aren’t being ripped off when purchasing it.

Even though soundbar-to-TV mounts are created for specific brands, we have found a few really great options we can recommend. These range from the Mounting Dream Soundbar Mount (on Amazon) that was discussed in “Step 1” in our article to the Mount-It!. A universal soundbar mount (on Amazon) is shown in the picture above.

It’s called Mount It! With its great price and quality, Universal Soundbar Mount is a product you can rely on based on the reviews.

Significant brands like Sonos, Samsung, Sony, and Vizio can be plugged in, and they can fit TVs from 32 to 70 inches. Designed to fit any TV and Soundbar, the design is flexible and will fit any brand or model. The device can be used with fixed or tilted wall mounts and full-motion, articulating, and interactive mounts.

IF YOU DECIDE TO GET ONE, the TV mount will also attach to another one. There’s a Mount-It! There is nothing cheap or flimsy about the Universal Soundbar Mount. Although it is much heavier than you will ever need, it is well-made with steel that is 2.5mm thick and can hold up to 33 lbs.

As well as being easy to install, it is also cost-effective. Watch the installation video and screw in four bolts to ensure you’re installing the unit properly. A hardware kit is included.

Optional Brand-Specific Features

Soundbar-to-TV mounts explicitly designed for your Soundbar are available if you prefer the peace of mind that comes with them. For example, SONOS Beam is compatible with the Sanus Soundbar Mount (on Amazon).

The Bose Soundbar Wall Mount Bracket by Dinghosenn (on Amazon) is an excellent option if you decide not to mount your TV and Soundbar together.

TV BrandTV ModelCompatible Mountable Soundbar
SamsungAny modelSamsung HW-Q70T (Mountable)
LG Any modelLG SK9Y (Mountable)
SonyAny modelSony HT-Z9F (Mountable)
VizioAny modelVizio SB3651-E6 (Mountable)
TCLAny modelTCL Alto 8 2.1 (Mountable)
HisenseAny modelHisense HS214 (Mountable)

Mounting a TV: Tips for Optimal Results

As previously discussed, the best viewing angle for your TV or screen in your home theater is at eye level. Here are some tips for mounting your TV to minimize eye and neck strain and optimize viewing and listening.

  • The mount you choose should be able to tilt downward if you plan on mounting the TV much higher than eye level.
  • If you wish to avoid neck strain, ensure that you sit a good distance from the mounted TV and are comfortable.
  • If you wish to mount it at a higher level, you may want to mount it at a low height, then experiment with small increments if you decide to mount it higher.
  • It is best to choose a flexible mount. Several high-quality, well-priced mounts now suit a wide range of viewing preferences and allow the viewer to move around freely without worrying about height. The ECHOGEAR Full Motion Articulating TV Wall Mount (on Amazon) is an excellent example of a full-motion mount.

Conclusion

Mounting a soundbar to your TV can enhance your home theater experience by providing improved sound quality and a more streamlined setup. Following the steps outlined in this guide, you can successfully mount your soundbar to your TV and enjoy a better audiovisual experience.

Remember to choose a high-quality bracket that fits your components properly and consider factors like soundbar placement and TV mounting options to achieve the best results.

FAQs


Q1: What is the benefit of mounting a soundbar to a TV? 

A1: Mounting a soundbar to a TV enhances sound quality, provides a streamlined setup, and ensures that the sound is directed toward the viewer for an improved home theater experience.

Q2: Can I mount a soundbar to my TV? 

A2: Most soundbars can be mounted to TVs using compatible brackets. Choosing a bracket that fits both your soundbar and TV and provides secure support is important.

Q3: Do I need to remove my TV from the wall to mount a soundbar? 

A3: If your TV is already mounted, you might need to temporarily remove it to attach the soundbar bracket. If your TV is not yet mounted, you can plan the bracket placement accordingly.

Q4: Can I use any screws to attach the soundbar bracket? 

A4: Using the appropriate screws and hardware provided with the bracket is essential to ensure a secure attachment. Using incorrect screws could lead to instability and potential damage.

Q5: Can I still operate my soundbar if mounted to the TV? 

A5: Yes, you can operate your soundbar even when it’s mounted to the TV. Make sure there’s enough space between the TV and the soundbar, especially if the soundbar has buttons on top.

Remember, proper installation is key to achieving the best results when mounting a soundbar to a TV. Following the steps and using suitable hardware will ensure a safe and enjoyable home theater setup.


Categories
Projectors Informational

Projector Light Bleed

What Is Projector Light Bleed? How Do You Fix It? [4 Methods]

Imagine settling in to enjoy an exciting game night on your projector, only to be annoyed by distracting light bleeding around the edges of the image. Thankfully, addressing projector light bleed is entirely possible. This guide will delve deep into the causes behind projector light bleed, offer comprehensive step-by-step solutions, and provide preventive measures to ensure your entertainment experiences remain immersive and unhindered.

Understanding Projector Light Bleed: 

Projector light bleed, also known as the projector halo effect, refers to the unintended scattering of light around the periphery of a projected image. This phenomenon can significantly diminish image quality and viewer engagement. The good news is that by pinpointing the underlying causes and implementing practical solutions, you can eliminate this issue and enjoy crisp, uninterrupted visuals.

Causes and Detailed Solutions:

Wrong Projected Lens:

Cause:

One of the prime contributors to projector light bleed is an incorrect alignment of the projector lens. When the lens isn’t positioned accurately within its housing, it can scatter light beyond the intended image borders. This misalignment creates an unwanted halo effect, negatively impacting the projected visuals’ quality.

Solution:

Step 1: Examine Lens Alignment: Begin by inspecting the alignment of the projector lens within its housing. Ensure that it is appropriately centered and isn’t tilted or skewed.

Step 2: Manual Lens Adjustment: If the lens is misaligned, you can often manually correct its position. Refer to the projector’s manual to understand how to access and adjust the lens alignment.

Step 3: Check Projection Surface: Besides the lens itself, examining the projection surface is crucial. Ensure that it is flat and level. Any irregularities or curvature in the surface can contribute to image distortion and exacerbate light bleed.

Step 4: Use Proper Projection Screen: Consider using a high-quality projection screen to achieve the best results. This will help minimize light bleed and enhance the overall image quality and viewing experience.

Step 5: Wall Projection Considerations: If you’re projecting onto a wall, ensure the wall surface is suitable for projection. A flat, white wall with minimal texture is preferable to reduce the risk of light scattering.

Step 6: Perform Tests: After adjusting, test the projector by projecting an image onto the screen or wall. Observe the edges of the image for any signs of light bleed. If the issue persists, you may need to revisit the alignment and adjustments.

Keystone Correction:

Cause: 

Keystone correction is a significant factor contributing to projector light bleed when the projector isn’t positioned perpendicular to the screen’s centerline. This misalignment results in keystoning, where the projected image appears skewed, bent, or displaced from its intended alignment. This distortion leads to light bleeding and compromises the overall image quality.

Solution:

Step 1: Understand Keystone Correction: It’s important to understand the keystone correction before addressing the issue. Keystone correction allows you to digitally adjust the shape of the projected image to counteract the effects of projector misalignment.

Step 2: Vertical Keystone Correction:

  • Step 2.1: Position the Projector: Start by ensuring the projector is perpendicular to the projection surface (screen or wall).
  • Step 2.2: Adjust the Vertical Angle: If the top or bottom of the image is wider than the other, it indicates keystone distortion. Use the projector’s keystone correction settings to make vertical adjustments.
  • Step 2.3: Downward Angle Adjustment: If the top is more comprehensive, adjust the vertical angle downward until the image appears rectilinear.
  • Step 2.4: Adjust Projector Height: If the image is too high, lower the projector’s height to align it with the screen’s centerline. Conversely, raise the projector if the image is too low.

Step 3: Horizontal Keystone Correction:

Projector Light Bleed by hometheaterjournal.com
  • Step 3.1: Horizontal Alignment: Ensure that the projector’s lens is horizontally aligned with the center of the screen for a rectangular image.
  • Step 3.2: Correct Image Skew: If the image appears skewed, use the projector’s keystone correction settings to make horizontal adjustments.
  • Step 3.3: Rotation Adjustment: If the image is tilted, you can physically rotate the projector clockwise or counterclockwise until the picture becomes rectangular.

Step 4: Lens Shift and Remote Control: Some projectors offer advanced features like lens shift and remote-controlled keystone correction. These functionalities can make the alignment process smoother and more precise.

Step 5: Check for Image Quality: After making adjustments, assess the quality of the projected image. Inspect the edges for any signs of light bleed or distortion. Make necessary tweaks until the image appears clear and rectangular without any anomalies.

Step 6: Choose a Suitable Projection Screen: Select a suitable projection screen to complement your efforts in keystone correction. A high-quality screen with appropriate gain minimizes light scattering and produces a clearer image.

Inappropriate Screen:

Cause: 

The choice of projection screen significantly affects the occurrence of projector light bleed. An inappropriate screen, whether of low quality or with unfavorable characteristics, can exacerbate the issue. Rough screen surfaces and inadequate light absorption contribute to scattered light and reduced image quality.

Solution:

Step 1: Screen Selection Criteria: Begin by understanding the characteristics of an appropriate projection screen. Look for screens designed to minimize light reflection and overspill, crucial in combating light bleed.

Step 2: Opt for High-Quality Screens:

  • Step 2.1: Research Screen Options: Explore various projection screen options available in the market. Look for those that prioritize reducing light reflection and providing optimal light diffusion.
  • Step 2.2: Gain Value: Check the gain value of the screen. A lower gain value minimizes light scattering and helps maintain image clarity.

Step 3: Dark-Colored Border: Opt for Dark Borders: Choose a screen with a dark-colored border. This serves as a visual frame for the projected image, minimizing the perception of light bleed at the screen edges.

Step 4: DIY Projection Screen: If you need to invest in a commercial projection screen, consider creating a DIY screen using suitable materials. White, reflective materials work well for this purpose.

Step 5: Screen Installation: Ensure that the projection screen is mounted on a flat surface. This prevents any distortions that could contribute to light bleed.

Step 6: Screen Maintenance: Regular Cleaning: Keep the projection screen clean and free from dust or debris. A clean screen ensures optimal light absorption and prevents unwanted light scattering.

Step 7: Experiment and Observe: Projection Tests: Conduct projection tests with different content after setting up the projection screen. Observe the edges of the projected image for any signs of light bleed.

Improper Contrast Ratio:

Cause: 

One of the common culprits behind the halo effect or projector light bleed is an improper contrast ratio. A contrast ratio represents the difference in brightness between the brightest and darkest parts of an image. When this ratio is imbalanced, it leads to variations in brightness levels across the projected image, resulting in light scattering and diminished image quality.

Solution:

Step 1: Understanding Contrast Ratio: Familiarize yourself with the concept of contrast ratio. It’s a measure of the difference between the brightest white and the darkest black that a projector can produce.

Step 2: Access Projector Settings: Access the contrast and brightness adjustment settings using your projector’s remote control or menu.

Step 3: Balancing Contrast and Brightness:

  • Step 3.1: Begin by adjusting the contrast setting. Gradually increase or decrease it while observing the impact on the image.
  • Step 3.2: Proceed to adjust the brightness setting similarly. Strive for a balance where neither the bright areas are excessively glaring nor the dark areas are overly dim.

Step 4: Testing Different Content: Project various types of content, including scenes with diverse lighting conditions. This helps ensure that the adjusted contrast ratio remains well-balanced across different scenarios.

Step 5: Avoid Extreme Settings: Steer clear of setting the contrast or brightness to extreme levels. Extreme settings can lead to further issues like light scattering and image distortion.

Step 6: Comparative Assessment: Display content with high contrast, such as scenes containing both dark and bright elements. Compare the image quality to ascertain that neither the dark areas appear excessively shadowy nor the bright areas appear unnaturally intense.

Step 7: User Manual Reference: Consult your projector’s user manual for recommended or optimal contrast and brightness settings. This can provide valuable guidance in finding suitable starting points.

Note: If the solutions provided do not effectively resolve the issue of projector light bleed, seeking professional assistance is recommended. Expert audiovisual technicians can accurately diagnose and address complex factors contributing to the problem, ensuring optimal projection quality and an immersive viewing experience.

What Methods Are Effective in Preventing Projector Light Bleed?

Preventing projector light bleed entails implementing strategies to ensure a superior projection experience. Here are the essential steps to preempt this issue:

Projector Placement: Thoughtfully position the projector at an optimal distance from the screen to sidestep light bleed onto neighboring surfaces. Leverage the projector’s lens zoom and throw ratio adjustments to attain the desired image size sans overspill.

Screen Material: Invest in a top-notch projection screen to curtail light reflection and diffusion. Opt for a screen with a suitable gain value to regulate projection angles and forestall unwarranted light dispersion.

Screen Size: Choose a screen size that aligns with your projector’s capabilities and the intended viewing area. Avoid employing an oversized screen about the projector’s luminosity, which could result in light bleed.

Ambient Light Control: Diminish ambient illumination within the viewing area by adjusting room lights or using blackout curtains. This establishes a dimmer backdrop, allowing the projected image to shine without seepage onto undesirable surfaces.

Masking and Bezel: Apply masking techniques or introduce a bezel around the screen to visually delineate the projected image from the encompassing surfaces. This reduces the perception of spillage and heightens the overall viewing satisfaction.

Projection Mapping: Consider projection mapping methods that meticulously map the projection onto specific surfaces instead of a single screen. This technique furnishes greater command over the image’s positioning, thereby minimizing the likelihood of excessive spillover.

By effectively executing these tactics, you can preempt projector light bleed and guarantee that your projected content emerges crisply, immersively, and free from uninvited light scattering.

Conclusion: 

By comprehending the root causes of projector light bleed and applying the detailed step-by-step solutions provided, you’re well-equipped to ensure a seamless and captivating entertainment experience. If you encounter persistent challenges, seeking expert guidance will optimize your projector’s performance. Through the proactive measures outlined here, you’ll create an environment primed for enjoyable movie nights and gaming sessions, free from the distractions of light bleed.

FAQs


Q1: Why is my projector showing red?

A1: If your projector lamp is flashing red, check for input signal mismatches or configuration errors. Examine your VGA cable for damage affecting color output. Also, inspect the projector screen for discoloration contributing to the red tint.

Q2: What causes projector discoloration?

A2: Projector discoloration can result from aging, discolored prisms, or dust buildup. This can lead to one color dominating the image. Dust, lamp issues, and optical misalignment can contribute. Regular maintenance and cleaning are essential to prevent such discoloration.

Q3: Does wall color affect the projector?

A3: Yes, wall color impacts projector image quality. Grey walls are optimal as they balance contrast and light absorption. Similarly, a color closer to gray than white is recommended for optimal sharpness and video quality for a projector screen.

Q4: Is projector light bleed normal?

A4: No, projector light bleed is not normal. It’s an unintended side effect causing light scattering around image edges. It compromises contrast ratio and overall image quality. Manufacturers aim to minimize light bleed, and users seek solutions to mitigate this issue.

Q5: How can I fix projector light bleed?

A5: Fixing projector light bleed involves aligning the lens correctly, correcting the keystone, using an appropriate screen, and balancing the contrast ratio. Check lens alignment and keystone correction. Choose a quality screen with suitable gain. Adjust contrast and brightness for optimal results.


Categories
Projectors Informational

Why is My Projector Screen Blue

Why is My Projector Screen Blue? Unveiling the Causes and Solutions

Have you ever fired up your projector, eagerly anticipating an evening of cinematic bliss, only to be greeted by a perplexing blue screen?

Don’t fret; this issue isn’t as daunting as it may seem. You can resolve it yourself without the need for professional intervention. The key to solving the enigma lies in understanding its causes. Let’s unravel the mystery of the blue projector screen.

What’s Behind the Blue Screen?

1. Improper Cable Connection:

  • One of the primary reasons your projector screen turns blue is due to improperly connected cables. Just like a jigsaw puzzle, every piece must fit snugly, or the picture won’t be complete. In this case, the blue screen is the projector’s way of telling you that something’s amiss with the connection.

2. Incorrect Source Selection:

  • The second common culprit is selecting the wrong source. Think of your projector as a detective searching for clues to the right signal. If it’s given the wrong lead, it might end up showing a blue screen, symbolizing its confusion.

What to Do When Your Projector Screen Turns Blue:

1. Stay Calm:

First and foremost, don’t panic. The blue screen issue is a minor hiccup and can be fixed in no time. Take a deep breath and follow these steps.

2. Check Cable Connections:

Begin by inspecting all the cable connections. Ensure that each cable is properly connected to the right ports. It’s easy to make a mistake in the heat of the moment, and this could be the root cause of the problem.

3. Source Selection:

If checking the cables doesn’t resolve the issue, grab your projector’s remote control. Look for the menu button and press it. Navigate through the menu using the arrow buttons until you find the source selection option. Make sure the correct source is selected.

4. Experiment with Inputs:

Sometimes, your projector may be set to an input source that isn’t actively transmitting a signal. Experiment by selecting different inputs, such as HDMI, VGA, or component, until you find the one that works.

5. Reboot the System:

If all else fails, try rebooting both your projector and the connected devices, such as your laptop or DVD player. This can refresh the connection and often resolves the issue.

Tips to Prevent Future Blue Screen Mysteries:

  • Label your cables: To avoid confusion in the future, label your cables according to their purpose. This simple step can save you a lot of trouble.
  • Keep an eye on the source: Double-check your source selection before turning on your projector. This extra moment of attention can save you from the blue screen surprise.
  • Update firmware: Sometimes, projector firmware updates can resolve compatibility issues and prevent blue screen incidents.
  • Invest in quality cables: High-quality cables are less likely to give you connectivity problems. It’s a wise investment for a seamless viewing experience.

Conclusion:

In conclusion, the blue projector screen is not a daunting issue to tackle. It’s often caused by simple mishaps, like improperly connected cables or a mix-up in source selection.

By following the steps mentioned above and implementing the tips to prevent future mishaps, you can enjoy your cinematic experiences without any unexpected blue interruptions. So, next time you see that blue screen, don’t panic, take a deep breath, and become the projector detective to uncover the solution.

FAQs | Why is My Projector Screen Blue


Q1: Why did my projector screen suddenly turn blue?

A1: Your projector screen turned blue due to one of two common reasons. The most likely cause is improperly connected cables. If they aren’t plugged in correctly, your projector can’t receive the signal it needs, resulting in a blue screen. The second reason could be an incorrect source selection, where your projector is looking for the signal in the wrong place.

Q2: What should I do when I see a blue projector screen?

A2: Don’t panic; it’s a fixable issue. First, check your cable connections to ensure they are properly seated in the correct ports. If the problem persists, use your projector’s remote control to access the menu, navigate to the source selection option, and make sure you’ve chosen the right source. These steps should resolve the blue screen problem.

Q3: How can I prevent my projector screen from turning blue in the future?

A3: To prevent future occurrences, label your cables to avoid confusion, double-check your source selection before turning on the projector, keep your firmware up to date, and invest in high-quality cables. These measures can help ensure a trouble-free viewing experience.

Q4: What if the blue screen issue persists even after checking cables and source selection?

A4: If the problem persists, try experimenting with different input sources, such as HDMI, VGA, or component. Rebooting both your projector and the connected devices can also refresh the connection and resolve the issue. If none of these steps work, consult your projector’s user manual or contact customer support for further assistance.

Q5: Can a firmware update fix the blue screen issue on my projector?

A5: Yes, sometimes a firmware update can resolve compatibility issues that lead to a blue screen. Check the manufacturer’s website or your projector’s documentation for information on how to update the firmware. It’s a good practice to keep your projector’s software up to date to avoid such issues.


Categories
Projectors Informational

Projector on Popcorn Ceiling

Can You Use a Projector on Popcorn Ceiling: Enhancing Viewing Experience

Projectors are commonly used on flat, white surfaces for optimal viewing experiences. However, projecting content onto a popcorn ceiling while lounging on a bed can offer a unique and immersive experience. This article delves into the feasibility and challenges of using projectors on popcorn ceilings, providing insights on mitigating potential issues for a better viewing encounter.

Can You Use a Projector on Popcorn Ceiling?

While projectors are best suited for smooth surfaces, they can be used on popcorn ceilings. However, the textured nature of popcorn ceilings can lead to image distortion, reduced brightness, and uneven projection due to the texture’s irregularities. Harsh shadows might also be cast, necessitating the use of soft lighting. Proper projector positioning, color adjustment, focus and zoom calibration, and a projector screen can alleviate these problems and enhance the viewing experience.

Challenges and Solutions:

Projector on Popcorn Ceiling by hometheaterjournal.com

Using a projector on a popcorn ceiling does come with specific challenges:

Image Distortion and Unevenness: The textured surface of popcorn ceilings can lead to distorted and unevenly projected images. Positioning the projector perpendicular to the viewing area can minimize this distortion.

Reduced Brightness: The texture of the ceiling scatters and diffuses light, resulting in reduced perceived brightness. Opting for a projector with higher brightness can compensate for this effect.

Harsh Shadows: Popcorn ceilings’ unique light reflection properties can create harsh shadows. Supplementing with soft lighting sources helps mitigate this issue.

Popcorn Ceiling Projector – How To Use It?

To make the most of using a projector on a popcorn ceiling, follow these steps:

Proper Positioning: Mount the projector as high as possible to minimize exposure to the textured surface.

Adjust Focus and Zoom: Calibrate focus and zoom settings to achieve the clearest image possible.

Projector Screen: If feasible, use a projector screen for a smoother projection surface and improved image quality. Alternatively, a white wall or poster board can be used.

Lens Cleaning: Regularly clean the projector lens to avoid hazy or distorted images caused by dust and debris.

Are projectors compatible with textured walls?

Projector on Popcorn Ceiling by hometheaterjournal.com

Projectors on Textured Walls: Projecting on textured walls presents challenges due to the uneven surface. The texture can lead to image distortion, graininess, and light diffusion, reducing image quality. The irregularities in the wall’s surface can scatter and refract light, causing inconsistencies in brightness and sharpness.

Positioning Matters: Proper positioning of the projector is crucial to combat these issues. Placing the projector perpendicular to the viewing area helps minimize distortion caused by the wall’s texture. Adjusting the projector’s angle and distance from the wall can also assist in achieving a more accurate and clear image.

Brighter is Better: Opt for a projector with higher brightness (measured in lumens) to counteract the light diffusion caused by the textured wall. A projector with more excellent brightness can maintain a vibrant image even in light scattering.

Impact of Wall Color: The textured wall’s color can also impact image quality. Light-colored walls like light yellow, pink, blue, or green tend to have higher reflectivity. This aids in maintaining a brighter image despite the texture. However, darker textured walls can lead to a loss of detail and vibrancy, particularly in darker scenes.

Use of Projector Screens: A projector screen is highly recommended for a more optimal projection experience on textured walls. A projector screen provides a flat and smooth surface, reducing the impact of the wall’s texture on image quality. However, if a projector screen is unavailable, a white wall or a large sheet of white poster board can be alternatives.

Does a projector’s color matter?

Projector on Popcorn Ceiling by hometheaterjournal.com

Yes, a projector’s color does matter, but in a slightly different context than you might expect. When referring to A projector’s color, it generally relates to its color accuracy and ability to reproduce accurate and vibrant colors in the projected image.

Here’s why a projector’s color accuracy matters:

Color Accuracy: A high-quality projector should be able to reproduce colors accurately as intended by the content creators. This is important for various applications, including movies, presentations, gaming, and more. Accurate colors contribute to a more immersive and true-to-life visual experience.

Vibrancy and Contrast: Color accuracy also impacts the vibrancy and contrast of the image. If a projector can reproduce colors accurately, it can result in dull or washed-out images with good contrast. On the other hand, a projector with good color accuracy can deliver more vibrant and dynamic visuals.

Professional Applications: In professional settings such as graphic design, video editing, and medical imaging, accurate color representation is critical. Projectors used for these purposes must adhere to specific color standards to ensure accurate content representation.

Color Modes and Calibration: Many projectors offer different color modes optimized for different scenarios, such as cinema mode, presentation mode, or sRGB mode for accurate color reproduction. Projectors often have calibration settings that allow users to fine-tune color settings for optimal performance.

Content Quality: A projector’s color accuracy can also impact the perception of content quality. If colors appear inaccurate or unnatural, it can detract from the overall viewing experience and distract viewers from the content.

Which lighting is best for popcorn ceilings?

When choosing lighting for rooms with popcorn ceilings, it’s important to consider options that complement the unique texture while providing adequate illumination. Popcorn ceilings can create distinct lighting challenges due to their uneven surface and potential for casting harsh shadows. Here are some lighting options that work well with popcorn ceilings:

Soft or Frosted Light Bulbs: Soft or frosted light bulbs help diffuse light and reduce the intensity of shadows. These bulbs create a gentle and even illumination that can help minimize the harshness of the popcorn texture.

Table Lamps and Floor Lamps: Lamps with shades that diffuse light can provide soft and indirect illumination. Placing table lamps and floor lamps strategically around the room can help create a cozy and inviting atmosphere while reducing shadows.

Wall Sconces: Wall sconces can be installed on the walls to direct light upwards or downwards, avoiding direct illumination on the popcorn ceiling. This indirect lighting can add a warm ambiance to the room.

Pot Lights or Recessed Lights: Pot or recessed lights can be installed in the ceiling to provide even lighting without creating harsh shadows. These lights are sleek and can blend seamlessly with the ceiling’s appearance.

Track Lighting: Track lighting allows you to direct multiple light sources towards specific areas of the room. With adjustable fixtures, you can control the direction of light to avoid casting shadows on the ceiling.

Dimmer Switches: Installing dimmer switches with your chosen light fixtures provides the flexibility to adjust light intensity according to your needs. Dimming the lights slightly can help soften the overall illumination and enhance the popcorn ceiling’s texture.

Natural Light: Maximize natural light during the daytime. Natural light creates a soft and pleasant atmosphere without directly interacting with the popcorn texture.

Wall Washers: Wall washer lights are designed to wash the walls with light, which can indirectly illuminate the ceiling. This can create a diffused, gentle glow that complements the popcorn texture.

When selecting lighting for a room with a popcorn ceiling, consider the overall aesthetic you want to achieve and the functionality of the space. It’s essential to balance providing sufficient illumination and creating a comfortable and visually appealing environment that works harmoniously with the texture of the ceiling.

Disadvantages of Using a Projector on a Popcorn Ceiling:

While using a projector on a popcorn ceiling can be an intriguing idea, there are notable disadvantages:

Image Quality: The texture of the popcorn ceiling can cause distortion and unevenness in the projected image, particularly towards the edges. This can lead to a less sharp and clear picture.

Reflectivity: Popcorn ceilings may not reflect light as efficiently as flat surfaces, resulting in a less crisp and bright image.

Shadows and Throw Distance: The unique way popcorn ceilings reflect light can create harsh shadows. Additionally, the considerable distance from the floor to the ceiling may require finding a high location for the projector, especially for smaller projected images.

Conclusion:

A projector on a popcorn ceiling is possible, albeit with some challenges. The texture of the ceiling can impact image quality, but strategic positioning, proper adjustments, and supplemental lighting can significantly improve the viewing experience. While textured walls present similar challenges, choosing the right projector and considering wall color can help achieve satisfactory results. Remember that a projector screen or alternative projection surface can enhance outcomes and viewing quality.

FAQ’s


Can I use a projector on a popcorn ceiling?

Yes, you can use a projector on a popcorn ceiling. However, the texture of the ceiling can cause challenges such as image distortion, reduced brightness, and uneven projection. To optimize the experience, ensure proper projector positioning, use soft lighting, and consider a projector screen for improved image quality.

Can projectors be used on textured walls?

Yes, projectors can be used on textured walls. However, the uneven surface can lead to issues like distorted images and reduced brightness. Positioning the projector accurately, choosing a brighter projector, and using a projector screen can help mitigate these challenges and improve the projection quality.

Does the color of the wall matter for a projector?

Yes, wall color matters for a projector. Light-colored walls such as light yellow, pink, blue, or green can help maintain a brighter image due to higher reflectivity. Darker walls might lead to a loss of detail and vibrancy. Choosing a projector screen or a smooth white wall as a projection surface can also impact image quality.

What lighting is best for popcorn ceilings?

The best lighting for popcorn ceilings includes options that create a soft and even glow while minimizing harsh shadows. Soft or frosted light bulbs, table lamps, floor lamps, and recessed lights can work well. Wall sconces and dimmer switches also help achieve a balanced and inviting atmosphere.

Does a projector’s color matter?

Yes, a projector’s color accuracy matters. Color accuracy affects how accurately the projector reproduces colors in the projected image. Accurate colors contribute to a vibrant and immersive visual experience. Projectors with good color accuracy provide better vibrancy, contrast, and overall image quality, making them suitable for various applications, including entertainment and professional use.


Categories
Subwoofer Informational

How To Wire A Dual Voice Coil Subwoofer

How To Wire A Dual Voice Coil Subwoofer or Speaker

A dual voice coil speaker system (typically a subwoofer) can be confusing. There’s one more problem when it comes to dual voice coil speakers because if you don’t know how to select or wire them in the right way, you may end up getting less sound & power than you expect!

The following is a how-to guide I have compiled to assist you if you are having trouble figuring out your way around. It includes detailed diagrams, answers to several common questions, and more.

Are you looking for instructions on how to wire a dual voice coil subwoofer or a recommendation on the type of amplifier that is right for you? For more information, you can read on.

What is a dual voice coil speaker?

Single voice coil speakers have one voice coil winding, one wire, and one wire terminal, but dual voice coil speakers have two voice coil windings, wires, and terminals. The speaker’s cone rests inside the magnet with a small gauge wire wound around a bobbin (tube). A musical signal causes them to produce sound.

There are almost no differences between single voice coil speakers and dual voice coil speakers, most often subwoofers. It comes down to their design and how they’re used which makes the difference.

How To Wire A Dual Voice Coil Subwoofer

Series and parallel wiring are two ways to wire your subwoofer. Parallel wiring attaches the positive of coils A and B to individual terminals on your amp, while serial wiring connects all four terminals together, making them work as one unit. The negative aspects of their relationship will be channeled through a single method, but the positive aspects will be shared.

Dual Voice Coil Subwoofers Can Be Wired In Series

You need to connect the positive and negative terminals for the second pair of coils. Since the power is split between coils A and B, series wiring has a higher impedance than parallel wiring, which reduces your overall wattage.

Dual Voice Coil Subwoofers Can Be Wired In Parallel

It is just a matter of connecting coil A’s negative terminal to the output channel of your amplifier and repeating this for coil B. 

In series wiring, the negative and positive are connected together. With parallel wiring, you get a slightly higher output overall since you have half the impedance compared to serial wiring. 

Understanding the difference between series and parallel wiring when wiring a dual voice coil subwoofer is helpful. 

It would certainly be best to use serial wiring instead of parallel wiring if you intend to reduce your energy bills. This is because you are only using one channel and occupying half of the total power of parallel wiring. 

It is important to note that a parallel connection will be the best option if what matters most to you is the sound quality or if your amplifier can provide you with more power per channel.

Dual voice coil subwoofers vs. Single voice coil: what’s the difference?
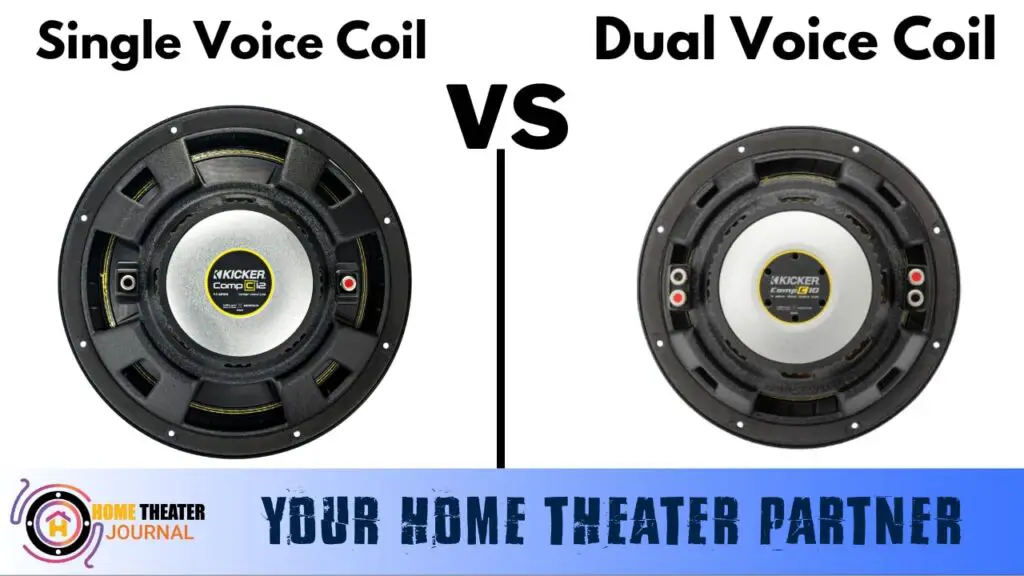
How To Wire A Dual Voice Coil Subwoofer by hometheaterjournal.com

ere’s a comparison table highlighting some differences between single and dual voice coil subwoofers:

AspectSingle Voice Coil SubwooferDual Voice Coil Subwoofer
Number of Voice Coils12
Wire TerminalsOneTwo
Wiring OptionsSeriesSeries or Parallel
Impedance OptionsTypically 4 or 8 ohms2, 4, or 8 ohms
Flexibility in WiringLimitedMore options available
Amplifier CompatibilityMay limit optionsMore flexible
Power HandlingSimilar to DVC but limitedGreater flexibility
Ohm Load MatchingLess versatilityBetter matching options
Usage in Multiple SystemsMay be restrictiveMore adaptable
CostGenerally lowerSlightly higher
Suitability for Different AmpsMay not match requirementsBetter adaptation

These are the parts of a standard speaker or subwoofer:

  • Magnets are attached to metal baskets that hold speaker parts
  • Magnet with a large capacity
  • Surround the speaker cone
  • A dust cap and surround for the speaker cone
  • The bobbin for the voice coil (the tube where the coil is wound)
  • The voice coil assembly is suspended by a “spider” that is stiff but flexible
  • A magnet contains a coil of tightly wound wire of a small gauge and a long length enclosed in a gap.
  • Leads & connectors for voice coils

A single voice coil subwoofer has only one winding of the speaker coil, while a dual voice coil subwoofer includes a second winding in the bobbin, with the same Ohm rating.

The speaker wire terminals and the second pair of wire leads have also been added.

Related: Subwoofer vs Speakers.

Can dual voice coil speakers perform differently?

Dual voice coil models have no direct performance differences compared to single voice coil models. It has some advantages, as I’ll explain in a moment.

There is a slight price increase for dual voice coil subwoofers compared to their single voice coil counterparts, but not by as much as you might expect. There are usually similar ratings for power handling (always double-check to be sure), but there might be a slight variation from one model to another.

When designing speaker boxes, you should be aware that dual voice coil speakers will typically have slightly different Thiele/Small parameters. In a speaker box or audio crossover, thine/small parameters determine how a speaker behaves when it is placed in certain conditions.

Which is better, single or dual voice coil subs?

A single or dual voice coil speaker or subwoofer isn’t the “best” choice.

A single or DVC subwoofer is better suited to your needs according to a combination of factors:

  • An amplifier’s minimum load rating (Ohms)
  • A stereo amp or a bridgeable amp
  • If you are going to be using speakers or subwoofers, you need to know how many you’ll have.

Home stereo amplifiers may not be bridgeable in many cases, unlike higher-power car amplifiers. It is important to remember that you should never assume your amplifier can be bridged – always check!

Dual voice coil subwoofer Pros

Many systems work fine with standard subwoofers (single voice coil). On the other hand, dual voice coil subwoofers offer advantages and flexibility that single voice coil subwoofers cannot match.

1. Max. Amp power

There are certain power ratings for car amplifiers (in Watts) when connected to specific speaker loads (in Ohms). Typical power ratings for mono amplifiers are as follows:

  • A speaker load of 4 ohms delivers 350W RMS
  • The RMS power is 600W at 2 ohms
  • RMS power of 1,000W at 1 ohm

If you want only one subwoofer and one bass setup (mono), let’s say. Because you’re usually only able to find 2 ohms or higher subwoofers, you’d be limited to 600W from the amp.

In theory, it would be possible to add a 2nd 2-ohm subwoofer to the setup and wire them up in parallel. However, any such setup would require a bigger box, more money, more space for installation, and so forth.

To allow the amp to put out its full power, it may be necessary to use a 2-ohm DVC subwoofer wired in parallel to the amplifier. Without this, your amplifier will never provide the power you were hoping for when you bought it.

This is certainly true in the modern era, where many class D amplifiers can handle an impedance of 1 ohm or higher.

Related: How To Test A Subwoofer with Multimeter?

2. Choosing the right amplifier channel and how to set it up

It is not possible to bridge all amplifiers, as I mentioned earlier. It’s a big problem if you’ve got a single amplifier with four channels. What are the best ways to power a subwoofer without buying an extra amplifier?

The power of a dual voice coil subwoofer can be driven with a single channel for each voice coil to guarantee that the subwoofer receives enough power to transmit the sound to the speakers. In addition to this, if you want to have a potent system, you may be able to have one amp per voice coil, whether it is a single or multiple subwoofer system.

Dual voice coil subwoofers can be driven with enough power using one channel for each voice coil. It’s also possible for multi- or single-subwoofer systems to use one amp for each voice coil.

3. Multi-subwoofer/amp impedance matching

Your amp’s Ohms load depends on which subwoofers are connected in series or parallel when several subwoofers are wired to the same channel.

In addition to offering more options, dual voice coil subs can match your amp’s minimum load rating much better thanks to their ability to offer a greater range of total Ohm load combinations.

4. Use them for home stereos and car stereos

Because 8-ohm subwoofers do not have the same power as a 4-ohm speaker, 8-ohm subwoofers cannot be used effectively for car audio. Since car subwoofers with 2 or 4-ohm ratings do not meet the minimum amp specification, they cannot be used with home stereo amplifiers.

In case of overheating, shut down, or overheating, a home amplifier can be permanently damaged.

In this case, double voice coil speakers offer a unique advantage, as they can be used both in a car or at home:

  • Home stereo wired in series for 8 ohms
  • Car stereo amplifiers can be connected in parallel to 2 ohms or use a single 4 ohm

You will be able to use speakers when you aren’t otherwise able to use them if you get a great price.

How to choose and match a dual voice coil subwoofer

Several things need to be considered when choosing dual voice coil subwoofers:

  • If you are interested in high power levels, you should check your amplifier’s minimum speaker load (Ohms rating)
  • Using how many subwoofers

It’s easy from there! You can figure out the correct subwoofer configuration using my wiring connection diagrams below.

If you want to get the minimum speaker load and maximum power rating Ohm load for your amplifier, you must consult the owner’s manual (or labeled printed instructions). The next step would be to pick the appropriate number of dual voice coil subwoofers that can be wired to match the amp’s preferred amount of output.

2 Ohm dual voice coil sub-wiring diagram
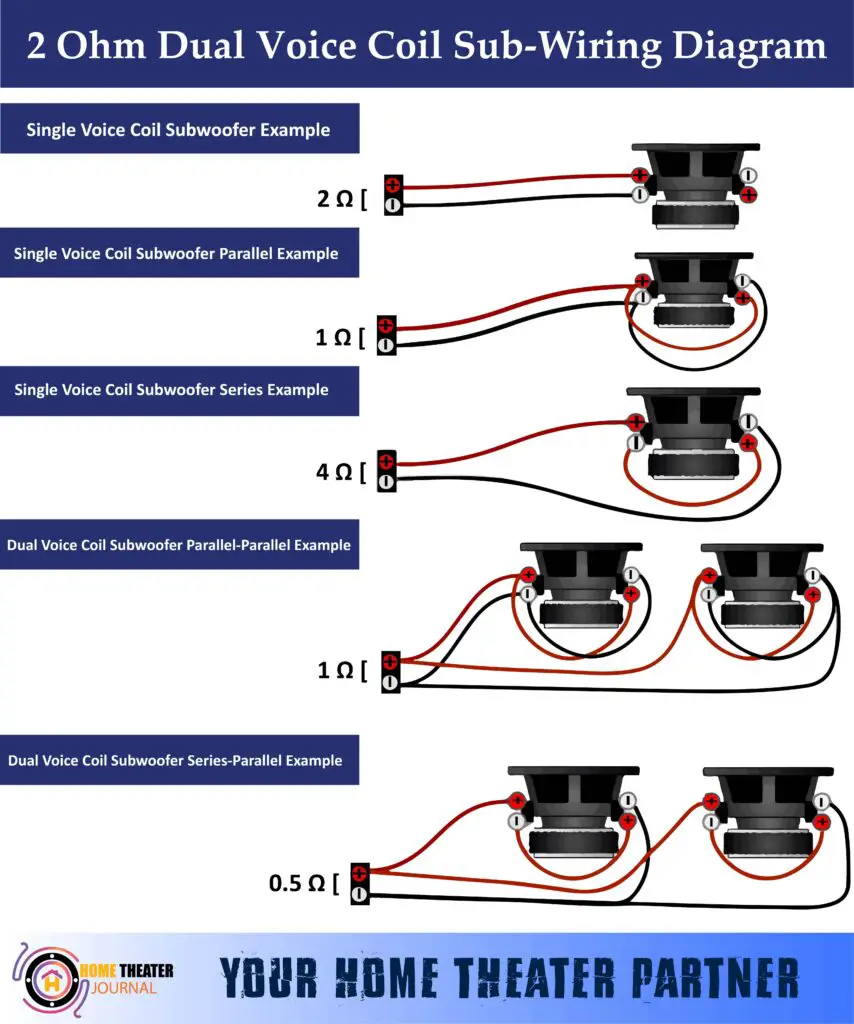
How To Wire A Dual Voice Coil Subwoofer

4 Ohm dual voice coil sub-wiring diagram

8 Ohm dual voice coil sub-wiring diagram
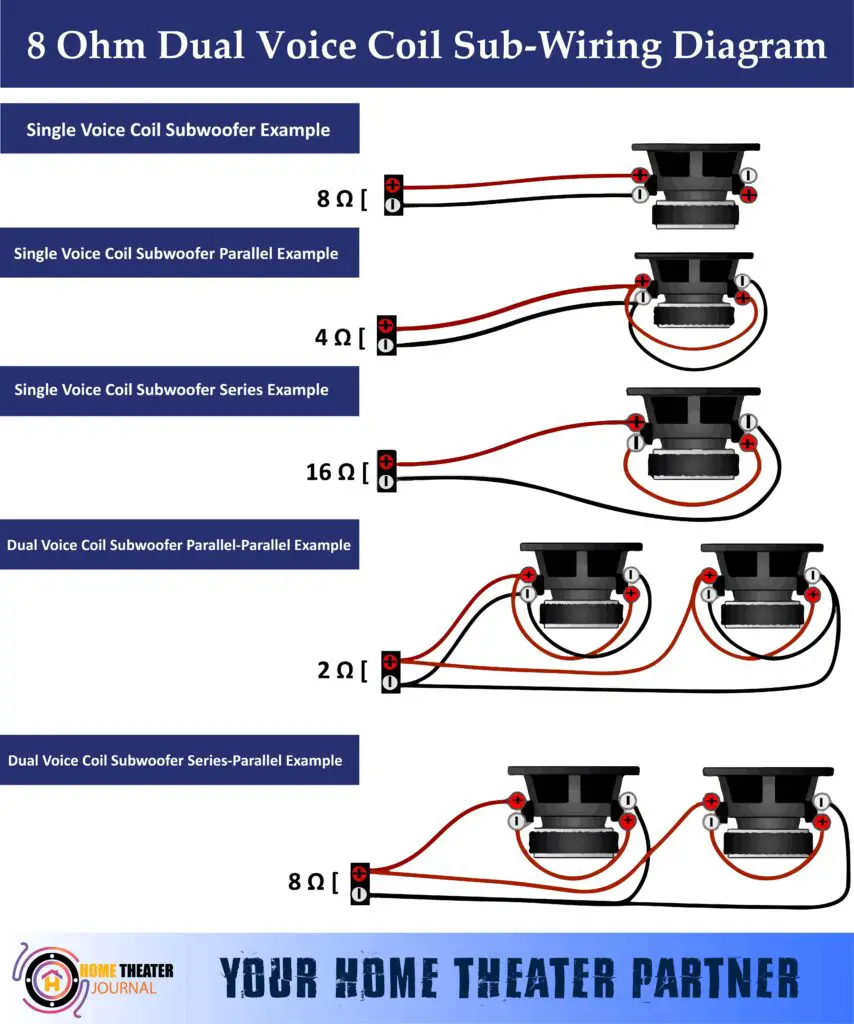
How To Wire A Dual Voice Coil Subwoofer by hometheaterjournal.com

Common Mistakes When Wiring Dual Voice Coil Subwoofers

One common mistake people make when wiring dual voice coil subwoofers is mismatching the impedance or incorrectly configuring the wiring setup. Here are a few common mistakes:

  1. Impedance Mismatch: Connecting the subwoofer in a way that doesn’t match the amplifier’s minimum impedance requirements can lead to poor performance or even damage to the amplifier. This might happen by wiring the coils in a way that creates an impedance load too low or too high for the amplifier.
  2. Incorrect Wiring Configuration: Choosing the wrong wiring method (series or parallel) based on the amplifier’s capabilities or desired outcome can significantly impact the subwoofer’s performance. Using series wiring when parallel is needed or vice versa can affect power handling and sound quality.
  3. Assuming Amplifier Compatibility: Assuming that any amplifier can handle any configuration of dual voice coil subwoofers can be a mistake. Not all amplifiers are designed to work with the full range of impedance options offered by DVC subwoofers.
  4. Incomplete Understanding of Wiring Options: Lack of understanding regarding the differences between series and parallel wiring can lead to suboptimal setups. People might choose a wiring configuration without considering how it impacts power handling, impedance, or the overall sound output.
  5. Neglecting Ohm Load Matching: Failing to consider how different wiring configurations affect the total Ohm load presented to the amplifier. This can lead to underpowering the subwoofer, reducing its efficiency, or potentially damaging the amplifier.

Avoiding these mistakes involves thorough research, understanding the amplifier’s specifications, knowing the subwoofer’s capabilities, and carefully following the correct wiring diagrams or guidelines provided by the manufacturer. It’s important to double-check and ensure that the wiring setup aligns with the amplifier’s requirements for optimal performance and longevity.

Conclusion


In conclusion, wiring a dual voice coil subwoofer or speaker can be confusing, but it is easy to do once you understand the process. The key is to know the difference between series and parallel wiring and to choose the best wiring option based on your amplifier and sound quality needs.

Dual voice coil speakers have two voice coil windings, wires, and terminals, while single voice coil speakers have only one. Dual voice coil subwoofers offer advantages and flexibility that single voice coil subwoofers cannot match.

When selecting a subwoofer or speaker, it is important to consider factors such as an amplifier’s minimum load rating, whether it is a stereo amp or a bridgeable amp, and how many speakers or subwoofers you will be using. By following the guidelines outlined in this how-to guide, you can successfully wire a dual voice coil subwoofer or speaker and achieve optimal sound quality.

FAQ’s


What is a dual voice coil speaker, and how does it differ from a single voice coil speaker?

A dual voice coil speaker has two voice coil windings, wires, and terminals, while a single voice coil speaker has only one. Dual voice coil speakers, such as subwoofers, have two positives and two negatives, which can be wired in series or parallel to achieve a desired impedance level.

How do I wire a dual voice coil subwoofer?

You can wire a dual voice coil subwoofer in series or parallel. Series wiring involves connecting the positive and negative terminals for the second pair of coils, while parallel wiring involves connecting the negative terminal of coil A to the output channel of your amplifier and repeating this for coil B. The wiring method used will depend on your specific needs and goals.

Can dual voice coil speakers perform differently from single voice coil speakers?

Dual voice coil models have no direct performance differences compared to single voice coil models. However, dual voice coil subwoofers offer advantages and flexibility that single voice coil subwoofers cannot match.

Should I use series or parallel wiring when wiring my dual voice coil subwoofer?

The wiring method used will depend on your specific needs and goals. Series wiring has a higher impedance than parallel wiring, which reduces your overall wattage, but it can be a good option if you are looking to reduce energy bills. Parallel wiring provides a slightly higher output overall and may be a better option if you are looking for improved sound quality or if your amplifier can provide more power per channel.

What factors should I consider when choosing between a single or dual voice coil subwoofer?

When choosing between a single or dual voice coil subwoofer, you should consider factors such as an amplifier’s minimum load rating, whether you are using a stereo amp or a bridgeable amp, and how many speakers or subwoofers you will be using. It is also important to remember that you should never assume your amplifier can be bridged – always check!


Categories
Soundbars Informational

How To Connect Soundbar To Tv Without HDMI

How To Connect Soundbar To Tv Without HDMI | 4-Ways

A soundbar is usually connected to a TV using HDMI or digital optical audio connection. They may even improve your listening experience if they transmit audio without degrading its quality. However, what if your device is not compatible with either of these?

With no HDMI or optical ports, you can connect your Soundbar to the TV with a wireless connection or use 3.5 mm aux, RCA, or coaxial cables for a mid-tech connection. Using an auxiliary device, coaxial cables can be converted to other connections.

It’s common to need creativity, mixing and matching, and a few adjustments to connect your Soundbar to your TV. Stay tuned for a detailed look at your options, and start setting up the same setup yourself.

1. Connect with Aux or 3.5mm Cable

How To Connect Soundbar To Tv Without HDMI by hometheaterjournal.com

If your TV does not support both HDMI and digital optical, you would want to connect a soundbar to it.

Auxiliary cables and auxiliary inputs are almost always the only way to transmit audio signals from old TVs. Mobile phones and other audio devices have the same type of connection.

If your TV supports this connection, a nylon braided aux cable from Syncwire (Amazon link) is good. All devices that support 3.5mm jacks are compatible with it. A 24K gold-plated connector ensures lossless transmission of audio signals and improves the device’s reliability.

However, it is possible to use an aux to RCA converter if the TV or Soundbar you are using does not support this type of connection. These converters use cables that are much cheaper than HDMI or optical cables.

There are a few reasons why the AmazonBasics 3.5MM to 2-Male RCA Adapter (Amazon link) would be a great option since it comes without fancy features and is corrosion-resistant. It’s also extremely inexpensive but will make your life easier.

Most of the soundbars available today support the connection of an auxiliary device using an auxiliary 3.5mm jack. Therefore, you do not have to possess any technical knowledge on using an aux cable to connect to a TV. 

The cable costs less than $10, so it’s an inexpensive alternative. However, using this connection for audio isn’t the best solution since you will have to deal with some problems.

Cons of Auxiliary Cables

A 3.5mm aux cable can transmit sound without a noticeable drop in sound quality. Auxiliary cables, however, can only output sound in stereo. Using soundbars with three channels, four channels, or more is impossible because the device only works with left and right speakers.

Using only left and right speakers will still result in good audio. However, there is a downside to using an aux cable to hear surround sound effects because an aux cable cannot send signals to the frequencies that create the effect.

A 3.5mm aux cable is a great alternative if you only want to connect your Soundbar to your TV. In contrast, investing in a new TV or going wireless would be a good idea if you want to make a media room with a sound that will make your heart race.

2. To Connect, Use Three RCA Cables (Yellow, Red, and White)

How To Connect Soundbar To Tv Without HDMI by hometheaterjournal.com

3.5mm, HDMI, and optical connections are compatible with most TVs these days. If you have an older TV, RCA, and coaxial cables are your only audio options. These cables are available in many electronic stores and can transmit audio signals effectively.

When it comes to soundbars, you’re in luck if your TV has RCA cables since most models now support two-channel audio. RCA cables must have RCA audio outputs on the TV and the cable before being used.

The yellow video cable should go into the TV port; the white and red audio cables must run directly into your Soundbar. If you only have one HDMI cable with input ports, you can fix that by connecting the yellow video cable.

These days, many TVs can provide both input and output for audio and video signals, serving as a central hub for processing audio and video signals. However, older TV sets only allow you to receive audio and video. You have to split the signal before it reaches the TV if you’re going to connect a soundbar to a TV with RCA cables.

Using an RCA connection with a soundbar is straightforward with the Monoprice Premium 2 RCA Plug (Amazon link). There are only two audio connectors – red and white. Using your sound bar and TV together eliminates the need for a yellow video connector.

For a more detailed guide on connecting a Vizio soundbar to a TV and exploring better audio connection options, check out this comprehensive resource How to Connect Vizio Soundbar to TV.

Cons of RCA Cables

Audio signals are only transmitted left and right on RCA cables, just like auxiliary inputs. The best audio juice will not be available if you consider buying a soundbar with at least 3.0 channels.

RCA can be an inexpensive alternative if you only wish to connect your Soundbar to a TV without needing high-resolution audio.

The RCA output on your TV will not enable surround sound even if it has 5-channel output. Because soundbars only work with HDMI, optical audio cable, or wireless connections, those working at three channels or higher can only support these connections.

An adapter such as the Mini RCA Composite CVBS (Amazon) adapter can help solve this problem and let you produce better audio quality without having to upgrade your TV.

To take advantage of the benefits of this device, you do not need to make a major investment in upgrading your TV to enjoy 3 or more channels. Because older televisions cannot produce true high-definition audio signals, it is impossible to get true surround sound effects.

Nevertheless, this is a neat trick to instantly upgrade your sound system without using the latest digital connections.

How to Connect a Soundbar Without HDMI ARC

You can use other audio connection options such as optical, RCA, or 3.5mm AUX cables to connect a soundbar without HDMI ARC.

Here’s how to do it:

  1. Check if your TV and soundbar have the same audio output ports.
  2. Turn off both devices and plug in the cable to the TV’s audio output port and the soundbar’s audio input port.
  3. Turn on the TV and soundbar and switch the soundbar to the appropriate input source.
  4. Adjust the audio settings on your TV to output sound to the connected soundbar.

These alternative audio connections can still deliver quality audio, but it’s important to check the soundbar’s specifications and ensure that it supports the audio connection method you plan to use.

3. Connect with Coaxial Cable

How To Connect Soundbar To Tv Without HDMI by hometheaterjournal.com

Possibly, you only have one option for your older TV – coaxial cable. Televisions in the past could only play cable programming since they were hooked up to cable. The cable you connect to your TV will send audio and video directly to the TV and the cable provider.

Many devices still use coaxial cable connections even though some say it is outdated. You will see a wire sticking out of the cable attached to a cable with a nut attached to both ends.

Using a coaxial cable to connect your Soundbar to the TV requires a VCR or DVD player. Videotapes and video discs are played on these devices. If you want to use a coaxial cable to establish an audio connection, this is your best option (or probably the only one).

Coaxial cables can be connected to the VCR output and the TV input, with one end plugged into the TV output and the other into the VCR output. You can then connect RCA cables to the Soundbar to output the audio from the VCR or DVD. The TV will only serve as a monitor, and you’ll remove all its features.

Coaxial cables can also be used with other options, but these are often too cluttered and expensive to be worthwhile. The adapter also requires external power, so you can’t use it with a coaxial cable. After connecting these devices and devices, you might already have a cluttered and cumbersome setup.

It would be better to invest the cash into an HDMI-capable modern TV rather than an old one with an adapter and external power source.

Cons of Coaxial Cable

Though tricky, you can connect a sound bar to a TV using a coaxial cable. Unfortunately, your TV and Soundbar cannot connect your devices since they are outdated.

In addition, it may be challenging to locate an electronic store with a VCR or DVD player if you don’t have one at home.

You will also have a hard limit on how many channels you can use when using this type of connection.

AV RCA to HDMI adapters can also be used with VCRs that have a 5-channel connection, but, unfortunately, they won’t be able to transmit accurate high-definition audio.

4. Wireless

How To Connect Soundbar To Tv Without HDMI by hometheaterjournal.com

Unfortunately, optical, HDMI, and USB audio connections are not always the best options. We could even upgrade your existing Soundbar to go wireless. Your Soundbar can produce excellent sound without the need for a wired connection.

In addition to the fact that some wireless conversion kits (my top picks) are compatible with aux or RCA cables, this option is even more attractive. Consequently, you do not need a new TV if it only supports auxiliary jacks or RCAs. You can still get wireless capabilities on an old TV!

It isn’t necessary to spend your time looking for ugly converters to convert your old audio connection to HDMI anymore. Instead, you can buy wireless conversion kits to provide your devices with the same reliable connection.

Moreover, installing the Soundbar will also be a lot easier since there will not be a need to connect a different device to the TV to make the connection. It is as simple as connecting the transmitting device to your television and the receiver to your Soundbar, and then you can enjoy it! This tool will be handy even if you’re trying to hide the cables connecting the computer to the other components!

Wireless speaker connections

These kits can be used as plug-and-play devices with a TV and sound bar. In the meantime, you should become familiar with the types of wireless speaker converters you can purchase before trying to find the best you can use.

Your TV may not have to be upgraded to take advantage of your Soundbar. You will know what setting suits your set-up best, which may help you pick the best Soundbar.

You can connect a soundbar to a TV using the following wireless connections:

  • Bluetooth®: There are several types of speaker conversion kits, but generally, you will find Bluetooth®, which is the most common type of connection. Using two devices, two transmitters and two receivers can be connected to a wide range of devices using HDMI, optical, aux, or RCA cables. Using a Bluetooth® connection, audio signals are sent from the transmitter to the receiver. The TV, in a nutshell, becomes a Bluetooth® device. The Bluetooth® connectivity will be available to all the models, including those that only connect using RCA.
  • Qualcomm’s aptXTM: In addition to Bluetooth®, Qualcomm’s aptXTM technology uses only high-quality audio transmissions. Using RCA cables, you can still accommodate your TV using true high-definition audio signals, even when your TV can only connect via RCA cables.
  • Radiofrequency: The wireless conversion kits can also establish connections using radio frequencies. Better coverage is usually provided by devices using the 2.4 GHz band. Several more advanced conversion kits use frequency hopping to minimize interference from interaction with other devices that work on the same frequency.
  • WiFi: To give your TV wireless capabilities, you can use WiFi, the least common type of connection. Audio signals are transmitted over the Internet by the transmitter. After downloading the uncompressed audio signals, the receiver can output them to the speaker via the output unit. As a result, this latency is highly dependent on Internet speed, so it may not be able to produce the best sound quality. As a result, if your connection is faster, you will have better audio quality.

For TVs that only support coaxial cables, you can use RCA, auxiliary, optical, or HDMI, but not if your TV has RCA, auxiliary, optical, or HDMI connectors. The best way to connect a soundbar to a TV is via wireless conversion kits since they cover most TV connections that we have today.

Wireless Connections: Pros and Cons

Almost any device can be connected through wireless technology, which is not cheap. To decide whether or not to have one, you must know both the pros and cons of using one. Wireless speaker conversion kits offer the following benefits:

  • They allow you to create a more open space. Long, messy cables persist regardless of whether you use digital optical or HDMI for audio connections. A world increasingly relying on wireless connections might consider this a huge disadvantage. If you plan on using conversion kits, you don’t need to install cable connections or keep them hidden.
  • You will have more channels at your disposal. We’ve discussed several ways to connect one speaker to another, but all of those have one major drawback-limited support for speakers with 3.0 or higher channels. You can get surround sound effects with a wireless connection because it does not require complicated configuration.
  • It features a coaxial connection as the only exception to all-in-one connections. These connections can be used to go wireless, including HDMI, optical, 3.5 mm, and RCA. Therefore, regardless of the options that your TV supports, you’re most likely to configure a wireless connection.
  • A lossless audio connection is available. The airwaves hardly affect the sound quality since it transmits audio signals.

Even though wireless kits offer many benefits, they are still far from perfect. You need to be prepared for the following problems to connect your Soundbar to a TV:

  • Wireless speaker conversion kits are a bit more expensive. While cheaper options may be available, you may have to invest in more expensive models if you want the most out of your TV and Soundbar.
  • Connectivity is not 100% cable-free. Because your TV still needs to be connected to the transmitter, and your sound bar needs to be connected to the receiver, you can only minimize the length of cables you need.
  • There are many ways to connect wireless conversion kits, but none are error-free. Even Qualcomm®’s aptXTM has a limited range, so even the best connection is limited. Using cables for connection would be better if you plan on using them to connect large spaces.

Conclusion

HDMI and digital optical may dominate an audio connection, but these aren’t your only choices. You still have the opportunity to use the following methods if your television does not support both the HDMI and the AV connections:

  • Connect with Aux or 3.5mm Cable
  • To Connect, Use Three RCA Cables (Yellow, Red, and White)
  • Connect with Coaxial Cable
  • Wireless

Wireless audio is available in all of these options. Depending on your TV, you may be able to use a different type of connection. The Wireless Speaker Conversion Kits will solve the problem of setting up cables when you don’t want to deal with that hassle!

FAQ’S


Q: What are the alternatives for connecting a soundbar to a TV without HDMI?

A: You can connect your soundbar to your TV using an optical cable, RCA cable, a 3.5mm auxiliary cable, or via Bluetooth if your soundbar and TV support it. Each method has its own advantages and disadvantages, so choose the one that works best for your setup and preferences.

Q: How do I connect a soundbar to a TV with an optical cable?

A: First, ensure your soundbar and TV have optical audio ports. Then, connect one end of the optical cable to the soundbar and the other to the TV. Next, adjust the audio settings on your TV to output audio through the optical port, and you’re good to go.

Q: Can I use RCA cables to connect my soundbar to my TV?

A: If both devices have RCA audio ports, you can connect your soundbar to your TV using RCA cables. Connect one end of the RCA cables to the soundbar and the other to the TV, and then adjust the audio settings on your TV to output audio through the RCA ports.

Q: How do I connect a soundbar to a TV using a 3.5mm auxiliary cable?

A: First, ensure that your soundbar has a 3.5mm auxiliary input and your TV has a 3.5mm headphone jack. Then, connect one end of the auxiliary cable to the soundbar and the other to the TV’s headphone jack. Finally, adjust the audio settings on your TV to output audio through the headphone jack.

Q: Can I connect my soundbar to my TV via Bluetooth?

A: If your soundbar and TV support Bluetooth, you can connect them wirelessly. Pair your soundbar and TV using the Bluetooth settings on each device, and you’re good to go. However, remember that Bluetooth audio sometimes has latency issues, so it may not be ideal for watching videos or playing games.


Categories
Projectors Informational

Mount a Projector Screen without Drilling

How to Mount a Projector Screen Without Drilling | 5-Methods

When it comes to mounting a projector screen, many of us cringe at the thought of drilling holes in our walls. We want to enjoy the immersive experience of a projector screen without causing permanent damage.

Luckily, there are several ingenious ways to achieve this goal without a single drill hole. In this guide, we will explore five fantastic methods to mount a projector screen without drilling.

Projector Screen Stands: A Solid Foundation

If you’re looking for a secure and non-invasive way to mount your projector screen, projector screen stands are a fantastic choice. These stands are designed explicitly for this purpose and offer an excellent alternative to wall mounting.

How to Mount with a Projector Screen Stand:

  • Start by selecting a projector stand that suits your screen’s size and weight. These stands come in various styles, so choose the one that best fits your needs.
  • Read the user manual carefully to understand how to set up the stand. Typically, no technical expertise is required, making this a user-friendly option.
  • Follow the instructions to mount your projector screen onto the stand securely. These stands are versatile and adjustable, ensuring your screen is at the perfect viewing height.
  • Enjoy your projector screen without any damage to your walls, and easily relocate it if needed.

Hanging Strips: The Affordable Option

Hanging strips are a versatile and cost-effective solution for mounting various items on your walls. While they are commonly used for hanging pictures, paintings, and mirrors, they can also be an economical temporary fix for mounting a projector screen.

How to Mount with Hanging Strips:

  • Find a clean area on your wall that hasn’t been treated with household cleaners. To ensure a secure hold, clean the area with rubbing alcohol.
  • Unpack and separate the hanging strips. These typically come in pairs, with one strip to attach to the wall and the other to the projector screen.
  • Attach one strip to the wall, press it for about 30 seconds, and allow it to adhere for an hour as per the instructions provided.
  • Once the strip is secure, attach the corresponding strip to your projector screen. Make sure it aligns correctly with the wall strip.
  • Carefully mount your projector screen, ensuring it’s level and properly attached.

Brick Clamps: Perfect for Exposed Brick Walls

For those with exposed brick walls, brick clamps provide an excellent solution to mount a projector screen without drilling. This method is both affordable and effective.

How to Mount with Brick Clamps:

  • Measure the depth of the mortar on your brick wall and select brick clamps that are compatible with your wall.
  • Carefully follow the provided instructions for hanging the brick clamps. Keep in mind that not all brick clamps are the same, so specific steps may vary.
  • Once the brick clamps are securely in place, mount your projector screen with confidence.

Cork Wall: A Stylish Solution

While a bit more expensive than other options, mounting your projector screen on a cork wall not only provides a secure foundation but also adds a touch of warmth and style to your living space.

How to Mount on a Cork Wall:

  • Start by installing the cork wall using adhesive liquid. This creates a unique and practical backdrop for your projector screen.
  • Measure your projector’s dimensions and mark the points on the cork wall where you want to mount it.
  • Install screws and nails in the marked areas to create a secure mounting point for your projector screen.
  • Carefully mount your projector screen on the cork wall, which not only ensures stability but also enhances the aesthetics of your room.

Floor Standing (Legs or Easel): A Mobile Solution

If you lack the technical knowledge or equipment to hang a projector screen, investing in floor-standing options, such as legs or an easel, can be an excellent alternative. These options don’t require wall mounting and are especially convenient for DIY projector setups.

How to Mount with Floor Standing:

  • If you choose legs, simply adjust the bolts on the legs to securely mount the projector screen in your desired location.
  • Alternatively, opt for an easel, which provides a stable frame to hold your projector screen. Adjust the easel’s frame to ensure a secure and safe fit for your screen.
  • The floor-standing options offer the flexibility to move your projector screen without hassle, making them ideal for various setups and scenarios.

Conclusion

In conclusion, mounting a projector screen without drilling is not only possible but also quite straightforward. By exploring creative alternatives like projector screen stands, hanging strips, brick clamps, cork walls, or floor-standing options, you can enjoy the benefits of a projector screen without permanent wall damage.

Whether you prioritize mobility, style, or cost-efficiency, there is a non-invasive solution for everyone. So go ahead, choose the method that suits your needs, and start enjoying the big screen experience in your home, worry-free.

FAQs | How to Mount a Projector Screen Without Drilling


1. Can I use hanging strips to mount a projector screen on any wall?

Answer: Hanging strips are best used on clean, untreated walls. However, they may not be suitable for textured or porous surfaces. Ensure the wall is compatible with the adhesive properties of hanging strips before use.

2. Are projector screen stands adjustable to fit different screen sizes?

Answer: Yes, projector screen stands are typically designed to be adjustable to accommodate various screen sizes. It’s essential to select a stand that can support the weight and dimensions of your projector screen.

3. Can cork walls be installed by homeowners, or do I need a professional for this method?

Answer: Cork walls can be installed by homeowners. You will need adhesive liquid, proper measurements, and basic DIY skills. However, if you’re uncertain about your ability to install it correctly, consulting a professional is a good idea.

4. Do brick clamps leave any permanent marks or damage on exposed brick walls?

Answer: Brick clamps are designed not to leave permanent marks or damage on exposed brick walls. They are a safe and effective way to mount a projector screen without drilling while preserving the integrity of the brick surface.

5. How much space do I need for floor-standing options like legs or an easel to mount a projector screen?

Answer: Floor-standing options like legs or an easel require more space compared to wall-mounted solutions. You should allocate enough space for the screen’s dimensions and the floor-standing apparatus, ensuring it doesn’t obstruct the viewing area.


Categories
Projectors Informational

Projector With Ceiling Fan

How to Safely Use a Projector with Ceiling Fan: Tips and Considerations

When it comes to Hanging projectors on ceilings, it’s a common practice, but sometimes limited space presents challenges, especially when a ceiling fan is also in the equation. This article delves into the details of safely using a projector alongside a ceiling fan, discussing potential compatibility issues, advantages, disadvantages, and essential tips to ensure a successful setup.

Can You Use a Projector with Ceiling Fan? 

Indeed, you can use a projector with a ceiling fan, but it’s essential to exercise caution and consider potential drawbacks. Placing a projector on a ceiling fan is not typically recommended due to image obstruction caused by fan blades and possible wind interference affecting the projection quality. However, some innovative solutions suit specific preferences, like hologram fan projectors or mounting the projector beside the fan.

Pros of Using a Projector with a Ceiling Fan: 

Opting for a ceiling-mounted projector offers several advantages, much like any ceiling-mounted setup.

  • Space-saving Elegance: Ceiling-mounted projectors save valuable floor space and provide a clean, sophisticated look to your space, be it a home theater or presentation area.
  • Protection from Damage: Ceiling mounting keeps the projector out of reach of pets and children, minimizing the risk of accidental damage.
  • Professional Appearance: A ceiling-mounted setup imparts your room a polished and organized appearance.

Cons of Using a Projector with a Ceiling Fan: 

Similar to using a projector on a popcorn ceiling, it has disadvantages.

  • Fan Interference: Ceiling fans can cast shadows or disrupt light paths, affecting the projection quality and viewing experience.
  • Compatibility Challenges: Using a projector and a ceiling fan might lead to conflicts due to the fan’s vibrations potentially affecting the projector’s alignment and stability.
  • Cable Management Complexity: Ceiling-mounted projectors necessitate additional wiring, posing challenges for both aesthetics and safety.
  • Ceiling and Fan Suitability: Not all ceilings or ceiling fans are suitable for projector mounting. Ceiling material, structure, and fan design must be assessed to ensure proper installation and functionality.

How to Use a Projector with a Ceiling Fan: 

Tips for a Successful Setup To ensure a safe and effective projector-ceiling fan setup, follow these steps:

  • Compatibility Check: Verify compatibility between the projector, ceiling mount, and your specific ceiling fan design. Ensure the projector can be properly positioned and the ceiling mount can securely attach to your ceiling.
  • Opt for the Right Projector: Choose a projector with a shorter throw distance if the ceiling fan is in the way. This allows for optimal projector placement closer to the screen.
  • Select a Suitable Location: Choose a ceiling spot that facilitates proper projector setup and minimizes any interference with the ceiling fan. Maintain sufficient space between the projector and fan blades to prevent obstruction.
  • Correctly Mount the Projector: Follow the manufacturer’s instructions to install the ceiling mount securely. Confirm its capacity to support the projector’s weight and ensure it’s firmly fixed to the ceiling.
  • Properly Install the Projector: Attach the projector to the ceiling mount following the on-screen instructions. Verify secure fastening and optimal positioning for ideal projection angles, ensuring stability.
  • Adjust Projection Angle: Employ adjustments on the ceiling mount to fine-tune the projection angle and alignment, reducing distortion and fan-related obstacles.
  • Configure Projector Settings: Post-installation, adjust projector settings such as focus, zoom, and keystone correction to optimize image quality and alignment.
  • Manage Cables: Handle cables connecting the projector to power, video sources, and audio devices carefully. Conceal or secure cables for an organized and safe setup.
  • Test and Calibrate: After installation, power on the projector and assess the image to ensure proper functioning. Adjust focus, keystone correction, and other settings for optimal results.

Alternative Solutions: 

Consider these alternatives to manage space effectively:

  • Ceiling Hugger Fan: Opt for a ceiling hugger fan designed to mount closer to the ceiling, creating space for your projector setup.
  • Quality Projector Screen: Use a projector screen engineered to reflect light evenly, enhancing image quality by reducing glare and light bleeding.

Common Mistake Avoid When Using a Projector with a Ceiling Fan

While setting up a projector alongside a ceiling fan can offer unique advantages, it’s crucial to be aware of the most common mistake people make in this scenario. Avoiding this mistake can help you ensure a seamless and effective projector setup without compromising on the performance of either the projector or the ceiling fan.

Neglecting Fan Blade Clearance

One of the most prevalent errors individuals make when using a projector with a ceiling fan is paying attention to the clearance between the fan blades and the projector’s light path. This oversight can lead to two main issues:

Obstructed Image: 

The moving blades can cast shadows on the projection surface if the projector is not positioned with adequate clearance from the fan blades. This obstructs parts of the image and reduces the overall quality of the projection. This can be especially noticeable during scenes with bright backgrounds or fast-moving action.

Interference with Airflow: 

Placing the projector too close to the fan can disrupt the airflow produced by the fan. This can lead to uneven projector cooling and cause overheating over extended periods. Additionally, the wind from the fan can cause the projected image to flutter or sway, negatively impacting the viewing experience.

Prevention and Solution: Proper Placement and Measurement

To avoid falling into the trap of neglecting fan blade clearance, take the following steps:

Measure and Plan: 

Before mounting the projector, carefully measure the dimensions of the projector and the ceiling fan. Factor in the fan’s range of motion, ensuring that the blades do not intersect the projector’s light path. This measurement will guide you in determining the appropriate distance between the projector and the fan.

Follow Manufacturer Guidelines: 

Consult the projector’s and ceiling fan’s manufacturer guidelines for recommended clearances. These guidelines often provide specific measurements or distance ranges that should be maintained between the two.

Test Before Final Mounting: 

Before finalizing the installation, temporarily position the projector where you intend to mount it and run the fan at various speeds. Observe any shadows or image disruptions caused by the fan blades. Make necessary adjustments to achieve a shadow-free and stable projection.

Opt for Adjustability: 

Choose a projector mount with adjustable angles and extension arms if possible. This flexibility allows you to fine-tune the projector’s position to ensure optimal clearance from the fan blades.

By prioritizing proper planning and measurement, you can easily prevent the mistake of neglecting fan blade clearance. This attention to detail will result in a visually pleasing and smoothly functioning projector setup that coexists harmoniously with your ceiling fan, enhancing your overall entertainment or presentation experience.

Conclusion

In conclusion, utilizing a projector with a ceiling fan is feasible but demands careful consideration. The potential challenges and risks should be weighed against the benefits. Following the outlined guidelines and considering alternative solutions can lead to a successful projector setup that coexists harmoniously with your ceiling fan. Your space can boast both functionality and aesthetics without compromising safety or performance.

FAQ’s


Can I Mount a Projector on a Ceiling Fan?

Answer: While mounting a projector on a ceiling fan is possible, it’s generally not recommended due to potential complications. Fan blades can obstruct the projector’s light path and disrupt the image quality. Additionally, the fan’s airflow might interfere with the projection. If you’re determined to proceed, use a specialized mount designed for this purpose and exercise caution.

What Are the Advantages of Ceiling-Mounted Projectors?

Answer: Ceiling-mounted projectors offer multiple benefits, including space-saving elegance, protection from damage by keeping it out of reach, and a polished appearance. They can help you optimize room aesthetics and create a professional atmosphere, making them popular home theater and presentation choices.

How Can Ceiling Fans Affect Projector Image Quality?

Answer: Ceiling fans can adversely impact projector image quality in two main ways. First, the fan’s blades can cast shadows onto the projection surface, disrupting the image. Second, the airflow produced by the fan might cause the projected image to flutter or sway, diminishing the viewing experience. Proper placement and clearance are essential to mitigate these effects.

Can a Ceiling Fan and Projector Be Used Simultaneously?

Answer: Using a ceiling fan and a projector simultaneously can pose compatibility challenges. The fan’s vibrations and movement may affect the projector’s stability and alignment. This interference can lead to suboptimal image quality and performance. Consider adjusting fan settings or using the projector during fan-off periods to avoid conflicts.

How Can I Ensure Proper Clearance Between the Projector and Fan Blades?

Answer: To ensure proper clearance, measure the projector’s and the fan’s dimensions, factoring in the fan’s range of motion. Consult manufacturer guidelines for recommended clearances. Test the setup before final mounting by temporarily positioning the projector and observing for shadows or disruptions caused by the fan blades. Adjust the projector’s position to achieve optimal clearance and a stable projection.


Categories
Blog Informational

IP55 vs IP65 vs IP67

IP55 vs IP65 vs IP67: Understanding the Differences in Ingress Protection Ratings

IP ratings are an essential aspect of any product that is designed to be used in outdoor or harsh environments. The IP rating system is used to determine the level of protection provided by an electrical enclosure against foreign particles, moisture, liquids, dust, and accidental contact. The rating system is defined in international standard EN 60529, which is also known as British BS EN 60529:1992 or European IEC 60509: 1989.

The IP rating system consists of the letter IP followed by two digits and an optional letter. The first digit indicates the level of protection against the intrusion of solid objects, while the second digit indicates the level of protection against the ingress of liquids.

The optional letter indicates additional protection against other elements such as oil, high-pressure water, or mechanical impacts. The higher the IP rating, the more protection the enclosure provides.

The most common IP ratings are IP55, IP65, and IP67. These ratings are often compared and contrasted to determine which one is better for a particular application. In the following sections, we will explore the differences between IP55, IP65, and IP67 and provide some examples of when each rating might be the most appropriate choice.

Overview of IP Ratings

Definition of IP Rating

IP rating, also known as Ingress Protection rating, is a standard used to define the level of protection provided by an enclosure or housing against intrusion of foreign objects such as dust and water. The rating consists of two digits, where the first digit represents the degree of protection against solid objects, and the second digit represents the degree of protection against liquids.

The first digit ranges from 0 to 6, where 0 means no protection against solid objects, and 6 means complete protection against dust. The second digit ranges from 0 to 9, where 0 means no protection against liquids, and 9 means complete protection against high-pressure water jets from all directions.

Significance of IP Codes

The IP code is significant in determining the level of protection that an enclosure or housing provides against dust and water. For example, IP55 provides limited protection against dust and low-pressure water jets from any direction, while IP65 provides complete protection against dust and low-pressure water jets from any direction. On the other hand, IP67 provides complete protection against dust and immersion in water up to 1 meter.

It is important to note that the IP rating does not indicate protection against other elements such as impact, temperature, or corrosion. Therefore, it is essential to consider other factors when selecting an enclosure or housing for a specific application.

In summary, understanding IP ratings is crucial in ensuring that the enclosure or housing provides adequate protection against dust and water. By considering the IP rating, one can determine the level of protection required for a specific application and select the appropriate enclosure or housing.

Comparison of IP55 vs IP65 vs IP67

IP RatingProtection Against SolidsProtection Against LiquidsWater Immersion Capability
IP55Moderate protection against dust; Not completely dust-tightProtection against low-pressure water jets from any directionNot suitable for immersion in water
IP65Complete protection against dust; Dust-tightProtection against low-pressure water jets from any directionNot suitable for immersion in water
IP67Complete protection against dust; Dust-tightComplete protection against immersion in water up to 1 meter for 30 minutesSuitable for temporary immersion in water

IP ratings are an important consideration when choosing an enclosure for electrical equipment. IP stands for “Ingress Protection,” which refers to the level of protection an enclosure provides against the intrusion of solid objects and liquids. The IP rating is composed of two digits, where the first digit represents protection against solids and the second digit represents protection against liquids. In this section, we will compare the characteristics of IP55, IP65, and IP67 ratings.

IP55 

IP55-rated enclosures provide moderate protection against dust and water. The first digit, 5, indicates that the enclosure is protected against dust that may harm the equipment, but it is not completely dust-tight. The second digit, 5, indicates that the enclosure can withstand low-pressure water jets from any direction. However, it is not suitable for use in environments where the equipment may be submerged in water.
The best IP55 speaker is Sound Town IP55 Certified 2-Way 70V/100V 8″ (on Amazon).

Pros:

  • Moderate Protection: Suitable for environments with moderate exposure to dust and water.
  • Versatility: Ideal for both indoor and outdoor applications.
  • Cost-Effective: Generally more affordable compared to higher IP ratings.

Cons:

  • Limited Water Resistance: Not suitable for heavy rain or direct water exposure.
  • Incomplete Dust-Tightness: May allow some dust entry, impacting devices in harsh conditions.

IP65 

IP65-rated enclosures provide a high level of protection against dust and water. The first digit, 6, indicates that the enclosure is completely dust-tight, meaning no dust can enter the enclosure.

The second digit, 5, indicates that the enclosure can withstand low-pressure water jets from any direction. IP65-rated enclosures are suitable for use in environments where the equipment may be exposed to rain or splashing water.

Electro-Voice EVID-S5.2X 300W 70V/100V (On Amazon) Which is the best option for outdoor speakers.

Pros:

  • Complete Dust-Tightness: Offers full protection against dust, making it suitable for harsh environments.
  • Water Resistance: Can withstand low-pressure water jets and exposure to heavy rain.
  • Durable: Suited for outdoor applications with higher levels of dust and potential water exposure.

Cons:

  • No Immersion Capability: Not designed for immersion in water, limiting suitability in certain environments.
  • Higher Cost: Generally more expensive compared to IP55, reflecting increased protection.

IP67 

IP67-rated enclosures provide the highest level of protection against dust and water. The first digit, 6, indicates that the enclosure is completely dust-tight, meaning no dust can enter the enclosure.

The second digit, 7, indicates that the enclosure can withstand immersion in water up to 1 meter for 30 minutes. IP67-rated enclosures are suitable for use in environments where the equipment may be exposed to heavy rain, high-pressure water jets, or temporary immersion in water.

Anker Soundcore Motion Boom Plus Outdoor IP67 Water Resistantce speaker (On Amazon) best portable speaker for rain.

Pros:

  • Complete Protection: Fully dust-tight and capable of withstanding immersion in water up to 1 meter.
  • Harsh Environment Suitability: Designed for challenging outdoor conditions with heavy dust, rain, or temporary water exposure.
  • Versatility: Suitable for a wide range of applications, including marine equipment.

Cons:

  • Cost: Highest among the three due to comprehensive protection features.
  • Limited Immersion Time: Can only withstand immersion for up to 30 minutes, not for continuous submersion.

In summary, IP55-rated enclosures provide moderate protection against dust and water, IP65-rated enclosures provide a high level of protection against dust and water, and IP67-rated enclosures provide the highest level of protection against dust and water. The appropriate IP rating for an enclosure depends on the environment in which the equipment will be used.

Durability and Protection Levels

When it comes to outdoor electronics, durability and protection are essential factors to consider. The IP rating system provides valuable information about the level of protection that electronic devices offer against the intrusion of solids and liquids. In this section, we will discuss the durability and protection levels of IP55, IP65, and IP67.

Protection Against Solids

The first digit of the IP rating system indicates the level of protection against solids. IP55, IP65, and IP67 all offer excellent protection against dust and other solid particles. However, the level of protection differs between these ratings.

IP55: Protects against dust and other small particles. It is suitable for outdoor use but not recommended for harsh environments.

IP65: Offers complete protection against dust and other small particles. It is suitable for harsh outdoor environments.

IP67: Provides complete protection against dust and other small particles. It is suitable for harsh outdoor environments and can withstand exposure to sand, dirt, and other harsh elements.

Protection Against Liquids

The second digit of the IP rating system indicates the level of protection against liquids. IP55, IP65, and IP67 all offer different levels of protection against water and other liquids.

IP55: Offers protection against water jets from any direction. It is suitable for use in damp environments but not recommended for use in areas where it may be exposed to heavy rain or water.

IP65: Offers protection against water jets from any direction and can withstand exposure to heavy rain. It is suitable for use in harsh outdoor environments.

IP67: Provides complete protection against water and can withstand immersion in water up to 1 meter deep for 30 minutes. It is suitable for use in harsh outdoor environments and can withstand exposure to water, rain, and other liquids.

Choosing the Right IP Rating

When selecting an IP rating for a device or enclosure, it is important to consider several factors to ensure the device is adequately protected from the elements.

Factors to Consider

The first factor to consider is the environment in which the device will be used. If the device will be used outdoors, it will need a higher IP rating than a device used indoors. For example, an IP55 rating may be sufficient for a device used indoors, while an IP65 or IP67 rating may be necessary for a device used outdoors.

The second factor to consider is the level of protection required. If the device will be exposed to dust and debris, it will need a higher IP rating than a device that will not be exposed to these elements. For example, an IP55 rating may be sufficient for a device that will not be exposed to dust and debris, while an IP65 or IP67 rating may be necessary for a device that will be exposed to these elements.

The third factor to consider is the level of water resistance required. If the device will be exposed to water, it will need a higher IP rating than a device that will not be exposed to water. For example, an IP55 rating may be sufficient for a device that will not be exposed to water, while an IP65 or IP67 rating may be necessary for a device that will be exposed to water.

Cost-Benefit Analysis

When choosing an IP rating, it is important to consider the cost-benefit analysis. A higher IP rating generally means a higher cost, so it is important to determine if the additional cost is worth the added protection.

For example, if a device will be used outdoors and exposed to water, an IP67 rating may be necessary for adequate protection. However, if the device will only be used occasionally and in a relatively dry environment, an IP65 rating may be sufficient and a more cost-effective option.

Overall, choosing the right IP rating requires careful consideration of the environment, level of protection required, and cost-benefit analysis.

conclusion

In conclusion, when choosing between IP55, IP65, and IP67, it is important to consider the level of protection against solids and liquids required for the device’s intended use.

IP55 provides basic protection against dust and water jets, while IP65 offers complete protection against dust and water jets and can withstand exposure to heavy rain. IP67 provides complete protection against dust and water and can withstand immersion in water up to 1 meter deep for 30 minutes.

FAQs


What are the main differences between IP55, IP65, and IP67 ratings?

IP ratings are used to describe the level of protection an electronic device has against dust and water. The first digit of the rating refers to the level of protection against solid objects, while the second digit refers to protection against liquids.

IP55-rated devices provide protection against dust and low-pressure water jets from any direction. IP65-rated devices provide complete protection against dust and low-pressure water jets.

IP67-rated devices provide complete protection against dust and can be immersed in water up to 1 meter deep for up to 30 minutes.

Can devices with IP55 rating be used safely outdoors?

IP55-rated devices can be used outdoors, but they are not suitable for use in areas with high levels of moisture or where the device may be exposed to heavy rain or direct water contact. Devices with IP55 rating are ideal for use in indoor environments where there is a moderate amount of dust and moisture.

How do IP55 and IP67 ratings compare in terms of water resistance?

IP55-rated devices are protected against low-pressure water jets from any direction, while IP67-rated devices can be submerged in water up to 1 meter deep for up to 30 minutes.

IP67-rated devices provide a higher level of water resistance than IP55-rated devices, making them suitable for use in environments where there is a high level of moisture or where the device may be exposed to heavy rain or direct water contact.

Which rating should I choose for high moisture environments: IP65 or IP67?

If you need a device for use in high moisture environments, you should choose a device with an IP67 rating. IP67-rated devices provide complete protection against dust and water immersion up to 1 meter deep for up to 30 minutes.

IP65-rated devices provide complete protection against dust and low-pressure water jets, but they are not suitable for use in areas where the device may be exposed to heavy rain or direct water contact.

What does an IP55 rating imply about dust and particulate protection?

An IP55 rating indicates that a device is protected against dust and other solid particles. The first digit of the rating (5) indicates that the device is protected against dust, but not completely. The device can still be exposed to some dust, but it will not interfere with the device’s operation.

Are IP67-rated devices fully submersible in water?

IP67-rated devices are fully submersible in water up to 1 meter deep for up to 30 minutes. However, it is important to note that the device must be removed from the water as soon as possible to prevent any damage to the device. It is also important to ensure that the device is completely dry before using it again.


Categories
Soundbars Informational

How To Connect Two Wireless Subwoofers To One Soundbar

How To Connect Two Wireless Subwoofers To One Soundbar

If you are also trying to do that, I can clear your doubts about connecting wireless subwoofers to a sound bar at your home theater.

Remember that you can connect Bluetooth subwoofers to your soundbar one at a time. It is possible to connect both wireless subwoofers to one soundbar, but it is not as straightforward as it may seem.

We assume you had an old wireless subwoofer, and now you have a new one that matches the rest of your audio system. Each subwoofer has a connection option, but only one at a time.

Having both of them connected might be tricky because if you connect one, the other will disconnect as Bluetooth connects to just one device simultaneously.

Connect 2 wireless subwoofers to 1 soundbar.

How To Connect Two Wireless Subwoofers To One Soundbar by hometheaterjournal.com

You can easily connect both speakers to your home theater system using the wired option on your subwoofer. You can still connect both subwoofers to one soundbar using an RCA splitter, even if you only have one subwoofer output on your home audio amplifier.

Related: Best Soundbar For Apartment

In addition to connecting them wirelessly, you can connect one subwoofer via wire and the other through a wireless connection.

Follow these steps to connect two wireless subwoofers to one soundbar:

  • When pairing a new subwoofer with the soundbar, pair the new one with the preexisting subwoofer
  • You will have to install a Bluetooth receiver and amplifier in your paired subwoofer to make the connection
  •  If you want to run the cables from here to the unpaired subwoofer, you would need to do so

Your wireless subwoofers can certainly be connected to a single soundbar if you can do this. You will enjoy an enhanced bass experience.

Audio signals are being delivered to two wireless subwoofers by your soundbar, including the one connected to your soundbar.

Related: How To Make Soundbar Louder

FAQ’s 


Can two wireless subwoofers be connected to the same soundbar simultaneously?

No, it is not as simple as that. It is not possible to connect to two Bluetooth devices simultaneously. It does not matter if they are the same model if you have one new and one old subwoofer.

Can both wireless subwoofers be connected more authentically?

It is impossible to guarantee that any method will work for you. Using the abovementioned method, you can only connect the soundbar to both wireless subs.

Can multiple subwoofers enhance bass?

You might want to consider installing multiple subwoofers to hear a heart-thumping bass. Take a look! To hear the desired sound quality, get a larger subwoofer instead of connecting multiple small ones
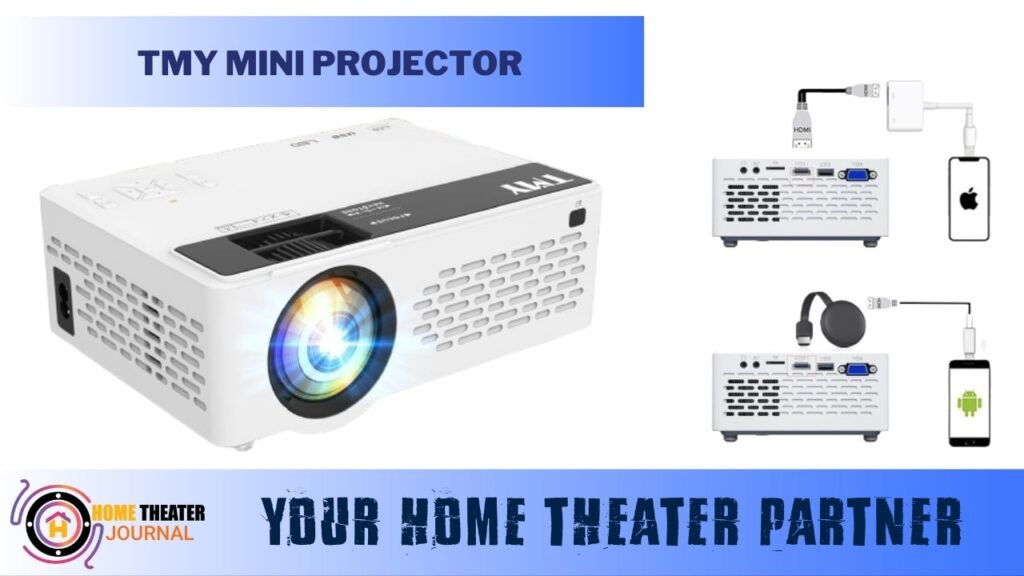
The above information explains how to connect two subwoofers to a single soundbar. Thanks for reading.


Categories
Subwoofer Informational

How To Tell If a Subwoofer Is Blown

How To Tell If A Subwoofer Is Blown: Detecting Damage and Exploring Solutions

Home theaters sound great with subwoofers. A subwoofer or two can make a huge difference in a home theater, but what happens when they stop working? Is it irreparably damaged? Is it possible to fix it?

How To Tell If Subwoofer Is Blown? When a subwoofer blows, it is a result of being either overloaded with power or overloaded with distorted audio signals. The sound of your subwoofer, the movement of the woofer, and the presence of a blown coil can be used to determine if the coil has blown.

Ensure your sub has not blown by listening to the sound at a low volume. The subwoofer is partially blown if distorted and completely blown if no sound ever comes out. Before jumping to conclusions, check the cable to which the subwoofer is connected before assuming otherwise.

For a deeper understanding of subwoofer types and their functionalities, explore the comparison between passive and active subwoofers. Gain insights into the differences between these two types and make an informed decision on the subwoofer that best suits your audio setup.

You’ll need to remove the cover to access the cone to test the woofer’s movement. To assess the damage to the cone, carefully move it with two hands.

  • The item is most likely damaged if it doesn’t move at all when you try to move it.
  • This is also another sign that there may be damage if it is extra wobbly.
  • It is a particular sign of a blown subwoofer if you hear scratching sounds.
  • It is also possible to detect a blown coil by using a multimeter. Multimeters can be used to measure voltage, resistance, and current, which can help one determine if electrical resistance is absent by measuring voltage, resistance, and current.

If your subwoofer displays any of these symptoms, it is likely blown. The first step is to evaluate the situation thoroughly. To decide what to do next, you must first understand the severity of the damage.

Subwoofers: What Happens When They Blow?

How To Tell If a Subwoofer Is Blown by hometheaterjournal.com

Suddenly, your low-end sound stops working, and you enjoy your home theater system. There may be a lot of softening or distortion in the sound. The low-end doesn’t sound, or it may sound weird and distorted. 

Subwoofers are one of the most important parts of home theater systems, so whatever is causing you to think they’re blown can be devastating.

Subwoofers have been damaged or blown by either too much power or signal. Overpowering your subwoofer with too much power is another cause of damaged subwoofers.

Distorted or clipped signals

You can easily damage your subwoofer when you turn up a distorted signal. Subwoofers do not like distorted or clipped signals. It may take a long time before your signal begins to distort and cause damage before you realize it is distorted.

Power is too much.

Subwoofers are often blown because too much power is applied to them, and this can often be a source of damage. Subwoofers can only handle so much volume, even when there is a lot. In extreme cases, it may be forced to function beyond its limits, resulting in damage due to too much pressure.

It is essential to ensure that the sound is clear and distortion-free even at extra high volumes, even though subwoofers are intelligently designed to withstand even more power than their specified RMS (root mean square) ratings.

Ensure your subwoofer(s) receive the right amount of power continuously by knowing their RMS wattage if you don’t already know it.

For additional insights on optimizing your subwoofer performance and ensuring its longevity, explore this informative guide Reduce Subwoofer Vibration Through Walls. Discover techniques to reduce subwoofer vibrations and maintain an optimal audio experience in your home theater setup.

Testing a blown subwoofer in different ways

To determine how much damage has been caused to your home theater’s subwoofer, it’s important to assess the unit when it appears to have blown fully.

In case of a subwoofer blowout in your home theater, it’s essential to know what types of damage typically occur when it blows. A blown subwoofer can be tested in three ways.

  • Sound test. Does it clip, distort, etc.?
  • Cone movement should be tested.
  • Test electrical resistance with a multimeter.

For more information on how to perform these tests without causing any more damage to the subwoofer, read on to find out how to accomplish these tests.

Sound test

It is an excellent indicator of the extent of the damage done to your subwoofer if it produces a loud sound. Full or partial subwoofer blowouts produce the following sounds:

  • Almost no sound – If your subwoofer is wholly blown, then it is most likely that it has been damaged. Cables and audio sources should be tested. Before making any conclusions, check that these are functioning correctly.
  • Distorted partial sound – You probably have a partially blown subwoofer if your subwoofer produces weak, distorted sound at any volume.

Cone Test

Subwoofer cones can be easily accessed to diagnose the damage. For a subwoofer cone to move fluidly, it is built with a suspension system, and you can easily identify the cone when it is out of place by using your hands. The following symptoms might occur if you lightly press down on the subwoofer cone using two indicators:

  • No movement in Cone – When a cone cannot move, it’s an indication that damage has occurred.
  • Wobbly cone – The suspension system of a cone that lurches has been seriously compromised.
  • A scratchy noise – 
  • There has been damage if you move the cone with your hands and make scratchy sounds. Any other equipment in your home theater system should be removed before this equipment is removed.

Use a Multimeter To Test electrical resistance.

Having a multimeter on hand will let you know if a subwoofer’s coil is damaged, which is essential to know. You should check electrical resistance with this device (also known as ohms; symbol = Ω).

A damaged coil would have zero electrical resistance or would not stay in place if the reading was not stable, depending on the condition of the coil. 

A subwoofer’s electrical resistance or ohms can be measured in the following ways:

  1. If there is a power source for the subwoofer, disconnect it.
  2. The subwoofer audio input must be disconnected.
  3. The subwoofer must be removed from its enclosure unless an external amplifier or receiver powers it.
  4. The multimeter should be connected to the two probes. Switch on the multimeter and measure ohms (Ω)
  5. Positive leads should have the red probe inserted, and negative leads should have the black probe inserted.
  6. Multimeters are then used to measure resistance. It is usually necessary to round up to the nearest whole number when determining the value for the correct resistance.

Your Subwoofer Blown? Here’s what you should do

Damage to a subwoofer is exceptionally stressful, but once you know it has been damaged, you should respond as soon as possible.

Your home theater system must be deactivated before removing the subwoofer. This may cause damage to your other equipment if you keep it in place, which can be even more problematic. Due to this, you should altogether remove it.

If your subwoofer is in poor condition, you should seek the advice of an expert. You can obtain a warranty for a relatively new subwoofer. Disassemble the subwoofer only after you have checked this!

Getting multiple people to examine the damage is better than doing it yourself. Consider getting a second and third opinion, whether you consult with a trusted friend or take it to Best Buy’s Geek Squad.

The last step is to decide how you will proceed without your subwoofer. Would a new one be a good investment for you? What would you do if you weren’t able to have it? Is it possible to fix it?

There may be another option to consider other than buying a new subwoofer. Find out what works best for you by reviewing all of your options.

Conclusion:

A blown subwoofer can be a frustrating setback for your home theater experience. Recognizing the signs of damage early can help you take timely action and prevent further harm to your equipment. 

Whether through sound tests, cone movement assessments, or using a multimeter to check electrical resistance, diagnosing a blown subwoofer involves careful examination. Remember to disconnect power sources and audio inputs before conducting any tests to ensure your safety.

Don’t rush to conclusions if you find that your subwoofer is indeed blown. Depending on factors like warranty coverage and the extent of the damage, consider seeking expert advice or a second opinion. 

It’s essential to weigh your options, whether repairing the subwoofer, getting a replacement, or exploring alternative solutions. Ultimately, your goal is to restore optimal sound quality to your home theater setup.

FAQs


Q1: What causes a subwoofer to blow? 

A1: Subwoofers can blow due to excessive power or distorted audio signals. Overpowering the subwoofer or subjecting it to distorted signals can damage the speaker’s components.

Q2: How To Tell If A Subwoofer Is Blown? 

A2: Signs of a blown subwoofer include no sound output, distorted or weak sound, lack of movement in the subwoofer cone, wobbly cone suspension, scratchy noises when moving the cone, and zero or unstable electrical resistance when measured with a multimeter.

Q3: Can I repair a blown subwoofer? 

A3: Depending on the extent of the damage and the warranty status, it might be possible to repair a blown subwoofer. Seeking professional advice and exploring repair options can help you determine the best action.

Q4: Should I conduct tests on a blown subwoofer myself? 

A4: Approaching testing cautiously is advisable, ensuring you disconnect power sources and audio inputs first. However, seeking guidance from experts or technicians is recommended for accurate diagnosis and safety.

Q5: What should I do if my subwoofer is blown? 

A5: If you confirm that your subwoofer is blown, disconnect it from power and seek expert advice. Check if the subwoofer is under warranty, and consider consulting multiple sources for opinions. Decide whether to repair, replace, or explore alternative solutions to maintain the audio quality of your home theater setup.


Categories
Soundbars Informational

How To Connect Vizio Soundbar To TV

How To Connect Vizio Soundbar To TV | 5-Methods

This article will cover How To Connect Vizio Soundbar To TV.

Connecting a sound bar to your Vizio TV can improve your home entertainment system.

Adding extra speakers will improve the quality of your movie- or TV-watching experience. Here are the steps to help you get started.

Here is how you can connect a soundbar to Vizio TV to enjoy your favorite shows and movies.

How To Connect Vizio Soundbar To TV

Method 1: HDMI Cable

How To Connect Vizio Soundbar To TV by hometheaterjournal.com

Here are the items you’ll need before we start the process:

  • The sound bar must have an HDMI port
  • With an HDMI cable
  • As well as an HDMI ARC port on the Vizio TV

With an HDMI ARC port on both your Soundbar and Vizio TV, you can connect them quickly, and the volume of the Soundbar can be controlled via the TV remote.

Follow these steps:

  1. Switch off your sound bar and your Vizio TV.
  2. Your Vizio TV has an HDMI ARC port. It would be best if you connected the HDMI cable to it
  3. Connect the other end to the HDMI ARC port on your sound bar to complete the connection.
  4. Power on your Vizio TV and then your sound bar.
  5. Select the HDMI input on your sound bar.
  6. You can change the ‘Digital Audio Out’ setting from ‘Bitstream’ to ‘Digital’ from your TV’s ‘Audio’ menu.
  7. With your Soundbar now connected to your Vizio TV, you should now hear all the audio from your Vizio TV.

You will need to set up Consumer Electronics Control (CEC) if you want to control the volume of the Soundbar with your TV remote. First, enable HDMI CEC control.

  1. Choose System > CEC from the menu on your Vizio TV.
  2. Click ‘Enable/On’ for CEC.
  3. In other words, the volume adjustment for Vizio TV will also work on Sound Bar if the volume has been adjusted on the TV.

Vizio TVs that support Dolby Atmos and DTS: X (Enhanced Audio Return Channel) support eARC (Enhanced Audio Return Channel). A soundbar can be connected to your TV using this feature to pass lossless, high-quality audio.

To enable this feature, follow the steps above to connect the sound bar to Vizio TV. From the TV menu, select Settings>Audio>Enable eARC to enable the eARC function once connected.

For more detailed instructions on alternative methods for connecting a soundbar to a TV without HDMI and exploring various connectivity options, you might find this comprehensive guide How to Connect Soundbar to TV Without HDMI.

Method 2: Connect via S/PDIF cable.

How To Connect Vizio Soundbar To TV by hometheaterjournal.com

Following these steps will allow your Vizio TV and sound bar to be connected by SPDIF cable:

  1. Switch off either the Vizio TV or the soundbar.
  2. Your Vizio TV has an optical port called the SPDIF port. Insert one end of the S/PDIF cable into this port.
  3. Your Soundbar’s ‘S/PDIF In’ port will be connected to the other end of the cable.
  4. Once your Soundbar is on, turn on your Vizio TV.
  5. You should also change the audio output on your Vizio TV and turn off your internal speakers. Turn the Soundbar input to Optical.
  6. Your Vizio TV should now emit audio through the Soundbar and allow you to hear the audio from your TV.

Method 3: Through an analog cable

Here are the steps to connect your Vizio TV and sound bar via an analog cable:

  1. Switch off both the TV and the soundbar.
  2. To connect the RCA or Analog cables, you must connect the other end of the cable to the Analog port on your Vizio TV (Red and White).
  3. If your sound bar has the ‘Audio In’ port (red and white color), connect the other end of the cables to it.
  4. Once your TV is turned on, turn on your sound bar.
  5. In addition, you need to turn your sound bar’s input to analog. You will also need to turn off the internal tv speakers of your Vizio smart TV.
  6. Having connected your Vizio TV and Soundbar to each other, I would like to congratulate you on a well-done job.

Method 4: Through a Bluetooth

How To Connect Vizio Soundbar To TV by hometheaterjournal.com

Wirelessly connecting a Vizio Soundbar to your TV is also possible via Bluetooth.

Follow these steps: wireless connection.

  1. Remove the original packaging from your Vizio Soundbar. Before beginning this process, please remove all the necessary accessories, such as screws, mounts, cables, etc.
  2. Connect the Soundbar to a power outlet using the power cable with the Soundbar’s packaging. Make sure the Soundbar is turned on once it has been connected.
  3. Press and hold the Bluetooth button on your Soundbar once it has been powered. The Soundbar will then be in pairing mode, and it will start looking for a device to pair with, and pairing will take place automatically.
  4. Turn on the Bluetooth on your television. The sound bar will notify you as soon as it finds your TV once Bluetooth is enabled and your TV is made discoverable. Connecting your Soundbar to your TV is as simple as confirming the connection.
  5. If all the steps were performed correctly, you could now use your Vizio soundbar for sound quality output.

Method 5: Using RCA Cable

What You’ll Need:

RCA cables

TV with RCA output jacks

Steps:

  1. Power off your TV and soundbar.
  2. Locate the RCA output jacks on your TV.
  3. Connect one end of the RCA cables to the RCA output jacks on your TV.
  4. Connect the other end of the RCA cables to the RCA input jacks on the back of your Vizio soundbar.
  5. Power on your TV and soundbar.
  6. Using your TV remote, navigate to the audio output settings and select “external speakers” or “audio system.”
  7. Adjust the sound settings on your Vizio soundbar to your liking.

That’s it! You should now be able to enjoy high-quality sound from your Vizio soundbar while watching TV.
Could you pair the Vizio TV with a Soundbar via Bluetooth?

You cannot connect Vizio TV to external speakers or soundbars via Bluetooth, as most Vizio TVs don’t have Bluetooth built-in. Many models also include the Low Energy option (Bluetooth LE), which isn’t the same as regular Bluetooth.

In addition to connecting SmartCast, Vizio also uses this technology to stream audio. You can connect your Soundbar to your Vizio TV with a wired connection.

Conclusion

This guide was helpful; you could connect your Soundbar to your Vizio TV without issues. This article explains the different methods you can use to connect your Soundbar to your Vizio TV.

FAQ’s


How do I connect my Vizio soundbar to my TV without HDMI?

You can connect a Vizio soundbar to your TV with a digital optical cable or a 3.5mm aux cable.

How do I connect my Vizio soundbar to my TV with HDMI?

Simply plug one end of an HDMI cable into your TV’s HDMI ARC cable port and the other into your Vizio soundbar’s HDMI ARC port.

Can I use a universal remote to control my Vizio sound bar?

Yes, most universal remotes can be programmed to control your Vizio sound bar. Consult your remote’s instructions for programming details.

Why are my Vizio soundbars not connecting to my TV?

Check that you have the correct cables and that they are securely plugged in. You can also reset your soundbar and check your TV’s audio settings.

What if my TV doesn’t have an RCA output?

A: If your TV doesn’t have an RCA output, you can use an RCA-to-HDMI adapter or an RCA-to-optical adapter to connect your Vizio soundbar.


Categories
Soundbars Informational

How To Use Google Home Max As A Soundbar

How To Use Google Home Max As A Soundbar

There has been great interest in Google Home Max as a smart home device. Many people love that it offers more functionality than many other smart home devices. You may wonder if your Google Home Max can also serve as a soundbar since it’s a top-quality speaker with an aux input.

The Google Home Max can be used as a soundbar by following the steps below:

  1. Be sure to get the right equipment for your setup.
  2. You need to set up your connection.
  3. The audio can now be routed to your Google Home Max through your TV’s settings.
  4. All of your other components can be connected to your TV.

When you properly connect your Google Home Max to your TV and other home entertainment components, the speaker will be able to enhance your TV and other components’ sounds. You can now use your Google Home Max as a multipurpose audio device instead of just a smart home device. How do you get started? Let’s take a closer look at the details.

Get the Right Setup Equipment

Different inputs are available on each TV, so it’s important to determine which you can use with your Google Home Max. Auxiliary (analog) inputs are present on some TVs, while optical (digital) inputs are not.

You will need to ensure the cord you buy for the connection between Google Home Max and your Bluetooth device is compatible with the Google Home Max since it only has an aux input.

Connecting your Google Home Max to your TV is easy if you make an analog-to-analog connection (only analog). An aux audio cable that measures 3.5 mm male to male will work. For a more comprehensive understanding of connecting devices like the Echo Dot to a soundbar, including dealing with different inputs, you might find this resource How to Connect Echo Dot to Soundbar helpful.

The AmazonBasics 3.5mm Male-to-Male Stereo Audio Aux Cable is very cheap, and you may already have one lying around.

You’ll need a few extra components if you’re connecting digitally to analog. The Google Home Max has analog, not digital, like your TV. Hence, you’ll need to convert your TV’s digital audio to analog audio to use your Google Home Max as a soundbar/speaker.

It is necessary to have a digital-to-analog converter to connect optical to aux if you don’t already have one, like the Techole Digital to Analog Audio Converter (on Amazon). A standard 3.5 mm male-to-male aux cable and an optical-to-optical cable are also required.

How To Use Google Home Max As A Soundbar | Set Up Your Connection

How To Use Google Home Max As Soundbar by hometheaterjournal.com

The 3.5mm aux cable must be connected to each device’s male end for the analog connection. Google Home Max takes one side. Your TV is connected to the other side. This is the simplest thing you can do.

A digital-to-analog converter and your TV will both require an optical cord for an optical-to-aux connection. Auxiliary cable ends should connect to the aux side of the converter, and Aux inputs on Google Home Max should connect to the other end. It’s easy!

Lastly, I wanted to point out that once the speaker has been connected, it should be positioned below the television if at all possible. Google Home Max’s two sound channels will perform best when used this way.

How to route TV audio to your Google Home Max

To use your Google Home Max, you will need to change the sound output on your TV from its internal audio speakers to an external device, such as an external speaker. You can usually find this option in your TV’s Settings Menu under Audio or Sound. Using the output you are using, you can change the audio speaker to an external speaker.

As some TVs have different settings menus, this can be a little tricky at first. There is an option that will appear once you find the audio section, though, and it is called “speakers,” “audio output,” or you may even find one called “sound output.” Try looking for a settings option that looks similar to this theme.

The problem is that it will not say “Google Home Max” as soon as you find the right setting, so here’s one more detail you have to get right: make sure to set the speaker output to the appropriate port you are using. In the optical method, look for “optical out” or “S/PDIF” as the output option if it’s a 3.5mm jack.

For a detailed guide on connecting a soundbar to a TV wirelessly, especially when configuring audio output settings and port selections, you might find this resource How to Connect a Soundbar to a TV Wirelessly.

Other Components: Connect them all

When using your Google Home Max as a soundbar, your TV should be the main connection point for all of your entertainment components. With the Google Home Max, you can enjoy the best audio quality, whether you’re playing Xbox or using Chromecast.

You are connecting the TV to the Google Home Max, so all audio going to the device comes through there. It is, therefore, impossible for a device to send sound directly to the TV if it is not routed directly to it. Your equipment will most likely be connected to the television’s back via HDMI.

There are a few options for switching between devices if you don’t have enough ports on your wall, such as using an HDMI switcher. However, if you are short on ports, you can also use a low-cost receiver that can handle all the inputs, then output sound to the Google Home Max. 

Conclusion

In addition to being an excellent smart home device, Google Home Max can serve as a high-quality speaker that can be used for all types of home entertainment activities. In the future, Google may make upgrades to make this device even better as a soundbar since it’s still a new concept to use it in place of a soundbar.

Adding sound to your home entertainment system is as simple as connecting this simple device. This is a great way to improve your home entertainment setup if you already have a Google Home Max. Using the instructions provided in this article, you can use your Google Home Max as a soundbar by following the steps provided in the article. Hopefully, it has answered all of your questions.

FAQ’s


Can I use my Google Home Max as a soundbar?

Yes, you can use your Google Home Max as a soundbar by connecting it to your TV via an aux or digital-to-analog converter (DAC) connection and then routing the TV audio to your Google Home Max through your TV’s settings.

What equipment do I need to use my Google Home Max as a soundbar?

You will need an aux cable (3.5mm male-to-male) or a DAC, depending on your TV’s audio output. You may also need an optical cable, depending on your TV’s output. You can find more details on the exact equipment needed in the blog post.

How do I connect my Google Home Max to my TV as a soundbar?

You can connect your Google Home Max to your TV by making an analog-to-analog connection with an aux cable or a digital-to-analog connection with a DAC and optical cable. Once the connection is established, you can route your TV audio to your Google Home Max via your TV’s settings.

Where should I position my Google Home Max when using it as a soundbar?

Ideally, your Google Home Max should be positioned below your TV for the best sound performance.

Can I use my Google Home Max as a soundbar for all my home entertainment components?

Yes, you can use your Google Home Max as a soundbar for all your home entertainment components by connecting them to your TV and routing the audio to your Google Home Max. You may need to use an HDMI switcher or a low-cost receiver to handle all the inputs if you’re short on ports.


Categories
Projectors Informational

Projectors Do Movie Theaters Use

What Kind of Projectors Do Movie Theaters Use?

Stepping into a movie theater is like entering a realm of visual enchantment, where captivating stories come to life on the big screen. Have you ever wondered about the wizardry behind those crystal-clear images and vibrant colors that transport audiences into different worlds? 

It all boils down to the exceptional projectors that movie theaters use to deliver an immersive cinematic experience. In this exploration, we’ll unveil the secrets behind the curtains and delve into the fascinating world of movie theater projectors.

Movie Theater Projectors:

Movie theaters have undergone a digital revolution, and with it, the projectors have evolved to meet the demands of new digital formats. Unlike the early days of film reels, theaters now exclusively use Digital Cinema Projectors (DCPs), marking a departure from traditional analog methods.

Commercial-Grade Projectors:

The projectors employed by movie theaters are not your run-of-the-mill devices found in offices or homes. These are heavyweight champions designed for the grand stage of cinema. Commercial-grade projectors are larger, heavier, and built to deliver exceptional performance in large auditoriums.

Technologies Used in DCPs:

Two prominent technologies, Digital Light Processing (DLP) and Silicon Crystal Reflective Display (SXRD), take the lead in powering DCPs.

Digital Light Processing (DLP):

DLP projectors utilize millions of silicon micromirrors, each contributing to the creation of a razor-sharp image. These projectors employ large lamps with high brightness, splitting light into the spectrum’s colors, projecting onto the correct mirror, and combining separate beams to form a unified, high-quality image on the big screen.

Silicon Crystal Reflective Display (SXRD):

SXRD technology divides the light beam into separate colors, falling onto a reflective surface embedded with silicon crystals. This process results in the production of a 4K resolution pixel, making it an ideal choice for movie projectors with high image quality demands.

Features of Movie Theater Projectors:

Movie theater projectors come equipped with a set of remarkable features, setting them apart from their counterparts intended for home or office use.

Brightness:

With an astounding brightness of around 25,000 lumens, movie theater projectors outshine standard models by approximately 22,000 lumens. This high brightness ensures that even those seated in the last row can enjoy clear and detailed visuals.

Resolution:

While regular projectors may offer 1080p resolution, movie theater projectors boast a higher 4K resolution. This increase in resolution enhances image quality, providing audiences with a visually stunning experience.

Screen Size:

Movie theater projectors project onto colossal screens, reaching sizes of up to 100 feet. This ensures that everyone in the audience can enjoy an expansive and clear view of the cinematic masterpiece.

Contrast Ratio:

Movie theater projectors boast an impressive contrast ratio, reaching up to 6000:1. This term, contrast ratio, signifies the disparity between the deepest blacks and the brightest whites a projector can display. The greater this difference, the more striking and lively the colors appear on the screen.

In simpler terms, contrast is the key to delineating the nuances between black and white shades. A heightened contrast ratio translates to a more vivid and dynamic display, enriching the visual experience. This enhancement becomes particularly crucial in cinema settings, where a captivating interplay of light and shadow contributes to the overall immersion.

High Frame Rate:

Maintaining a high frame rate is crucial for a smooth transition of frames in a movie. Movie theater projectors achieve this, ensuring a seamless and immersive cinematic experience.

Cooling System:

Theater projectors tackle the heat generated by large lamps with a liquified cooling system and fans. This prevents overheating of the equipment, making them unsuitable for home use due to their unique cooling requirements.

Price:

Understandably, the price tag of movie theater projectors is higher than that of regular projectors. Ranging from $10,000 to $80,000, the cost reflects the large size and expensive components essential for delivering top-notch cinematic experiences.

Weight:

Portable yet substantial, movie theater projectors weigh around 140 kilograms, a testament to the size and components packed within. Their weight is justified by the need for durability and performance in a professional cinema setting.

Other Special Features:

Exclusive features like web control interfaces and automation capabilities set movie theater projectors apart. Operators can seamlessly control the projector remotely, scheduling events and sequences to enhance the cinematic experience.

Brands Manufacturing Movie Theater Projectors

Meeting the stringent standards set by the Digital Cinema Initiative (DCI) is no small feat. Only four brands – Barco, Christie, NEC, and Sony – have managed to provide the required picture quality assurance.

  • Barco, Christie, and NEC: These brands incorporate DLP technology into their projectors, ensuring high-quality visuals that meet industry standards.
  • Sony: Utilizing SXRD technology, Sony stands as a formidable player in the movie projector market, offering 4K resolution and impeccable picture quality.

Conclusion:

In conclusion, the mesmerizing visuals that grace the screens of movie theaters are made possible by specialized Digital Cinema Projectors. With technologies like DLP and SXRD, these high-end projectors deliver sharp, vibrant, and immersive images at 2K or 4K resolutions.

Movie theaters entrust brands like Barco, Christie, NEC, and Sony to provide the pinnacle of visual experiences. The magic of cinema begins with the flicker of light from these powerful projectors, creating an unforgettable journey for audiences worldwide.

FAQs | What Kind Of Projectors Do Movie Theaters Use?


1. What technologies are commonly used in movie theater projectors?

Answer: Movie theater projectors primarily leverage two key technologies: Digital Light Processing (DLP) and Silicon Crystal Reflective Display (SXRD). DLP utilizes silicon micro mirrors to create a sharp image, while SXRD employs a reflective surface with silicon crystals to produce high-resolution pixels, especially in 4K projectors.

2. Why do movie theater projectors have higher brightness than regular projectors?

Answer: Movie theater projectors boast an astonishing brightness of around 25,000 lumens, significantly higher than the approximately 3,000 lumens found in standard projectors. This heightened brightness is essential for large auditoriums, ensuring that even those seated at the back have a clear and detailed view of the visuals on the expansive screen.

3. How do movie theater projectors handle heat generated by large lamps?

Answer: The large lamps used in movie theater projectors generate substantial heat. To combat this, theater projectors incorporate a liquified cooling system along with fans. This ensures that the equipment does not overheat during prolonged usage, maintaining optimal performance throughout the screening.

4. What is the contrast ratio in movie theater projectors, and why is it important?

Answer: Movie theater projectors typically feature an enhanced contrast ratio of up to 6000:1. Contrast ratio represents the difference between black and white levels on the screen. A higher contrast ratio results in more vibrant colors mixed with deep blacks, enhancing the overall visual appeal of the on-screen content.

Answer: Movie theater projectors are designed for professional cinema settings and come with unique features like a liquified cooling system, high brightness, and automation capabilities. 

These projectors, weighing around 140 kilograms, are tailored for the demands of large auditoriums, making them impractical and unnecessary for typical home usage where smaller, lighter, and less expensive projectors are more suitable.


Categories
Projectors Informational

Project Image onto the Canvas Without Projector

How to Project Image onto the Canvas Without Projector? | 5-Methods

Embarking on a journey of artistic expression often involves translating visions onto a canvas. While projectors offer a convenient means to enlarge images for detailed rendering, not every artist has the luxury of owning one. This guide unveils various creative and budget-friendly methods for projecting images onto a canvas without relying on a projector.

How To Project Image With Lightbox Method:

The lightbox method is a classic technique that artists have employed for decades to transfer images onto canvases with precision and ease. A lightbox is essentially an illuminated box featuring a glass pane on top. While traditional lightboxes may be too small for larger canvases, this method can be adapted by printing an enlarged copy of the reference image.

Materials Needed:

  1. Lightbox
  2. Enlarged printout of the reference image
  3. Canvas
  4. Pencil or fine-tip marker
  5. Eraser (optional)
  6. Paints or other preferred artistic medium

The Lightbox Method | Step-by-Step Guide:

  1. Print an Enlarged Copy: Begin by printing a scaled-up version of the reference image. This can be done using graphic design software or by taking the image to a printing service that offers size customization.
  2. Set Up the Lightbox: Place the printed image on the glass pane of the lightbox. Ensure that the lightbox is in a position where you can comfortably trace the image onto the canvas.
  3. Turn on the Light Source: Activate the light source within the lightbox. The illumination will make the lines of the image visible through the paper, allowing you to trace with accuracy.
  4. Trace the Outlines: With the lightbox providing a clear view of the reference image, start tracing the outlines onto the canvas. Pay close attention to details and nuances in the image, capturing them accurately in your traced lines.
  5. Replicate and Refine: Once the initial tracing is complete, you can replicate the drawing on the canvas. This method allows for multiple redraws and refinements, enabling artists to enhance their skills and experiment with different variations of the same image.

The lightbox method is particularly effective when precision and detail are crucial in the artistic process. It provides a controlled environment for tracing, eliminating the guesswork associated with freehand replication. While traditional lightboxes may have limitations regarding canvas size, the adaptation of printing an enlarged image makes this method accessible for artists working on larger surfaces.

Advantage: 

  • The lightbox method allows for precise tracing of intricate details from the reference image onto the canvas, ensuring accuracy in reproducing complex compositions.
  • While traditional lightboxes may be smaller, the method is adaptable. Enlarged prints can be used for tracing, offering flexibility in transferring images to canvases of various sizes.
  • The ability to replicate and refine drawings multiple times on the lightbox serves as a valuable training tool for artists, enhancing their skills and techniques.

How To Project Image With DIY Projector:

For artists on a budget or those who enjoy a hands-on approach to their craft, the DIY Projector method provides an innovative and cost-effective solution for projecting images onto a canvas without the need for a professional projector. By utilizing common household items, this method allows for creativity to flourish without breaking the bank.

Materials Required:

  • Phone or Flashlight.
  • Magnifying Glass.
  • Cardboard.
  • Mirror.
  • Matte Black Paper.
  • Scissors, Tape, or Glue.

DIY Projector | Step-by-Step Guide:

  1. Cut a Window in the Cardboard: Begin by cutting a window in the cardboard, ensuring it is on the larger side. This window will be the frame through which the image will be projected.
  2. Attach the Magnifying Glass: Position the magnifying glass over the window in the cardboard, securing it in place using tape or glue. Ensure that the magnifying side is facing inward towards the cardboard.
  3. Insert the Mirror: Place a small mirror within the cardboard structure, angled to redirect the light from the phone or flashlight towards the magnifying glass.
  4. Create a Light-Tight Enclosure: Cover the sides of the cardboard structure with matte black paper, creating a light-tight enclosure. This step is crucial for enhancing the contrast of the projected image.
  5. Place the Phone or Flashlight: Position the phone or flashlight behind the magnifying glass, ensuring that the light source is directed towards the mirror and subsequently through the magnifying glass.
  6. Project the Image: With the DIY projector assembled, place the reference printout or image in the window of the cardboard. Turn on the flashlight or use the phone’s torch function. The magnifying glass will project a fairly magnified or enlarged image onto the canvas or wall.

Advantage: 

  • Creating a DIY projector is a cost-effective alternative, making image projection accessible to artists on a budget. 
  • Artists can customize the size and design of their DIY projector based on the canvas dimensions and personal preferences.
  • The required materials, such as a phone, magnifying glass, and cardboard, are commonly found at home, making the DIY projector method easily accessible.

How To Project Image With Grids for Precision:

When it comes to achieving precision and accuracy in transferring images onto a canvas without a projector, the Grids method proves to be a meticulous and reliable technique. This manual approach involves creating a grid on both the reference image and the canvas, allowing artists to break down complex compositions into manageable sections for detailed reproduction.

Materials Required:

  1. Canvas
  2. Reference Image
  3. Ruler
  4. Pencil
  5. Eraser
  6. Painter’s Tape (Optional)
  7. Work Surface
  8. Printout of Reference Image

Grids for Precision | Step-by-Step Guide:

  1. Select a Canvas with Similar Ratio: Begin by choosing a canvas that shares a similar aspect ratio with the reference photo. This ensures that the proportions remain consistent during the transfer process.
  2. Draw One-Inch Squares on the Canvas: Using a ruler and a pencil, draw a grid of one-inch squares on the canvas. The number of squares will depend on the complexity and size of the reference image.
  3. Draw a Corresponding Grid on the Reference Photo: Replicate the grid pattern on the reference photo, ensuring that the squares align with those on the canvas. This step requires patience and precision, as accuracy is crucial for a successful transfer.
  4. Fill Each Square on the Canvas: Focus on one square at a time. Examine the content within each square of the reference photo and reproduce it in the corresponding square on the canvas. This methodical approach ensures that no details are overlooked.
  5. Continue Section by Section: Progress through the grid sections systematically, replicating the details from the reference image onto the canvas. This step-by-step process allows for better control and accuracy in capturing the entire composition.
  6. Refine and Connect Grid Sections: Once all grid sections are filled, step back and assess the overall continuity of the artwork. Begin refining and connecting the individual sections to create a cohesive and seamless representation of the reference image. 

Advantage:

  • Grids provide a systematic approach, ensuring precision and accuracy in transferring images onto the canvas, particularly beneficial for detailed compositions.
  • The method is scalable to accommodate different canvas sizes, allowing artists to adapt the size of grid squares based on the level of detail in the reference image.
  • Drawing grids requires attention to detail, contributing to skill development and enhancing an artist’s observational abilities.

How To Project Image With Transfer Paper Technique:

The Transfer Paper Technique offers artists a straightforward and effective method to transfer images onto a canvas without the need for a projector. This approach employs transfer paper, which is readily available and easy to use. The technique allows for precise tracing of images onto the canvas, making it an ideal choice for artists seeking accuracy and convenience in their creative process.

Materials Required:

  1. Canvas
  2. Reference Image
  3. Transfer Paper
  4. Printout of Reference Image
  5. Tape
  6. Pencil or Pen
  7. Eraser

Transfer Paper Technique | Step-by-Step Guide:

  1. Prepare the Canvas: Ensure the canvas is clean, primed, and ready for the transferred image.
  2. Select and Print the Reference Image: Choose a reference image and print a clear copy in the desired size.
  3. Position the Reference Image: Tape the reference image to the canvas in the desired location. Ensure it stays in place during the transfer process.
  4. Place the Transfer Paper: Position the transfer paper with the graphite-coated side facing down onto the canvas. Align it with the reference image.
  5. Secure Both Layers: Tape the transfer paper to the canvas, securing both the reference image and the transfer paper in place.
  6. Trace the Image: Using a pencil or pen, trace the outlines of the reference image onto the canvas. Apply moderate pressure to transfer the graphite from the paper to the canvas.
  7. Check the Transfer: After tracing, carefully lift one corner of the transfer paper to check the transferred image. Ensure that all desired details have been successfully transferred.
  8. Complete the Tracing: Continue tracing the entire image until all necessary details are transferred onto the canvas.
  9. Remove Transfer Paper and Reference Image: Once tracing is complete, carefully remove the transfer paper and the reference image from the canvas.
  10. Refine and Complete: Review the transferred image on the canvas and refine any areas that may require adjustments. Complete the artwork with additional detailing and color as needed.

Advantage: 

  • The transfer paper technique offers a precise and detailed transfer of images onto the canvas, capturing intricate details with accuracy.
  • This method is user-friendly and suitable for artists of various skill levels, providing a straightforward approach to image transfer.
  • Transfer paper works well with different surfaces, offering versatility for various artistic projects beyond canvas.

How To Project Image With Window Projection:

Window Projection is a simple and budget-friendly method for transferring images onto a canvas. This technique utilizes natural light, such as daylight or sunlight, to project the image onto the canvas, eliminating the need for a projector. It’s a versatile approach, especially suitable for larger canvases, and requires minimal materials.

Materials Required:

  1. Canvas
  2. Reference Image
  3. Thin Canvas Paper (Optional)
  4. Tape
  5. Pencil or Pen

Window Projection |Step-by-Step Guide:

  1. Prepare the Canvas: Ensure the canvas is clean, primed, and ready for the transferred image.
  2. Select and Print the Reference Image: Choose a reference image and print a clear copy in the desired size.
  3. Tape the Reference Image: Tape the reference image to the window, ensuring it stays in place during the tracing process.
  4. Place the Canvas Paper: If using a thinner canvas paper, tape it to the window on the opposite side of the reference image. This allows more sunlight to pass through and makes tracing easier.
  5. Position the Canvas: Place the canvas on a stable surface, directly opposite the taped reference image. Ensure that it receives ample sunlight or daylight.
  6. Trace the Image: Using a pencil or pen, trace the outlines of the reference image onto the canvas paper. The natural light passing through the window will project the image onto the canvas.
  7. Adjust for Visibility: If necessary, adjust the position of the canvas or reference image to improve visibility and clarity during the tracing process.
  8. Complete the Tracing: Continue tracing until the entire image is transferred onto the canvas paper.
  9. Remove Canvas from the Window: Carefully detach the canvas from the window, ensuring that the traced image remains intact.
  10. Refine and Complete: Review the transferred image on the canvas paper, refining details or adding additional elements as needed to complete your artwork.

Advantage: 

  • Window projection is a budget-friendly method, utilizing natural light and requiring minimal materials for image transfer.
  • The method is adaptable to various canvas sizes, making it versatile for different artistic projects.
  • Window projection is accessible to artists of all skill levels, requiring only basic materials and utilizing natural light.

Conclusion:

While the use of dedicated projectors guarantees optimal results, these budget-friendly alternatives can aid artists in honing their skills and bringing their visions to life. From the traditional lightbox method to the ingenuity of a DIY projector, each technique offers a unique approach to image projection without the need for a costly investment.

Artists can experiment with these methods based on their preferences and available resources. Whether tracing with precision using grids or enjoying the simplicity of natural light through a window, the key is to find a technique that resonates with the individual artist’s style and vision.

By embracing these creative alternatives, artists can break free from the constraints of expensive equipment and focus on unleashing their creativity onto the canvas, one traced image at a time.

FAQs | How to Project Image onto the Canvas Without Projector


Q1: What alternative methods are there for projecting images onto a canvas without using a projector?

A1: There are several alternative methods that artists can use for image projection without a projector. These include the Lightbox Method, DIY Projector, Grids Method, Transfer Paper Technique, and Window Projection.

Q2: How does the Lightbox Method contribute to precision and versatility in image transfer?

A2: The Lightbox Method excels in providing precision by allowing artists to trace intricate details from a reference image onto the canvas. It is versatile as it can accommodate different canvas sizes by using enlarged prints for tracing.

Q3: What makes the DIY Projector a cost-effective and customizable option for artists?

A3: The DIY Projector is cost-effective as it involves creating a projector using everyday items. It’s customizable, allowing artists to tailor the size and design of the DIY projector based on their canvas dimensions and preferences.

Q4: How does the Grids Method contribute to precision, scalability, and skill development in image transfer?

A4: The Grids Method ensures precision by breaking down complex compositions into manageable sections. It is scalable, allowing artists to adapt the size of grid squares based on canvas dimensions. This method also contributes to skill development through attention to detail.

Q5: What advantages does the Transfer Paper Technique offer in terms of precision, ease of use, and versatility?

A5: The Transfer Paper Technique provides precision by allowing for detailed tracing onto the canvas. It is user-friendly, suitable for artists of varying skill levels due to its straightforward approach. Additionally, it is versatile as transfer paper works well with various surfaces beyond canvas.


Categories
Subwoofer Informational Soundbars

How To Connect Subwoofer To Soundbar

How to Connect Subwoofer to Soundbar | Step-by-Step Guide

Are you looking to add a subwoofer to your sound system to make it louder and better? Depending on which type of soundbar you are considering, some are sold independently, while others are sold with a subwoofer. The question is how to add a subwoofer to a soundbar without one if it doesn’t come with one.

A standalone subwoofer can’t be added to most soundbars because they don’t have ports. A native connection between a sound bar and a subwoofer can usually only be made when they are sold together.

While you might be able to jerry-rig an additional subwoofer to your soundbar, you’re probably better off purchasing a package that includes both a soundbar and subwoofer, such as the Sony HT-S350 (on Amazon).

Can a Soundbar be connected to a subwoofer?

It can be a challenge to connect soundbars and subwoofers. Many soundbars come without a subwoofer when you purchase them alone or with speakers. If you want a better sound, you add a subwoofer. Unfortunately, that isn’t as easy as it seems.

Soundbars connect to native speakers.

Some soundbars are compatible with subwoofers in their brand line. Some manufacturers will let you add an extra speaker or subwoofer to your soundbar if you use the recommended products.

For example, suppose you buy a Bose soundbar. In that case, you can consider purchasing a Bose subwoofer compatible with the device to match it, such as the Bose Bass Module 500 subwoofer (on Amazon) or the Bose Bass Module 700 subwoofer (on Amazon). Similarly, Sonos soundbars are compatible with the Sonos Sub (sold on Amazon) and can also be connected to this speaker. It is almost always impossible to add a subwoofer to these soundbars.

Soundbars with subwoofers

How To Connect Subwoofer To Soundbar by hometheaterjournal.com

You can also buy a soundbar and a subwoofer together if you want to connect them. The available soundbars on the market come with a subwoofer and extra speakers to produce a better stereo effect. Soundbars are often criticized for lacking bass because they have front-heavy sound and lack a good amount of front-heavy sound.

There are now a lot of soundbars from manufacturers that include both a subwoofer and external speakers since multiple-speaker packages have become increasingly popular. Many are wireless as well.

Check out our recommended soundbars if you’re looking for a soundbar with a subwoofer! These soundbars mostly have wireless subwoofers.

It is a good idea to purchase a soundbar package if you currently own a soundbar but cannot add a subwoofer. In terms of the options available at all price ranges, there are many great options to choose from, so you are sure to find one that meets your needs and produces high-quality sound.

Jerry-Rigged Subwoofer Addition to a Soundbar

To add a subwoofer to a soundbar, you must have the equipment, which is not a traditional method. To use this method, you’ll need a soundbar, subwoofer, receiver, and a mini mixer.

Your soundbar must be connected to a receiver first. A stereo mixer, like the Rolls MX42 Stereo Mini Mixer (available on Amazon), can then be connected to the left, right, and center channel pre-outs. The stereo mini mixer can then be connected to the sound bar, and the receiver can be connected to the subwoofer.

You’re sacrificing some sound quality with all these connections, so this is not the most convenient way to do it. If you do not already have these items, purchasing a soundbar and subwoofer package might be better.

Is it Necessary to Add a Subwoofer to a Soundbar?

Soundbar packages come in a wide variety, including soundbars with external speakers, soundbars with external speakers and speakers with only built-in speakers (including some with built-in subwoofers), and soundbar packages with an external subwoofer.

Depending on your type of soundbar, some will produce great sound without external speakers, and some will produce basic sound. It all depends on what you are looking for, but many people argue that a subwoofer is crucial to being able to experience the full potential of a soundbar.

You may wonder whether a soundbar needs a subwoofer if you are considering adding a subwoofer to it, in which case you will likely also need a soundbar package. 

Subwoofers Fill a Gap

Subwoofers serve various purposes, so it’s important to understand their function before deciding whether or not one is needed. Subwoofers are loudspeakers whose sole purpose is to produce lower-pitched audio frequencies, which are not produced by other speakers.

The low-pitched frequencies in your audio will be impossible to reproduce without a subwoofer. Subwoofers make a significant difference in the sound of any sound system, and members of any sound system who have used them know it.

Now, soundbars produce high-quality sound that’s an excellent alternative to traditional surround sound setups. They used to boost the sound of flat-screen TVs, but now, they’re an upgrade to basic flat-screen TV sound.

Movie and music enthusiasts know that subwoofers are essential to enjoy a full sound experience. In addition to being wireless and compact, subwoofers no longer resemble these big, bulky towers.

Soundbars Need Subwoofers

Most soundbars produce front-heavy audio, making sense since they are located in the front of the room, and that’s typically where your audio comes from unless you have external speakers. Most soundbars lack strong bass, too.

A subwoofer is essential to achieving a fuller, more robust sound with a soundbar. Using a subwoofer and a soundbar can make your living room, home theater, or media room sound better.

Subwoofers are typically placed in a corner or at the front of a room, depending on the room. In our guide on subwoofer placement, you can find some pointers on how to place each subwoofer based on the room size.

Conclusion

A broad range of sound quality is available for soundbars on the market. As soundbars have become more popular, manufacturers have worked hard to perfect ideal soundbars for consumers. This has resulted in more options, and many consumers consider pairing their soundbar with a subwoofer important.

We hope this article helped you see the different subwoofer options you have – whether you’re in the market for a new subwoofer, considering upgrading to a better soundbar/subwoofer package, or still undecided.

No matter what kind of subwoofer you choose, it’s essential to know how they fit into a sound system and how they work.

You probably won’t regret upgrading to a subwoofer/soundbar package, even if you’re not ready to upgrade your soundbar yet, especially if you’re a full-bodied music and movies fan.

FAQ’s of How to Connect Subwoofer to Soundbar


What is the best way to connect a subwoofer to a soundbar?

The best way to connect a subwoofer to a soundbar depends on the soundbar’s compatibility with a subwoofer. If the soundbar is compatible with a subwoofer in its brand line, it is best to purchase the recommended subwoofer. If the soundbar does not have native ports, adding a subwoofer to the soundbar can be challenging. One method is to use a receiver, a stereo mixer, and a mini mixer to connect the subwoofer to the soundbar. However, this method can sacrifice sound quality, and it may be better to purchase a soundbar and subwoofer package.

Is it necessary to add a subwoofer to a soundbar?

Adding a subwoofer to a soundbar depends on the soundbar’s built-in speakers and the user’s preference. Some soundbars have built-in subwoofers, while others produce basic sound. Subwoofers are designed to fill the gap in the lower-pitched audio frequencies that are not produced by other speakers. Therefore, adding a subwoofer to a sound system can significantly enhance the sound quality, providing a more immersive sound experience, especially for movie and music enthusiasts.

Can any subwoofer be connected to a soundbar?

Not all subwoofers can be connected to a soundbar. Many soundbars lack native ports, making it impossible to connect a subwoofer. Some soundbars are compatible with subwoofers in their brand line, and some manufacturers will allow users to add an extra speaker or subwoofer to their soundbar if they use the recommended products. However, it is generally challenging to add a subwoofer to most soundbars, and it is best to purchase a soundbar and subwoofer package.

What are the benefits of adding a subwoofer to a soundbar?

Adding a subwoofer to a soundbar can significantly enhance sound quality by filling the gap in the lower-pitched audio frequencies that are not produced by other speakers. Subwoofers make a significant difference in the sound of any sound system, providing a more immersive sound experience, especially for movie and music enthusiasts. Furthermore, subwoofers are wireless and compact, making them an excellent addition to any sound system.

Are soundbars with subwoofers available in the market?

Yes, many soundbars with subwoofers are available in the market. Soundbars with subwoofers produce a better stereo effect, providing a better sound experience than soundbars without subwoofers. Soundbars with subwoofers also produce less front-heavy audio, which is common in soundbars without subwoofers. Many soundbars with subwoofers are wireless and compact, making them an excellent addition to any sound system.


Categories
Soundbars Informational

Where To Place Subwoofer With Soundbar

Where To Place Subwoofer With Soundbar | Subwoofer Placement

A subwoofer should always go where the sound is loudest. Knowing where to place a subwoofer is important whether you have an existing soundbar and want to add a subwoofer or buy a soundbar package that includes a subwoofer. An effective bass sound system must have subwoofers to add low-frequency audio and improve bass sounds. Finding where to place them to achieve the best sound is hard – having those elements is easy.

Where To Place Subwoofer With Soundbar? To properly place your subwoofer with a soundbar, you will need to consider the size and shape of the room. It is most common to place the subwoofer in the corner placement of the room or in the front of the room – usually right in front of the TV. The best way to find the perfect sound effects for your event is to test different locations and see where it sounds best.

How big is your room? Do you have a small or a big room? Is your living room equipped with a subwoofer and sound bar, or is it a dedicated home theater room? Do you wireless connection your subwoofer to your soundbar? Can you fit a large or compact subwoofer in your room? How many subwoofers do you have? Let’s determine where your subwoofer should be placed based on your current setup and best practices.

Where To Place Subwoofer With Soundbar? Best Place

It’s safe to say that if it comes to locating the best place for your subwoofer, the optimal placement in your room may differ from that in another person. There is a lot to consider regarding the dynamics of your room and the characteristics of your subwoofer, but you should start by looking at popular placements.

Related: Best Soundbar For Apple TV 4K

Famous Subwoofer Placements for Soundbars

Where To Place Subwoofer With Soundbar by hometheaterjournal.com

There is a tendency to place subwoofers in front of and facing the room rather than just in the back. For many rooms, placing your subwoofer in front of the room is much easier so that your front channel speakers are in sync with your subwoofer. Although it may not be the best option for you, it is a good place to begin, even if it isn’t the best choice.

Set it next to your television if you start with the room’s front. To hear which sounds best for you, you can try it out both on the left side of the TV as well as the right side.

Furthermore, it is best to position the table in a corner at the front of the room if it is not far from your seating area.

The sound of a subwoofer usually sounds better at corners. When placed in a corner, a large subwoofer can be an excellent addition to the viewing experience as long as it sounds good.

In choosing where you would like the shelf placed on a corner or against a wall, it is important not to place it directly against the wall. To ensure that your subwoofer is breathing and sounding properly, regardless of size, it must be at least six inches from the wall.

Placement of Subwoofers in Your Room

The size of your room greatly influences a soundbar sound system’s acoustics. You may only be able to fit a subwoofer in one place if you have a small room. The sound from your subwoofer will have more room to spread if you have a larger room.

In addition to your room’s seating, your subwoofer’s placement is influenced by the chairs in your room. It may not be the most suitable place next to the TV if you have seating. This is because the speaker will only be more audible to those sitting in the front.

A suitable place to place the subwoofer is in a corner or somewhere with the good sound quality for everyone. To test this, listen to your subwoofer from different seats and locations.

Is your home theater room or living room home to your subwoofer? Maintaining the style of the room may be important to you if your subwoofer is in the living room. The location is more flexible if the home theater is the main focus.

What You Need To Know About Soundbar With Your Subwoofers

Where To Place Subwoofer With Soundbar by hometheaterjournal.com

Would you prefer a compact or larger subwoofer? A big room may have called for a big subwoofer to ensure the whole place is filled, but the subwoofer’s placement should be strategic. Otherwise, the enjoyment of watching will be diminished. You’ll have to experiment with the placement of a compact subwoofer to find the right one.

Are you using a wireless subwoofer or a wired subwoofer? A wired subwoofer might not be as far from the soundbar as a wireless subwoofer, and you may need to hide or cover the wiring. In addition to being placed in an entertainment center, a wireless subwoofer can be placed on the floor, behind the main seating area, or on a shelf.

Related: How to Connect Subwoofer To Soundbar

Are there several subwoofers in your home? Dual subwoofers may be the best choice if you have a large room. It would be best to place them on either side of the room. Try placing them in front of the TV on either side or near it at a distance of about two feet, and you may also try them on their side when they are or right next to the TV.

What Is The Maximum Distance Between a Subwoofer and a Soundbar?

Where To Place Subwoofer With Soundbar by hometheaterjournal.com

Whether your subwoofer is wired or wireless will determine how far it can be from your soundbar. To sound coherent, your front speakers and your soundbar should stay close to each other since the soundbar houses your front speakers.

The distance between your subwoofer and the soundbar depends on your subwoofer’s wiring. Place your wireless subwoofer as far away from your listening area as possible. Placing them as close as possible to each other to achieve the best sound quality is a good idea, especially in 2.1 and 3.1 soundbar setups.

There is typically a range of around 30 feet for wireless subwoofers. Anything beyond that range may result in intermittent or delayed connectivity.

Is It Possible to Install a Subwoofer in a Cabinet?

If you’re wondering if your entertainment center can accommodate subwoofers, you may have wondered if they may be placed within a cabinet or enclosed on a shelf. This question is so common because you do not always want to be looking at your subwoofer all the time; in fact, you want your head to be elsewhere.

Placing a subwoofer in a cabinet is not the best idea unless there is a very breathable material directly in front of the subwoofer where it is firing.

Putting subwoofers in cabinets will not produce a good sound, so they should not be put in there. If they are in there, the sound will be obstructed so it does not move around the room. It is a matter of the fact that the sound will be trapped in the cabinet or enclosure and, due to its inherent power, may even cause unnecessary vibrations and jiggling sounds.

Furthermore, it is not recommended that technology be placed in small enclosed spaces, in general, to prevent overheating and malfunctions. The best way to keep your subwoofer and other components of your sound system in good condition is to keep them in places with adequate air supply and function properly.

Choose The Right Subwoofer For Your Soundbar

There are several subwoofers to choose from, so you need to decide which one is best for your soundbar based on the type of soundbar you have, the speakers you currently use, the room in which you live, and your personal tastes.

You may be restricted to several subwoofer options depending on the soundbar you purchased. Subwoofers can be connected to a soundbar or line of subwoofers. Acoustimass subwoofers are the only subwoofers compatible with the Bose SoundTouch 300.

It is possible to purchase them separately or in a package deal sometimes. A soundbar can connect virtually any subwoofer, making it an excellent choice for many people. Many soundbars use only a single subwoofer that is usually sold with the soundbar to ensure compatibility with a single subwoofer.

Consider a compact subwoofer to match your compact speakers if you have compact speakers and the soundbar’s internal speakers. Smaller rooms are likely to benefit from these. A living room’s sound system should complement the room’s aesthetics.

Choose a high-powered subwoofer or a large one if you have a large room. Large subwoofers don’t always make the best choice for a large room, but sometimes they do. In addition to measuring the size, checking the power output is essential.

Wiring should also be taken into consideration. Are you interested in a wireless or wired connection between your soundbar and subwoofer? Soundbars differ in their capabilities, as well as your personal preferences.

After a Subwoofer, What Do You Need To Add?

When you have added a subwoofer to your system, you may wonder what you can do next to make your sound even more remarkable. Consider adding rear speakers to your soundbar and your soundbar’s built-in speakers, which serve as your front speakers and subwoofer, so long as your soundbar can support them.

With rear speakers, your sound system can be transformed from a 2.1 or 3.1 system into a 5.1 system to enjoy the immersive experience of surround sound. There is no doubt that a 3.1 system does deliver great sound, but it is no secret that it is extremely front-heavy. When using a 3.1 system, the rear speakers take the room to the next level by bringing in the wonderful sounds of the surroundings from the front speakers.

Conclusion

The article discusses the importance of subwoofer placement with a soundbar to improve bass and low-frequency audio. The ideal location of the subwoofer varies based on the size and shape of the room. Placing it in the corner or in front of the room, preferably near the TV, is most common. The article suggests testing different locations to determine the perfect sound for your event.

Placing the subwoofer near the corner can enhance the viewing experience, but it should be at least six inches from the wall to ensure proper breathing and sound quality. The article also discusses the size of the room, seating arrangements, and the number of subwoofers used, which can affect the best subwoofer placement.

The article suggests experimenting with placing compact and large subwoofers and placing them on the floor, behind the main seating area, or on a shelf, based on personal preference. The maximum distance between a subwoofer and a soundbar depends on whether wired or wireless.

FAQ’s


Q: Why is subwoofer placement important with a soundbar?

A: Proper subwoofer placement can greatly impact the overall immersive sound quality and ensure that the bass frequencies are well-balanced with the other audio frequencies from the soundbar.

Q: Can I place my subwoofer anywhere in the room with my soundbar?

A: It is recommended to place the subwoofer close to the soundbar, ideally on the floor, and away from walls or corners that can cause unwanted vibrations and resonance.

Q: Can I place the subwoofer on top of the soundbar?

A: It is not recommended to place the subwoofer on top of the soundbar as it can cause unwanted vibrations and distortion in the audio system.

Q: What should I do if my subwoofer sounds too boomy or distorted?

A: Try moving the subwoofer to a different location or adjust the settings on both the soundbar and the subwoofer to find a better balance of audio frequencies.

Q: Can I use multiple subwoofers with my soundbar?

A: Some soundbars are designed to support multiple subwoofers, but it’s important to follow the manufacturer’s guidelines for placement and configuration to avoid any audio issues.


Categories
TV's Informational

How To Close Apps On Samsung TV

How To Close Apps On Samsung TV: 4 Methods

Ah, the joys of modern technology! With smart TVs becoming increasingly sophisticated, they’ve transformed our living rooms into hubs of entertainment and connectivity. However, with all the available apps and features, you might wonder, “How do I close apps on my Samsung TV?” Fear not, for we’re here to unravel this digital enigma and provide step-by-step solutions to master the art of closing apps on your Samsung TV while highlighting common mistakes to avoid.

Method 1: The Classic Remote Control Way 

Let’s start with the basics. Your Samsung TV remote control is your trusty sidekick. To close an app using this method, follow these steps:

  1. Locate the “Home” button on your remote control. It usually looks like a house icon.
  2. Press the “Home” button to access the main menu.
  3. Using the directional buttons, navigate to the app you want to close.
  4. Once you’ve highlighted the app, press the “Down” button.
  5. A pop-up menu will appear at the bottom of the screen. Highlight and select the “Remove” option.
  6. Confirm by selecting “Yes” on the confirmation dialog.

Common Mistake: 

Some users mistakenly press the “Back” button instead of the “Home” button, which can take you back within the app instead of closing it. Ensure you’re using the correct button.

Method 2: The Multi-Tasking Shortcut 

Like your smartphone, Samsung TVs allow you to multitask by quickly switching between open apps. Here’s how you can do it:

  1. Press the “Home” button on your remote control.
  2. Navigate to the app you want to close using the directional buttons.
  3. Press and hold the “Select” button (the center button in the navigation pad) until a small window appears.
  4. In this window, you can see the app’s preview. Navigate to the app and press the “Down” button to select it.
  5. Once the app is selected, press the “Close” button to shut it down.

Common Mistake: 

Rushing the process can lead to accidentally opening another app instead of closing the one you intended. Take your time to navigate and select the correct app.

Method 3: The ‘Settings’ Approach 

You can close apps through the TV’s settings menu for those who prefer a more systematic approach. Here’s how:

  1. Press the “Home” button on your remote control.
  2. Navigate to the “Settings” option on the main menu.
  3. In the Settings menu, scroll down and select “System.”
  4. Now, select “Expert Settings.”
  5. Scroll to “Smart Hub” and choose “App Auto Update.”
  6. Here, you’ll see a list of recently used apps. Select the app you want to close and press the “Delete” button.

Common Mistake: 

Some users mistakenly delete apps from this menu, thinking it will close them, but it only removes them from the list, not closing the running app. Be sure to choose the correct option.

Method 4: The ‘Task Manager 

Trick If you’re an advanced user who loves to tinker with settings and multitasking, the Task Manager is your best friend:

  1. Press the “Home” button on your remote control.
  2. Navigate to the “Settings” option on the main menu.
  3. In the Settings menu, scroll down and select “General.”
  4. Choose “System Manager.”
  5. Select “Task Manager.”
  6. You’ll see a list of open apps here. Highlight the app you want to close and press the “Close” button.

Common Mistake: 

Users sometimes accidentally close essential system apps, which can cause issues. Always double-check the app you’re about to close in the Task Manager.

Conclusion 

Closing apps on your Samsung TV doesn’t have to be a mystery. However, avoiding common mistakes, such as pressing the wrong buttons or misunderstanding the function of certain settings, is crucial to ensure a seamless and enjoyable viewing experience. With these tricks up your sleeve and awareness of these pitfalls, you’ll be the master of your Samsung TV’s app ecosystem. Happy TV time, and may your apps always close with ease!

FAQs


How do I know which apps are running on my Samsung TV?

Answer: To check which apps are running on your Samsung TV, use the Multi-Tasking Shortcut method mentioned in the blog post. Press the “Home” button on your remote control, navigate to the app you want to check, and press and hold the “Select” button (the center button in the navigation pad). A small window will appear, displaying the running app’s preview. This allows you to see which apps are actively running and switch between them or close them if needed.

Can I close all running apps at once on my Samsung TV?

Answer: Unfortunately, Samsung TVs do not provide a built-in feature to close all running apps simultaneously. You’ll need to close apps individually using one of the methods mentioned in the blog post. However, some apps may automatically close when you launch a new one, helping to manage system resources effectively.

What happens if I accidentally close a system app using the Task Manager?

Answer: Closing a system app using the Task Manager can cause issues with the normal functioning of your Samsung TV. These system apps are essential for the TV’s operation. If you accidentally close one, you may experience glitches or unexpected behavior. To avoid this, exercise caution when using the Task Manager and only close apps you’re sure are not system-critical.

Why can’t I close some apps on my Samsung TV using the methods mentioned?

Answer: Some Samsung TV apps are designed to run continuously in the background and may not be closable using the methods outlined in the blog post. These apps often provide essential services like software updates or remote control functionality. If you encounter an app that can’t be closed, it’s likely because it is crucial to your TV’s operation.

Will closing apps on my Samsung TV improve its performance?

Answer: Closing apps on your Samsung TV can help free up system resources, which may improve performance, especially if you’re experiencing slowdowns or lag. However, modern smart TVs are designed to manage apps efficiently, so you may not always notice a significant difference in performance. It’s a good practice to close apps you’re not actively using to ensure smooth operation and prevent any potential issues related to resource allocation.


Categories
Soundbars Informational

What Wattage Soundbar Do I Need

What Wattage Soundbar Do I Need

A soundbar or speaker’s Wattage or Watts is yet another marketing method used to sell their product as being louder and better than other products available on the market. In most cases, the wattage of a speaker is not important. What matters is how sensitive they are and how loud they can go. Most of the time, the many “sound bar specs” included on soundbars are unclear and accurate and can often confuse consumers. What Wattage Soundbar Do I Need?

Would all manufacturers use the same format and method for providing the correct soundbar specifications? Of course not; of course, they wouldn’t. It’s the highest Specification the manufacturer deems reasonable and believable. Many sound bars products are being rated this way, for example, soundbar wattage, speaker wattage, amplifier wattage, projector lumens, projection throw ratio, etc. And the list keeps going and going.

Do not solely rely on specs before making a purchase! We have recommended soundbars for every budget, so you won’t have to worry about buying the wrong one. Let’s get to the point.

How Do Soundbar Specifications Work?

The sound bars work of wattage does not matter for how it sounds (in our guide, you can learn more about other uncommon terms used with soundbars). A speaker’s quality doesn’t depend on the total watts.

You should probably understand what the different soundbar specs mean before searching through them. Both soundbars and regular speakers have a variety of specifications, so I will explain each in straightforward terms.

Explanation of Soundbar Watts

The power of an amplifier can be measured in Watts. The wattage of amplifiers is specified as the output power. Watts are used to indicate the amount of power input for normal speakers. Each speaker has a limit on how many output watts it can take without damage. The manufacturer usually gives this figure out regarding normal speakers.

In the case of soundbars, the configuration is different since most sound bars have integrated amplifiers. Soundbars are driven by their dedicated amplifiers once you connect power to them. The built-in amplifier wattage will vary depending on the manufacturer. 

A passive soundbar does not contain a built-in amplifier, so it can be viewed as a model that does not have an amplifier. An external amplifier or a standard receiver powers this type of soundbar. Generally speaking, passive soundbars use high-quality speakers and cost much more than active soundbars. Despite this, passive soundbars are not common.

Sensitivity of the speaker (dB or decibels)

What Wattage Soundbar Do I Need by hometheaterjournal.com

A speaker sensitivity converts power and Watts to volume or decibels (decibels). dB is the sensitivity specification. SPL is sound pressure level. An audio system’s dB specification is found by supplying the speaker with 1 watt of power, then measuring the decibels it produces from one meter away.

We will say, for example, that a speaker has a sensitivity of 85dB, which means it can produce a louder sound of 85 decibels. A person one meter from the speaker, using one watt of power, should be able to hear sounds of 85dB at an equal distance from the speaker. Wattage doesn’t always equal dB, so you should be aware that wattage increases won’t necessarily increase the output. You’ll only get a 3dB volume boost every time the watts double.

A dB sensitivity rating chart can be found below to better display the conversion from watts to DBS according to the sensitivity rating. There aren’t any specific soundbars requirements because the specs are usually very general. However, it is still imperative for you to know the measurements used for some specifications.

What Wattage Soundbar Do I Need by hometheaterjournal.com

Understanding what a dB spec means can be hard, but soundbar manufacturers often provide it. It is unclear whether they are speaking of the actual sensitivity rating or talking about how loud the soundbar can play using the built-in amplifier. 

How to Understand dB Levels

Most people do not understand when a soundbar states it has “up to 90 dB of audio quality”. Below, a handy chart connects dB levels to some of the most recognized and commonly heard sounds.

dB LevelDescription
0 dBThe threshold of hearing for the average human ear.
10 dBThe sound of breathing or rustling leaves.
20 dBThe sound of a whisper or a quiet library.
40 dBThe sound of a refrigerator or background noise in an office.
60 dBThe sound of normal conversation or a busy street.
80 dBThe sound of heavy traffic, a vacuum cleaner, or a garbage disposal.
100 dBThe sound of a motorcycle, a rock concert, or a jackhammer.
120 dBThe threshold of pain for the average human ear.
140 dBThe sound of a gunshot or a jet engine at takeoff.
194 dBThe theoretical maximum sound level in air.

Frequency Range

In a speaker, the frequency range is the difference between the lowest and highest frequencies it can reproduce. Hertz (Hz) is the unit of measurement for frequency. The low-pitched sound of the bass is around 20Hz – 200Hz. The subwoofer is principally responsible for producing the very low end. 

Between 200Hz and 2000Hz, the midrange frequencies can be found. Midbass speakers and woofers are primarily responsible for producing these ranges. From 2000Hz to 20000Hz (2kHz to 20kHz) is the range in which higher frequency or higher pitch sounds are recorded. Tweeters can also be used to produce these higher frequency ranges.

Remember that most speakers have difficulty reproducing at the absolute lowest and highest ranges of their frequencies. As with your voice, making a super deep or high-pitched sound is difficult. This is also the case with speakers. Generally, they are most likely to attract and delight their fans through the middle of their ranges!

It’s important to know that soundbars have less low-frequency ability than other audio components. The majority of soundbars contain little depth. As a result, they cannot provide enough room for a standard-sized wireless subwoofer to be accommodated in the cabinet (usually 8″) due to the small size of the enclosure.

This is because most soundbars can connect a separately mounted wireless subwoofer to them. You must use your system to have that deep bass boom while listening to music.

Soundbar Channels

What Wattage Soundbar Do I Need by hometheaterjournal.com

There are usually 2 or 3 channels on standalone soundbars. In two-channel soundbars, left and right speakers make up the audio output. There are three-channel soundbar speakers on the left, middle, and right sides.

Modern soundbars also come with wireless subwoofers and rear speakers that are becoming increasingly popular. Adding a subwoofer would increase the number of channels to either 2.1 or 3.1, drastically increasing the system’s ability to handle low frequencies.

Wireless speakers and wireless external subwoofer are some of the components of some systems. For instance, you may have a 5.1 surround sound system installed in your home. You should definitely read about the differences between 2.1 and 5.1 soundbars if you want to learn more about some of the best soundbars for Hisense TVs available.

Our article explaining everything you need to know about virtual surround sound channels can be found here if you want more information.

Choose the Right Wattage Soundbar for Your room Size

Here is a comparison table outlining the wattage ranges you might want to consider when choosing a soundbar based on the size of your room:

Room SizeSoundbar Wattage
Small (up to 150 sq. ft.)50-100 watts
Medium (150-300 sq. ft.)100-300 watts
Large (300-500 sq. ft.)300-500 watts
Extra Large (500+ sq. ft.)500+ watts

It’s important to note that wattage isn’t the only factor to consider when choosing a soundbar. Other factors like soundbar’s sound quality, brand reputation, and connectivity options should also be considered. Additionally, the size and layout of your room can also affect the sound quality and performance of your soundbar. It’s always a good idea to read reviews and do research before purchasing to ensure that you’re getting the best soundbar for your needs.

What You Need to Know About Soundbar Specification

What Wattage Soundbar Do I Need by hometheaterjournal.com

There are a lot of soundbar specs out there. Everywhere I look, and I mean everywhere. The manufacturer will usually specify the wattage (power output), the decibels (decibels), or the frequency ranges within which the multiple speakers operate.

Manufacturers differ in their specifications, though. Depending on the supplier, some may provide a clear specification, and some may not! Finding a soundbar that meets your needs can be challenging if you have particular specifications in mind.

To give you an idea of the specifications for different soundbars, here are a few examples:

  • A Polk MagniFi MAX soundbar has a system power of 180W.
  • Sound Bar VIZIO SB2920-C6 – This Sound Bar has been mentioned in previous reviews as producing 95 decibels and less than 1% of total harmonic distortion while stating the sound bar’s frequency range is between 70Hz – 19KHz.
  • PLAYBAR by Sonos – Now, this is crazy. A specification for power output, dB levels, or frequency range is not provided. Null! I have seen a spec sheet containing “nine Class-D digital amplifiers.” Class-D digital amplifiers may be highly effective in power distribution and utilization, but apart from that, there is no data to back that up.
  • Samsung Sound+ Premium Soundbar – The manufacturer does not specify the soundbar’s output power or decibel level. However, it does mention that it has a frequency response of 40Hz – 20KHz.

Four different manufacturers offer different soundbar specifications, and comparing them is a bit confusing. It makes sense that everyone would use the same method to define a product’s capabilities so that consumers could make accurate comparisons between their products. Unfortunately, this does not happen.

The Sonos Playbar (on Amazon) wins the four examples. Having installed a few myself, I know they have incredibly good sound quality with immersive surround sound. Nevertheless, the question remains as to how the average consumer will be able to tell that the Sonos Playbar is better. It is an immersive sound bar that is much more expensive than the others, and I am unsure if the individual realizes it is of higher quality.

Sonos specifically asked me why audio specs were not published for their Playbar. They replied, “Sonos does not provide audio specifications because the figures do not represent the speakers’ capabilities. The best way to get a good feel for the speakers is to try them out yourself.

Soundbar ModelNumber of ChannelsTotal Power OutputRecommended Room SizeRecommended TV Size
Samsung HW-T4502.1200 wattsSmall to mediumUp to 55 inches
Vizio SB36512-F65.1.2360 wattsMedium to large55 inches or larger
Yamaha YAS-2092.1200 wattsSmall to mediumUp to 55 inches
Sonos Arc5.0.2450 wattsMedium to large55 inches or larger
Sony HT-G7003.1400 wattsMedium to large55 inches or larger

It’s important to note that the recommended wattage and room/TV size may vary based on your personal preferences and the layout of your home theater setup. The soundbar’s other features, such as connectivity options and audio formats supported when purchasing, are also worth considering.

FAQ’s


Q: Do I need to match the wattage of my soundbar to my TV?

A: No, you don’t need to match the wattage of your soundbar to your TV. However, ensuring your soundbar is compatible with your TV’s audio output is important.

Q: How do I know if a soundbar is compatible with my TV?

A: You can check the specifications of your soundbar and TV to ensure they are compatible. Look for input/output options like HDMI, optical, or Bluetooth.

Q: Can a soundbar with high wattage consume more power?

A: A high-wattage soundbar can consume more power than a lower-wattage soundbar. However, modern soundbars are designed to be energy-efficient.

Q: What is the difference between RMS and peak power output?

A: RMS (Root Mean Square) measures average power output, while peak power output measures the maximum power output a device can produce. When choosing a soundbar, look for the RMS power output.

Q: Is it better to use a higher-wattage soundbar if I have a small room?

A: Not necessarily. A higher-wattage soundbar may produce more volume, but it’s unnecessary if you have a small room. A 50-100 watt soundbar should be sufficient for small rooms.


Categories
Blog Informational

IPX8 vs IP68

IPX8 vs IP68 | Waterproof/Dustproof Rating Guide

IP rating stands for “ingress protection rating” or International Protection Rating’. A rating system is used to indicate the degree of protection provided by an enclosure against the intrusion of foreign objects (e.g. dust) and water.

The IP Code, also known as the Ingress Protection Code or International Protection Code, is a standard set by the International Electrotechnical Commission (IEC) that classifies the degree of protection provided by the enclosures of electrical equipment against the intrusion of solid objects, dust, water, and other foreign substances.

The IP Codes are usually followed by two numerals representing the level of protection. The first digit indicates the degree of protection against foreign solid objects, while the second digit indicates the degree of protection against liquids. For example, an IP68 rating means that the device is completely protected against dust and can be submerged in water or liquid resistance beyond 1 meter for an extended period of time.

The IP Code is commonly used in electronic devices, telecommunications, and construction industries to ensure that products meet the required level of protection for their intended use. Note, IPX8 is a product rating that sometimes has a number replaced with an X.

The IPX8 vs IP68 ratings are relative to the product’s ability to protect against solid objects (dust), whereas IP68 means the product is durable against water and dust.

It is important to understand that any IP Ratings with an X instead of the first digit is not tested for solid objects like dust. If it is instead of the second digit, it means that it was not tested for liquids such as water.

I recommend buying any product that has been put through both tests because then you will know what it can resist and cannot.

IPX8 vs IP68 rating comparison here.

We recommend you read the complete guide to IPX waterproof ratings before visiting for the first time.

IPX8 vs IP68 by hometheaterjournal.com

Here’s a comparison table between IPX8 VS IP68 ratings:

FeaturesIPX8IP68
Dust-proofNot specifiedYes
Water-resistantYes, for continuous immersion beyond 1 meterYes, for immersion beyond 1 meter
WaterproofYes, for continuous immersion beyond 1 meterYes, for immersion beyond 1-meter
Protection against water depthCan be submerged beyond 1 meter deepCan be submerged beyond 1 meter deep
Protection against water pressureNot specifiedCan withstand high water pressure
Protection against dustNot specifiedFully protected against dust resistant
Example devicesWaterproof watches, earbuds, smartphonesWaterproof smartphones, tablets, cameras, smartwatches

Note that the IPX8 rating only certifies the device’s ability to withstand continuous immersion beyond 1 meter deep for a specific amount of time but does not specify any protection against dust or water pressure. On the other hand, the IP68 rating certifies that the device can withstand immersion beyond 1 meter deep and provides complete protection against dust and high water pressure.

Which is better, IPX8 or IP68?

IPX8 vs IP68 by hometheaterjournal.com

Suppose you are going to buy a device. When two different brands for the same device are showing you ratings that are IPX8 and IP68, you are sure to be wondering which one is the better one.

The “X” indicates that the product has not been tested. This means that the value that will not be tested could be either the lowest or the highest. Thus, a numeric value would be better.

Solids are protected by a maximum value of 6, while liquids are protected by a maximum value of 8.

Unlike IPX8, IP68 tests products against solids and has passed all tests, giving the maximum value of 6. Unlike IPX8, IP68 tests products against solids and has passed all the tests. Thus, IP68 is far superior to IPx8.

The two devices are 100% waterproof; however, IP68 is said to be the only one fully weatherproof because it can withstand both solid and liquid conditions simultaneously.

Related: IPX4 vs IP55, IPX5, IPX7, IP67, IP44, IP24, IP78

Would it be better to buy an IP68 or IPX8-rated product?

IPX8 vs IP68 by hometheaterjournal.com

If you want to use your product outside your door, the best option is to get an IP68 Rated product because it protects against liquids and solids.

Water shouldn’t be an issue since both devices are waterproof. Dustproof products are only needed if you need them.

To ensure that a product is IP68-compliant, you should check if it is expected to be used in dusty environments. If the product description does not mention “waterproof” or is vaguely described as such, please get in touch with the manufacturer for more information.

You don’t need to buy a product that is IP68 if you’re only going to use it in neat, clean areas since IPX8 is sufficient.

This was all about comparing IPX8 and IP68 ratings for waterproofness and dustproof. Thank you for understanding. It will help you make a better decision.

Related: IPX7 vs IP67

 FAQ’s


What is the difference between IPX8 and IP68 water resistance ratings? 

IPX8 is a rating that indicates a device can be submerged in water beyond one meter for an extended period. In contrast, IP68 indicates that the device is dust-tight and can withstand submersion in water up to 1.5 meters deep for 30 minutes.

Can a device with an IPX8 rating withstand the same level of water exposure as one with an IP68 rating? 

No, a device with an IPX8 rating is not guaranteed to withstand the same level of water exposure as one with an IP68 rating. While both ratings indicate a high level of water resistance, IP68 offers better protection against water and dust than IPX8.

Are devices with an IP68 rating more expensive than those with an IPX8 rating? 

Generally, devices with an IP68 rating are more expensive than those with an IPX8 rating due to the higher level of protection they offer against water and dust. However, pricing may also depend on other factors, such as the device’s overall quality, brand, and features.

Do all smartphones have an IPX8 or IP68 rating or are other water resistance ratings available? 

No, not all smartphones have an IPX8 or IP68 rating code. Other water resistance ratings, such as IPX6 and IPX7, indicate a device is protected against water exposure to a lesser extent. Some smartphones may also have their proprietary water resistance technology.

Is there a specific level of water pressure or immersion duration that devices with IPX8 or IP68 ratings can withstand? 

To be water-resistant, devices with IPX8 or IP68 ratings must meet specific standards. For IPX8, a device must withstand being submerged in water beyond one meter for an extended period. For IP68, a device must withstand submersion in water up to 1.5 meters deep for 30 minutes. However, it’s worth noting that some manufacturers may claim even higher levels of water resistance for their devices.


Categories
Soundbars Informational

How To Choose a Soundbar

How To Choose a Soundbar in 2025 | Guide

Sound bars are all over the market now; some are great, and others aren’t. Plenty of options are on the market right now, and some are well worth the bubble wrap. Each sound bar has its features- some of which are worth paying attention to.

For example, how many HDMI inputs does it have? Does it have Bluetooth built-in for streaming music? Of course, there are many options. And yes, we can help. Here is our guide to picking the right sound bar for you, your TV, and your room – so let’s get started. How to choose a soundbar?

Some key features to consider when choosing the best soundbar:

FeatureDescription
Sound QualityLook for a soundbar with good frequency response, low distortion, and clear dialogue reproduction. Consider brands known for their audio expertise.
Size and DesignConsider the size sound bar and design of the soundbar to ensure that it will fit comfortably in your space and match your decor.
Connectivity OptionsLook for a soundbar with various connectivity options, such as HDMI Connection, Bluetooth, google assistant, and Wi-Fi, to ensure compatibility with your devices.
PriceConsider your budget and look for soundbars that offer good value for their price.
Room SizeChoose a soundbar with the appropriate wattage range for the size of your room. Refer to our comparison table above for guidance.
Additional FeaturesSome soundbars come with additional features, such as built-in voice control assistants, multi-room audio capabilities, and app controls. Consider these features if they are important to you.

When choosing a soundbar, it’s important to consider all of these factors to ensure you find the best option for your needs and preferences.

How To Choose a Soundbar: 6 things to consider:

  1. Where will it be placed? 
  2. What size to choose? 
  3. Active Soundbar vs. Passive Soundbars
  4. Channels of Soundbar
  5. Which connections are necessary? 
  6. How do you control it?

A soundbar buyer’s guide

Are you in a hurry? Before buying a soundbar, here’s what you need to know (or do):

  • Consider sound bars with at least three channels. However, there is still the possibility of getting 2-channel sound bars, which are really nothing more than glorified mini-stereo systems. You can create a virtual surround experience using 3 or more channels to make your immersion experience more realistic.
  • Choose an active soundbar. A passive soundbar does not have an amplifier (active sound bars do). Especially if you want a two-in-one solution or are trying to save space.
  • Place your sound bar in a convenient place. Does it need to be hung or laid flat? From an aesthetic perspective, you should not have a sound bar that is wider than the TV. In a perfect world, your sound bar should be centered beneath or above your TV, whether on a wall or a shelf. If it’s too big, don’t put it there!
  • Keep the connections in mind. Streaming music from any computer, phone, or tablet is easy with Wi-Fi and Bluetooth sound bars. HDMI-switching also makes switching audio sources easy, so you do not need to reroute HDMI cables.

Are sound bars worth it?

Sound bars are often bought by people who do not have the space necessary for true surround sound in their home theaters. Their slim, low-profile design allows them to be inserted easily in any room. It is possible to achieve real home theater great sound in many different ways. Typically, you will need multiple speakers (a center speaker, one left speaker, one right dedicated speakers, and two rear speakers) and a subwoofer. This is usually more expensive than purchasing just a soundbar.

So what? Authentic home theater sound is so amazing in so many ways that you should consider it if you have the space and budget. If a good soundbar improves your TV’s sound by one hundred times, a real home theater will improve it by ten thousand times. Alternatively, a sound bar will improve the quality of your TV’s audio if you’re just looking for a simple solution.

There are two types: sound bars and sound bases.

How To Choose A Soundbar by hometheaterjournal.com

This is indeed a buying guide for sound bars, but there are actually two types of sound bars available: sound bars and sound bases. Both come with built-in speaker system, and both serve the same purpose: improving the audio quality of your TV. You will hear clearer dialogue (especially if your TV has Voice Enhancement), richer sounds, clearer images, a more immersive and cinematic experience, etc. As a result, crickets at night don’t sound like someone left the water running, but they sound like crickets at night. There will also be moments when you might be diving for cover, such as when The Hulk has a major temper tantrum. 

However, there are some other differences.

What is a soundbar?

Sound bars are made up of speakers and a lot of technical wizardry that are placed in a long, rectangular-shaped bar. It is as if a good pair of glasses make things crystal clear for you to see, then a good sound bar does the same for our spoken word. Due to this in-built sound enhancement, voices come through crisp and distinct – to the point that even whispered dialogue is audible. 

There is no need to turn on subtitles or increase the volume.) Furthermore, sound bars are wider than sound bases. These allow sound to travel further (left and right), giving you a closer experience to home theater than you would get from a sound base (albeit to a certain extent). 

The location of sound bars varies from A) mounting them to the wall under your television to B) setting them in front of your TV if your television is on a table to C) placing them on a shelf below or above your television if it is in a shelving system. Many sound bars consist of a wireless subwoofer, which enhances the audio experience while providing an additional thump-thump kick.

What is a sound base?

While both sound bases and sound bars aim to increase the volume of your TV to an extraordinary level, their size and power differ. There are some differences between sound bases and sound bars regarding depth (front to back) and width (side to side). But generally, they sit under TVs or on shelves directly beneath them rather than on top. 

In general, sound bases have more space inside than sound bars, and as a result, they usually come with better built-in amplification and larger bass drivers. This makes them less of a necessity to purchase a subwoofer – although some would argue that a good stand-alone subwoofer is harder to beat. 

And it’s always better to have a big device for your sound system. No question sounds bases are becoming harder and harder to find these days. Because of advances in sound bar technology, as well as their versatility and the fact that they are offered by some of the best brands available today, we will often recommend sound bars over sound bases.

Expert Tips

  • A sound base doesn’t perform stereo as well as a soundbar. Unlike sound bars, sound bars offer better separation of stereo channels because the speakers are farther apart.
  • TVs and sound bars are becoming thinner as well. While skinny can be attractive, it isn’t a good choice for audio quality. If you really want your sound bar to sound great, you should consider adding a subwoofer.
  • Soundbars can block your remote’s signal to the TV depending on how you set up your setup. There are workarounds, like this Salamander universal IR extender. But it’s best to measure how the soundbar will fit to avoid blocking your TV’s IR receiver.

Buying a sound bar: 6 things to consider:

Where will it be placed? 

How To Choose A Soundbar by hometheaterjournal.com

The type of sound bar or sound base you choose will depend on where your TV is located and how much space you have around it. Additionally, the type will affect where you place it. Installing sound bars is much easier – you can hang them on the wall or place them under (and near) your television. Setup is easy for all soundbars as well. Put the sound bar on the same table as your TV stand, directly below the screen, if your TV is on a table or credenza. 

There is no need to worry about your TV falling out. Its bottom flat on the table or floor. Check the sound bar specs, and measure the area before you buy. The sound bar should be mounted directly below your wall-mounted TV. In some cases, you can purchase mounting kits that help with the DIY installation of sound bars. 

However, sound bases are made to be placed on top of a table or shelf so that they can sit under your TV (which is why they are so heavy).

Expert advice

  • The question of whether you can mount a sound bar above a TV often arises. What do we think? Of course, you can do that if that’s the only location you can find, it just won’t sound up to par. However, the speakers are better than the ones on your TV.
  • The sound base will raise the TV a few inches when placed under your TV (where it belongs). Perhaps that is trivial, but knowing that now makes measuring the space more straightforward.
  • Many sound bars look pretty cool, others are understated to blend in, and some are designed to work with specific television models. Depending on your TV model, you may be able to find soundbars made for it by the manufacturer. With their low-profile sound bars, some Sony 4K TVs look beautiful. 

What size to choose? 

In an ideal world, your new sound bar would have the exact same width as your TV, so they look evenly proportioned. Although technically, any TV can be paired with a soundbar. Choosing the right size is up to you. Especially if your TV is older than 8 years, make sure it has the right connections to connect your new sound bar.

How can I tell if my sound bar is active or passive?

Passive soundbars are those without a built-in amplifier and must be connected to a receiver or amplifier for operation. The speakers are better, however, which means better sound. You will need to connect more components to a passive sound bar, so its price is slightly higher. Additional bass can be achieved by connecting a traditional subwoofer.

Active: The sound bar comes as an active speaker, which means it comes with its own amplifier that powers everything, as well as a channel processing unit that separates the left, right, and center speakers in the soundbar. There is no need to buy or plug in an additional receiver in addition to having fewer wires with an all-inclusive device. 

You should choose an active sound bar if you only want to upgrade the audio on your TV. Passive sound bars are much better suited for a custom installation (for example, if you want your soundbar to disappear into your TV or if you want a full-blown Dolby Atmos system).

How many channels do I need, and what does “channel” mean?

You can think of channels as individual speakers or sound sources. Today, most shows and movies offer five different audio channels (and sometimes more, especially with surround sound). Center, left, right, and two in the rear (left rear and right rear) are embedded digitally. 

Several factors make a soundbar different from a typical home theater setup, including all channels/speakers being contained in one unit. This is because a 2-channel sound bar has two left and right speakers.

A 3-channel sound bar has three speakers: a center speaker, a right speaker, and a left speaker.

The 5-channel sound bar has all five abovementioned speakers: the center, right, left, and two rear speakers. (5-channel systems have been essential to the home theater experience for almost two decades.)

A 7-channel sound bar has 7 speakers. With 7 channels, you effectively get 5 channels in addition to the rear and surround channels: By splitting them into 4 channels each, you’ll get 7 channels. (This is the most recent and best standard.)

Dolby Atmos Soundbars: TRULY the best soundbar 5- or 7-channel soundbar on the planet. Upward-firing speakers achieve a heightened, three-dimensional soundstage in the soundbar. For example, when you see channel numbers like 5.1.2 or 7.1.2, the third element represents upward-firing Dolby Atmos speakers (whereas the first element represents a traditional channel and the second represents a subwoofer). A hard, reflective ceiling and a flat up to 11 feet high are ideal for this sound bar.

Which connections are necessary? 

How To Choose A Soundbar by hometheaterjournal.com

Modern soundbars provide multiple ways to connect – and a wide range of connectivity options. Here are a few key connections to look for:

HDMI ARC

Is simple. Connect the sound bar to the TV’s audio return channel (ARC) input with an HDMI cable. Your sound bar can now be connected to the audio return channel of your TV. HDMI connections is the best way to connect your sound bar with multiple channels.

Wireless Connectivity

Would you like to be able to stream your mobile device or sound bar directly to your sound bar? Take a look at these features: 

  • Bluetooth: These days, most soundbars come with Bluetooth made into them, which can be used to stream music from your smartphone, computer, and tablet.
  • Wi-Fi: Many wireless soundbars are now made available. They contain wireless technology that allows them to hook up to your home’s Internet network and stream anything from anywhere (Spotify, TIDAL, Pandora, etc.).

Optical Port

An optical patch cord is the best way to connect your TV to your sound bar. The simplest, easiest, and most reliable connection is also provided. However, it isn’t capable of carrying 5.1. Most TVs these days have both optical audio output and HDMI ARC.

USB Inputs

These are normally only available for firmware updates. However, many sound bar users today get their sound bar software updated through a computer. You don’t need this if you’re just planning to plug in your thumb drive with your songs on it and no other purpose.

Tips from the experts

  • The Sonos Beam or Arc are excellent wireless soundbars that double as stereos with immersive sound. Your computer, phone, or tablet can stream music directly to it, so you can stream music from your living room to party city.

How do you control it?

Will there be another remote control for the sound bar? Possibly. You will need to purchase your own remote control for your new device. However, with most TV remote controls, you can also program them to work with your sound bar. We can show you how to simplify your life by having a single remote that controls everything on your cocktail table. (A cocktail table full of remotes? We hate it.

With a free app, you can operate some sound bars via mobile devices, such as a phone or tablet.

FAQ’s


Is it possible to add speakers to a sound bar?  

There are some yeses and some noes. A lot of the newer sound bars come with additional wireless rear speakers built into them so that you can truly experience the sound of a home theatre system. There is only one other way to connect wireless dedicated rear surround speakers to your sound bar: if it supports multi room audio system functionality. This is perfect if you have (or want to set up in your home) an audio system where you can play music in multiple rooms simultaneously it simulate surround sound.

Is it possible to add a subwoofer to a sound bar?  

A wireless separate subwoofer is often included with wireless sound bars. Also, some do not usually include a woofer port, which you can add if you wish. This will give you a more immersive experience (and you should if you want it).

In the case of a sound bar, is a receiver needed?

It depends on whether the soundbar is active or passive, no matter which you buy. You can read more about that under “what to consider”.

What is a Dolby Atmos soundbar?

Many new soundbars now come with Dolby Atmos technology, which simulates surround sound by reflecting audio off the ceiling. It’s not the real thing, but it’s pretty good. 

How do I know if a soundbar will be compatible with my TV and other devices?

A: When choosing a soundbar, it’s important to consider its connectivity options. Look for a soundbar with multiple inputs, such as HDMI, optical, and RCA, to ensure that it will be compatible with your TV and other devices. You may also want to consider a soundbar with Bluetooth or Wi-Fi capabilities for wireless connectivity. Be sure to check the specifications of both your TV and the soundbar to ensure that they are compatible. Some soundbars also come with universal remotes or smartphone apps that can simplify the process of switching between devices.


Categories
Speakers commercial Informational

Sonos Play 5 Gen 1 Vs Gen 2

Sonos Play 5 Gen 1 vs Gen 2: A Comprehensive Comparison

Choosing the perfect speaker is pivotal for a superior listening experience. The Play 5 Gen 1 and Gen 2 comparison is important to the Sonos lineup. This guide delves into a comprehensive analysis of both models, providing an in-depth understanding of their distinctions and aiding your decision-making process.

Important Note: It’s worth noting that the Sonos Play 5 Gen 1 is no longer in production, though it remains accessible on platforms like Amazon. Given its inception in 2005, it’s prudent to lean towards the technologically advanced Sonos Play 5 Gen 2.

Premium Pick

Sonos Play: 5 Gen 1

Sonos Play 5 Gen 1 Vs Gen 2 by hometheaterjournal.com
  • Solid bass performance

  • cost-effective option

  • wireless connectivity

Diamond Pick

Sonos Play: 5 Gen 2

Sonos Play 5 Gen 1 Vs Gen 2 by hometheaterjournal.com
  • Enhanced audio quality

  • multiroom capability

  • modern connectivity options

Comparison Table Of Sonos Play 5 Gen 1 vs Sonos Play Gen 2

Parameters of ComparisonSonos Play 5 Gen 1Sonos Play 5 Gen 2
Release Year2005 (Discontinued)2015
Sound PerformanceGood bass performance and sound outputMore drivers, high-quality, crystal-clear audio
ConnectivityBluetooth, WiFi, 3.5mm aux-in jackWiFi, Apple AirPlay 2, Alexa voice control
ControlsPhysical buttons, smartphone app supportTouch controls, voice commands via Siri remote, built-in speakerphone
DesignSquare box with glossy finishSlightly triangular, matte finish
Size and WeightSmaller and lighter (8 pounds)Larger and heavier (14 pounds)
PriceLess expensive, lacks advanced featuresMore expensive, additional drivers and features

Sonos Play: 5 Gen 1 Wireless Speaker for Streaming Music (Black)

Sonos Play 5 Gen 1 Vs Gen 2 by hometheaterjournal.com
Overall Score
83%
SOUND RANGE
80%
VOICE DISTORTION
83%
AUDIBLE FREQUENCY
87%
VALUE FOR MONEY
84%

While the Gen 1 model boasts a powerful sound output and commendable bass performance, its outdated software and limited connectivity options make it less appealing than the Gen 2. Given its discontinuation, opting for the more advanced Gen 2 for an elevated listening journey is advisable.

Feature And Specifications: 

  • Solid bass performance, wireless connectivity, and affordable option.
  • Release Year: 2005
  • Connectivity: Bluetooth, WiFi, Ethernet
  • Sound: 5 amplifiers, 2 mid-woofers, 2 tweeters, 1 woofer
  • Control: Physical buttons, smartphone app support
  • Design: Square box with glossy finish
  • Size and Weight: 4.8×14.4×8.5 inches, 8 pounds
  • Price: Budget-friendly

Pros

  • Solid bass performance

  • cost-effective option

  • wireless connectivity

Cons

  • Discontinued by the company

Sonos Play: 5 Gen 2 Ultimate Wireless Smart Speaker – Black

Sonos Play 5 Gen 1 Vs Gen 2 by hometheaterjournal.com
Overall Score
88%
SOUND RANGE
88%
VOICE DISTORTION
89%
AUDIBLE FREQUENCY
82%
VALUE FOR MONEY
89%

With its advanced firmware, exceptional audio quality, and smart features, Sonos Play 5 Gen 2 is the preferred choice. Its compatibility, wireless connectivity, and voice control options make it a cutting-edge addition to any audio setup. The investment in Gen 2 promises an immersive auditory experience and aligns with modern technological demands.

Feature and Specifications: 

  • Enhanced audio quality, advanced features, multiroom capability, modern connectivity options, and sleek design.
  • Release Year: 2015
  • Connectivity: WiFi, Apple AirPlay 2, Alexa voice control
  • Sound: 6 amplifiers, 3 mid-woofers, 3 tweeters, 0 woofers
  • Control: Touch controls, voice commands via Siri remote, built-in speakerphone
  • Design: Slightly triangular, matte finish
  • Size and Weight: 14.3x8x6 inches, 14 pounds
  • Price: Higher-end option

Pros

  • Enhanced audio quality

  • multiroom capability

  • modern connectivity options

  • Sleek design

Cons

  • Higher price

  • No Bluetooth connectivity

Sonos Play 5 Gen 1 vs Gen 2: Major Differences

Sonos Play 5 Gen 1 Vs Gen 2 by hometheaterjournal.com

The principal variance between these models revolves around their software architecture. While some features bear semblance, a comprehensive comparison reveals disparities in size, design, audio quality, and control options.

Release: 

Sonos Play 5 Gen 1, a pioneer from 2005, stands as an entry-level Sonos speaker. Its connectivity encompasses Bluetooth and Ethernet but lacks speakerphone and multiroom functionality. Conversely, Sonos Play 5 Gen 2 debuted in 2015, a decade after its precursor. Armed with updated firmware, it boasts backward compatibility and multiroom capabilities. Moreover, it excels in delivering high-fidelity digital audio and eliminates the need for an external amplifier.

Sound Quality: 

Gen 2 triumphs in audio quality, attributed to its adeptness in handling low latency, frequent firmware updates, and robust driver assembly. With 6 amplifiers, 3 mid-woofers, and 3 tweeters, Gen 2 thrives in delivering pristine and immersive audio. Gen 1, housing 5 amplifiers, 2 mid-woofers, 2 tweeters, and 1 woofer, imparts powerful sound output, particularly excelling in bass performance.

Style and Look: 

Gen 1, presented in a square, glossy form, exudes elegance, while Gen 2’s slightly triangular shape and matte finish lend a professional aura. Both iterations are available in black and white, catering to diverse aesthetic preferences.

Controlling Methods: 

Sonos Play 5 Gen 2 enhances control with touch controls and compatibility with Siri remote for voice commands and speakerphone use. Gen 1 relies on physical buttons and smartphone app support, positioned more as a computer speaker, whereas Gen 2 embraces a more intelligent approach.

Connectivity Options: 

Gen 1 boasts Bluetooth connectivity, whereas Gen 2 opts for WiFi and Apple AirPlay 2. Both models embrace Alexa voice control. Gen 1 provides a 3.5mm aux-in jack and Ethernet port, enabling physical connections. Gen 2 ensures wireless connection via WiFi and leverages Apple AirPlay 2 for seamless streaming, cementing its place in the modern digital landscape.

Size and Weight:

Sonos Play 5 Gen 1 spans 4.8×14.4×8.5 inches, offering portability at 8 pounds. In contrast, Gen 2’s dimensions of 14.3x8x6 inches and weight of 14 pounds confer a more extensive and weightier profile. Both models facilitate versatile placement, supporting various orientations and even the option of mounting on a ball stand.

Price: 

Sonos Play 5 Gen 2 commands a higher price point, justified by its additional drivers, enhanced audio quality, and advanced control and connectivity features.

SONOS PLAY 5 GEN 1 VS 2 COMPARISON CHART

FeatureSonos Play:5 (Gen 1)Sonos Play:5 (Gen 2)
Audio QualityExcellent sound qualityEnhanced sound quality
Amplifiers5 Class-D amplifiers6 Class-D amplifiers
Drivers5 drivers: 2 tweeters, 26 drivers: 3 mid-woofers, 3
mid-woofers, 1 subwoofertweeters, 1 subwoofer
Trueplay TuningNoYes
Line-InYesNo
Audio Line-OutYesNo
Ethernet PortYesNo
Wireless ConnectivityDual-band Wi-Fi (2.4GHz and 5 GHz)Dual-band Wi-Fi (2.4GHz and 5 GHz)
Apple AirPlay 2 SupportNoYes
Trueplay TuningNoYes
Dimensions (H x W x D)4.8×14.4×8.5 inches14.3 x 8 x 6 inches
Weight8 Pound14 Pound
Supported Streaming ServicesWide range of streamingWide range of streaming
services via Sonos appservices via Sonos app
Multiroom AudioYes, with other Sonos speakersYes, with other Sonos speakers
Stereo PairingYesYes
Voice Assistance CompatibilityNoneAmazon Alexa, Google Assistant
Wall MountableYesYes

Final Thoughts

In conclusion, the comprehensive evaluation underscores the superiority of the Sonos Play 5 Gen 2 over Gen 1. The technologically advanced features, superior audio quality, and enhanced connectivity of Gen 2 solidify its position as the preferred choice. Given Gen 1’s discontinuation and outdated firmware, investing in Gen 2 promises an immersive and unparalleled auditory experience.

FAQs


Are Bose speakers better than Sonos? 

Both Bose and Sonos are renowned brands for speakers, each with its strengths. While Bose is known for its exceptional surround sound capabilities, Sonos specialises in enhancing speech clarity. For instance, the Bose Smart Soundbar 700 offers a well-balanced sound profile and less distortion at higher volumes than the Sonos Playbar.

What makes Sonos speakers so popular? 

The popularity of Sonos speakers can be attributed to their exceptional sound quality and broad compatibility with a wide range of streaming services. From popular platforms like Pandora and Spotify to Tidal, SiriusXM, and more, Sonos ensures a seamless and enjoyable listening experience across multiple apps and services.

How many Sonos speakers can be connected? 

You can establish a Sonosnet, a dedicated wireless network within your home theater, to connect up to 32 Sonos speakers to a primary or master speaker. This secure wireless connection, Sonosnet, facilitates synchronized audio playback throughout your space.

What’s the suitable number of Sonos speakers for an average room? 

Generally, a single Sonos speaker, such as the Sonos One, is well-suited for an average-sized room, providing satisfying audio quality. However, if your room is more prominent, opting for a stereo pair with two speakers, like two Sonos One speakers, can significantly enhance the audio experience and deliver louder sound output.

Is it possible to power off a Sonos speaker?

Unlike traditional devices, Sonos speakers are designed to remain on most of the time. When inactive, they automatically transition to a lower power mode, conserving energy. This approach eliminates the need for frequent power on/off cycles, ensuring speakers are always ready to deliver high-quality audio without inconveniences.


Categories
Subwoofer Informational

Subwoofer Vs Woofer

Subwoofer Vs Woofer- Which is Better?

A woofer or subwoofer is the only way to produce bass. Despite this, buyers are always confused about the difference between woofers and subwoofers.

Many believe both terms refer to the same thing, but that is not always true. Some are interested in determining which is best for them based on the differences between the two appliances. These appliances produce low-frequency sounds, which produce bass.

In almost all of the different audio parameters, they differ from one another. A detailed comparison of subwoofers and woofers will be presented in this article.

What is a Subwoofer?

Subwoofer Vs Woofer by hometheaterjournal.com

Subwoofers are loudspeakers that are capable of producing low-pitched audio frequencies of sound. Subwoofers are usually manufactured in a range of frequencies between 20Hz and 200Hz to reproduce low-frequency sound.

As a result, your audio system can benefit from rich bass. In the case of traditional sound systems, you need a subwoofer if they aren’t capable of producing low-frequency sound, which means it will not produce a significant amount of bass.

For those looking for the best subwoofers to enhance their home audio experience. Explore top-rated subwoofers that offer excellent performance without breaking the bank, ensuring a powerful and immersive sound experience for your home theater setup.

Advantage

  • Stability: The low-frequency tones produced by a subwoofer improve sound quality. Subwoofers will reduce distortion in your audio system so that you will notice an improvement in the quality of your audio, and your audio system’s overall performance will also be improved.
  • Bass Enhancement: Subwoofers are used to increase bass in audio systems. To create a rich bass effect, it primarily focuses on low frequencies. A general woofer provides much worse bass than this speaker.

Disadvantage

  • Space: It takes up a lot of space to install a subwoofer. A lack of space will make it difficult for places.
  • Power: The wattage consumed by a subwoofer is greater than that of a woofer. Plugs with high amperage will be required.

What is a Woofer?

Subwoofer Vs Woofer by hometheaterjournal.com

Woofers are loudspeakers that are capable of producing low-frequency sounds, which is also known as a woofer. Basically, woofers are only designed as passive bass drivers. A subwoofer, on the other hand, has a broader range of frequencies as compared to a regular speaker.

This band has a wide range of frequencies from 40 Hz to 2500 Hz. This makes it an ideal speaker for a variety of uses. It is an ideal audio system for home theaters since it can handle many audio types.

Advantages

  • Overall Sound Quality: A woofer can improve the overall audio quality. In other words, it can enhance both low-frequency and high-frequency sounds.
  • Design: A woofer’s size differs from a subwoofer’s, as it is much more compact. Having a great sound and saving space is possible with it.
  • Frequency Range: 
  • Subwoofers have a frequency range of 200 Hz, whereas woofers have a range of up to 2k Hz.

Disadvantages

  • Insufficient Specialization: Woofers cannot produce very low or high frequencies, so they are not specialized devices.
  • Power Consumption: A woofer consumes significant power due to its technical specifications.

Comparison Table: Woofer Vs Subwoofer

AspectWooferSubwoofer
Frequency RangeTypically handles frequencies from 40 – 2500 HzHandles frequencies from 20 Hz to 200 Hz or (narrower frequency range)
DriversSingleSubwoofer driver Multiple(2-4)
SizeGenerally smaller in size than subwoofers (3-8 inches)Larger in size than woofers (8-20 inches)
Powering the Driver Through external amplifierThrough inbuilt amplifier 
Power ConsumptionGenerally lower power handling capacity. Relatively low(10-100W) It can handle higher power levels. High(200-1000W) 
Sound QualityMid-range frequencies responseFocused on the lower frequency range
UseIt can be placed indoors on dashboards of vehicles or on a bookshelf or floor-standing speakers.Used in home theater systems, car audio systems, and high-end audio setups
PlacementIt can be placed indoors on dashboards of vehicles or on a bookshelf or floor-standing speakers.Typically placed on the floor or on stands or installed in walls or ceilings.
PriceGenerally less expensive than subwoofersMore expensive than woofers
Bass OutputProvides a moderate bass outputProvides deep and powerful bass output

Subwoofer Vs Woofer: What’s the Difference?

Subwoofer Vs Woofer by hometheaterjournal.com

We will now show you how a woofer differs from a subwoofer.
If you are looking for the difference between subwoofers and speakers. we have another guide which will help you with subwoofers vs speakers which one is a better choice for home theater or outdoor?

The frequency ranges

It is generally believed that woofers can reproduce sound within the frequency range of 40 to 1000 Hz. However, a few woofer reproduces sound ranging are available that can produce sound between 40 and 2500 Hz. The woofers can be classified as mid-woofers due to their wide frequency range.

Subwoofers, on the other hand, can reproduce sound at frequencies between 20 and 120 Hz. Some specialized subwoofers also cover the 20 to 200 Hz frequency range.

Subwoofers are rated as subwoofers because they can produce “sub-level” frequency sounds. In addition, some rotary or propeller subwoofers produce a sound lower than 20Hz apart from traditional subwoofers.

Size

Subwoofers have a larger structure than woofers. Several components make up a subwoofer, which is why this is the case. In a nutshell, the system is usually enclosed in a black enclosure that plays both the role of protecting the system as well as tuning its output. Besides the passive radiator, there is also a passive pressure release system that releases excessive pressure. A port vent could perform the same function as a radiator.

Within the main body, you will find the amplifier and woofer, which are the most important components. The woofer creates sound waves, while the amplifier amplifies sound levels. Deeper bass can be achieved with larger surface areas. Thus, subwoofers are larger than woofers.

Although some woofers are large in size when compared to the average woofer, these are the exceptions. A woofer is usually between 3 and 8 inches, whereas a subwoofer can be between 8 and 20 inches. In general, the size of a woofer can range between 3 and 8 inches in size.

Approximately how many drivers are there?

A woofer usually has more than one driver. The drivers of woofers typically have a 2-way or 3-way configuration. In a 2-way woofer, two drivers are used, a woofer and a tweeter. Three types of woofers are the woofers, the tweeters, and the midrange drivers that make up the 3-way woofer. Subwoofers with a super-tweeter are also available in 4-way configurations.

In contrast, subwoofers typically contain only one driver. Multiple drivers are available on some custom subwoofers. A single enclosure could have multiple subwoofers and drivers.

Consumption of electricity

Subwoofers consume more power than woofers. To reach the lowest frequencies, a subwoofer must draw more power from its amplifier, which is why it has hit the lowest frequencies.

The car’s lights will dim when your subwoofer hits a low bass note when your battery is low if the subwoofer is connected to your car sound systems. The reason for this is that excess power is needed.

Woofers, on the other hand, do not need to be able to produce such low frequencies. Therefore, they consume less power. However, the power consumption could increase slightly if a lower frequencies driver is used.

A subwoofer, however, consumes more power. A woofer generally consumes between 10 and 100 watts, while a subwoofer consumes between 200 and 1000 watts.

Driver powering

As far as powering the drivers is concerned, woofers are basically passive subwoofers. External amplifiers are used to power the woofers and regular speakers as well.

However, with active subwoofers, you do not have to worry about where to connect the amplifier because it comes with the driver. The dedicated amplifier boosts the input signal strength for the best performance from the subwoofer.

The high frequencies can also be filtered out using an integrated crossover.

For the same reason, subwoofers are slightly more complicated to set up than woofers.

Conclusion

This question cannot be answered definitively since it depends on your needs. It would be best to have a subwoofer for the best bass effect for low-frequency sound.

With this sound system, you can enjoy the heart-pumping bass effects that you will find at parties. Due to its suitability for home theater systems, it is ideal for this type of system.  Due to its wider frequency range, a woofer is the most suitable option if you are trying to improve the overall quality sound of your audio system. Hence, it’s better for car audio.

FAQ’s


Can I use a subwoofer and a woofer together in my audio setup?

A: You can use a subwoofer and a woofer in your audio system for a more balanced and dynamic sound experience.

Which one is better, a subwoofer or a woofer?

A: It depends on your audio needs and preferences. If you want to reproduce low-frequency sounds accurate, a subwoofer would be better, while a woofer would be a good choice for overall sound performance.

Do I need a subwoofer or a woofer for my home theater system?

A: A subwoofer is highly recommended for home theater systems as it enhances the overall sound quality, especially for movies and music with heavy bass.

Q: Can a subwoofer replace a woofer?

A: No, a subwoofer cannot replace a woofer as they serve different purposes. A subwoofer is designed to reproduce low-frequency sounds, while a woofer handles a wider range of frequencies.

Q: What is the difference between a passive and an active subwoofer?

A: A passive subwoofer requires an external amplifier to power it, while an active subwoofer has a built-in amplifier. Active subwoofers are typically more convenient and easier to set up, while passive subwoofers offer more amplifier choice and customization flexibility. However, active subwoofers can be more expensive than their passive counterparts.


Categories
Projectors Informational

Projector Screen Above Fireplace

Safely Putting Projector Screen Above Fireplace

Are you looking to transform your living space into a cozy yet sophisticated home theater? Consider the allure of mounting a projector screen above your fireplace. Not only does it optimize space in smaller rooms, but it also adds a touch of elegance to your entertainment area. However, before diving into this installation project, it’s crucial to understand the process, risks, and safety measures involved to ensure a seamless and enjoyable viewing experience.

Can You Put A Projector Screen Above Fireplace?

Projector Screen Above Fireplace by hometheaterjournal.com

Absolutely! Mounting a projector screen above a fireplace is entirely feasible, but it requires careful consideration of various factors. While it offers numerous benefits, such as maximizing space and creating a focal point, there are inherent risks associated with this setup. However, by taking appropriate precautions and following recommended guidelines, you can mitigate these risks and create a safe and functional entertainment space.

The Risks Of Putting a Projector Screen Above a Fireplace

While the idea of mounting a projector screen above your fireplace may seem enticing, it’s crucial to be aware of the potential risks involved. Understanding these risks will help you make informed decisions and take necessary precautions to ensure the safety and longevity of your equipment.

1. Heat Damage

One of the primary concerns of placing a projector screen above a fireplace is the risk of heat damage. Fireplaces naturally emit heat, and if the screen is positioned too close, it may sustain damage over time. Prolonged exposure to heat can cause the screen material to warp, discolor, or even melt, rendering it ineffective and compromising image quality.

2. Image Distortion

The heat generated by the fireplace can create air currents or hotspots in the vicinity, leading to image distortion on the projector screen. These fluctuations in air temperature can result in a hazy or distorted image, affecting your viewing experience. Additionally, the performance of the projector itself may be impacted, leading to decreased color accuracy and image clarity.

3. Reduced Projector Lifespan

Exposing the projector to high temperatures from the fireplace can accelerate thermal degradation of internal components, potentially reducing its lifespan. Over time, this may result in decreased performance or premature failure of the projector. It’s essential to keep the projector within its recommended operating temperature range to ensure optimal performance and longevity.

4. Safety Hazards

Placing a projector screen above a fireplace also poses safety hazards, particularly if proper precautions are not taken. The risk of fire may increase if the projector or its cables come into contact with hot objects or if the screen is positioned too close to the fireplace. To mitigate these risks, adequate airflow and suitable safety equipment, such as heat shields or mantel-mounted deflectors, should be utilized.

5. Accumulation of Smoke and Soot

Fireplaces can emit smoke and soot particles into the air, which may accumulate on the projector screen if it is positioned nearby. This can result in a cloudy or dirty screen surface, diminishing image clarity and requiring frequent cleaning to maintain optimal viewing conditions.

6. Warping

The heat from the fireplace can cause the screen material to warp or deform, resulting in an uneven surface that compromises image quality. Additionally, warping may make it challenging to achieve a flat, smooth projection surface, detracting from the overall viewing experience.

7. Limited Viewing Angle

Placing the projector screen above the fireplace may impact the viewing angle for the audience, particularly if the screen’s height and placement are not adjusted accordingly. It’s essential to ensure that everyone has a comfortable and unobstructed view of the screen to enhance the viewing experience.

8. Interference with Fireplace Use

Installing a projector screen above the fireplace may interfere with its intended use, making it difficult to maintain or enjoy the warmth and ambiance of a fire. Adjustments may be required every time the fireplace is in use, potentially disrupting the overall viewing experience.

By being mindful of these risks and taking appropriate precautions, you can safely enjoy the benefits of a projector screen above your fireplace while minimizing potential hazards. Prioritizing safety and proper installation practices will ensure a seamless and enjoyable home theater experience for years to come.

How To Put A Projector Screen Above A Fireplace?

Embarking on the journey to install a projector screen above your fireplace requires careful planning and execution to ensure safety, functionality, and aesthetic appeal. Follow these step-by-step guidelines to successfully mount your projector screen in this unique location:

1. Choose the Correct Screen:

Begin by selecting the right projector screen for your space. Consider factors such as room size, viewing distance, and ambient light conditions. Opt for an ambient light rejecting (ALR) screen if your room receives natural light, as it helps improve image clarity and contrast. Additionally, ensure the screen size complements the dimensions of your room and fireplace area for an immersive viewing experience.

2. Securely Mount the Screen:

Once you’ve chosen the projector screen, it’s crucial to securely mount it above the fireplace. Use heavy-duty brackets or mounts that are compatible with your screen’s weight and dimensions. Locate and anchor the brackets to wall studs or ceiling joists to ensure stability and safety. Follow the manufacturer’s instructions carefully for proper installation, and ensure the screen is positioned at a safe distance from the fireplace to prevent heat damage.

3. Position the Projector:

Next, position the projector to achieve optimal image quality on the screen. Consider factors such as throw distance and angle, as specified by the projector manufacturer. Ensure the projector is placed at the correct height and angle to produce a crisp, bright image on the screen. Adjust the projector as needed to achieve the desired viewing experience, keeping in mind the audience’s seating arrangement and viewing angles.

4. Avoid Fireplace Usage with Screen Down:

It’s essential to avoid using the fireplace while the projector screen is lowered or in use. Operating the fireplace with the screen down can expose the screen to excessive heat, increasing the risk of damage or fire hazards. Retract or raise the projection screen whenever the fireplace is in use to ensure safety and prevent heat-related issues.

5. Consider Adding a Shelf or Mantle:

For added protection and aesthetics, consider installing a shelf or mantle between the fireplace and the projector screen. This provides a barrier against heat and helps shield the screen and other electronics from potential damage. Ensure there is sufficient space between the shelf or mantle and the screen to allow for adequate airflow and heat dissipation.

6. Ensure Proper Ventilation and Airflow:

Maintain adequate ventilation and airflow around the projector screen and fireplace area to prevent heat buildup and ensure optimal performance. Avoid blocking vents or obstructing airflow pathways, as this can lead to overheating and potential damage to electronic components.

Conclusion

While installing a projector screen above a fireplace presents its challenges, it can significantly enhance your home theater experience when done correctly. By understanding the risks involved and following recommended guidelines, you can create a visually stunning and functional entertainment space that you’ll enjoy for years to come.

So, why wait? Elevate your home theater experience today by installing a projector screen above your fireplace and immerse yourself in the magic of cinema from the comfort of your own home.

FAQs


Is it safe to mount a projector screen above a fireplace?

While it is possible to mount a projector screen above a fireplace, it’s crucial to take safety precautions. Ensure proper ventilation, maintain a safe distance between the screen and fireplace to prevent heat damage, and use suitable mounting hardware to secure the screen.

What type of projector screen is best for this setup?

The best type of projector screen depends on factors such as room size, ambient light conditions, and personal preferences. Consider options like standard screens or ambient light rejecting (ALR) screens, especially if your room receives natural light.

How should I position the projector for optimal performance?

Position the projector according to manufacturer recommendations, considering factors such as throw distance and angle. Aim for a crisp and bright image on the screen, ensuring that the projector is placed at the correct height and angle for optimal viewing.

Can I use the fireplace while the projector screen is down?

It’s generally advised to retract or raise the projector screen when using the fireplace to prevent heat damage. Operating the fireplace with the screen down can expose the screen to excessive heat, increasing the risk of damage or fire hazards.

What precautions should I take to protect the projector screen and equipment?

To protect the projector screen and other equipment, consider adding a shelf or mantle between the fireplace and the screen for added protection and aesthetics. Regularly clean the screen to maintain optimal image clarity, and ensure proper airflow to prevent overheating.

Categories
Soundbars Informational

Does a Soundbar Replace a Receiver

Does a Soundbar Replace a Receiver? Helpful Guide

In the ever-evolving world of home theater setups, the question of whether a soundbar can effectively replace a receiver is a common consideration.

As technology advances, so do the features embedded in soundbars, making them an attractive option for those looking to streamline their audio systems.

In this post, we’ll delve into the specifics of active and passive soundbars, discussing how they may or may not replace the traditional receiver.

Active Soundbars: 

Active soundbars have emerged as a self-contained audio solution, incorporating both surround sound processing and amplifiers within a single unit.

This integration simplifies the setup process, as users only need to connect the soundbar to the TV through the component outlet. The appeal lies in the reduction of bulk and the elimination of excessive wiring, making active soundbars an attractive option for those with space constraints or a preference for a minimalist home theater design.

How Active Soundbars Replace Receivers:

Replacing a traditional receiver with a soundbar involves understanding the features and capabilities of both devices. Below is a detailed explanation of how exactly a soundbar can replace a receiver, focusing on the functionalities of active soundbars, which come equipped with built-in surround sound processing and amplifiers.

1. Active Soundbars as Self-Contained Units:

  • Built-in Surround Sound Processing: Active soundbars are designed with integrated surround sound processing capabilities. This means they can decode and process audio signals to create a simulated surround sound experience without the need for an external receiver. This is particularly advantageous for users seeking a simple and compact audio solution.
  • Amplification within the Soundbar: Active soundbars also feature built-in amplifiers. These amplifiers power the speakers within the soundbar, eliminating the requirement for a separate receiver to handle the amplification process. This self-contained design reduces the number of components in the audio setup.

2. Simplified Setup Process:

  • Connection to the TV: Active soundbars typically connect directly to the television through a designated component outlet. This streamlined setup process eliminates the complexities associated with wiring and configuring a separate receiver. Users can enjoy enhanced audio without the need for extensive technical knowledge or additional equipment.
  • Reduced Bulk and Wiring: One of the key advantages of using an active soundbar as a receiver replacement is the reduction in bulk and the elimination of excessive wiring. Traditional surround sound systems often involve multiple speakers, a receiver, and intricate wiring. With an active soundbar, the entire audio solution is consolidated into a single unit.

3. Compatibility Considerations:

  • Limitations with External Speakers: While active soundbars excel at providing an all-in-one audio solution, they may have limitations when it comes to compatibility with external speakers. These soundbars are optimized to work seamlessly with their built-in speakers, and connecting additional speakers may require careful consideration of matching ports and compatibility.
  • Alternative Options for Surround Sound: In cases where users desire a more expansive surround sound setup with external speakers, alternative options such as digital surround sound speakers or a traditional receiver-based system may be more suitable. Researching the soundbar’s specifications is crucial to ensure compatibility with external components.

4. Pros and Cons of Using a Soundbar as a Receiver:

Pros:

Fewer Wires and Streamlined Design: Active soundbars contribute to a cleaner aesthetic with fewer visible wires.

Cost-Effective: For users needing both a receiver and a passive soundbar, opting for an active soundbar can be more cost-effective.

Achievable Digital Surround Sound: Active soundbars can deliver a convincing digital surround sound effect using a single speaker.

Cons:

Potential Higher Cost: Active soundbars may carry a higher upfront cost compared to entry-level receivers.

Sound Quality Discrepancies: The audio quality from a single soundbar may not match the immersive experience of a full surround sound speaker setup.

Amplifier Quality: Receivers often house superior amplifiers, impacting overall audio performance.

Considerations for Using a Receiver with a Soundbar:

Using a soundbar alone can be an excellent solution for many home audio setups, providing a streamlined and space-efficient alternative to traditional receiver-based systems. However, there are certain scenarios where incorporating a receiver into your setup remains essential. Understanding when you might need a receiver with a soundbar involves considering various factors, including the type of soundbar, audio preferences, and the desire for a more expansive audio experience.

Passive Soundbars:

  • Multiple Channels: Passive soundbars often come with multiple channels, such as the center, left, and right channels. Each channel may have one or more speakers, and these channels require connections to a receiver. If you opt for a passive soundbar, a receiver becomes a necessary component to process and distribute the audio signals to the respective channels.
  • External Amplification: Passive soundbars lack built-in amplifiers, relying on an external amplifier or receiver to power the speakers. In this case, a receiver is not just a convenience but a requirement for the proper functioning of the sound system.

Enhanced Surround Sound Systems:

  • Expanding the Audio Setup: If you have a vision of expanding your audio setup beyond a single soundbar, incorporating additional speakers for a more immersive surround sound experience, a receiver becomes crucial. A receiver is designed to manage and distribute audio signals to multiple speakers, optimizing the synchronization of sound elements in a multi-channel setup.
  • Speaker Compatibility: Receivers provide the necessary connections and compatibility for a diverse range of speakers. If you plan to integrate rear speakers, a subwoofer, or even overhead speakers for a Dolby Atmos setup, a receiver is the central hub that can accommodate these components.

Customization and Fine-Tuning:

  • Audio Processing Capabilities: Receivers typically offer advanced audio processing capabilities that can enhance the overall sound quality. They may include features like room calibration, equalization, and various sound modes. If you seek a high level of customization and fine-tuning to match your preferences and room acoustics, a receiver provides the necessary controls.
  • Diverse Audio Sources: Receivers often come equipped with multiple input ports, allowing you to connect various audio sources such as Blu-ray players, gaming consoles, streaming devices, and more. This flexibility is particularly valuable if you have a diverse range of entertainment devices in your setup.

Maintaining Sound Quality Consistency:

  • Matching Sound Characteristics: When using a soundbar as the center channel speaker in conjunction with other speakers connected to a receiver, achieving consistency in sound characteristics becomes a consideration. The amplifiers within a receiver are often of higher quality compared to those in soundbars, ensuring a more balanced and cohesive audio output across all channels.
  • Avoiding Interference: Using two amplifiers simultaneously, such as the one in the soundbar and the one in the receiver, may lead to interference and potential audio quality issues. In such cases, relying on the receiver for amplification can help maintain a clean and interference-free audio signal.

In summary, the need for a receiver when using a soundbar primarily arises when dealing with passive soundbars, expanding your audio setup, seeking advanced customization options, or aiming for a more comprehensive surround sound experience. Assessing your specific requirements and long-term audio goals will guide whether a receiver is an essential component in your home theater setup.

Conclusion

In the dynamic landscape of home audio, the decision to replace a receiver with a soundbar hinges on individual preferences, space considerations, and the desired audio experience. While active soundbars offer a sleek, all-in-one solution, users must carefully weigh the potential drawbacks, such as limited compatibility and potential disparities in sound quality.

Passive soundbars, on the other hand, provide a cost-effective avenue for users with existing receivers, emphasizing the nuanced decision-making process in crafting the ideal home theater setup.

As technology continues to advance, the choice between a soundbar and a receiver reflects the evolving needs and preferences of audio enthusiasts.

FAQs | Does a Soundbar Replace a Receiver


Can an active soundbar replace a traditional receiver in a home theater setup?

Answer: Yes, active soundbars can replace traditional receivers for users seeking a streamlined audio solution. They come equipped with built-in surround sound processing and amplifiers, simplifying the setup process and reducing the need for additional components.

What are the advantages of using an active soundbar as a receiver replacement?

Answer: Active soundbars offer a cleaner aesthetic with fewer visible wires, a cost-effective solution for users needing both a receiver and a passive soundbar, and the ability to achieve convincing digital surround sound effects using a single speaker.

When might a receiver be essential when using a soundbar, especially for passive soundbars?

Answer: A receiver becomes essential when dealing with passive soundbars that lack built-in amplifiers, require connections to external amplifiers or receivers, or when users plan to expand their audio setup with additional speakers for a more immersive surround sound experience.

What considerations are crucial when integrating external speakers with an active soundbar?

Answer: Users should be cautious about compatibility when connecting external speakers to active soundbars. While active soundbars excel as all-in-one solutions, additional speakers may have compatibility limitations, requiring careful consideration of matching ports and specifications.

How does a receiver contribute to maintaining sound quality consistency in a home theater setup?

Answer: Receivers offer higher-quality amplifiers compared to those in soundbars, ensuring balanced and cohesive audio output across all channels. They are essential for managing multiple speakers, providing advanced audio processing capabilities, and avoiding interference that may arise from using multiple amplifiers simultaneously.


Categories
Soundbars Informational

How to Connect Echo Dot to Soundbar

How to Connect Echo Dot to Soundbar | Different Methods

Bluetooth or an AUX (3.5mm) cable can be used to connect an Echo Dot to a soundbar. Connecting with either of these options takes only a few minutes, and both types are simple to set up.

In addition to listening to hands-free music, audiobooks, alarms, information, and more via Echo Dot, when connected to your soundbar, you’ll also have access to a robust set of speakers to enjoy your entertainment. What could be better than that?

How to Connect Echo Dot to Soundbar: Different Methods

There are two ways to connect your Echo Dot to a soundbar: wirelessly or with a wire. Bluetooth via WiFi is the best way to make a wireless connection. An AUX (3.5mm) cable can be used if you want to connect wired.

For more detailed instructions on using smart home devices like Google Home Max as a soundbar alternative, refer to this informative guide How to Use Google Home Max as a Soundbar.

Most soundbars generally come with Bluetooth or an AUX Out port to connect your Echo Dot and soundbar with these methods.

Bluetooth Connection: How to Do It

How To Connect Echo Dot To Soundbar by hometheaterjournal.com

Echo Dots can connect to Bluetooth-enabled soundbars via Bluetooth, provided they are Bluetooth-enabled. Since most soundbars have this feature, your Echo Dot will be easily connected to your soundbar. You can get started by following these steps:

  1. Connect your Dot to your home WiFi network and ensure its settings are correct
  2. Activate Bluetooth pairing on your soundbar
  3. On your smartphone, open the Amazon Alexa app
  4. Choose ‘Settings’ from the main menu
  5. Click on ‘Device Settings
  6. You can search by name for your Echo Dot
  7. If a current Bluetooth pairing is present, select ‘Bluetooth.’
  8. Your soundbar appears once you select ‘Pair a New Device.’
  9. To pair your sound bar, you must first choose it.

Your Echo Dot will then be able to connect wirelessly via Bluetooth to your soundbar after this process has finished. As long as your soundbar is on and connected to your network, your Echo Dot will function as your speaker.

It follows the same process if you want to disconnect your wireless connections to your Dot and soundbar:

  1. Using your phone, open the Alexa app
  2. Then, select ‘Settings’ from the ‘Main Menu
  3. Click on ‘Your Devices’
  4. Enter the name of your Echo Dot
  5. You can view your current Bluetooth pairings by selecting ‘Bluetooth.’
  6. Select your soundbar and click ‘Forget Device’ to remove it.

Using this method, you can take your Echo Dot and any other Bluetooth-enabled device off the same Bluetooth network.

Connecting via AUX (3.5mm) cable

How To Connect Echo Dot To Soundbar by hometheaterjournal.com

AUX (3.5mm) cables can also be used to connect Echo Dots to your soundbar. Due to their AUX output ports, Dots are compatible with most soundbars. A soundbar and Dot can be connected wired if they’re close to each other (or if you have an AUX cable long enough).

How to wire your AUX cable for a wired connection:

  1. Make sure you have an AUX cord that fits 3.5mm. It should be a good length
  2. On your smartphone, open the Amazon Alexa app
  3. Go to the Settings menu and select ‘Devices.’
  4. Click on the name of the Dot you want to select
  5. Choose the ‘AUX Audio’ option and then choose the ‘Line In’ or ‘Line Out’ option.
  6. Connect your AUX cord to them if you have a soundbar and an Echo.

If your soundbar and Echo Dot are powered on, you can start streaming and listening to music on your Echo Dot using your AUX cord (3.5mm). If your soundbar’s AUX cable is disconnected, you can use another device to listen to your Echo Dot.

How do I connect a Soundbar with a Digital Optical Input?

How To Connect Echo Dot To Soundbar by hometheaterjournal.com

You may wonder if you can use your soundbar’s digital optical input if your soundbar doesn’t have AUX input, as with the higher-end Sonos Playbar (on Amazon), which is discussed more below.

If you want to connect devices to your TV, using the same inputs is best, as there is a big difference between AUX audio and digital optical audio. You may receive a less-than-satisfactory sound quality if you connect an AUX to an optical audio input.

Auxiliary inputs support analog audio connections, and digital optical inputs support digital audio connections. Signals transmitted digitally and analogically are totally different. The difference between an analog and digital signal is that the former is continuous, and the latter is not.

This connection can be made with the help of cables. In either scenario, Bluetooth would be the best option. In the case of no Bluetooth connection, you can use an AUX to the optical digital cord, or you can find another Echo Dot speaker.

Some Soundbars have Alexa Built-in.

As the service has become more popular, many soundbars now come equipped with Amazon Alexa. Alexa is integrated into some soundbars, while others claim to be Alexa-compatible. Amazon Alexa can also be accessed through your Echo Dot and your soundbar by itself.

For further insights into selecting the right soundbar, especially when pairing it with a projector, check out this comprehensive guide Best Soundbar for Projector.

Bose Soundbar 700

A quality choice in the high-end price range is the Bose Soundbar 700. A wide range of capabilities is included, including Alexa and Google Assistant. In addition to its sleek design and two color options (white or black), this player supports high-quality audio, including Dolby Digital and DTS.

Bose Soundbar 700 is available on Amazon.

Sonos Beam

A top-of-the-line soundbar from Sonos, the Beam includes built-in Amazon Alexa, making it one of the best soundbars on the market. As you would expect from Sonos, it has a compact design and excellent sound quality. Easy to use and minimalistic. On Amazon, you can purchase the Sonos Beam.

Yamaha YAS-209

In addition to soundbars, Yamaha also makes built-in soundbars with Alexa, and the Yamaha YAS-209 is among its best soundbars. You can place the wireless subwoofer anywhere you want on the Yamaha YAS-209 for extra deep bass.

The price point is also reasonable for a product of this quality. As well as enhanced dialogue clarity and 3D surround sound, it has DTS Virtual:X surround sound. Yamaha YAS-209 is available on Amazon.

Conclusion

Once you have an AUX input or Bluetooth pairing option on your soundbar, you can connect your Echo Dot. You can improve Dot’s low-power speaker with both speakers powered on and connected to the Echo Dot.

FAQ’s


Can I connect my Echo Dot to any soundbar?

Yes, you can connect your Echo Dot to any soundbar with an HDMI, optical, or auxiliary input. However, make sure to check the soundbar’s user manual for specific instructions on how to connect external devices.

Do I need any additional equipment to connect my Echo Dot to a soundbar?

In most cases, you won’t need any additional equipment to connect your Echo Dot to a soundbar. However, if your soundbar doesn’t have an HDMI, optical, or auxiliary input, you may need a converter or adapter to make the connection.

Can I use my voice to control my soundbar with my Echo Dot?

Yes, if your soundbar is compatible with Alexa, you can use your voice to control it with your Echo Dot. Simply enable the soundbar’s Alexa skill, and you can adjust the volume, change the input, and perform other functions with your voice.

What should I do if my Echo Dot isn’t connecting to my soundbar?

If your Echo Dot isn’t connecting to your soundbar, try resetting both devices and checking all the connections. Ensure you’re using the correct input on your soundbar and that your Echo Dot is set up properly. If you’re still having trouble, consult the user manual or contact the manufacturer for assistance.

Can I connect multiple Echo Dots to the same soundbar?

Yes, you can connect multiple Echo Dots to the same soundbar if it has multiple inputs. However, you’ll need to switch inputs manually or use a device like a Harmony Hub to control them simultaneously.


Categories
Soundbars Informational

Does a soundbar need a subwoofer

Does a soundbar need a subwoofer? | Helpful Guide

In the ever-evolving realm of home entertainment, soundbars have emerged as a popular choice for enhancing the audio experience, especially when paired with flat-screen TVs.

The question that often arises in the minds of consumers is whether a soundbar needs a subwoofer to deliver an optimal audio experience.

In this comprehensive guide, we’ll delve into the intricacies of soundbars, and subwoofers, and help you decide whether investing in a subwoofer is the right choice for you.

Soundbars

A soundbar, essentially a compact speaker system, serves as a sleek and efficient upgrade to a TV’s built-in speakers. Available in various configurations, from 2.0 to 7.1.6 and beyond, soundbars aim to create a surround sound experience. 

They are not only compatible with smart home devices but can also support advanced technologies like Dolby Atmos, making them a versatile choice for home theaters or entertainment rooms.

Soundbar ConfigurationChannelsExplanation
2.02Stereo sound with left and right speakers. No dedicated subwoofer.
2.12Stereo sound with left and right speakers. Includes a dedicated subwoofer for enhanced bass.
3.03Three speakers (left, center, and right) for improved dialogue clarity and stereo effect. No dedicated subwoofer.
3.13Three speakers (left, center, and right) with a dedicated subwoofer for enhanced bass.
5.15Five speakers (left, center, right, and two surround speakers) with a dedicated subwoofer for a true surround sound experience.
7.17Seven speakers (left, center, right, two surround speakers, and two rear surround speakers) with a dedicated subwoofer for an extended surround sound experience.
7.1.27Seven speakers (left, center, right, two surround speakers, and two rear surround speakers) with two overhead speakers for Dolby Atmos. Includes a dedicated subwoofer.
7.1.47Seven speakers (left, center, right, two surround speakers, and two rear surround speakers) with four overhead speakers for an advanced Dolby Atmos setup. Includes a dedicated subwoofer.
7.1.67Seven speakers (left, center, right, two surround speakers, and two rear surround speakers) with six overhead speakers for an immersive Dolby Atmos setup. Includes a dedicated subwoofer.

Subwoofer

While soundbars are designed to enhance audio on their own, subwoofers play a crucial role in reproducing low-frequency sounds that many soundbars may not fully capture. Subwoofers are responsible for delivering deep bass, adding richness to music and providing a cinematic thump to movie soundtracks.

They come in various sizes, including wireless options, offering flexibility in placement and reducing the stereotypical bulk associated with traditional subwoofers.

When Do You Need a Subwoofer?

The decision to include a subwoofer in your setup depends on your priorities and preferences. If you seek a truly immersive sound experience, especially for bass-heavy music or cinematic adventures, a subwoofer is highly recommended. 

1. Assess Your Audio Preferences: If you enjoy genres like hip-hop, EDM, or action-packed movies, a subwoofer can significantly enhance your experience by delivering powerful and deep bass.

2. Check Your Current Sound System: Some speakers and soundbars come with built-in subwoofers or advanced bass technologies. Check your current system’s specifications to see if it already caters to your bass preferences.

3. Evaluate Room Size: Larger rooms may benefit from a subwoofer to ensure even bass distribution. Assess your room size and layout to determine if a subwoofer would improve the overall sound experience.

4. Identify Your Activities: If you’re an avid gamer, movie enthusiast, or music lover, a subwoofer can add an immersive element to your activities by reproducing impactful low frequencies.

5. Budget Considerations: Subwoofers come in various price ranges. Evaluate your budget and explore options that align with your financial considerations. There are both high-end and budget-friendly subwoofers available.

6. Explore Soundbar Capabilities: If you have or plan to get a soundbar, research its features. Premium soundbars, like the Bose Smart Soundbar 700 or Sonos Playbar, often provide impressive bass without the need for an external subwoofer.

7. Listen to Your System: Pay attention to your current audio system’s performance. If you feel that it lacks the depth and richness in low frequencies, a subwoofer could be the missing piece.

8. Consider Room Acoustics: Room acoustics can affect bass response. Experiment with subwoofer placement to optimize its performance in your specific room, ensuring an even and immersive sound experience.

9. Wireless Options: If you’re concerned about cables, consider wireless subwoofers. They provide flexibility in placement and simplify the installation process.

10. Personal Listening Tests: Conduct personal listening tests with and without a subwoofer if possible. This hands-on experience will help you make an informed decision based on your specific audio preferences.

However, there are soundbars in the market that boast impressive low-frequency reproduction even without an external subwoofer. If budget constraints are a consideration, these standalone soundbars might be a suitable choice for those looking for a more economical sound system.

Where to place subwoofer with soundbar

For those opting for a subwoofer, proper placement is crucial to achieving an optimal surround sound experience. Whether wired or wireless, subwoofers are commonly placed next to the TV or on an entertainment stand. 

In larger rooms, strategic placement in corners or behind seating areas can enhance the overall effect. Some subwoofers even offer mounting options or can be placed on high shelves for a vertical surround sound experience.

How to connect a Subwoofer to a Soundbar

The connection between a soundbar and a subwoofer is a straightforward process. In a wired setup, a cord connects the subwoofer to the soundbar’s output. 

Wireless subwoofers can be linked to the soundbar via Bluetooth, providing a seamless and hassle-free setup. Compatibility between the soundbar and subwoofer is essential, whether purchased together or separately.

Top Soundbars without Subwoofers:

Bose Smart Soundbar 700

The Bose Smart Soundbar 700 (on Amazon) is a premium Bluetooth soundbar that boasts exceptional audio quality. With its emphasis on clear and immersive sound, this soundbar has been engineered to deliver a rich audio experience without the need for an external subwoofer.

Its premium design and built-in Alexa voice control contribute to an all-encompassing audio experience, making it a stand-alone solution for users who prioritize simplicity without compromising on sound quality.

Sonos Playbar

The Sonos Playbar (on Amazon) is a versatile soundbar designed for TV, movies, music, and more. Known for its mountable design, the Playbar offers flexibility in placement, and it excels in providing clear dialogue and detailed audio.

While the Playbar delivers impressive sound on its own, it does not come with a dedicated subwoofer. However, users have the option to integrate it into a broader Sonos speaker system, providing an opportunity to enhance bass performance by adding a separate Sonos Sub if desired.

SENNHEISER AMBEO Soundbar Max:

The SENNHEISER AMBEO Soundbar Max (on Amazon) is a top-tier soundbar that aims to replicate a true cinematic audio experience. With its 5.1.4 channel configuration and support for Dolby Atmos technology, the AMBEO Soundbar Max is designed to provide immersive 3D sound.

Unlike many traditional soundbars, this premium offering from Sennheiser incorporates advanced audio technologies and a sophisticated speaker setup, minimizing the need for an external subwoofer. The AMBEO Soundbar Max is engineered to deliver deep bass frequencies, making it a comprehensive sound solution on its own.

In summary, while the Bose Smart Soundbar 700 and the SENNHEISER AMBEO Soundbar Max are designed to offer a robust sound experience without the necessity of an additional subwoofer, the Sonos Playbar provides users with the option to enhance bass performance by integrating it into a broader Sonos speaker system that includes a dedicated subwoofer if desired.

Conclusion

In the debate over whether a soundbar needs a subwoofer, the answer ultimately depends on your audio preferences and budget considerations. While subwoofers undoubtedly contribute to a fuller and more immersive sound experience, advancements in soundbar technology have led to standalone options that impress without additional components.

Whether you choose a soundbar with a built-in subwoofer or explore the growing selection of standalone soundbars, the key is to tailor your audio setup to meet your specific needs and preferences.

FAQs


1. Does the Bose 900 Soundbar Need a Subwoofer?

Answer: The Bose 900 Soundbar is equipped with an impressive speaker array that includes built-in bass modules to deliver deep and impactful low frequencies.

Bose has engineered this soundbar to provide a well-rounded and immersive audio experience without the need for an external subwoofer. Therefore, the Bose 900 Soundbar is designed to function optimally as a standalone audio solution.

2. Does Bose Soundbar 600 Need a Subwoofer?

Answer: Similar to the Bose 900 Soundbar, the Bose Soundbar 600 (on Amazon) is designed to offer a comprehensive audio experience without requiring an additional subwoofer.

With its built-in speakers and advanced audio technology, the Bose Soundbar 600 is capable of reproducing deep and rich bass frequencies. Users can enjoy a full-range sound without the necessity of investing in a separate subwoofer, making it a convenient and space-efficient solution for home entertainment setups.

3. Can I use a soundbar without a subwoofer for a home theater setup?

Answer: Yes, many soundbars, including premium models like the Bose Smart Soundbar 700 and the Sonos Playbar, are designed to create an immersive surround sound experience without requiring an external subwoofer. These soundbars utilize advanced speaker configurations and technologies to deliver satisfying low-frequency performance.

4. Does a soundbar need a subwoofer to deliver optimal bass?

Answer: While soundbars can produce quality sound on their own, a subwoofer enhances the low frequencies, providing a fuller and more immersive audio experience. Some soundbars, especially those with built-in or optional subwoofers, offer robust bass without the need for an additional unit.

5. Are there soundbars that deliver impressive bass without a separate subwoofer?

Answer: Yes, some soundbars on the market, such as the Sennheiser AMBEO Soundbar Max (on Amazon), are engineered to provide immersive low-frequency reproduction without the need for an external subwoofer. These soundbars utilize advanced speaker technology and configurations to achieve a well-balanced and impactful sound profile.


Categories
Projectors Informational

How to Reset NEC Projector Lamp Without Remote

How To Reset NEC Projector Lamp without Remote | Step-by-Step Guide

Resetting the lamp on a NEC projector without a remote may seem like a daunting task, but fear not – it’s entirely doable, and I’m here to guide you through the process.

NEC projectors are indeed marvels of technology, but they require some TLC, including occasional lamp resets. So, let’s embark on this journey of resetting your NEC projector’s lamp without a remote.

How To Reset NEC Projector Lamp without Remote

How To Reset NEC Projector Lamp Without Remote by hometheaterjournal.com
  • Power Up the Projector
  • Access the Menu
  • Navigate to the “Default” Option
  • Submenu Unveiled
  • Lamp Hours or Hour Meter
  • Clear the History
  • Wait for the Magic
  • Exit the Menu

1. Power Up the Projector: 

To begin, ensure your NEC projector is powered on and in a functional state. It’s crucial that it’s running before you attempt to reset the lamp.

2. Access the Menu: 

Your trusty projector will have a control panel or buttons for navigation. What you need to do now is locate the “Menu” button and press it. This button opens up a treasure chest of options and settings on the projector’s screen.

3. Navigate to the “Default” Option: 

Once inside the menu, scroll down through the options until you find “Default.” This is the gateway to resetting your lamp timer.

4. Submenu Unveiled: 

Upon selecting the “Default” option, patiently wait for the submenu to grace your projector’s screen. This submenu is where the magic happens.

5. Lamp Hours or Hour Meter: 

Within this submenu, you’ll want to find an option related to either “Lamp Hours” or “Hour Meter.” This is where the projector keeps track of how long your lamp has been burning bright.

6. Clear the History: 

Highlight the “Lamp Hours” or “Hour Meter” option and select it. You should find an option to clear or reset the lamp timer. Go ahead and confirm your selection and initiate the history-clearing process.

7. Wait for the Magic: 

After you’ve given the command to reset the lamp timer, sit back and relax for a few moments. The projector will work its internal wizardry, and you’ll likely see a message on the screen confirming that the reset is complete.

8. Exit the Menu: 

Your task is almost complete. Navigate down to the “ESC” or “Exit” option in the menu and select it. This is your cue to gracefully exit the menu, returning you to the projector’s main screen, now with a freshly reset lamp timer.

Great job! You’ve successfully reset the lamp timer on your NEC projector without needing a remote control.

However, do keep in mind that the menu options and their locations may vary depending on the specific model of your NEC projector. Some projectors might feature a “Reset Lamp” or “Reset Lamp Hours” option instead of “Lamp Hours” or “Hour Meter.” Don’t let this confuse you; the end goal is the same – to clear the history of your lamp’s usage.

What do you need to do before resetting?

Before you embark on this journey, there are a couple of key points to remember:

1. Operational Projector: 

Your NEC projector needs to be up and running before you initiate the lamp reset. It won’t work if the projector is turned off.

2. Timing Is Everything: 

Reset the lamp timer only when the lamp is either expired or displaying signs of failure. Look out for indicators such as warning lights, lamp failure, or poor color quality. This is the signal that it’s time to replace and reset the lamp.

3. New Lamp Installed: 

The resetting procedure should ideally be performed after you’ve replaced the lamp with a new one. It ensures that the timer accurately reflects the new lamp’s usage.

Conclusion

In summary, resetting the lamp timer on your NEC projector without a remote is a straightforward process, as long as you follow the steps mentioned above.

Turn on your projector, access the menu, locate the lamp hours or hour meter option, clear the history, and you’re good to go. Happy projecting!

FAQs


1. How often should I reset the lamp timer on my NEC projector?

The lamp timer on your NEC projector should be reset only when the lamp is either expired or displaying signs of failure. Look for indicators such as warning lights, lamp failure, or poor color quality. Typically, this happens when you replace the lamp with a new one.

2. Can I reset the lamp timer on my NEC projector while it’s turned off?

No, you should reset the lamp timer when the projector is turned on and in a functional state. It won’t work if the projector is turned off or in standby mode.

3. What if my NEC projector model has different menu options for lamp timer reset?

NEC projector models may have variations in their menu options. Some may feature “Reset Lamp,” “Reset Lamp Hours,” or “Lamp Hours,” while others may have “Hour Meter.” Regardless of the specific option, the goal is the same – to clear the history of the lamp’s usage.

4. How do I know when it’s time to reset the lamp timer on my NEC projector?

It’s time to reset the lamp timer when you notice warning lights, lamp failure, or a decrease in color quality during projector operation. These are signs that the lamp has reached the end of its useful life and should be replaced.

5. Can I reset the lamp timer on my NEC projector using the projector’s remote control?

Yes, you can often reset the lamp timer using the projector’s remote control if it’s available and compatible with your model. Check your projector’s user manual for instructions specific to your remote control.


Categories
Subwoofer Informational

Subwoofer vs Speaker

Subwoofer vs Speaker: 13 Key Differences and How to Choose?

Would it be necessary to add subwoofers to your pair of speakers? Do these components look similar? Whether you use a pair of speakers or a subwoofer along with the receiver, audio is reproduced as soon as it is connected to it. Subwoofers and regular speakers indeed have some key differences. 

A subwoofer differs from a speaker only in terms of the frequency range. Subwoofers handle Lower frequencies, also called sub-bass responses, while speakers handle higher frequencies.

You should know about a few other subwoofer features and their frequency ranges.

Differences Between Subwoofers And Speakers

Subwoofers and speakers produce audio, but from now on, there is no connection between them. It will be difficult for regular speakers to handle heavy bass and sub-bass. They are used in computers and televisions because they respond to mid-range and high-range frequencies. The components are suitable for producing voices, but you will notice something lacking if you listen to music.

Subwoofers are necessary for hearing the lower frequencies. Most music genres require deep bass to create a balanced sound, so subwoofers are designed for this purpose. A key difference between speakers and subwoofers is that you can only use speakers with subwoofers.

Related: Subwoofer vs Woofer | Which one is better?

Subwoofer vs Speaker

AspectSubwooferSpeaker
PurposeEmphasizes low-frequency bass sounds.Reproduces a wide range of audio frequencies.
Frequency RangePrimarily handles frequencies below 200 Hz.Handles a broader frequency range, including mid and high frequencies.
Sound QualityFocuses on deep and powerful bass output.Provides balanced audio across various frequencies.
SizeGenerally larger and heavier due to the larger drivers and enclosure needed for bass production.Smaller and lighter, especially for satellite or bookshelf speakers.
ComponentsTypically equipped with larger woofers (subwoofers) designed to move a lot of air for bass production.Can have woofers, tweeters, and mid-range drivers for a full frequency spectrum.
Audio ImpactEnhances the overall audio experience by adding depth and impact, especially in movies and music with heavy bass.Provides detailed sound reproduction and clarity for a wide range of content.
PlacementOften placed on the floor or in corners to take advantage of room acoustics.Can be placed on shelves, mounted on walls, or integrated into various audio setups.
Ideal Use CasesHome theaters, music production studios, EDM events, and situations where deep bass is essential.General audio playback, home theater setups, and music listening where balanced sound is key.
Standalone or ComboUsually used in combination with speakers for a complete audio setup.Can be standalone speakers or used alongside subwoofers to create a fuller sound.
CrossoverTypically requires a crossover to ensure proper distribution of frequencies between the subwoofer and other speakers.Can have built-in crossovers to separate and direct frequencies to different drivers within the speaker.
PowerRequires a dedicated amplifier to provide sufficient power for bass reproduction.Can be powered by regular amplifiers, A/V receivers, or even directly from some audio sources.
Price RangeCan range from moderate to high, especially for high-quality and specialized subwoofers.Varied price range depending on factors like brand, features, and audio quality.
PortabilityLess portable due to size and weight.More portable, especially smaller bookshelf or portable speakers.

Subwoofers

In most cases, the price of a subwoofer is a function of its frequency range. Subwoofers are designed for one thing, which is to produce lower frequencies. There is a price premium for professional subwoofers, but has lower frequency ranges. Less expensive subs can reproduce most types of music with frequencies between 20Hz and 200Hz.

A vent or port for the audio in the wood casing usually protects the sensitive component. Passive and active subs are also available. An active subwoofer is equipped with an amplifier, which differentiates them from passive subwoofers. It’s more expensive than passive systems but can improve sound quality.

Audio quality can be greatly improved by adding a subwoofer. Because the subwoofer can handle lower frequencies, this frees up the speakers to concentrate on producing mid and high frequencies. This is where they are more suited by default.

The sound will sound clearer, crisper, and fill more of the ‘sonic image.’ The difference between higher-grade speakers won’t be discernible to most casual listeners, but a high-quality subwoofer has a lower frequency range that is easier to hear. 

Advantages

When it comes to sound systems, adding a subwoofer has various advantages.

  • Since the speaker strain is reduced, the bass is deeper, and the midrange sound is improved.
  • All frequencies are improved overall.
  • Using a subwoofer can turn up the volume without distorting your speakers.
  • Audio from a subwoofer tends to be sharper and clearer than from full-range speakers since it focuses on a separate frequency range.

Disadvantages

The components of subwoofers can still cause some problems, even though they improve sound quality.

  • A subwoofer cannot be used on its own. A speaker must be connected for it to work.
  • There can be problems with sound quality when subwoofers are not well-designed. Even setting them up can be difficult.

Speakers

Most TVs, computers, and smartphones have speakers. Passive and active speakers are both types of subwoofers. In contrast to passive speakers, active speakers are equipped with an amplifier. An amplifier also requires an external power source to power the speaker or subwoofer.

Both types of speakers produce a quality sound. There is no difference in the intensity or clarity of sound produced by high and low frequencies on speakers. Instruments and sounds within this range will be more pronounced as the lower frequencies are muted or barely audible.

When it comes to speakers, you can often only find them in pairs, unlike subwoofers, which come in singles. In contrast to mono sound, which comprises one speaker, surround stereo sound comprises two speakers, left and right. You can create surround sound by adding a subwoofer.

Advantages

It starts with the price, which is one of the advantages of speakers.

Subwoofers can be expensive, even when replaced by factory-installed speakers.

In addition, a regular pair of speakers will still be able to reproduce most frequencies, but you will hear less bass.

You might not need a subwoofer if you use your speakers for certain purposes or if the music style differs.

Disadvantages

Quality speakers have very few downsides, so long as you use them.

Firstly, deep bass won’t sound as good since speakers produce higher-range frequencies.

Low-frequency sounds can appear muffled, fuzzy, muddy, or unclear when speakers transmit lower-range frequencies.

It is also important to note that a loud volume can cause distortion or “clipping.”

How Subwoofers Work with Speakers

You will notice an immediate improvement in sound quality when subwoofers are used along with speakers. Because subwoofers handle lower frequencies, the speakers don’t have to worry about them. Thus, you will be able to focus the power of your speakers on the midrange and high-range frequencies.

How to Setup Subwoofers

It is not uncommon for people to put together subwoofers without much trouble, regardless of whether they have decided that the optimal quality of their audio depends on these devices or they want to hear more of the frequency spectrum. If you want the audio to sound perfect, you must do a little fine-tuning, but connecting the components shouldn’t take too long.

Subwoofer connections

Your home theater receiver can connect directly to the subwoofer. A cable is connected to both the output and input of the receiver and the subwoofer. A speaker cable will be needed if your receiver does not have an output for subwoofers. Speakers are connected to the subwoofer, and the receiver is connected to the subwoofer.

There are likely to be diagrams illustrating the various setup options that came with the subwoofer to make it easier to set up. If not, research is another way to ensure your subwoofers and speakers are set up properly.

For a comprehensive guide on how to wire a dual voice coil subwoofer and optimize your audio setup. Explore step-by-step instructions and tips to ensure proper wiring for a dual voice coil subwoofer, enhancing your overall home theater experience.

Subwoofer adjustment

It is common for subwoofers to have more than two dials, although models sometimes have more dials when they are more expensive. You must locate the dials on the control panel’s volume and crossover frequencies. For the subwoofers to produce their highest ranges, the crossover frequency determines what frequency will be used for those subwoofers. If you are trying to get the range to be “exactly right,” you must spend some time playing around with the dial.

A subwoofer’s connection to a component will also affect where you set the crossover frequency. A trial-and-error approach is needed when adjusting the volume. If you are still determining what sound to seek, try adjusting the volume in the middle and moving it up and down until you are satisfied.

How to Test Audio Quality

Testing audio quality will follow the connection and fine-tuning of the subwoofer. Subwoofer placement will also have an impact on this. To prevent the subwoofer from being muted by furniture, knick-knacks, or other components in the room, it is necessary to ensure that any of these doesn’t block it, as this will mute the sound regardless of how optimal the crossover frequency and volume are.

If you need to check the audio’s sound quality, sitting where you like to listen to music is a good idea. A broad range of frequencies is also important when playing music. Musicians, including double bassists, cellists, and violinists, who cover a variety of frequencies in classical music, recommend it because of its variety of instruments.

You might need to rearrange the sound if you notice muting or the sound is unbalanced. Check the bass and high frequencies to ensure the sound is clear and crisp. You can download apps that will listen for you if you still need to figure out sound quality on your smartphone. After the app analyzes the different frequencies, you will be notified if any adjustments need to be made.

Conclusion

You wouldn’t be able to hear any audio from your devices if they didn’t have speakers. All your devices have speakers, including laptops, TVs, and smartphones. A subwoofer is necessary to enhance the bass, notably only with a wide range of frequencies.

You don’t need much experience to install a subwoofer. If you need lower frequencies, you will want to purchase these components, which can be more expensive than a pair of speakers. There will be an improvement in lower frequencies and mid-range and high frequencies. Subwoofers are a great addition to audio systems for audiophiles or bass lovers.

FAQs


1. What is the main difference between a subwoofer and a speaker?

A subwoofer focuses on reproducing low-frequency bass sounds, typically below 200 Hz, to add depth and impact to audio. On the other hand, speakers cover a broader frequency range, including mid and high frequencies, providing balanced audio across the spectrum.

2. Do I need to add a subwoofer to my speakers?

Adding a subwoofer can significantly enhance your audio experience, especially if you want to enjoy deep and powerful bass. Subwoofers complement speakers by handling the lower frequency range, allowing speakers to focus on mid and high frequencies, resulting in clearer and more balanced sound.

3. Can speakers handle bass frequencies on their own?

While regular speakers can produce some bass frequencies, they may struggle with heavy bass and sub-bass responses. Speakers are designed to excel in mid-range and high-range frequencies, making them ideal for reproducing voices and instruments. Subwoofers are necessary for accurate and impactful reproduction of lower frequencies.

4. How does a subwoofer improve audio quality when used with speakers?

Subwoofers improve audio quality by taking over the task of reproducing deep bass frequencies, freeing up the speakers to focus on mid and high frequencies. This separation ensures a clearer and more detailed sonic image. The result is a more immersive and balanced listening experience, especially in music genres that rely on deep bass.

5. How do I set up a subwoofer and adjust its settings?

To set up a subwoofer, connect it to your receiver using appropriate cables. Adjustments can typically be made through the subwoofer’s control panel, where you’ll find dials for volume and crossover frequencies. The crossover frequency determines which frequencies the subwoofer handles. Experiment with adjustments to achieve the desired sound quality, and consider the subwoofer’s placement in the room for optimal results.


Categories
TV's Informational

How To Close Apps On LG TV

How To Close Apps On LG TV | 4-Methods

LG TVs come packed with various apps for your entertainment needs, from streaming services to games. But have you ever found yourself wondering how to close these apps once you’re done using them? Don’t worry; we’ve got you covered with some simple methods to close apps on your LG TV.

Method 1: Using the Home Button

The home button on your LG TV remote is your gateway to navigating through apps.

  • Press the “Home” button on your remote to bring up the home screen.
  • Use the remote’s directional buttons to highlight the app you want to close.
  • Press the “Up” button to reveal additional options.
  • Look for the “X” icon, “Close,” or “Quit” option, and select it to close the app.

Method 2: Utilizing the Recent Apps Button (if available)

Some LG TVs come with a dedicated “Recent Apps” button on the remote.

  • Press the “Recent Apps” button to view a list of recently used apps.
  • Navigate to the app you want to close.
  • Highlight the app and press “Enter” or “OK.”
  • Select the “Close” or similar option to shut down the app.

Method 3: Using the Settings Menu

Accessing the settings menu on your LG TV can also help in closing apps.

  • Press the “Settings” button on your remote control.
  • Find and select “All Settings.”
  • Look for options like “App Settings,” “Applications,” or “Installed Apps.”
  • Choose the app you want to close from the list.
  • Look for an option to force stop or close the app within its settings.

Method 4: Power Cycling (if necessary)

In case an app becomes unresponsive or frozen, a simple power cycle might do the trick.

  • Turn off your LG TV and wait for a minute.
  • Turn the TV back on; this should close any open apps in the process.

These steps should help you navigate through and close apps on your LG TV, enhancing its performance by freeing up resources. Remember, slight variations in steps might exist depending on your TV model or operating system version.

By following these easy methods, you can seamlessly manage your apps and enjoy a smoother TV experience on your LG device.

Conclusion: How To Close Apps On LG TV

In conclusion, managing and closing apps on your LG TV is a breeze with these straightforward methods. Whether you prefer using the remote shortcuts like the Home or Recent Apps buttons, diving into the settings menu, or resorting to a quick power cycle, you have multiple options to efficiently close apps.

By closing unused apps, you can optimize your TV’s performance, ensuring smoother operation and freeing up valuable resources. Remember, these steps might slightly differ based on your LG TV model or operating system version, but the fundamental approach remains consistent.

So, next time you’re done streaming your favorite show or playing a game on your LG TV, use these simple techniques to close apps effortlessly, enhancing your overall viewing experience and keeping your TV running smoothly.

FAQs


1. How do I know which apps are running on my LG TV?

On your LG TV, press the “Home” button on the remote. Navigate to the app icon using the directional buttons. Once selected, press the “Up” button to reveal additional options. Look for the “X” icon or a “Close” option to shut down the app.

2. Is it necessary to close apps on my LG TV?

Closing apps on your LG TV can help optimize its performance and free up resources. While some apps might automatically suspend when not in use, manually closing them ensures efficient operation and can prevent any potential slowdowns.

3. Can I force close an app if it’s frozen or unresponsive?

Yes, you can force close an app on your LG TV. Access the settings menu by pressing the “Settings” button on the remote, navigate to “All Settings,” then find “App Settings,” “Applications,” or “Installed Apps.” Select the frozen app and choose the option to force stop or close it.

4. Will closing apps on my LG TV delete any saved data or progress?

Closing an app on your LG TV doesn’t delete any saved data or progress associated with that app. It simply shuts down the application, similar to closing an app on a smartphone or computer.

5. Can I close multiple apps simultaneously on my LG TV?

LG TVs typically allow you to close apps one at a time using the methods mentioned earlier. While you can’t usually close multiple apps simultaneously, you can quickly navigate through the apps and close them individually.


Categories
Subwoofer Informational

How to Recone a Subwoofer

How to Recone a Subwoofer | DIY Guide for Improved Sound Quality

A powerful subwoofer is essential to any car’s sound system, regardless of its type. Subwoofers can hit some pretty low frequencies when they are brand new. However, they lose their ability to deliver the same sound as they age. Subwoofers’ performance decreases over time due to wear and tear. Your subwoofer’s limits are closer to being reached the louder and more often, you crank up the bass.

Subwoofer cones are highly susceptible to fatigue, making them one of the most crucial parts. Your sub can develop cracks and splits due to constant use and abuse. Subwoofers are unable to move air effectively once this occurs. If you continue using it, you will only exacerbate the damage caused by your fatigued subwoofer. 

External objects can physically damage a subwoofer by piercing the cone and eventually rendering it useless due to physical damage. A damaged cone can be repaired by various methods, fortunately. Take your old, tired speaker to an audio doctor in your area for a little tune-up to see if it will work any better. If you would like a more accessible and cheaper method to recone your subwoofer, here is a guide:

Reconing

Subwoofer damage can be repaired through a simple process called reconing (except for damage to the magnet, frame, and enclosure). There are several steps involved in this process, but it essentially entails removing all the moving parts of a subwoofer, such as a cone and surround, spider, lead wires, voice coil, cone and surround, and moving parts. A subwoofer can be reconed in several different ways. 

Buying a complete kit for re-coning is the first method of re-coning. The prices for these kits can range from low to high. A more involved method would be to strip your subwoofer, requiring you to do more work on the machine. You must decide which is best for you based on your budget, experience, and time. A complete DIY guide to reconditioning your fatigued subwoofer is provided below.

How to Recone a Subwoofer | What You’ll Need

Here are some tools you might need to help smooth the dismantling process:

  • Buy a new soldering iron
  • Use a Phillips bit to drill
  • Gel for stripping aircraft paint
  • Glue that rubberized
  • Screwdriver
  • Blade or knife
  • An Acetone bottle

The subwoofer needs to be stripped.

Make sure your subwoofer is disconnected from the battery by removing the sides of the trunk or panel where it is installed. Take the woofer out of the enclosure and place it on a work table with your Phillips screwdriver. 

It is also essential to eliminate all dirt, junk, and debris as soon as possible to move on smoothly to the next step. You can clear your view and diagnose problems by wiping down spider landings and surrounding units with acetone.

How to Recone a Subwoofer

Step 1: Gather Materials and Prepare:

  • Collect all the necessary tools and replacement parts.
  • Set up a clean and well-ventilated workspace.

Step 2: Remove Old Components:

  • Use a blade to cut and remove the old cone, spider, and coils from the subwoofer.

Step 3: Clean the Basket and Frame:

  • Thoroughly clean the basket and frame using acetone to remove old glue residues.

Step 4: Prepare for Bonding:

  • Ensure all parts are clean, as clean parts make for better bonds.

Step 5: Insert Spacers:

  • Insert spacers and slide them through the former, ensuring a snug fit without damaging it.

Step 6: Secure Spider:

  • Confirm that the spider is firmly attached to the spacers before proceeding.

Step 7: Solder Tinsel Leads:

  • Use a soldering iron to desolder the old tinsel leads and solder the new ones in place.

Step 8: Place Gap Spacers:

  • Once tinsel leads are in place, position gap spacers as needed.

Step 9: Attach the Cone:

  • Position the new cone, making sure it is flush against the top lip of the basket and snugly seated against the raised lip.

Step 10: Stick Surround to Basket:

  • Apply adhesive to the edges of the basket and attach the surround over the top of the cone.

Step 11: Apply Even Pressure:

  • Place several books on top of the frame to evenly press down the surrounds, ensuring a great, airtight bond.

Step 12: Allow for Drying Time:

  • Let the subwoofer dry for a couple of days, allowing the adhesive to set properly.

Step 13: Test the Subwoofer:

  • After the subwoofer has dried, you should be able to hear the difference in sound quality between the new and old components.

Step 14: Reinstall Subwoofers:

  • Place the reconed subwoofers back into their enclosures, ensuring they are securely mounted.

Step 15: Test Sound Output:

  • Put the car back on the road and test the sound to ensure that the reconed subwoofer is functioning correctly and producing the desired sound.

Following these step-by-step instructions will guide you through the process of reconing your subwoofer and improving its performance.

Common Mistakes to Avoid When Reconing a Subwoofer

While reconing a subwoofer can be a rewarding DIY project, people can make several common mistakes during the process. Here are some of the most frequent mistakes:

  • Lack of Patience and Rushing: Reconing requires precision and attention to detail. Rushing through the process can lead to misalignments, poor glue bonding, and other issues that could affect the subwoofer’s performance.
  • Inadequate Cleaning: To ensure good glue bonding, thoroughly clean the subwoofer’s frame, basket, and other components before applying new adhesive. Any residual old glue or debris can hinder the new components from adhering properly.
  • Improper Glue Application: Applying adhesive incorrectly or unevenly during the reconing process can lead to air leaks and compromised performance. It’s essential to use the right type of adhesive and to apply it evenly to ensure a strong and airtight bond.
  • Neglecting Alignment: Incorrectly aligning the voice coil, spider, and cone can lead to poor movement and distortion when using the subwoofer. Proper alignment is crucial for optimal performance.
  • Overstretching Surrounds: Stretching the surrounds too much during installation can lead to an imbalanced suspension, affecting the subwoofer’s performance and longevity. It’s important to be gentle when positioning the surroundings.
  • Incorrect Wiring: Reattaching the voice coil wires improperly or crossing them can result in short circuits or poor electrical connections, affecting the subwoofer’s functionality.
  • Need for Drying Time: Rushing to reinstall the subwoofer before fully dries the adhesive can result in poor bonding and misalignments. Giving the reconed subwoofer adequate drying time is crucial.
  • Ignoring Manufacturer Guidelines: Every subwoofer model may have specific reconing guidelines provided by the manufacturer. Ignoring these guidelines or not using recommended replacement parts can lead to suboptimal performance.
  • Using Wrong Parts or Tools: Using incorrect replacement parts, adhesives, or tools can lead to problems during the reconing process. Ensuring you’re using the right components for your subwoofer model is essential.
  • Inadequate Testing: Please test the reconed subwoofer thoroughly before final installation can lead to disappointment when you realize there are still issues with the sound quality or performance.

Conclusion

Consider reconing and repairing your equipment before replacing your entire sound system. There’s a good chance you’ll save some money. In addition, a well-repaired speaker functions just like a brand-new subwoofer. Get your unit serviced by a professional to avoid getting your hands dirty.

FAQs


1. What is reconing, and why must I do it? 

Reconing is the process of repairing a subwoofer by replacing its components like the cone, voice coil, spider, and surround. Over time, subwoofers can experience wear and tear, leading to decreased performance. Reconing can restore your subwoofer’s sound quality without replacing the entire unit.

2. Can I recone any subwoofer, or are there limitations? 

Reconing is generally feasible for most subwoofers, but it’s crucial to consider the subwoofer’s design, size, and compatibility of replacement parts. Some subwoofers may have proprietary components that aren’t readily available, making reconing more challenging. Refer to manufacturer guidelines or consult experts to determine if your subwoofer is suitable for reconing.

3. Is reconing a DIY-friendly task, or should I seek professional help? 

Reconing can be a complex DIY project that requires precision and patience. If you’re experienced with electronics, mechanics, and adhesive work, you can recone a subwoofer. However, if you need more clarification on any step or need more tools, seeking professional assistance is recommended to ensure the best results.

4. What are some common mistakes to avoid during the reconing process? 

Common mistakes include inadequate cleaning before applying new adhesive, improper alignment of components, stretching surrounds too much, using incorrect adhesives or replacement parts, and not giving the reconed subwoofer sufficient drying time. Ignoring manufacturer guidelines and skipping testing after reconing can also lead to issues.

5. Will reconing my subwoofer make it perform like new? 

While reconing can significantly improve a subwoofer’s performance, managing expectations is important. Reconing can restore much of the original sound quality. Still, factors like the quality of replacement parts, the precision of the reconing process, and the overall condition of the subwoofer will influence the final results. If done correctly, reconing can extend the lifespan and improve your subwoofer’s sound.


Categories
Soundbars Informational

How To Connect Soundbar To Projector

How To Connect Soundbar To Projector | 4-Connections

You may have a question about whether you can connect your soundbar to your projector. Even if you can, it’s another subject to discuss whether you should.

You can connect a soundbar to a projector if your devices have compatible ports. It is possible, however, to get lower-quality sound with this option due to some limitations.

Usually, consulting the manual of your device will ensure the best sound experience. It is possible to find most of them online, but you’ll need to know what you’re looking for before you start.

Related: Best Soundbar For Projectors

How To Connect Soundbar To Projector: Options

You shouldn’t expect your projector to be a hub for all your devices. Most projectors come with sound output options to make the most out of the sound output, but many don’t support the more advanced digital sound formats or analog sound beyond stereo. You may have no choice but to resort to this method sometimes.

To transmit audio to a soundbar from your projector, you may be able to use any of the following formats:

  • An HDMI cable or HDMI ARC
  • RCA and auxiliary analog connections
  • SPDIF or Digital Optical
  • Bluetooth and WiFi (wireless)

The correct cable is usually all you need to connect your projector to your soundbar. Whenever you connect two devices with a cable, ensure they are both off.

Choose the Compatible soundbar for your Projector. Here Are the Two Options, Bose Soundbar 700 Vs Bose Soundbar 900 choose one of them on your requirements.

Via HDMI

The best way to connect audiovisual devices is through HDMI. You will find the most options for digital sound with HDMI. The right connections and sources enable HDMI cables to transmit digital formats like Dolby Atmos and DTS:X and support surround sound.

Connecting HDMI to a projector

Apps such as Netflix, Hulu, YouTube, and others can now be downloaded and used on many projectors. The soundbar is a better audio option than most projectors, which don’t have any speakers or poor ones. It is usually light and compact to use a soundbar.

An HDMI cable can be plugged into the HDMI port on the projector to connect the soundbar to the projector. Unfortunately, HDMI ARC ports are rare with projectors, so you may not have an HDMI ARC or EARC port to enhance audio quality. The best way to connect them is as follows:

  1. Your HDMI cable should be connected to your projector’s HDMI/ARC port when the devices are off.
  2. Ensure your soundbar’s HDMI/HDMI ARC port is connected to the other end of the HDMI cable.
  3. You need to turn on both devices.
  4. Check to make sure both devices are connected to the same HDMI channel.

The HDMI ARC port is not available on all projectors, so this approach will still work, but it will not support some high-quality audio streams like Dolby Atmos and DTS:X. While many of these projectors lack ARC ports, some great options include the LG HF65LA Ultra Short Throw LED Projector (on Amazon) and XGIMI MOGO Pro (on Amazon).

An ARC or eARC connection should work perfectly if you’re streaming Dolby Atmos. A Blu-ray player (even ARC) will simply output 5.1 channels through the HDMI connection. The 5.1 channel sound will still be delivered through a “normal” HDMI connection.

HDMI Connection With an Auxiliary Source

How To Connect Soundbar To Projector by hometheaterjournal.com

A laptop, DVD player, or TV box connected to an external source could complicate things a little. The equipment you have will ultimately determine your setup.

Depending on your auxiliary source, your soundbar will need to have HDMI out and an audiovisual input channel matching an output channel. As a starting point, follow these steps:

  1. Connecting a compatible cable from your soundbar to your external device can connect an input channel to a matching output channel.
  2. An HDMI cable must connect your soundbar’s HDMI output to the projector’s HDMI input.
  3. Make sure your soundbar is connected to the same source as your external device, then turn all of your devices on.
  4. Select the HDMI channel on which the soundbar is connected as the projector’s source.

The following general instructions are usually sufficient, but consult your manual if your soundbar or projector doesn’t produce sound.

CEC

You can use Consumer Electronic Control or CEC if all your devices are connected with HDMI ARC or eARC. Using this feature, you can control your HDMI-connected devices’ audio levels and quality and send media between them.

Additionally, your devices can be controlled using the same remote control. Additionally, it lets you control the volume of all your devices from one place rather than having to calibrate each one individually.

The HDMI port label usually indicates whether your devices support HDMI ARC or eARC. Most devices have HDMI ARC, and CEC built in. The setup process involves navigating your device’s audio or system controls to find them. eARC features may automatically be enabled on your devices if they support HDMI eARC.

Via Analog Connections

There will be more cables involved with analog connections, but it can be more intuitive in some ways. Cables connect specific components because they are designed to do so. Each audio channel has its own cable, and the video channel has its own cable.

Digital has its advantages, but analog has one distinct advantage over digital: compatibility. Port compatibility will ensure device compatibility as long as the ports match. An analog connection can either be RCA or Aux.

The live analog port differs from a digital connection in that it continuously broadcasts sound signals, regardless of whether any devices are connected to it or not. The fact that your devices are still on may result in your speakers becoming damaged if you try to connect them while they are still on. Consequently, when making an analog connection, the devices must be turned off before making the connection.

RCA connections

How To Connect Soundbar To Projector by hometheaterjournal.com

Multiple cables are required to connect a projector to a soundbar using RCA connections. Despite its appearance, connecting RCA ports of the same color is as simple as using the same color cables.

An RCA connection may allow you to get specific sound arrangements. The Left and right channels will be created by connecting the red and white ports, which is the simplest way to create a 2.x sound. The center channel is added by connecting the green ports for 3.x sound.

The surround channels in some soundbars are directed to bounce off the walls in your room to simulate 5.x surround sound. The soundbar’s blue and grey surround channels must be connected to the right and left channels.

There may be a purple subwoofer input on your soundbar if it has a subwoofer. Subwoofers are often used if the soundbar does not have anything attached to the subwoofer channel. This allows the subwoofer to amplify the bass.

Using the Auxiliary

As minijacks, 3.5mm jacks, or 18-inch jacks, auxiliary jacks allow audio connections of up to 3.x. Soundbars should not be connected to auxiliary jacks.

Your projector’s aux output and your soundbar’s aux input should be connected with the appropriate cable. Other than that, there’s nothing complicated about it.

Via Digital Optical

How To Connect Soundbar To Projector by hometheaterjournal.com

Audiovisual formats such as digital optical were more popular before HDMI became the norm. Projectors that support digital optical are rare, especially relatively new ones. However, some portable models are still compatible.

Setting up a digital optical connection is as follows:

  1. A digital optical cable should be connected to the soundbar with both devices off.
  2. To connect your projector to the cable, plug the other end in.
  3. Ensure the projector is set to digital optical mode, and the devices are turned on.

It is usually best to place the soundbar in the middle of the screen when connecting to an auxiliary device, such as via HDMI. The digital optical output would be needed on the soundbar, and a digital optical input would be needed on the projector.

Via Bluetooth

How To Connect Soundbar To Projector by hometheaterjournal.com

Unlike a wired connection, you must have your devices on when you set up a wireless connection. To enable your devices to communicate, you need to pair them together rather than setting them to a particular output channel or source.

Wireless connections can be divided into two types: Bluetooth and WiFi. For your devices to connect wirelessly, they should both have WiFi or Bluetooth enabled.

  1. Follow your soundbar’s manual instructions to set it up for Bluetooth pairing.
  2. Connecting with Bluetooth can be found in the projector’s device settings.
  3. It displays a list of devices where you can find your soundbar.
  4. The soundbar will pair once you select it.

Soundbars typically signal to pair by making a chime or otherwise sounding.

Are Soundbars and Projectors Compatible?

Connecting a soundbar to a projector allows you to create a quick and dirty home theater setup with a very portable audiovisual option. However, there are some drawbacks as well.

There are few all-in-one devices like soundbars and projectors on the market. While many can serve that function, advanced audio and video features may be compromised. All your devices can be used to their full potential when connected to a decent A/V receiver.

  Nevertheless! All these options will get the sound out of your projector and into your soundbar if you just need to get started without purchasing any more advanced hardware.

FAQ’s


Can I connect my soundbar to my projector?

Yes, you can connect your soundbar to your projector if your devices have compatible ports.

Will I get lower-quality sound if I connect my soundbar to my projector?

You may get lower-quality sound due to some limitations, but consulting the manual of your device will ensure the best sound experience.

What are the options for connecting a soundbar to a projector?

You can transmit audio to a soundbar from your projector using an HDMI cable, RCA and auxiliary analog connections, SPDIF or Digital Optical, and Bluetooth and WiFi (wireless).

How do I connect my soundbar to my projector using HDMI?

You need to connect the HDMI cable to your projector’s HDMI/ARC port when the devices are off. Ensure your soundbar’s HDMI/HDMI ARC port is connected to the other end of the HDMI cable. Turn on both devices and check to make sure both devices are connected to the same HDMI channel.

What is CEC, and how can I use it to connect my soundbar to my projector?

CEC is Consumer Electronic Control, which allows you to control your HDMI-connected devices’ audio levels and quality and send media between them. You can use it if all your devices are connected with HDMI ARC or eARC. The HDMI port label usually indicates whether your devices support HDMI ARC or eARC.


Categories
Soundbars Informational

Comment choisir une barre de son

Comment choisir une barre de son

Les barres de son sont omniprésentes sur le marché ; certaines sont excellentes, d’autres moins. Il existe de nombreuses options sur le marché, et certaines valent la peine d’être emballées dans du papier bulle. Chaque barre de son a ses propres caractéristiques, dont certaines méritent qu’on s’y attarde.

Par exemple, combien d’entrées HDMI possède-t-elle ? Est-elle équipée de la technologie Bluetooth pour diffuser de la musique en continu ? Bien entendu, il existe de nombreuses options. Et oui, nous pouvons vous aider. Voici notre guide pour choisir la barre de son qui vous convient le mieux, à vous, à votre téléviseur et à votre pièce. Comment choisir une barre de son ?

Quelques caractéristiques clés à prendre en compte pour choisir la meilleure barre de son :

CaractéristiqueDescription
Qualité sonoreRecherchez une barre de son avec une bonne réponse en fréquence, une faible distorsion et une reproduction claire des dialogues. Considérez les marques connues pour leur expertise audio.
Taille et designConsidérez la taille et le design de la barre de son pour vous assurer qu’elle s’intégrera confortablement dans votre espace et qu’elle correspondra à votre décoration.
Options de connectivitéRecherchez une barre de son avec différentes options de connectivité, telles que la connexion HDMI, Bluetooth, Google Assistant et Wi-Fi, pour assurer la compatibilité avec vos appareils.
PrixConsidérez votre budget et recherchez des barres de son qui offrent un bon rapport qualité-prix.
Taille de la pièceChoisissez une barre de son avec une plage de watts appropriée pour la taille de votre pièce. Consultez notre tableau de comparaison ci-dessus pour vous guider.
Fonctionnalités supplémentairesCertaines barres de son sont dotées de fonctionnalités supplémentaires, telles que des assistants de commande vocale intégrés, des capacités audio multi-pièces et des contrôles d’application. Considérez ces fonctionnalités si elles sont importantes pour vous.

Lorsque vous choisissez une barre de son, il est important de prendre en compte tous ces facteurs pour vous assurer de trouver l’option la mieux adaptée à vos besoins et à vos préférences.

Comment choisir une barre de son : 6 éléments à prendre en compte:

  1. Où sera-t-il placé?
  2. Quelle taille choisir ?
  3. Barre de son active et barre de son passive
  4. Canaux de la barre de son
  5. Quelles sont les connexions nécessaires ?
  6. Comment la contrôler ?

Guide d’achat d’une barre de son

Vous êtes pressé ? Avant d’acheter une barre de son, voici ce qu’il faut savoir (ou faire) :

  • Envisagez des barres de son dotées d’au moins trois canaux. Toutefois, il est toujours possible de se procurer des barres de son à 2 canaux, qui ne sont en fait rien d’autre que des mini-stéréos glorifiées. Vous pouvez créer une expérience surround virtuelle en utilisant 3 canaux ou plus pour rendre votre expérience d’immersion plus réaliste.
  • Choisissez une barre de son active. Une barre de son passive ne possède pas d’amplificateur (contrairement aux barres de son actives). C’est particulièrement vrai si vous souhaitez une solution deux-en-un ou si vous essayez de gagner de la place.
  • Placez votre barre de son à un endroit pratique. Doit-elle être suspendue ou posée à plat ? D’un point de vue esthétique, la barre de son ne doit pas être plus large que le téléviseur. Dans un monde parfait, votre barre de son devrait être centrée sous ou au-dessus de votre téléviseur, que ce soit sur un mur ou une étagère. Si elle est trop grande, ne la placez pas là !
  • Gardez à l’esprit les connexions. Les barres de son Wi-Fi et Bluetooth permettent de diffuser facilement de la musique en continu à partir d’un ordinateur, d’un téléphone ou d’une tablette. La commutation HDMI permet également de changer facilement de source audio, de sorte que vous n’avez pas besoin de réacheminer les câbles HDMI.

Les barres sonores en valent-elles la peine ?

Les barres de son sont souvent achetées par des personnes qui ne disposent pas de l’espace nécessaire pour un véritable son surround dans leur home cinéma. Leur conception fine et discrète leur permet de s’insérer facilement dans n’importe quelle pièce. Il est possible d’obtenir un véritable son de cinéma à domicile de différentes manières. En général, vous aurez besoin de plusieurs enceintes (une enceinte centrale, une enceinte gauche, une enceinte dédiée à la droite et deux enceintes arrière) et d’un caisson de basse. Cette solution est généralement plus coûteuse que l’achat d’une simple barre de son.

Et alors ? Le son authentique d’un cinéma à domicile est si étonnant à bien des égards que vous devriez l’envisager si vous disposez de l’espace et du budget nécessaires. Si une bonne barre de son améliore cent fois le son de votre téléviseur, un véritable home cinéma l’améliorera dix mille fois. Par ailleurs, une barre de son améliorera la qualité du son de votre téléviseur si vous recherchez une solution simple.

Il en existe deux types : Les barres de son et les bases de son.

How To Choose A Soundbar by hometheaterjournal.com

Il s’agit bien d’un guide d’achat pour les barres de son, mais il existe en fait deux types de barres de son : les barres de son et les bases de son. Toutes deux sont équipées d’un système de haut-parleurs intégré et ont le même objectif : améliorer la qualité audio de votre téléviseur. Vous entendrez des dialogues plus clairs (surtout si votre téléviseur est équipé de la fonction Voice Enhancement), des sons plus riches, des images plus nettes, une expérience plus immersive et cinématographique, etc. Ainsi, les grillons de la nuit ne sonnent pas comme si quelqu’un avait laissé couler l’eau, mais comme des grillons de la nuit. Il y aura aussi des moments où vous devrez plonger pour vous mettre à l’abri, comme lorsque Hulk fait une grosse crise de colère.

Cependant, il y a d’autres différences

Qu’est-ce qu’une barre de son ?

Les barres de son sont composées de haut-parleurs et d’un grand nombre de dispositifs techniques placés dans une longue barre de forme rectangulaire. Si une bonne paire de lunettes rend les choses claires comme de l’eau de roche, une bonne barre de son fait de même pour la parole. Grâce à cette amélioration sonore intégrée, les voix sont claires et distinctes, au point que même les dialogues chuchotés sont audibles.

Il n’est pas nécessaire d’activer les sous-titres ou d’augmenter le volume). En outre, les barres sonores sont plus larges que les bases sonores. Elles permettent au son de voyager plus loin (à gauche et à droite), ce qui vous donne une expérience plus proche du cinéma à domicile que celle que vous obtiendriez avec une base de son (bien que dans une certaine mesure).

L’emplacement des barres de son varie de A) les fixer au mur sous votre télévision à B) les placer devant votre télévision si celle-ci est sur une table à C) les placer sur une étagère au-dessous ou au-dessus de votre télévision si celle-ci est dans un système d’étagères. De nombreuses barres de son sont équipées d’un caisson de basse sans fil, qui améliore l’expérience audio tout en donnant un coup de fouet supplémentaire.

Qu’est-ce qu’une base saine ?

Bien que les bases de son et les barres de son visent toutes deux à augmenter le volume de votre téléviseur à un niveau extraordinaire, leur taille et leur puissance diffèrent. Il existe des différences entre les bases et les barres de son en ce qui concerne la profondeur (d’avant en arrière) et la largeur (d’un côté à l’autre). Mais en général, ils se placent sous les téléviseurs ou sur des étagères directement en dessous d’eux plutôt que sur le dessus.

En général, les bases de son ont plus d’espace à l’intérieur que les barres de son et, par conséquent, elles sont généralement dotées d’une meilleure amplification intégrée et de plus grands haut-parleurs de basses. Il n’est donc pas nécessaire d’acheter un caisson de basse, même si certains diront qu’un bon caisson de basse autonome est plus difficile à battre.

Et il est toujours préférable d’avoir un appareil de grande taille pour votre système audio. Il ne fait aucun doute que les bases de son sont de plus en plus difficiles à trouver de nos jours. En raison des progrès de la technologie des barres de son, de leur polyvalence et du fait qu’elles sont proposées par certaines des meilleures marques disponibles aujourd’hui, nous recommandons souvent les barres de son plutôt que les bases de son.

Conseils des experts

  • Une base de son ne fonctionne pas aussi bien en stéréo qu’une barre de son. Contrairement aux barres de son, les barres de son offrent une meilleure séparation des canaux stéréo car les haut-parleurs sont plus éloignés les uns des autres.
  • Les téléviseurs et les barres de son sont de plus en plus minces. Si la minceur peut être attrayante, elle n’est pas un bon choix pour la qualité audio. Si vous voulez vraiment que votre barre de son produise un son exceptionnel, vous devriez envisager d’ajouter un caisson de basse.
  • Les barres de son peuvent bloquer le signal de votre télécommande vers le téléviseur, en fonction de votre configuration. Il existe des solutions de contournement, comme ce prolongateur IR universel Salamander. Mais il est préférable de mesurer la taille de la barre de son pour éviter de bloquer le récepteur IR de votre téléviseur.

Acheter une barre de son : 6 éléments à prendre en compte :

Où sera-t-il placé?

How To Choose A Soundbar by hometheaterjournal.com

Le type de barre de son ou de base de son que vous choisirez dépendra de l’emplacement de votre téléviseur et de l’espace dont vous disposez autour. En outre, le type de barre de son aura une incidence sur l’endroit où vous la placerez. L’installation des barres de son est beaucoup plus facile : vous pouvez les accrocher au mur ou les placer sous (et à proximité) de votre téléviseur. L’installation est également facile pour toutes les barres de son. Placez la barre de son sur la même table que votre téléviseur, directement sous l’écran, si votre téléviseur est posé sur une table ou une crédence.

Vous n’avez pas à craindre que votre téléviseur tombe. Son fond est à plat sur la table ou le sol. Vérifiez les spécifications de la barre de son et mesurez la surface avant d’acheter. La barre de son doit être installée directement sous votre téléviseur mural. Dans certains cas, vous pouvez acheter des kits de montage qui facilitent l’installation des barres de son.

Toutefois, les bases de son sont conçues pour être placées au-dessus d’une table ou d’une étagère afin de pouvoir être placées sous votre téléviseur (c’est pourquoi elles sont si lourdes).

Conseils des experts

  • La question de savoir s’il est possible de monter une barre de son au-dessus d’un téléviseur se pose souvent. Qu’en pensez-vous ? Bien sûr, vous pouvez le faire si c’est le seul endroit que vous pouvez trouver, mais le son ne sera pas à la hauteur. Toutefois, les haut-parleurs sont meilleurs que ceux de votre téléviseur.
  • La base sonore surélèvera le téléviseur de quelques centimètres lorsqu’elle sera placée sous le téléviseur (à sa place). C’est peut-être insignifiant, mais le fait de le savoir maintenant rend la mesure de l’espace plus simple.
  • De nombreuses barres de son ont un look très cool, d’autres sont discrètes pour se fondre dans le décor, et certaines sont conçues pour fonctionner avec des modèles de téléviseurs spécifiques. Selon le modèle de votre téléviseur, vous pourrez peut-être trouver des barres de son conçues pour lui par le fabricant. Avec leurs barres de son discrètes, certains téléviseurs 4K de Sony sont magnifiques.

Quelle taille choisir ?

Dans un monde idéal, votre nouvelle barre de son devrait avoir exactement la même largeur que votre téléviseur, de manière à ce que les proportions soient égales. Techniquement, n’importe quel téléviseur peut être associé à une barre de son. C’est à vous de choisir la bonne taille. Surtout si votre téléviseur a plus de 8 ans, assurez-vous qu’il dispose des bonnes connexions pour brancher votre nouvelle barre de son.

Comment puis-je savoir si ma barre de son est active ou passive ?

Les barres de son passives sont celles qui n’ont pas d’amplificateur intégré et doivent être connectées à un récepteur ou à un amplificateur pour fonctionner. Les haut-parleurs sont toutefois de meilleure qualité, ce qui se traduit par un meilleur son. Vous devrez connecter davantage de composants à une barre de son passive, ce qui explique son prix légèrement plus élevé. Des basses supplémentaires peuvent être obtenues en connectant un caisson de basse traditionnel.

Active : La barre de son est un haut-parleur actif, ce qui signifie qu’elle est équipée de son propre amplificateur qui alimente l’ensemble, ainsi que d’une unité de traitement des canaux qui sépare les haut-parleurs gauche, droit et central de la barre de son. Il n’est pas nécessaire d’acheter ou de brancher un récepteur supplémentaire et il y a moins de câbles avec un appareil tout compris.

Vous devriez choisir une barre de son active si vous souhaitez uniquement améliorer le son de votre téléviseur. Les barres de son passives conviennent beaucoup mieux à une installation personnalisée (par exemple, si vous souhaitez que votre barre de son disparaisse dans votre téléviseur ou si vous voulez un système Dolby Atmos complet).

De combien de canaux ai-je besoin, et que signifie le terme “canal” ?

Les canaux peuvent être considérés comme des haut-parleurs ou des sources sonores individuels. Aujourd’hui, la plupart des émissions et des films proposent cinq canaux audio différents (et parfois plus, en particulier avec le son surround). Le canal central, le canal gauche, le canal droit et les deux canaux arrière (arrière gauche et arrière droit) sont intégrés numériquement.

Plusieurs facteurs font qu’une barre de son est différente d’une installation de home cinéma classique, notamment le fait que tous les canaux/hauts-parleurs sont contenus dans une seule unité. En effet, une barre de son à 2 canaux comporte deux haut-parleurs gauche et droit.

Une barre de son à 3 canaux comporte trois haut-parleurs : un haut-parleur central, un haut-parleur droit et un haut-parleur gauche.

La barre de son à 5 canaux possède les cinq haut-parleurs susmentionnés : le haut-parleur central, le haut-parleur droit, le haut-parleur gauche et les deux haut-parleurs arrière. (Les systèmes à 5 canaux sont essentiels à l’expérience du cinéma à domicile depuis près de vingt ans).

Une barre de son à 7 canaux possède 7 haut-parleurs. Avec 7 canaux, vous disposez effectivement de 5 canaux en plus des canaux arrière et surround : En les divisant en 4 canaux chacun, vous obtiendrez 7 canaux. (Il s’agit de la norme la plus récente et la meilleure).

Barres de son Dolby Atmos: Véritablement la meilleure barre de son à 5 ou 7 canaux de la planète. Les haut-parleurs orientés vers le haut permettent d’obtenir une scène sonore tridimensionnelle dans la barre de son. Par exemple, lorsque vous voyez des numéros de canaux tels que 5.1.2 ou 7.1.2, le troisième élément représente des haut-parleurs Dolby Atmos orientés vers le haut (alors que le premier élément représente un canal traditionnel et le second un caisson de basse). Un plafond dur et réfléchissant, ainsi qu’un appartement d’une hauteur maximale de 3 mètres, sont idéaux pour cette barre de son.

Quelles sont les connexions nécessaires ?

How To Choose A Soundbar by hometheaterjournal.com

Les barres de son modernes offrent de multiples possibilités de connexion et un large éventail d’options de connectivité. Voici quelques connexions clés à rechercher :

HDMI ARC

C’est simple. Connectez la barre de son à l’entrée du canal de retour audio (ARC) du téléviseur à l’aide d’un câble HDMI. Votre barre de son peut maintenant être connectée au canal de retour audio de votre téléviseur. Les connexions HDMI sont le meilleur moyen de connecter votre barre de son à plusieurs canaux.

Connectivité sans fil

Vous souhaitez pouvoir diffuser votre appareil mobile ou votre barre de son directement sur votre barre de son ? Jetez un coup d’œil à ces caractéristiques:

  • Bluetooth: De nos jours, la plupart des barres de son sont équipées de la technologie Bluetooth, qui peut être utilisée pour diffuser de la musique à partir de votre smartphone, de votre ordinateur ou de votre tablette.
  • Wi-Fi: De nombreuses barres de son sans fil sont désormais disponibles. Elles sont dotées d’une technologie sans fil qui leur permet de se connecter au réseau Internet de votre domicile et de diffuser de la musique de n’importe où (Spotify, TIDAL, Pandora, etc.).

Port optique

Un cordon de raccordement optique est le meilleur moyen de connecter votre téléviseur à votre barre de son. Il s’agit de la connexion la plus simple, la plus facile et la plus fiable. Cependant, il n’est pas capable de prendre en charge le 5.1. La plupart des téléviseurs actuels disposent à la fois d’une sortie audio optique et d’un HDMI ARC.

Entrées USB

Ces entrées ne sont normalement disponibles que pour les mises à jour du micrologiciel. Cependant, de nombreux utilisateurs de barres de son mettent aujourd’hui à jour le logiciel de leur barre de son par le biais d’un ordinateur. Vous n’avez pas besoin de cette entrée si vous prévoyez simplement de brancher votre clé USB contenant vos chansons, sans autre finalité.

Conseils des experts

  • Les Sonos Beam ou Arc sont d’excellentes barres de son sans fil qui font office de chaînes stéréo avec un son immersif. Votre ordinateur, votre téléphone ou votre tablette peut diffuser de la musique directement sur cette barre, ce qui vous permet de diffuser de la musique depuis votre salon jusqu’à la ville où vous faites la fête.

Comment le contrôler ?

Y aura-t-il une autre télécommande pour la barre de son ? C’est possible. Vous devrez acheter votre propre télécommande pour votre nouvel appareil. Cependant, la plupart des télécommandes de téléviseurs peuvent être programmées pour fonctionner avec votre barre de son. Nous pouvons vous montrer comment vous simplifier la vie en ayant une seule télécommande qui contrôle tout sur votre table de cocktail. (Une table de cocktail pleine de télécommandes ? Nous détestons cela.

Grâce à une application gratuite, vous pouvez commander certaines barres de son à l’aide d’appareils mobiles, tels qu’un téléphone ou une tablette.

FAQ’s


Est-il possible d’ajouter des haut-parleurs à une barre de son?

Il y a des oui et des non. La plupart des barres de son récentes sont équipées de haut-parleurs arrière sans fil supplémentaires afin que vous puissiez vraiment profiter du son d’un système de cinéma à domicile. Il n’y a qu’une seule autre façon de connecter des haut-parleurs arrière dédiés sans fil à votre barre de son : si elle prend en charge la fonctionnalité de système audio multi-pièces. Cette fonction est idéale si vous avez (ou si vous souhaitez installer dans votre maison) un système audio qui vous permet de diffuser de la musique dans plusieurs pièces simultanément et de simuler un son surround.

Est-il possible d’ajouter un caisson de basse à une barre de son ?

Un caisson de basse séparé sans fil est souvent inclus dans les barres de son sans fil. De plus, certaines ne comprennent généralement pas de port pour le caisson de basse, que vous pouvez ajouter si vous le souhaitez. Vous obtiendrez ainsi une expérience plus immersive (et vous devriez le faire si vous le souhaitez).

Dans le cas d’une barre de son, un récepteur est-il nécessaire?

Cela dépend si la barre de son est active ou passive, quel que soit le modèle que vous achetez. Vous trouverez plus d’informations à ce sujet dans la section “Éléments à prendre en compte”.

Qu’est-ce qu’une barre de son Dolby Atmos?

De nombreuses barres de son sont désormais dotées de la technologie Dolby Atmos, qui simule un son surround en réfléchissant le son sur le plafond. Ce n’est pas la réalité, mais c’est déjà pas mal.

Comment savoir si une barre de son sera compatible avec mon téléviseur et d’autres appareils ?

R : Lorsque vous choisissez une barre de son, il est important de prendre en compte ses options de connectivité. Recherchez une barre de son dotée de plusieurs entrées, telles que HDMI, optique et RCA, pour vous assurer qu’elle sera compatible avec votre téléviseur et d’autres appareils. Vous pouvez également opter pour une barre de son dotée de capacités Bluetooth ou Wi-Fi pour la connectivité sans fil. Veillez à vérifier les spécifications de votre téléviseur et de la barre de son pour vous assurer qu’ils sont compatibles. Certaines barres de son sont également équipées de télécommandes universelles ou d’applications pour smartphone qui peuvent simplifier le passage d’un appareil à l’autre.


Categories
Subwoofer Informational

How To Choose A Subwoofer

How To Choose A Subwoofer | Buying Guide 2025

The best way to choose the right subwoofer depends on various factors, including sound quality and size, power, crossover, and room calibration.

You have to navigate a minefield when buying a subwoofer. A sub the size of a rhinoceros might not be a good fit for your living room if you want the best bass possible. This article explains how you can choose a subwoofer based on sound quality, volume, price, and whether or not you need a wireless subwoofer. Check out our best subwoofers article for our top picks.

HOW TO CHOOSE A SUBWOOFER

FactorConsideration
Sound QualityDedicated sub improves bass, enhances richness
Subwoofer Size12″ driver is common, offers balanced bass
Power and VolumeRMS wattage matters, higher wattage for more power
Wireless vs WiredWired offers versatility, better compatibility
Frequency RangeLower frequency better, around 25Hz ideal
Front-Firing vs Down-FiringBoth work well, consider placement
EQ and Room CalibrationDSP tech improves sound in room environments
Ported vs SealedSealed offers controlled sound, ported for power
Hi-Fi vs Home TheaterHi-fi usually requires 1 sub, home theater 2
Cost$200- The best subwoofer under $1,000 range often provides the best options

For a comprehensive guide on understanding the role of subwoofers and their significance in your audio setup, check out our blog post on what does a subwoofer do?

Sound Quality

A subwoofer’s primary purpose is to increase bass, so it’s always a big question: will it do that? You can improve your bass with a dedicated sub, regardless of how much you spend. 

There will be a lot more meat to it, more richness, and more depth to it. Both movies and music benefit from subwoofers because they boost the low end.

When choosing a subwoofer, however, you’ll find out one important thing nobody tells you. As important as it is, sound quality is only one of the essential factors in choosing a podcast. 

Alternatively, we recommend you spend a lot of money on the most extravagant, loudest, and largest subwoofer you can find. One of the main things to remember is that you need to consider factors such as size, power output, frequency, etc. 

It is not just about having the best bass; it is about having the right balance of sound quality at this point rather than having just the best bass.

Subwoofer Size

How To Choose A Subwoofer by hometheaterjournal.com

When it comes to subwoofers, size matters; depending on the size of your driver, you’ll be able to achieve a wide range and quality of bass. Subwoofer drivers are basically speakers – circular cones that produce sound. 

As a result of the energy required to move bass frequencies through the air, it is not easy to do. Larger drivers will be able to put out more power than smaller drivers, which will, in turn, require a larger cabinet to accommodate the output. There is a question of how big it is.

Subwoofers are different, but there’s a good guideline here about how long they should be. You want to install a home theater or hi-fi system in an average-size room, between 150 and 230 square feet. A 12″ driver is the best choice for a subwoofer. 

There are a number of different sizes of drivers available, and this is likely to be the most common one, but it is also likely to be the most forgiving – both in terms of price and in terms of results. 

This generator will provide enough power to meet your needs without breaking the bank. The top subwoofer we recommend is the ELAC Debut 2.0 SUB3010 10”($451.60 on Amazon), which has a 10-inch driver, as do many other subwoofers we like.

While you can try subwoofers of any size, 12″ is a great starting point if you’re new to the world of subwoofers.

Subwoofer SizeRecommended Room Size
6.5 inchesSmall rooms up to 1,000 cubic feet
8 inchesSmall to medium rooms up to 1,500 cubic feet
10 inchesMedium rooms up to 3,000 cubic feet
12 inchesMedium to large rooms up to 5,000 cubic feet
15 inchesLarge rooms exceeding 5,000 cubic feet

These estimations are based on general guidelines and might vary depending on the subwoofer’s specifications and the acoustic properties of the room.

Power and Volume

A subwoofer with its internal amplifier is usually active, meaning it doesn’t require an external one. Subwoofers are powered by internal amplifiers, which are the device’s core. Choosing a good subwoofer requires understanding how power is measured in watts.

It is usually stated on the specs of subwoofers how many watts they produce at peak and at RMS. The peak can be ignored for all practical purposes. If you crank up a subwoofer to its maximum power, it will produce maximum power. Considering your ears are among the most important parts of your body, it would be unfair to expect you to perform that act frequently. The RMS wattage is the one that will give you the most information. 

Please understand that Root Mean Square, or RMS, is sometimes referred to as continuous wattage, which is short for Root Mean Square – but does not make us explain the math. When a subwoofer is driven at a reasonable volume for a period of time, you can get an idea of what kind of power it can produce when driven at a reasonable volume. 

In this case, let me give you an example of an inexpensive speaker that gives you fantastic sound for under $150, the Monoprice 9723. The unit has an RMS power consumption of 150 watts, which is typical for this range of prices and plenty powerful for most people to use without any problems.

Wattage does not equal volume, which is one of the most important things to remember. 

Subwoofers can always be turned down, no matter how powerful they are. The wattage figure should limit how hard a subwoofer can be pushed. Generally, the higher the wattage output, the more likely it is to play sound at higher levels that is clear, distortion-free, and free from noise and noise.

A higher wattage number will cost you more, so you should consider that. Most people will be satisfied with a wattage of 150-500 watts, which balances the amount of power output with an affordable price, which most individuals will find perfectly acceptable.

Wireless vs Wired Subwoofers

Most subwoofers must be connected directly to your amplifier and to a wall outlet to receive power. Power cables are used for the former, while RCA cables are used for the latter, usually included with subwoofers. Is it possible to go entirely wireless?

You can purchase a wireless subwoofer for $699 at Sonos. These devices work well with their audio sources when they are connected via Bluetooth or Wi-Fi. Companies like VIZIO and the Sonos Sub frequently make wireless subwoofers that connect directly to soundbars.

 You may not want to invest time in wireless subwoofers despite our praise. A single wire keeps your subwoofer from connecting to your amplifier, so you’re paying extra for simple things.

The second problem is that most wireless subwoofers operate within an ecosystem closed to the outside world. Sonos subwoofers work only with other Sonos products, so a sub like what I mentioned above can only be used with another. Later, if you upgrade your system, you won’t be able to use it.

A regular wired subwoofer is better if you intend to use speakers from multiple brands in your system. Ultimately, you’ll save money and get better sound quality. There is a place for wireless subwoofers, but they offer little versatility compared to their wired counterparts.

Frequency Range

It is essential to understand that every sound has a frequency – how high or low it is. Understanding frequency is essential for subwoofers, as frequency is measured in Hertz (Hz). Due to the characteristic of low-frequency bass notes, subwoofers that can reach the lowest possible frequency are considered outstanding subwoofers.

We know that humans have a hearing range of about 20Hz and a feeling range of about 10Hz, which is the range that rumbles your stomach when you hear something. 

A subwoofer’s performance will be enhanced if it can get close to these targets. Some very expensive subwoofers can reach a depth of 16Hz, like the $2,000 Power Sound Audio S3611. A good subwoofer should reach a frequency of 25Hz, although if a bass isn’t what you want, you can settle for a 50Hz subwoofer. You’ll have to pay more if you’re looking for a subwoofer with a lower frequency floor.

Note the highest frequency your subwoofer can generate when setting it up. Subwoofers begin to produce sound at this point, known as the crossover. 

It’s possible to manually set the crossover on most A/V receivers, guaranteeing better bass sound. Some hi-fi amplifiers have this feature, but we have yet to see it on a lot of them.

Front-Firing vs Down-Firing Subwoofers

There is a forward-facing main driver on a front-firing subwoofer. Down-firing subwoofers have their drivers mounted under the floor, facing down. You can choose one based on where you plan to place your subwoofer as there are very minimal differences between them. 

You should invest in a front-firing subwoofer if it will be near the main speakers. Both are equally good choices, but you don’t have to choose one.

Ensure you get a subwoofer with passive radiators to enhance your bass performance even more. Subwoofers with these vehicles can carry more bass overall because they are not powered and point out on the sides.

 Investing in a subwoofer with these features will cost you some extra money, but it’s ultimately worth it.

EQ and Room Calibration

Sound can uniquely respond to its environment more than any other type. It collects in corners and becomes muddy and indistinct when it encounters a room that could be better due to its slow, heavy nature. 

DSP technology (Digital Signal Path) is a technology that subwoofer manufacturers know about. Subwoofers operate in a way that improves and alters the sound before it is pushed out of them, thereby interacting better with the room. 

In general, DSP comes in two forms. EQ stands for Equalizer, a tool that allows you to boost or cut certain frequencies within a sound by adjusting its amplitude. Some subwoofers come with this kind of feature, which is usually adjustable over the phone, as it is on this $999 SVS SB-3000 subwoofer. 

Choosing presets for EQs is a great way to start if you’re unfamiliar with how to adjust them – no worries. The room calibration may not be necessary because you don’t need to mess with anything in that area.

During room calibration, a series of test tones are played through a microphone attached to a subwoofer. The subwoofer can adjust itself to fit the tones bouncing through the room, thanks to the microphone recording those tones as they bounce around. 

A significant boost in clarity and realism can be seen with this technology. It is almost certain that these upgrades will cost you more. For the most part, people don’t need them. A subwoofer under $500 is unlikely to have this feature if you want to get the most bass out of it.

Ported vs Sealed Subwoofers

Subwoofers are very strange when it comes to holes: they have a higher probability of having holes if they are more expensive. As the name implies, subwoofers with ported ports directly connect to the chamber interior through one or more ports. 

Ports are absent from sealed subwoofers. The majority of subwoofers on our list of the best available right now are sealed subwoofers, generally speaking, the best models on the market at the moment.

It is the sound quality that distinguishes seal subwoofers from ported subwoofers. The sealed subwoofers usually produce tight, even, controlled sound, while the ported subwoofers can produce large amounts of sound. 

Subwoofers with ports are not needed for small audio or home theater setups. You should consider a port-equipped one if you have a large room or want to spend a lot of money.

Hi-Fi vs Home Theater

The versatility of subwoofers makes them ideal for playing music, watching movies, and playing video games. A significant difference between a subwoofer for a hi-fi system and a subwoofer for a music system is that you usually don’t need to buy more than one subwoofer for an audio system. 

This isn’t just because one subwoofer will be sufficient for music – that’s for sure. However, the main reason is that most stereo amps cannot send sound from one subwoofer to another subwoofer because they cannot do so.

There is a difference between home theater and regular television. Surround sound systems often require two subwoofers to be played at once through A/V receivers, so this makes sense. 

Adding two subwoofers, the power doubles, and the sensation is the same that everyone who likes bass lusts over. There is a certain sensation associated with an engulfing bass hitting you right in the stomach as it comes from all angles, enveloping you completely. 

There are a lot of factors that can influence the sound quality of two subwoofers. Still, if you don’t mind experimenting and have a reasonable budget, you can achieve some fantastic results.

Cost of Subwoofers

If you plan on buying a subwoofer, you should spend at least $100. Several other price points have been heard as well, with mixed results. Subwoofers can be purchased for as little as $140, and if you spend a little more, you’ll often see fantastic results. Some real gems are in the $200-$1,000 price range, but many options are available.

Subwoofers are expensive. However, you’re paying more for power and output wattage when you’re over $2,000. Purchasing a subwoofer over $2,000 is unnecessary unless you have a massive room and an equally huge system. The chances of auditioning subwoofers at high-end audio stores are getting increasingly rare, so we recommend shopping online for them. 

Conclusion: 

Choosing the right subwoofer involves carefully balancing factors to achieve optimal sound quality and bass performance. From considering the size of the driver to understanding wattage and frequency range, each aspect contributes to creating a satisfying audio experience.

Room calibration, subwoofer type, and cost considerations further guide your decision-making. Finding a subwoofer that aligns with your preferences and budget will enhance your audio setup and immerse you in a powerful and rich bass world.

FAQs:


A common and balanced starting point is a 12″ driver. It provides sufficient power output without compromising sound quality and is generally forgiving in terms of price.

2. How does wattage relate to subwoofer volume? 

Wattage isn’t a direct indicator of volume but represents the limit at which a subwoofer can be driven without distortion. Balanced wattage, usually between 150-500 watts, offers clear and distortion-free sound.

3. Are wireless subwoofers a good choice? 

Wireless subwoofers can limit compatibility and tend to work within closed ecosystems. Wired subwoofers offer more versatility and often better sound quality, making them a better choice for most setups.

4. What is the significance of frequency range?

 A subwoofer’s frequency range indicates the low frequencies it can reproduce. Optimal subwoofers can reach frequencies around 25Hz, delivering a satisfying bass experience, especially for movies and music.

5. How do EQ and room calibration affect subwoofer performance? 

EQ allows adjusting frequency levels for optimal sound quality, while room calibration, utilizing DSP technology, tailors the subwoofer’s output to the room’s acoustics, improving clarity and realism in the sound.


Categories
Blog Informational

IPX7 vs IP67

IPX7 vs IP67 Explained | Which is Better?

In comparison to IP67, IPX7 defines a product as waterproof and submersible in water for 30 minutes in water of 1 meter depth. Due to its dust and waterproof properties, the IP67 rating is better than the IPX7. IP67 is also waterproof and can be water-submersed one meter deep for 30 minutes.

According to IPX7, the symbol “X” indicates that the device has not been tested for resistance to solid particles. While X has a maximum dust protection rating of “6” on IP67, what this rating means is that the device is fully dustproof. We don’t know what X will be in the IPX7 rating since the manufacturer hasn’t tested its devices.

What are the IP ratings?

by hometheaterjournal.com

An IP code stands for ingress protection rating are international standard that indicates how well the electrical enclosure seals. An IP code rating indicates how well the enclosure resists moisture intrusion and foreign bodies. Moisture and foreign bodies can sometimes cause effects on the device, and this IP rating describes how well the device handles these effects. The second digit in an IP rating signifies the degree of protection against moisture and water.

People are usually confused by the IPX7 and IP67 ratings. In this article, we will explain each one in detail.

IPX7 Ratings:

Rating IPX7 indicates the level of protection against water provided by the device. The digit 7 represents the powerful water resistance. The Ipx7 rating doesn’t provide a guarantee of protection against dust or solid particle protection

Waterproofing is extremely popular; many people believe it is because it signifies waterproofing. The device shows the state of water resistance when fully submerged in water up to one meter deep for 30 minutes. In addition, the device will operate effectively after another 30 minutes. The information is typically misunderstood, and people don’t pay attention to certain facts, but here we will discuss a few.

In the following section, you will encounter a variety of terms related to how water is protected in the electronic device enclosure you use. Generally, you will hear the terms waterproof, water resistant, and water-repellent. To know what level of protection you have, you must know the device you have.

These species are water-resistant, water-repellent, or hydrophobic because they do not enjoy the water. Getting wet is going to take a bit longer than normal. Further, hydrophobic has some similarities to hydrophobic but has a few differences. This pattern repels liquids more effectively than hydrophobic ones. As such, if your device implies waterproofing, it is fully protected against water intrusion; if any other term is mentioned, you should make sure it means the same thing. Some of the higher ip ratings are designed for specific conditions like IP69 is the highest protection IP. It is mostly used for such as high-pressure, high-temperature jets of water, making them suitable for certain industrial applications like food-grade tankers.

Advantages of IPX7

  • Ideal Water Resistance: Withstands immersion in water up to 1 meter for 30 minutes, making it suitable for various water-related activities.
  • Cost-Effective: Offers basic water protection, suitable for everyday scenarios like rain or poolside use.
  • Simplified Design: Focuses solely on water resistance without the additional complexity of dust protection, making it a straightforward option.

Disadvantages of IPX7

  • Limited Protection: Lacks specific dust or solid particle resistance, making devices vulnerable in dusty or dirty environments.
  • Restricted Scope: Primarily focuses on water resistance, limiting its suitability for environments requiring comprehensive protection against multiple elements.

Related: IPX4 Vs IPX7

ip67 ratings

According to IP ratings, IP67 ratings represent the highest level of protection possible. IP67 provides excellent water and dust resistance to a device. Additionally, the device is protected against liquid ingress protection and water.

Of course, the level of emergency will determine the degree of protection. A developer will not be responsible for a flood of more than one meter of water if the level of emergency is higher. The enclosure also indicates that it would be suitable for use in areas with high pressure, high temperature water jets, and outdoor applications.

Currently, IP67 is considered to be the best rating for scientific instruments that have to withstand harsh weather conditions. IP67 has been considered for outdoor security systems generally because it has weather resistance to an extent.

Advantages of IP67 Ratings:

  • Comprehensive Protection: Guards against both water immersion and dust, dirt, and sand ingress, ideal for outdoor and harsh environments.
  • Versatile Use: Suitable for diverse settings, from scientific instruments to outdoor security systems, due to its robust weather resistance.
  • Enhanced Durability: Provides a higher level of defense against environmental elements, ensuring reliability in challenging conditions.

Disadvantages of IP67 Ratings:

  • Potentially Complex Design: The inclusion of dust and water resistance might result in slightly more complex device designs or manufacturing processes.
  • Higher Cost: Devices with an IP67 rating may tend to be more expensive due to the additional comprehensive protection against water and dust.

IPX7 vs IP67 | Difference between ipx7 and ip67

difference between ipx7 and ip67 are water and dust tight (dust resistant) standards but are measured and defined differently. Here’s a comparison table of IPX7 vs IP67:

AspectIPX7IP67
Water ResistanceCan withstand immersion in water up to 1 meter for 30 minutesCan withstand immersion in water up to 1 meter for 30 minutes
Dust ResistanceNot specifiedCan resist the ingress of dust, dirt, and sand
Test MethodTested by submerging the device in waterTested by subjecting the device to a dust chamber
Additional ResistanceN/ACan resist immersion in water for long periods or at greater depths
Certification AgencyInternational Electrotechnical Commission (IEC)IEC

In summary, while IPX7 and IP67 protect water immersion for up to 30 minutes, IP67 also protects against dust, dirt, and sand ingress. However, IPX7 does not have a dust resistance rating. Additionally, IP67 may offer higher water resistance for longer periods or at greater depths.

Which is better IPX7 Vs IP67

by hometheaterjournal.com

From our discussion above, it has been shown that IP67 is better than IPX7. It all depends on your requirements.

Suppose the product will be used only at home or in a clean environment without any dust. In that case, you may select the IPX7 version since it has a waterproof rating, can withstand water, and will never be exposed to dusty conditions.

Conversely, if you live in a dusty environment or intend to use that product in a dusty environment, it should be IP67-rated. Due to their ability to withstand various weather conditions, especially rain and dust, IP67 and IP68 are known as weather-proof products.

Those devices which must be used in extreme conditions should also be dustproof and waterproof. As well as being drop-proof, such devices should be able to resist damage if they are accidentally dropped from your hands.

Related: IPX8 vs IP68 rating

Conclusions

Hopefully, now you can better understand the ipx7 waterproof rating vs the ip67. It is better to buy IP67 if you need it, but it is unnecessary for most people. In the rain, in showers, on beaches and poolside, and in many other watery settings, IPX7 is ideal for water resistance rating electronic devices.

FAQs


1. What does IPX7 mean in terms of water resistance?

IPX7 indicates a device’s capability to withstand submersion in water ingress up to one meter deep for 30 minutes. However, it doesn’t guarantee protection against dust or solid particles.

2. How does IP67 differ from IPX7?

IP67 offers both water and dust resistance. Like IPX7, it can endure water submersion for 30 minutes at a one-meter depth, but it also protection against solids, dust particles, dirt, and sand ingress.

3. Can IPX7-rated devices resist dust or solid particles?

No, IPX7-rated devices are solely certified for water resistance and lack a specific dust resistance rating. They’re designed to endure water submersion but might not protect against dust intrusion.

4. Are all wireless earbuds waterproof?

Not all wireless earbuds are waterproof. Check the product’s specifications for IP ratings; some earbuds carry IPX4 or higher ratings, offering resistance against splashes or sweat.

5. Can I use my IPX7-rated smartphone underwater for photography?

While an IPX7 rating indicates water resistance, it’s generally advised not to intentionally submerge smartphones, even with IPX7 ratings, as these ratings are based on controlled conditions.

6. Which IP rating suits extreme conditions or harsh environments?

For extreme conditions, including high-pressure water jets or dusty surroundings, opting for IP67 or even higher-rated devices like IP68 ensures robust protection against dust and water resistance.


Categories
Subwoofer Informational

How To Make Subwoofers Louder

How To Make Subwoofers Louder: 10 Effective Ways

Bass waves produced by subwoofers are known for their high frequencies and rich bass. Despite their improved sound output, it may still be necessary to use an amplifier. In addition to increasing the volume and depth of a sound, amplifying it also ensures that it is heard the same way throughout a room or arena.

Sound distortions are prevented and improved by amplifiers because they increase bass output. In addition to being expensive, amplifiers require constant maintenance. You can find alternative ways to power your subwoofer if you are not willing to spend much money on it.

Using different techniques, you can easily amplify. Here are some options for amplifying the subwoofer box’s output:

How to Make Subwoofers Louder Without an Amplifier

How To Make Subwoofers Louder by hometheaterjournal.com

Before making the subwoofer louder we need to know how the subwoofer works in our blog post.

1. Place your subwoofers correctly

Subwoofers can be easily increased in noise output by positioning them differently. Adjusting the woofer as per the recommended position may be necessary to experience the best sound. There is a tendency to place subwoofers in the corner of the home. There are, however, some cases where that may not be ideal. It is possible to get the best bass sound output by placing the subwoofer in the corner of the room. It is important to note that not every person will receive the same level of bass output because of placement.

The sounds may be less audible for some people. Nevertheless, corner placements provide the most bass output without an amplifier without adding an amplifier. Place it in the center of the room to ensure everyone hears equal bass output. The bass response is evened out by placing the speakers in such a way, creating a consistent sound throughout the room.

When placing the woofer in a small house, make sure there is at least an inch of space between the woofer and the wall. Subwoofers with rear ports are recommended to be placed in this position. The loudest possible bass output will be achieved even in rooms with worm shapes that aren’t rectangles or squares. Try to position the subs asymmetrically if the worm is anything other than rectangles or squares.

The subwoofer can be placed behind the couch if there is a space crunch, but never under it. A dampening effect will be achieved by placing it under the couch.

2. Tune the subwoofer properly

An amplified bass effect can also be achieved by tuning the subwoofers. The “Boom effect” is a signature feature of subwoofers, but tuning the woofer is needed to achieve louder and clearer audio. Depending on the woofer’s controls, you may need to adjust them to ensure the machine does not strain too much.

3. Adjust phase & crossover settings

In addition to crossover settings, phase settings are also essential for subwoofers. During the sound system’s installation, ensuring that the woofer is in phase with the other components is important. You can use the single-phase switch or balanced meals to adjust the settings to ensure that the phasing is properly set. The crossovers typically come with a dial ranging from 0 to 180 degrees.

Once you get the desired sound output, adjust the settings and phasing. Observe the crossover settings closely as well. A speaker that does not have a correct crossover between the main and lower speakers will not produce precise sound and will be unclear if the crossovers are not optimized. There is a risk that speakers will cancel each other out due to an incorrect crossover level. In turn, this results in a distorted sound and a shabby voice, which in turn results in a distorted sound.

A speaker’s size determines the ideal crossover frequency. Higher frequencies are better suited for smaller and more compact woofers than lower frequencies for larger speakers.

The adjustment can be enhanced by playing heavy bass music.

For the optimal sound and the deep bass subwoofer, we have two options for you Polk Audio PSW108 Vs Polk Audio PSW10.

4. Files Must Be Use High-Quality 

High-quality subwoofers don’t produce the same sound as shabby-grade audio files. Even the best machine can’t save an audio file if it is not up to par. The demand for compressed and small files is often a result of the size crunch. However, compressed audio files lose their high- and low-frequency content, resulting in poor sound quality.

Compressed files have missed frequencies and other essential aspects that you may be unable to identify using headphones. To achieve this, it is most effective to use advanced music files designed for loudspeakers or subwoofers, containing all the frequencies and effects required. Experts recommend Lossless audio file formats like FLAC and AIFF due to their lossless nature.

Choose advanced apps that stream music from high-quality audio files if you plan to stream music from an app. Also, make the music app ensure that the streaming service is of the highest quality.

5. Reduce electrical impedance

Playing your favorite music with a subwoofer converts electric energy into sound. The sound quality drops dramatically when there is resistance in the connection. When a subwoofer plays music, its impedance has a certain degree of resistance; a high impedance decreases its efficiency. Because of this, the subwoofer cannot convert as much electrical energy into audio, resulting in distorted sound.

Several factors, including the magnetic and coil conditions and the control conditions, can cause higher impedance. Subwoofers produce bass, so you should ensure that the woofer works properly without excessive wear and tear. As well as checking the magnet and coil condition of the teeth, check their condition. For these parts to work properly, they must be in perfect condition.

You can also fine-tune the audio quality of the subwoofer control units to reduce impedance by checking the subwoofer control units. You should call an electrician if any of these parts are damaged. Calling an electrician will give you the best listening experience for your audio system.

6. Invest in sound-dampening materials

In addition to muddying up the sound, extra vibrations also affect the bass effect, which becomes blunt and lacks sharpness. It will produce damp bass sounds if the subwoofer vibrates excessively. Add dampening materials to the solution. Material that dampens vibrations is best for insulators.

Vehicular subwoofers usually have dampeners that cancel vibrations to produce maximum sound output. Furthermore, the bass effects raise the volume of the speakers. A dampener also enhances the sharpness and accuracy of sound. A common trend is to use a dampening enclosure lined up along a cubical or rectangular shape. In this design, internal reflections and parallel surfaces often deflect sound waves in the wrong direction.

It is a good idea to use acoustic foam, according to experts. The foam is designed to negate vibrations and absorb sound reflections. Thus, sound distortion is reduced without affecting bass output. The sides of the subwoofer box can be covered with acoustic foam. Acoustic foam can be applied to both sides of larger woofers to increase sound quality.

Sound and musical equipment stores or e-commerce sites sell acoustic foams easily. Plastering foam with hot glue works well.

7. Replace the cables

A woofer is one of many components important to the system. Its cables are equally important. Using old and rugged cables may result in poor sound output since they can’t transport electricity as efficiently as they should. Worn-out or low-quality cables should be avoided.

Furthermore, the older VC valves often cause audible sound distortions as they adversely degrade the electric signals. Cables of poor quality are also prone to the same problems.

When using electric cables, always choose reputable brands that offer premium quality. In addition, you can maintain the sound output by changing the cables every twelve months. Cables that have visible wear or tears should be replaced immediately.

8. Make sure the subwoofer is isolated from your floor

Subwoofers should not be placed directly on the floor. The poor sound output will result from this.

Subwoofers produce a lot of vibration, and it is often worse when they are placed directly on the floor. Moreover, directly placing the subwoofer on the floor will also cause reverberations that will prevent the subwoofer from performing as intended.

So, if you want to ensure that it is not affected by the floor, try to isolate it. It should not be placed directly on the floor. To maintain a small gap of at least three inches between the subwoofer and the speaker, you should use special subwoofer stands. It is also important to use air circulation to allow the subwoofer to work correctly, allowing you to hear the sound more clearly and precisely.

9. Upgrade the heatsink

Audio electronic appliances are especially susceptible to damage caused by heat. Subwoofers usually emit waves of sound. The result is that they generate a great deal of heat when they operate. The heat can damage woofers and their cones, resulting in sound distortions. Additionally, the amplifiers inbuilt into the device amplify electronic signals, resulting in more heat emissions.

The sound output will be improved by dissipating this heat. Furthermore, it extends the subwoofer’s shelf-life. Adding an extra heatsink to the subwoofer is the best way to go. You can do so if you prefer to purchase it offline or online. Heatsinks are now built into most subwoofers’ backs.

A more oversized or separate heatsink is an option if your woofer doesn’t have one. The woofer should be able to handle it if it can be mounted. Heat sinks can be attached to woofer sides with hot or industrial glue if you cannot use screws.

10. Locked Enclosures / Custom Boxes 

Many customers prefer custom subwoofer boxes. Neither of the methods above works if you enclose your woofer in a DIY box. Different steps must be followed, such as.

Ported Subwoofer Box:

Music listening experiences should also be considered when designing enclosures. Custom-ported boxes, for instance, are necessary if you want loud and deep bass tones.

The use of wholly enclosed woofers is not recommended. Instead, an amplifying soundbox with a ported design provides a great listening experience. A pit near the 50Hz region will have a louder bass or boom effect. You will benefit significantly from it.

Fill the subwoofer with polyfill.

Placing polyfill inside the enclosure box is another great idea. Using a compact subwoofer, you can boost bass sound output by using polyfill.

In the box, sound waves are slowed down by polyfill layers. The waves traveled farther because the tooth boxes grew larger. Deeper bass is the result of this effect.

Ensure that the box is filled from all sides using layers and polyfills. Layers will become lighter as you lift them upwards by attaching the thickest layer at the bottom. To prevent fibers from escaping from the box, attach cotton gauze on top. Use paper glue instead of glue if you’re using glue.

A tightly packed box should be avoided. It is possible that you will not achieve the desired results if you don’t follow these steps.

Choose a box with a more robust material

Long-lasting materials should be used if you need to use an enclosed box. As the woofer box expands, damages and degradation occur over time due to the airwaves within the sealed box.

The box is made from durable materials to last a long time and to offer great sound quality. Ported and leased boxes can both benefit from this strategy.

A box can be designed with fiberglass or MDF.

Conclusion

A subwoofer’s sound output can be enhanced significantly by amplifiers. Listening to clearer and louder music with a subwoofer amplifier is possible. On the other hand, those with a tight budget may not be able to afford amplifiers. Everyone cannot keep and maintain the amplifier, as they need more space.

To get a louder bass effect, you can adjust the speaker’s placement and fine-tune it to meet your needs. The crossover and phase settings can also be adjusted. You should also use premium audio files to get a great audio listening experience. Make sure you choose ported or polyfill-layered enclosure boxes of premium materials if you use enclosure boxes to amplify the sounds.

FAQs


Q1: Can I improve the sound output of my subwoofers without using an amplifier? 

A1: Yes, you can enhance your subwoofers’ sound output without an amplifier. By adjusting placement, tuning, and phase settings and using high-quality audio files, you can achieve louder and clearer bass.

Q2: How should I position my subwoofer for optimal sound output? 

A2: Placing the subwoofer in a corner of the room generally provides the most bass output. However, consider placing the subwoofer in the center of the room for even sound distribution. Ensure there’s a bit of space between the subwoofer and the wall for better results.

Q3: How do I tune the subwoofer to achieve better bass output? 

A3: To achieve amplified bass, properly tune your subwoofer. Adjust the controls according to the manufacturer’s recommendations, avoiding excessive strain on the machine. This tuning helps you achieve louder and clearer audio.

Q4: What are phase and crossover settings, and how do they affect subwoofer performance?

A4: Phase and crossover settings are crucial for subwoofer performance. Phase settings ensure the subwoofer is in sync with other components, while crossover settings determine the frequency range each speaker handles. Properly set phase and crossover settings prevent sound distortion and ensure precise audio reproduction.

Q5: How can using high-quality audio files improve my subwoofer’s sound output? 

A5: High-quality audio files are essential for achieving the best sound output. Compressed files lack frequency details and may result in poor sound quality. Lossless formats like FLAC and AIFF preserve all frequencies. Using these formats and streaming services that offer high-quality audio enhances your subwoofer’s performance.