How to Use a Projector to Trace Art | 7-Steps Helpful Guide
Whether seasoned professionals or enthusiastic beginners, artists are always looking for innovative techniques to enhance their creative process.
If you want to add a new dimension to your artwork or make your next project easier, consider using a projector to trace your art. This technique opens up possibilities, allowing you to bring your visions to life precisely and easily.
Table of Contents
The Magic of Projector Tracing | Unveiling Your Creativity
Projector tracing is like having your personal art assistant. It allows you to effortlessly transfer images, designs, or sketches onto a canvas or surface. Whether you’re working on a large mural, a detailed illustration, or a simple craft project, a projector can save you hours of painstaking freehand work.
What You Need
Before diving into the world of projector tracing, gather your essentials:
Artwork: Your source image or sketch
Projector: A reliable projector, preferably with adjustable brightness and focus
Surface: Your canvas, paper, or any other medium you’ll be tracing onto
Dark Room: Create a space with minimal ambient light for optimal projection
Materials: Pencils, pens, or whatever medium you plan to use for tracing
Patience and Creativity: Your artistic spirit!
How to Use a Projector to Trace Art | Steps to Illuminate Your Art
Now that you have everything ready let’s explore the steps to use a projector for tracing your art:
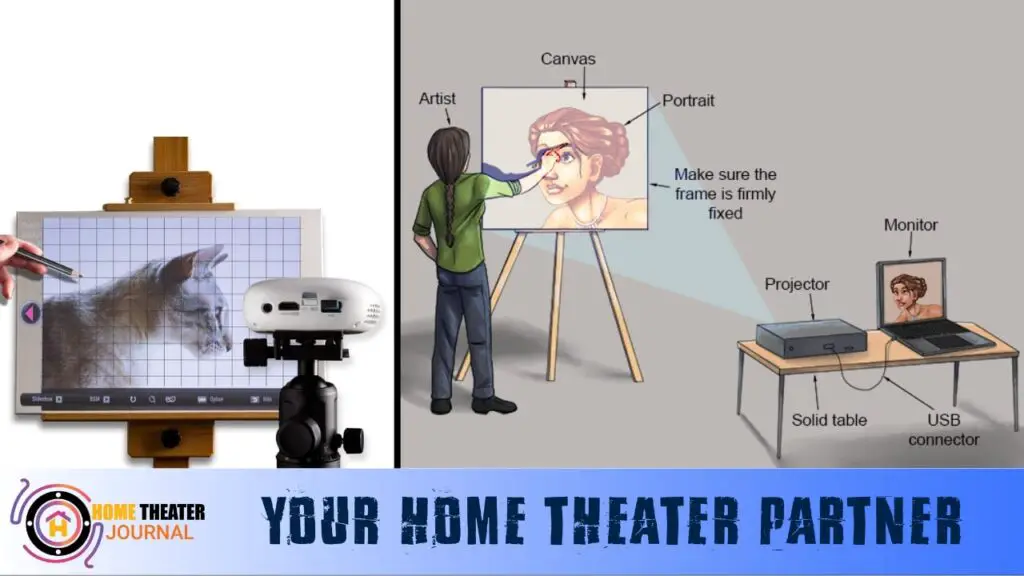
1. Set Up Your Projector
Place your projector on a stable surface, ensuring it’s at the right distance and angle to project onto your working surface. Ensure it’s connected to a power source and any device (like a laptop) containing your artwork.
2. Prepare Your Artwork
Ensure your source image or sketch is in digital format, making it easier to adjust the size and position on the projector. Adjust the image’s brightness, contrast, and color settings to achieve the desired clarity and contrast.
3. Position Your Surface
Place your canvas or paper on the surface where you want to transfer the image. Make sure it’s flat and stable. You can secure it in place to prevent any accidental shifts during tracing.
4. Project Your Art
Turn on the projector and adjust its focus, size, and position until the image covers your canvas or paper. Play with the settings until you achieve the perfect alignment.
5. Trace with Precision
Now comes the fun part – start tracing! Use a pencil, pen, or any desired medium to follow the projected lines and shapes onto your surface. Take your time to ensure accuracy and detail.
6. Add Your Personal Touch
While tracing, don’t hesitate to add your unique flair and creativity. Adjust details, experiment with colors, or even modify the original design to make it your own.
7. Fine-tune and Finish
Once you’ve traced the entire image, turn off the projector, and allow your artwork to dry if necessary. Now, it’s time to refine and enhance your traced art. Add shading, highlights, and additional details to make it yours.
Embrace Creativity with Projector Tracing: Unlocking Your Artistic Potential
Using a projector to trace art isn’t just a time-saver; it’s a powerful tool that allows you to push the boundaries of your creativity. Whether you’re a professional artist looking to streamline your workflow or an aspiring creative exploring new techniques, projector tracing can be a game-changer in your artistic journey.
So, next time you embark on an artistic endeavor, don’t hesitate to embrace the magic of projectors. Let them illuminate your canvas, unveil your creativity, and transform your visions into stunning works of art.
Conclusion
Using a projector to trace art is more than a shortcut; it’s a gateway to unlocking your full artistic potential. Fusing traditional craftsmanship and modern technology can lead to extraordinary creations that captivate and inspire. So, whether you’re an established artist seeking new horizons or a budding creative looking to elevate your work, embrace the magic of projectors and let your imagination soar.
With each traced line and every stroke of your brush, you’re not just creating art; you’re crafting a unique story that resonates with the world. So, experiment boldly, and keep tracing your path to artistic excellence. The canvas of your imagination knows no bounds when illuminated by the projector’s light.
FAQs
1. Is using a projector for tracing cheating in art?
Answer: No, using a projector for tracing is not cheating in art. It’s simply a tool that artists can use to transfer images or sketches onto a canvas or surface with precision. Many professional artists employ various techniques and tools to aid their creative process, and a projector is one such tool that can save time and help achieve accurate results.
2. What type of projector is best for art tracing?
Answer: The best projector for art tracing depends on your specific needs. Look for a projector with adjustable brightness and focus controls to ensure you can customize the projection to your liking. Consider a portable and lightweight model if you plan to use it in different locations. Additionally, projectors with a high resolution will provide clearer and more detailed images for tracing.
3. Can I use a projector to trace copyrighted images or photographs?
Answer: Respecting copyright laws when using a projector to trace images is important. Tracing copyrighted material without permission can infringe on the copyright holder’s rights. If you intend to use copyrighted images, always obtain proper licensing or permission from the copyright owner before proceeding.
4. What are some common tips for achieving better results with projector tracing?
Answer: To achieve better results with projector tracing, consider the following tips:
Ensure a dark room with minimal ambient light for a clear projection.
Take your time to align the image correctly to avoid distortion.
Experiment with different scales and layering to add depth to your art.
Use the projector as a guide but feel free to add your unique artistic touch.
Document your process for future reference and share it with others.
5. Can I use a projector to trace different surfaces besides canvas and paper?
Answer: Yes, projectors can be used to trace on various surfaces. Besides canvas and paper, you can use projectors to trace wood, fabric, walls, glass, and more. The key is to ensure that the surface is flat and stable and the projector can be positioned at an appropriate angle for accurate tracing. Experimentation with different materials can lead to exciting and innovative art projects.
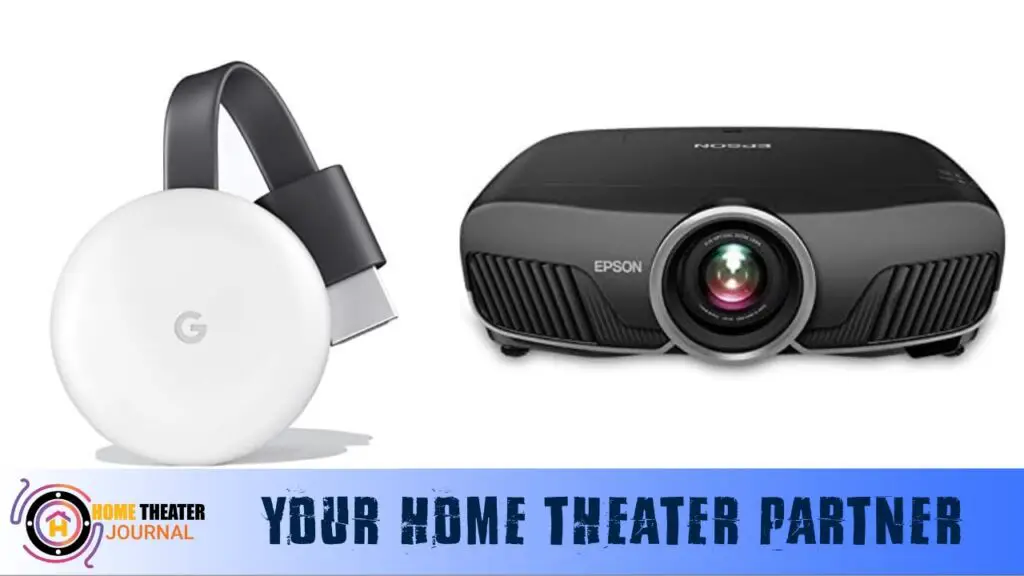
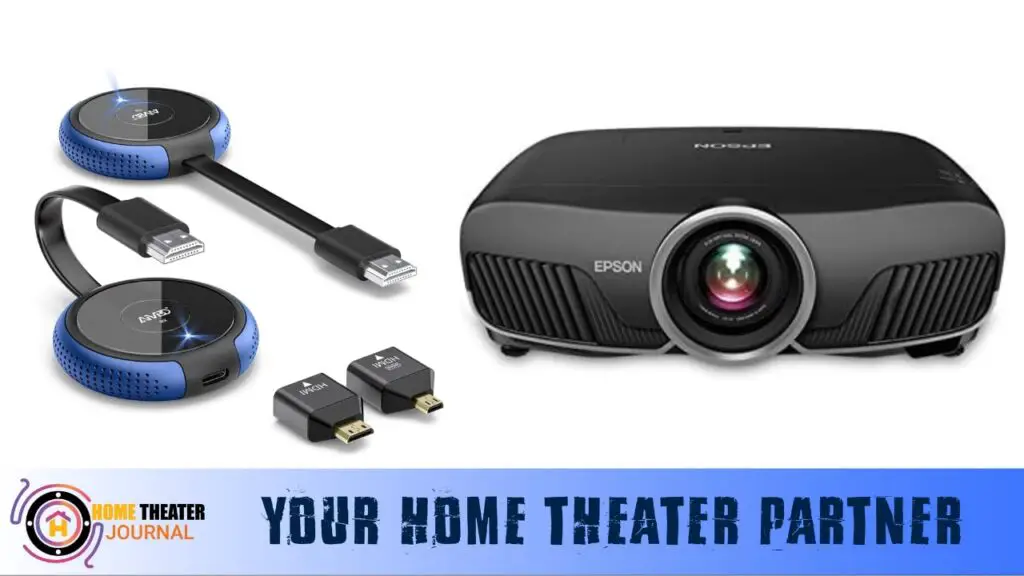
How To Connect a Chromecast To A Projector | Step-by-Step Guide
Streaming content from your Chromecast to a projector offers a fantastic home entertainment experience, but the process might present challenges, especially when it comes to audio connectivity. In this guide, we’ll walk you through the simple steps to connect your Chromecast to a projector and address potential audio issues, ensuring a smooth and immersive streaming experience.
Table of Contents
Challenges When Connect Chromecast with a Projector
The main problem that users encounter when connecting a Google Chromecast (on Amazon) to a projector lies in the audio aspect of the setup. While the Chromecast’s HDMI signal carries both video and audio, challenges arise when attempting to seamlessly route the audio signal to the projector or another audio component.
This issue is particularly pronounced when projectors lack built-in speakers, requiring users to explore alternative methods to ensure a synchronized and high-quality audio experience. The primary complications can be summarized as follows:
Audio Challenges:
Projectors Without Built-in Speakers: Not all projectors come equipped with onboard speakers, creating a hurdle for audio output. In such cases, users need to find alternative solutions to ensure clear and synchronized audio during streaming.
Mismatched Audio Support: Some newer Chromecast devices support advanced audio technologies like Dolby Atmos. However, not all projectors are designed to accommodate these features, leading to potential compatibility issues and audio disruptions.
Lag in Audio or Disruptions: Attempting to connect the Chromecast directly to the projector and then wirelessly connecting to external speakers via Bluetooth can introduce audio lag or disruptions in the streaming experience. This can result in an unsatisfactory user experience with delayed audio.
How To Connect a Chromecast To A Projector
Bluetooth Connectivity:
Access Chromecast Menu: Begin by accessing the menu on your Chromecast device. This can usually be done through the settings or options menu on your TV screen.
Navigate to Bluetooth Pairing: Look for the Bluetooth pairing option within the Chromecast menu. This is where you initiate the process of connecting your Chromecast to Bluetooth-enabled speakers.
Activate Bluetooth on Speakers: Turn on the Bluetooth feature on your speakers. Refer to the speaker’s manual for specific instructions on how to activate Bluetooth pairing mode.
Sync Speakers with Chromecast: Once Bluetooth is activated on both the Chromecast and the speakers, the devices will search for each other. Follow on-screen prompts to sync the Chromecast with the Bluetooth speakers.
Confirm Connection: After a successful sync, confirm that the Chromecast and Bluetooth speakers are connected. You may see a confirmation message on the TV screen or within the Chromecast menu.
Advantages:
Simplicity and Speed: Bluetooth connectivity is a quick and straightforward solution, requiring minimal setup time.
Wireless Experience: Eliminates the need for additional cables, providing a clean and wireless audio connection.
Compatibility: Ideal for users with Bluetooth-enabled speakers or AV receivers.
HDMI Connectivity:
Locate HDMI Port on Projector: Identify the HDMI port on your projector. Typically, this is labeled as “HDMI” and may be accompanied by a number indicating the HDMI input.
Plug in Chromecast: Take the HDMI end of your Chromecast device and plug it into the identified HDMI port on the projector. Ensure a secure connection.
Select HDMI Input on Projector: Using the projector’s remote control or onboard controls, navigate to the input/source selection menu. Choose the HDMI input to which your Chromecast is connected.
Power On Chromecast: Power on your Chromecast device. This can usually be done through a dedicated power button on the device or via the Chromecast remote.
Ensure Proper Display: Confirm that the content from the Chromecast is displayed on the projector screen. Adjust the projector settings if necessary to optimize the display.
Advantages:
Simplicity and Reliability: HDMI connectivity is a straightforward and reliable method, providing both audio and video signals through a single cable.
High-Quality Transmission: HDMI cables support high-definition audio and video, ensuring a superior streaming experience.
Universal Compatibility: Virtually all projectors and Chromecast devices are equipped with HDMI ports, ensuring broad compatibility.
Wireless HDMI Kit Connectivity:
Connect Chromecast to HDMI Transmitter: Plug your Chromecast device into the HDMI transmitter that comes with the wireless HDMI kit. This transmitter is typically a compact device with an HDMI input.
Position Wireless HDMI Transmitter: Place the wireless HDMI transmitter in a location within your entertainment setup. It does not need a direct connection to the projector.
Connect HDMI Receiver to Projector: Use an HDMI cable to connect the HDMI receiver, provided with the wireless HDMI kit, to the HDMI port on your projector.
Power On Chromecast and HDMI Kit: Power on your Chromecast device and the HDMI transmitter. The HDMI transmitter will wirelessly send the Chromecast’s audio and video signals to the HDMI receiver.
Confirm Connection: Check the projector’s input/source settings and ensure it’s set to the HDMI port where the wireless HDMI receiver is connected. Confirm that the content from the Chromecast is displayed on the projector screen.
Advantages:
Wireless Convenience: Eliminates the need for a physical connection between the Chromecast and the projector, reducing cable clutter.
Flexibility in Placement: The wireless HDMI transmitter can be positioned anywhere within the range of the kit, providing flexibility in arranging your entertainment setup.
Supports Audio and Video Wirelessly: Both audio and video signals are transmitted wirelessly, offering a comprehensive solution.
How to Connect Your HDMI Kit to Your Projector
Setting up an HDMI kit (on Amazon) with your projector involves a few straightforward steps to establish a wireless connection between your Chromecast and the projector. Here’s a detailed guide on how to set up an HDMI kit for optimal streaming:
Steps to Set Up an HDMI Kit with Your Projector:
Gather Your Equipment: Ensure you have all the necessary components: the HDMI transmitter, HDMI receiver, HDMI cable, power adapters for both transmitter and receiver and your Chromecast device.
Connect Chromecast to HDMI Transmitter: Plug your Chromecast into the HDMI transmitter. This is usually a compact device that comes with the HDMI kit.
Position the HDMI Transmitter: Place the HDMI transmitter in a location within your entertainment setup. It doesn’t need a direct line of sight to the projector but ensure it’s within the specified wireless range.
Connect HDMI Receiver to Projector: Use an HDMI cable to connect the HDMI receiver, which comes with the HDMI kit, to the HDMI port on your projector.
Power On Devices: Power on your Chromecast device, the HDMI transmitter, and the HDMI receiver. Ensure each device is connected to a power source using the provided adapters.
Configure Projector Input: Access the input/source settings on your projector and select the HDMI port to which the HDMI receiver is connected. This establishes the connection between the projector and the wireless HDMI kit.
Check Chromecast Display: Confirm that the content from your Chromecast is being displayed on the projector screen. This verifies the successful wireless transmission of both audio and video signals.
Tips for Optimal Setup:
Wireless Range: Be mindful of the wireless range specified by the HDMI kit manufacturer. Ensure the transmitter and receiver are within this range for optimal performance.
Power Management: Ensure all devices are adequately powered. Use reliable power adapters to prevent interruptions during streaming.
Line of Sight: While not always necessary, maintaining a clear line of sight between the HDMI transmitter and receiver can enhance signal stability.
Firmware Updates: Check for firmware updates for both the Chromecast device and the HDMI kit components to ensure compatibility and optimal performance.
By following these steps, you can set up an HDMI kit seamlessly, creating a wireless connection between your Chromecast and projector. This not only reduces cable clutter but also provides flexibility in positioning your entertainment components for an enhanced streaming experience.
Conclusion:
Connecting a Chromecast to a projector is a straightforward endeavor, yet addressing potential audio challenges can significantly enhance your streaming experience. Whether opting for Bluetooth connectivity, leveraging an HDMI audio extractor, or embracing the wireless convenience of an HDMI kit, you can tailor the solution to suit your specific setup.
Choose the method that suits your preferences and enjoy seamless streaming with both crystal-clear video and high-quality audio. Explore these options to unlock the full potential of your home entertainment setup, making the most of your Chromecast and projector combination.
FAQs
1. How do I connect Chromecast to a projector without built-in speakers?
Answer: If your projector lacks built-in speakers, you can use alternative audio solutions. Options include connecting Chromecast to external speakers via Bluetooth, using an HDMI audio extractor, or employing a wireless HDMI kit for a comprehensive audio and video streaming experience.
2. Can I connect Chromecast to a projector wirelessly?
Answer: Yes, you can establish a wireless connection between Chromecast and a projector using a wireless HDMI kit. This kit typically includes a transmitter connected to the Chromecast and a receiver linked to the projector, eliminating the need for physical cables between the devices.
3. What should I do if there is a delay in audio when connecting Chromecast to a projector?
Answer: Audio delays can occur when wirelessly connecting Chromecast to a projector, especially via Bluetooth. To address this, consider using an HDMI audio extractor or a wireless HDMI kit. These solutions help synchronize audio and video signals, providing a seamless streaming experience without noticeable delays.
4. Are all projectors compatible with Chromecast?
Answer: In general, most projectors equipped with HDMI ports are compatible with Chromecast. Ensure your projector has an available HDMI port, and you can connect Chromecast directly or through a wireless HDMI kit for a versatile streaming setup.
5. Can I use a wireless HDMI kit with other devices besides Chromecast?
Answer: Yes, a wireless HDMI kit is not exclusive to Chromecast and can be used with various HDMI-enabled devices. This versatile solution allows you to wirelessly transmit both audio and video signals, providing flexibility for expanding your entertainment system to include other HDMI sources, such as gaming consoles or Blu-ray players.
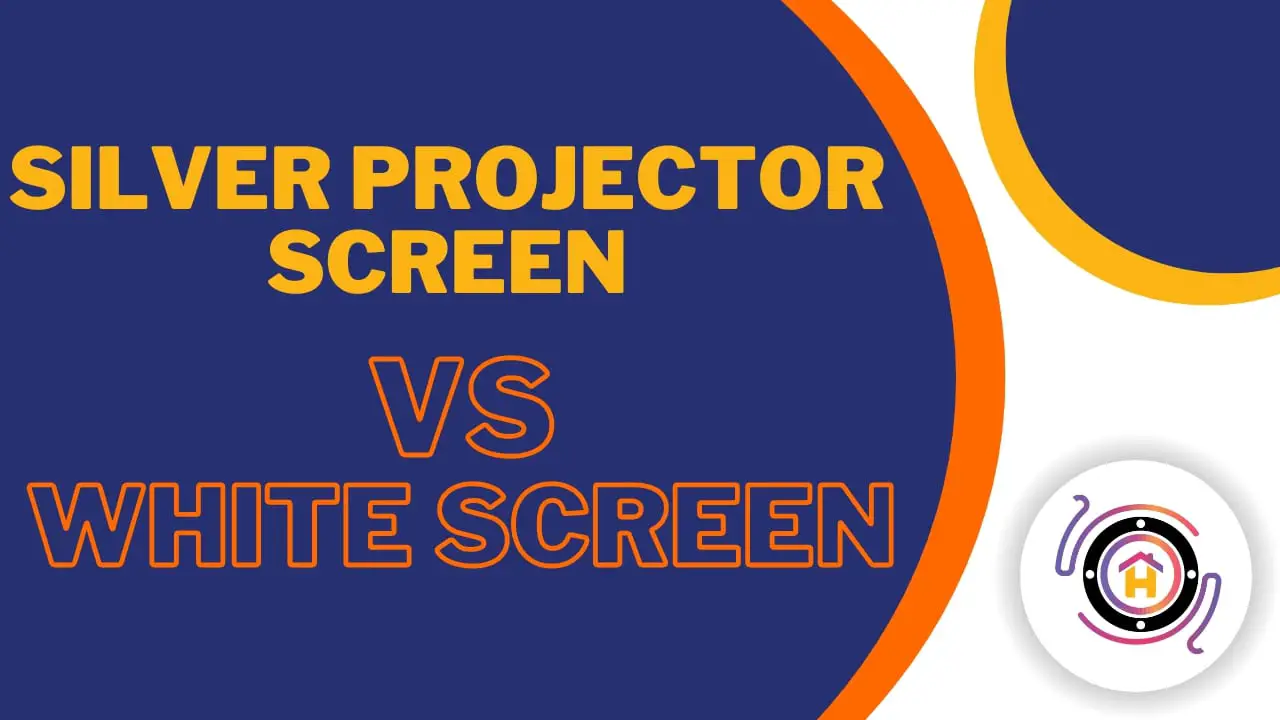
Silver Projector Screen Vs White Screen | Choosing the Perfect Canvas
When creating the ultimate cinematic experience in your home theater, one crucial decision can make or break the show: choosing between a silver projector screen and a white screen. Both options have their advantages and drawbacks, so it’s essential to understand the nuances before you hit play on your favorite film.
In this article, we’ll take a deep dive into the silver projector screen and the white screen, comparing their features, pros, and cons to help you decide which canvas for your visual masterpiece.
Table of Contents
Silver Projector Screen Vs White Screen
Feature
Silver Projector Screen
White Screen
Brightness & Contrast
Enhanced
Natural
Ambient Light Performance
Excellent
Challenging
3D Projection
Excellent
Reduced Brilliance
Viewing Angle
Limited
Wide
Cost
Higher
Budget-Friendly
The Silver Screen: Unveiling Its Brilliance
Shimmering Brilliance
Imagine the allure of a silver screen that adds a touch of elegance to your home theater. Silver projector screens are known for their remarkable ability to enhance the brightness and contrast of your projected images. Thanks to their reflective properties, they can make even the darkest scenes pop with clarity and brilliance.
Ambient Light Friendliness
Silver screens also have an edge when it comes to handling ambient light. They maintain picture quality, even in rooms with less-than-ideal lighting conditions. This means you can enjoy your favorite movies or sports events without drawing the curtains or turning off every light in the house.
Optimal for 3D Projection
If you’re a fan of 3D movies, a silver projector screen is your best friend. It ensures that the 3D effects appear sharp and immersive, elevating your movie-watching experience to a whole new dimension.
However, silver screens are not without their drawbacks:
Limited Viewing Angle
One of the primary drawbacks of silver screens is their limited viewing angle. If your seating arrangement varies widely in angle or distance from the screen, some viewers might experience color shifts or reduced image quality.
Higher Cost
Silver projector screens tend to be more expensive than their white counterparts. If you’re on a budget, you might need to think twice before choosing the silver option.
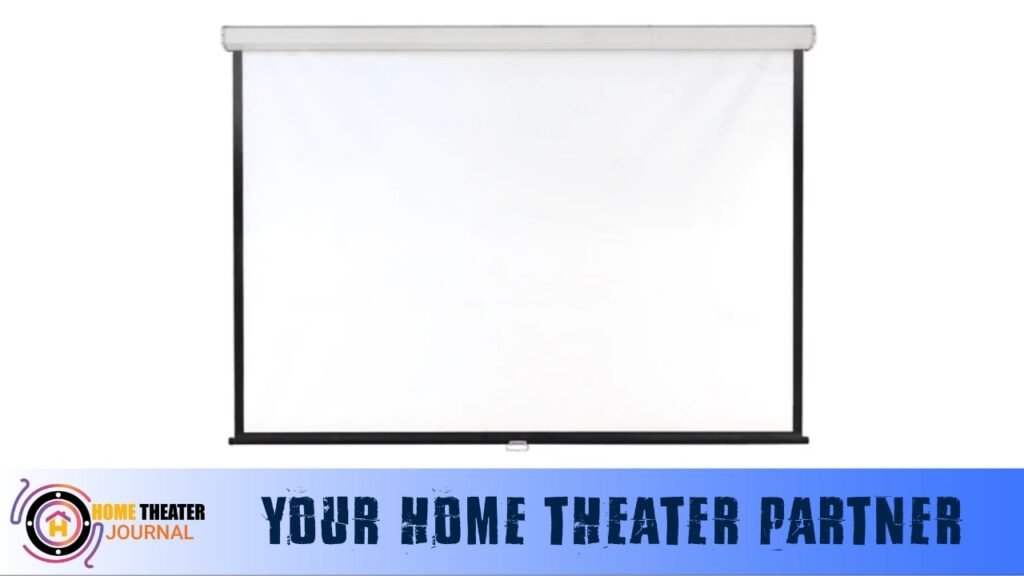
The White Screen: A Timeless Classic
Natural Colors
White projector screens have been a staple in home theaters for a long time and for a good reason. They deliver natural and accurate colors, making them an excellent choice for purists who value color fidelity. If you’re a cinephile who prefers the director’s vision to be presented without any enhancements, a white screen may be your go-to choice.
Wide Viewing Angle
White screens offer a wider viewing angle, ensuring everyone in your home theater gets a consistent and enjoyable viewing experience. Whether you’re sitting dead center or on the periphery, you’ll still enjoy vibrant colors and sharp images.
Budget-Friendly Options
Compared to silver screens, white screens are generally more budget-friendly. This makes them a practical choice for those who want a quality screen without breaking the bank.
However, white screens do have their limitations:
Challenging with Ambient Light
White screens might struggle to maintain picture quality in rooms with ambient light. They are more susceptible to washout and glare, which can be distracting during your movie nights.
Reduced 3D Brilliance
If you’re a 3D enthusiast, white screens may not provide the same level of brilliance and depth as silver screens. You might miss out on the full 3D experience.
Conclusion
There’s no one-size-fits-all answer in the battle between the silver projector screen and the white screen. Your choice ultimately depends on your preferences, budget, and the characteristics of your home theater room.
If you crave the wow factor, have a penchant for 3D, and don’t mind investing a bit more, the silver projector screen might be your ticket to a dazzling cinematic experience. On the other hand, if you prioritize color accuracy, have a limited budget, or need a screen for a room with controlled lighting, the classic white screen is a reliable choice.
So, whether you opt for the shimmering brilliance of silver or the timeless charm of white, your home theater will be your oasis of cinematic delight. It’s all about creating the perfect canvas for your visual masterpiece, so sit back, relax, and enjoy the show!
Choose your screen wisely, and let the movie magic begin!
FAQs
Q1: Which type of screen is better for watching movies in a well-lit room with windows?
A1: A Silver Projector Screen is the better choice if your home theater room has windows or is prone to ambient light. Silver screens handle ambient light, ensuring you can enjoy your movies without compromising on picture quality.
Q2: Do Silver Projector Screens work well for 3D movies?
A2: Yes, Silver Projector Screens are excellent for 3D projection. They enhance the brightness and contrast of 3D images, providing a more immersive and vibrant 3D viewing experience.
Q3: Are White Screens more budget-friendly than Silver Screens?
A3: Generally, yes. White Screens tend to be more budget-friendly compared to Silver Screens. A White Screen might be the better choice if you’re looking for a cost-effective option without sacrificing quality.
Q4: Do Silver Screens have a limited viewing angle?
A4: Yes, Silver Projector Screens tend to have a limited viewing angle. If you have a home theater with seating arrangements that vary widely in angle or distance from the screen, some viewers may experience color shifts or reduced image quality.
Q5: Which screen type provides a more accurate color representation?
A5: White Screens are known for delivering more natural and accurate colors. If color fidelity is your top priority, a White Screen is the preferred option, as it presents the director’s vision without any enhancements.
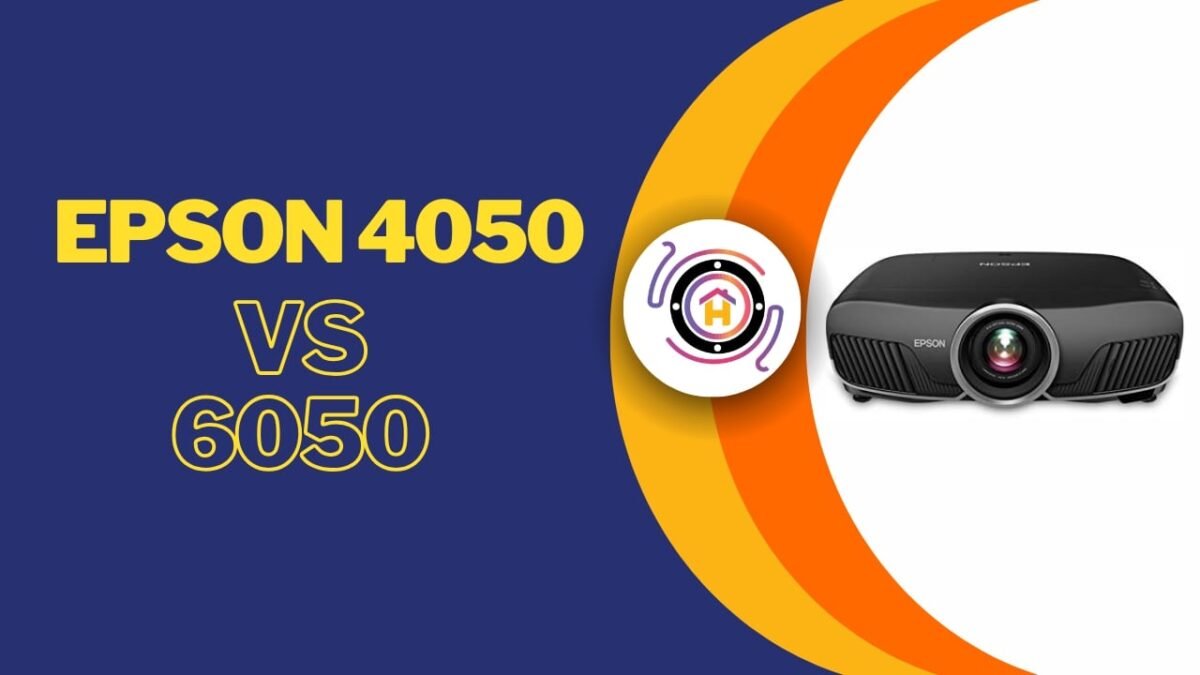
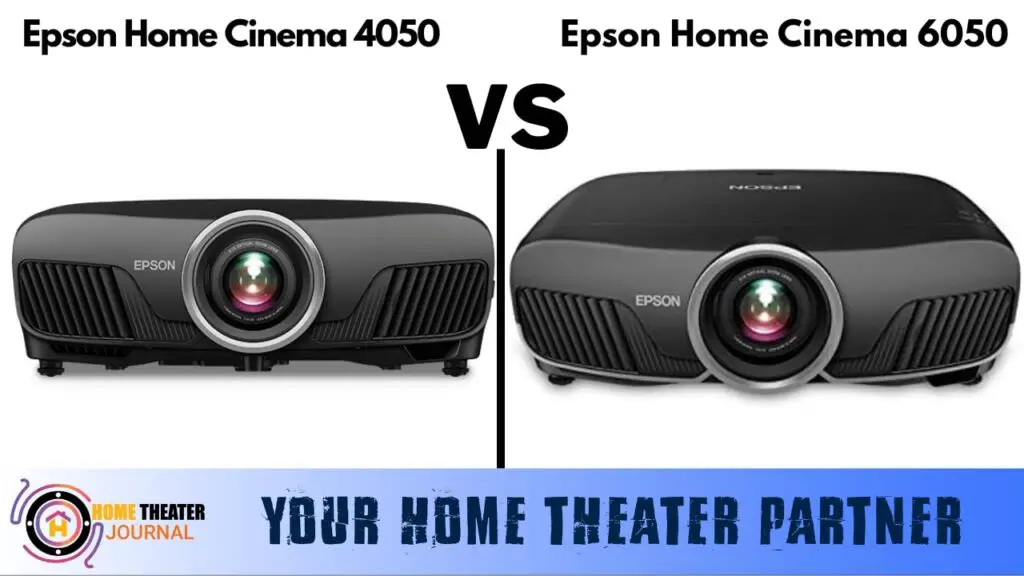
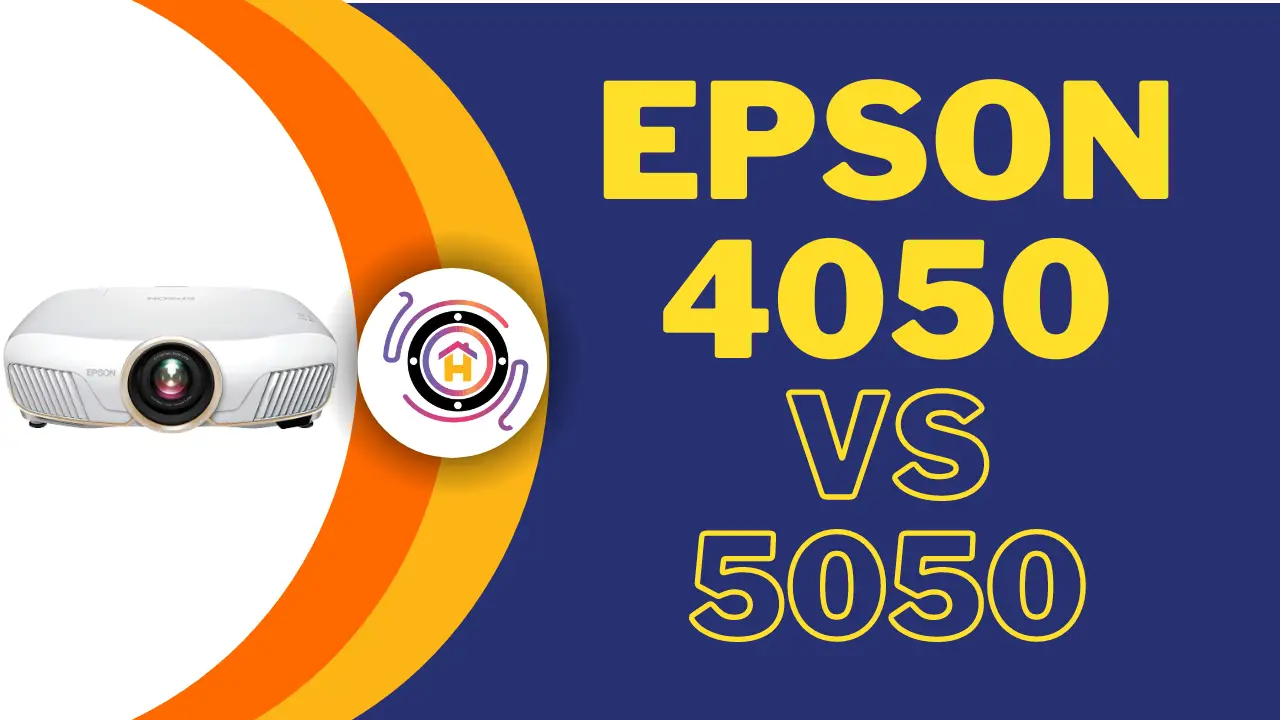
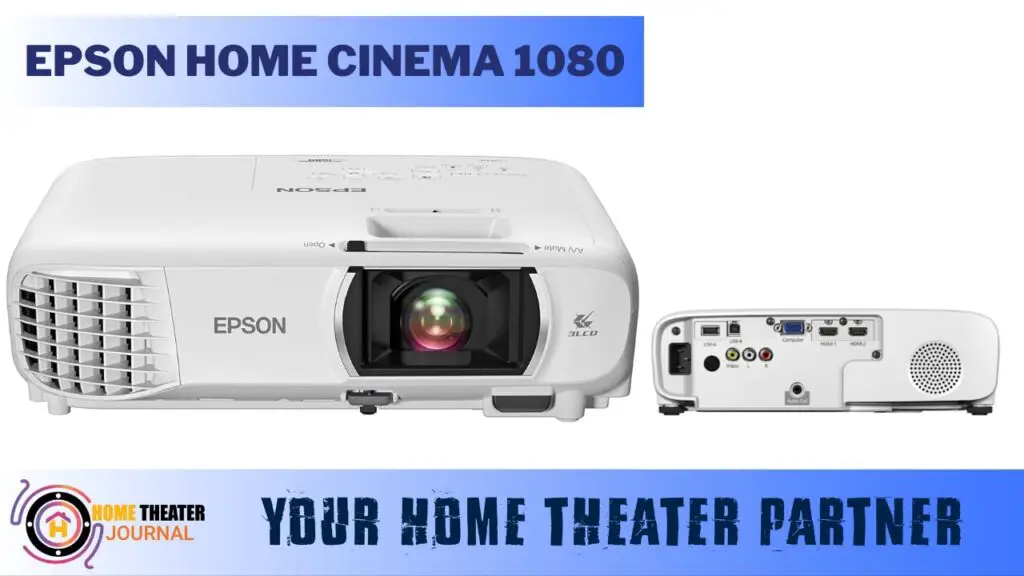
Epson 4050 vs 6050: Choosing the Right Projector for Your Home Theater
In-home theater projectors, Epson stands out as a reliable brand that consistently delivers outstanding image quality and performance. When it comes to choosing between two of their popular options, the Epson 4050 and the Epson 6050, making an informed decision is crucial.
Let’s dive into a detailed comparison to help you determine which one suits your needs best.
The Epson 4050, also known as the “Pro Cinema 4050 4K Pro-UHD Projector,” was introduced in September 2018. It promises an immersive 4K viewing experience with vibrant colors, high brightness, and exceptional detail.
Features and Specifications:
Display Technology: 3LCD
Native Resolution: 4K UHD (3840 x 2160)
Brightness: 2,400 lumens
Contrast Ratio: Up to 200,000:1
HDR Support: Yes (HDR10 and HLG)
Color Accuracy: Full 10-bit color
Lens: Powered Zoom and Focus
Lens Shift: Vertical and Horizontal
3D Support: Yes (requires compatible 3D glasses)
Input Connectivity: HDMI (x2), USB (x1), RS-232c, Ethernet
The Epson 6050, or the “Epson Pro Cinema 6050UB 4K PRO-UHD Projector,” is a projector that has captured the hearts of many home theater enthusiasts. While it’s been discontinued by the manufacturer, you can still find second-hand units on the market. Like most Epson projectors, it boasts high brightness, full 3D HD support, and a remarkable contrast ratio.
Features and Specifications:
Display Technology: 3LCD
Native Resolution: 4K UHD (3840 x 2160)
Brightness: 2,600 lumens
Contrast Ratio: Up to 1,200,000:1
HDR Support: Yes (HDR10 and HLG)
Color Accuracy: Full 10-bit color
Lens: Powered Zoom and Focus
Lens Shift: Vertical and Horizontal
3D Support: Yes (requires compatible 3D glasses)
Input Connectivity: HDMI (x2), USB (x1), RS-232c, Ethernet
Epson home cinema 4050 vs 6050: Which Beat the Battle?
Now, let’s dissect these projectors’ features and performance to determine which one reigns supreme.
Appearance:
Epson is renowned for its sleek and stylish designs; the 4050 and 6050 are no exceptions. They both share a similar aesthetic, making distinguishing between them at a glance challenging.
Brightness:
Brightness plays a crucial role in projector performance. The Epson 4050 offers 2400 lumens, while the Epson 6050 takes the lead with 2600 lumens. Higher lumens translate to a brighter picture, making the Epson 6050 the better choice for those who crave vivid visuals. However, even the 4050’s 2400 lumens are sufficient for a small home theater in moderately lit conditions.
Contrast Ratio:
Brightness alone isn’t enough to judge picture quality; contrast ratio matters too. The Epson 6050 boasts a dynamic contrast ratio of up to 1,200,000:1, surpassing the 4050’s 200,000:1. This means the Epson 6050 delivers superior image contrast and depth.
Aspect Ratio:
Both projectors support various aspect ratios. The Epson 6050 is compatible with 4:3 in Normal, Full, or Zoom modes, while the 4050 supports 16:9 widescreen, 4:3 resize, and 16:10 resize, in addition to Normal, Full, or Zoom modes.
Lamp Life:
Lamp life is essential for long-term use. The Epson 4050 and 6050 offer a lamp life of up to 3500 hours in high mode, 4000 hours in medium mode, and 5000 hours in eco mode. Therefore, they are on par in this aspect.
Warranty:
Both projectors come with a generous 3-year warranty. This means that you can rely on Epson’s support in case of any issues during this period.
Usability:
Both the Epson 4050 and 6050 are designed for home theater use. They excel in small to medium-sized, fully-light-controlled rooms. While they can serve unprofessional purposes, their primary strength lies in delivering top-notch home theater experiences.
Price:
With more incredible lumens and a superior contrast ratio, the Epson 6050 naturally comes at a higher price point. It is priced at$5,499.00, while the Epson 4050 is more budget-friendly at $2,399.
Conclusion:
The Epson 6050 emerges as the superior choice, offering higher brightness and an impressive contrast ratio. If you’re seeking an economical option for a small, light-controlled room, the Epson 4050 is a solid choice. However, if you’re willing to invest in a top-tier home theater experience and have no budget constraints, the Epson 6050 projector will elevate your viewing pleasure. Ultimately, the choice depends on your specific needs and budget.
FAQs
What is the main difference between the Epson 4050 and the Epson 6050 projectors?
Answer: The main difference between the Epson 4050 and Epson 6050 projectors lies in their brightness and contrast ratio. The Epson 6050 offers higher brightness at 2600 lumens compared to the 2400 lumens of the Epson 4050. Additionally, the Epson 6050 boasts an impressive contrast ratio of up to 1,200,000:1, whereas the Epson 4050 has a contrast ratio of up to 200,000:1. These differences result in the Epson 6050 delivering brighter and more visually stunning images with superior contrast and depth.
Can both the Epson 4050 and Epson 6050 projectors be used in rooms with some ambient light?
Answer: Both the Epson 4050 and Epson 6050 projectors are designed for optimal performance in fully light-controlled rooms. While the Epson 6050’s higher brightness gives it an advantage in dealing with ambient light, the Epson 4050’s 2400 lumens are also suitable for small home theaters in moderately lit conditions. However, for the best viewing experience, it’s recommended to use them in dark or dimly lit rooms.
Do the Epson 4050 and Epson 6050 projectors support 3D content, and do they come with 3D glasses?
Answer: Yes, both the Epson 4050 and Epson 6050 projectors support 3D content. However, they require compatible 3D glasses, which are not included with the projectors themselves. You would need to purchase the 3D glasses separately to enjoy 3D viewing.
What is the price difference between the Epson 4050 and Epson 6050 projectors?
Answer: The Epson 4050 is more budget-friendly, with a price of $2,399, while the Epson 6050 is priced at $5,499.00. The price difference reflects the superior brightness and contrast ratio offered by the Epson 6050, making it a premium option for those seeking the best home theater experience.
How long is the warranty for the Epson 4050 and Epson 6050 projectors?
Answer: Both the Epson 4050 and Epson 6050 projectors come with a generous 3-year warranty. This warranty provides peace of mind and manufacturer support in case of any issues during the warranty period.
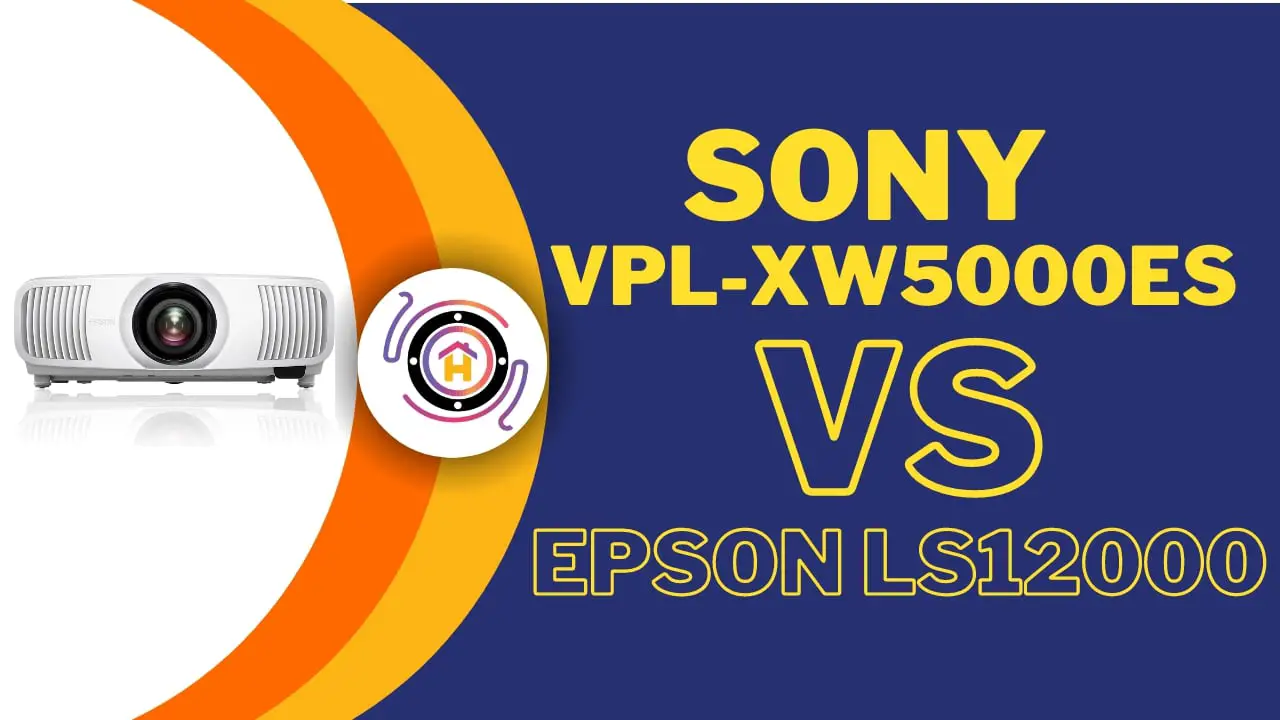
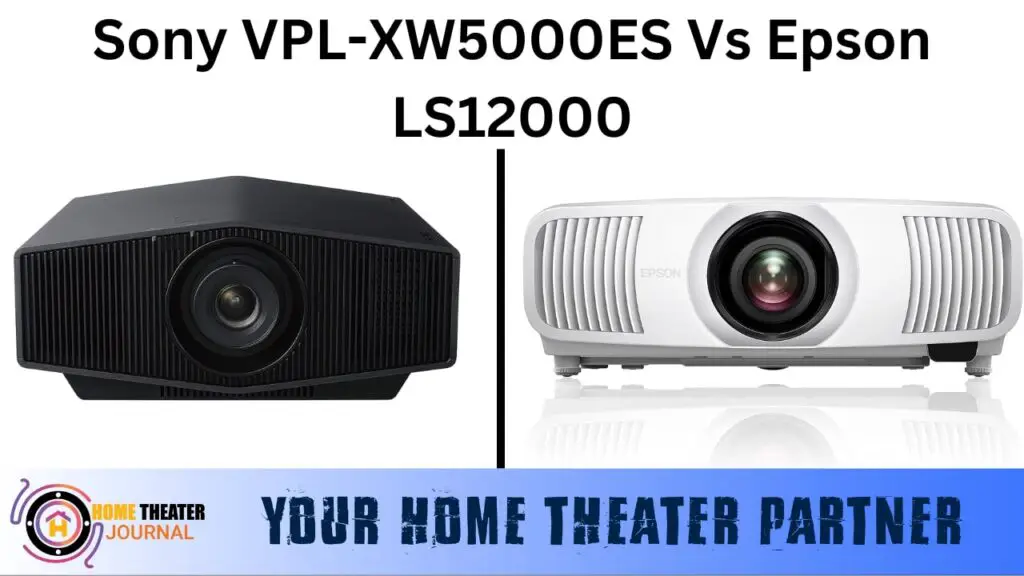
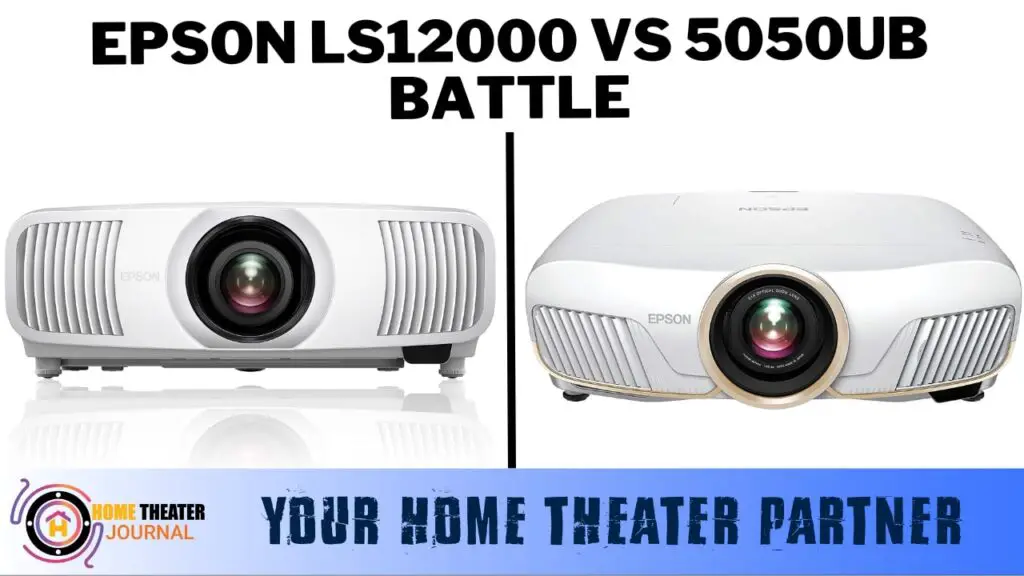
Sony VPL-XW5000ES vs Epson LS12000: 9 Main Difference. Best Review!
When it comes to creating a breathtaking home theater experience, the centerpiece is undoubtedly the projector. A high-quality 4K projector can make all the difference, delivering a sharp, detailed picture with vibrant colors. In this head-to-head comparison, we’ll be examining two impressive contenders: the Sony VPL-XW5000ES and the Epson LS12000, both of which belong to the new generation of laser-based home cinema projectors.
Sony has recently introduced a premium lineup of home cinema projectors, including the luxurious Sony VPL-XW70000ES, the mid-tier Sony VPL-XW6000ES, and the more budget-friendly Sony VPL-XW5000ES. These projectors represent Sony’s shift away from bulb-based models in favor of laser technology.
Epson has also embraced laser technology for its home theater projectors, with the Epson LS12000 (alongside the Epson LS11000) offering outstanding visual quality at a reasonable price point. Let’s dive into the comparison to determine which of these projectors, the Sony VPL-XW5000ES or the Epson LS12000, is the better choice for your home cinema.
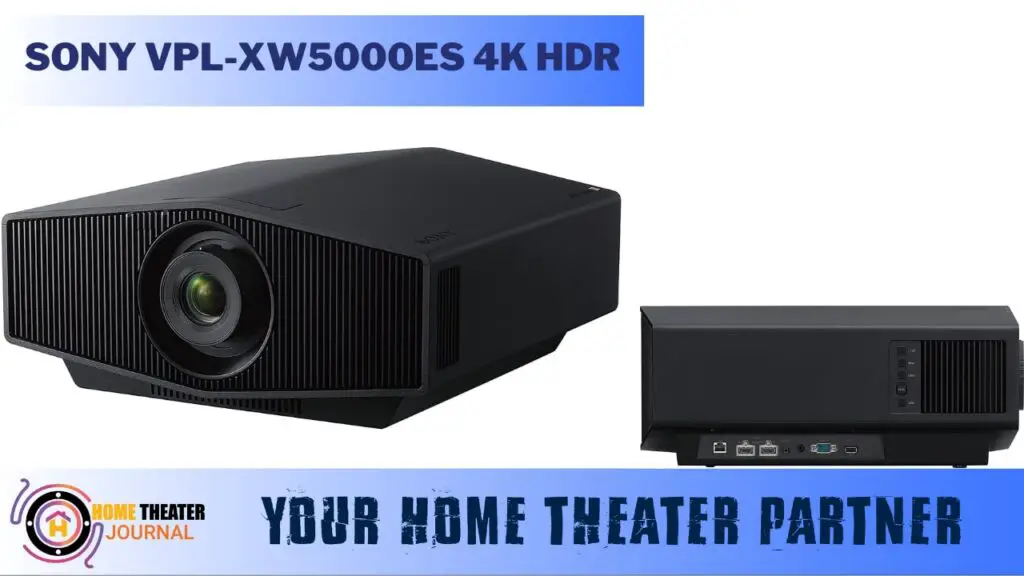
Ladies and gentlemen, let’s embark on an extraordinary cinematic journey with the Sony VPL-XW5000ES, where visual storytelling transcends the ordinary. Picture this: a projector that’s not just a machine but a magical portal to worlds of captivating visuals. The Sony VPL-XW5000ES is no mere device; it’s a symphony conductor for your senses, transforming your living space into an enchanting theater. As we raise the curtain on this review, prepare to step into a realm where every frame is a masterpiece, every scene an immersive adventure, and every movie night a thrilling odyssey.
Feature And Specifications:
Native 4K Brilliance: The Sony VPL-XW5000ES boasts a native 4K 0.61″ SXRD DLP chipset. It’s like having a Ferrari engine under the hood of your projector. With every pixel meticulously rendered in stunning 4K resolution, your movies and content come to life with unparalleled clarity and detail.
Contrast Beyond Infinity: Sony claims an infinite dynamic contrast ratio, and while it might not be infinite, it’s certainly out of this world. Every frame is a testament to the depths of dark blacks and radiant whites, creating a visual experience that’s nothing short of mesmerizing.
Wide Color Gamut: This projector covers an impressive 95% of the DCI-P3 color spectrum. It’s like having a palette overflowing with vibrant hues, ensuring that every shade, from the deepest blues to the brightest reds, is a visual symphony.
Precision Lens Shift: With horizontal +/- 25% and vertical +/- 71% lens shift capabilities, the Sony VPL-XW5000ES offers the precision of a surgeon’s scalpel. Whether you’re dealing with a slightly tilted ceiling or aiming for that cinematic sweet spot, this projector lets you fine-tune your visuals with surgical precision.
Aesthetic Choices: Sony knows that your home theater is a reflection of your style. That’s why the VPL-XW5000ES is available in both white and black chassis options, allowing you to choose the perfect look to complement your setup.
Specifications:
Brightness: 2000 lumens
Throw Ratio: 1.38:1 – 2.21:1
Light Source: Single Blue Laser
Input Lag: 21 ms
Price: $5,999.99
The Sony VPL-XW5000ES is not just a projector; it’s a cinematic marvel. With native 4K resolution, mind-boggling contrast, a wide color gamut, and precise lens shift capabilities, it’s like having a world-class artist at your disposal to craft the perfect visual masterpiece for your home theater. This projector is your ticket to a cinematic journey where every frame is a work of art, and every movie night is an unforgettable adventure.
Pros
One of the sharpest pictures available
Fantastic black levels for enhanced contrast
Wide color gamut (95% DCI-P3).
Utilizes a native 4K LCoS chipset.
Offers both white and black chassis options.
Cons
Comes with a higher price tag.
Lacks built-in streaming apps.
No 3D support.
Epson Pro Cinema Ls12000 4k Pro-UHD Laser Projector
The Epson LS12000 is a projector that is poised to redefine your cinematic experience. Imagine a device that’s not just a piece of technology but a gateway to a world of awe-inspiring visuals. The Epson LS12000 isn’t your average projector; it’s a beacon of cinematic brilliance, ready to transform your living room into a mesmerizing theater. As we pull back the curtain on this review, get ready to explore a universe where every frame is a work of art, every scene a captivating journey, and every movie night an unforgettable spectacle.
Feature And Specifications:
Supernova Brightness: The Epson LS12000 packs a visual punch with its remarkable brightness of 2700 lumens. It’s like having a spotlight that can pierce through even the most challenging ambient light conditions, ensuring that your visuals remain vibrant and sharp.
Vivid Colors: Get ready for a visual feast as the LS12000 boasts colors that pop like fireworks on the Fourth of July. With a 90% coverage of the DCI-P3 color spectrum, it’s like having a palette filled with the most vivid and lifelike hues, making every frame a masterpiece.
Contrast that Tells a Story: The LS12000 offers an impressive 1,250,000:1 contrast ratio, like a storyteller who reveals intricate details in the darkest of tales. From the deepest shadows to the brightest highlights, every nuance is captured, immersing you in a world where every visual has a story to tell.
Value Beyond Compare: Epson understands that cinematic brilliance shouldn’t come at an exorbitant price. The LS12000 delivers exceptional value for a home cinema projector, making it like discovering a treasure chest of visual wonders that doesn’t break the bank.
Flexible Installation: This projector offers multiple installation options with horizontal +/- 96.30% and vertical +/- 47.10% lens shift capabilities. It’s like having a magician’s wand that can move the projector image with finesse, ensuring that your visuals hit the mark every time.
Specifications:
Brightness: 2700 lumens
Throw Ratio: 1.35:1 – 2.84:1
Light Source: Single Laser with Fixed Yellow Phosphor
Input Lag: 20 ms
Price: $4,999.00
The Epson LS12000 is not just a projector; it’s a beacon of cinematic brilliance that doesn’t break the bank. With its supernova brightness, vivid colors, outstanding contrast, and flexible installation options, it’s like having a front-row seat to a visual extravaganza. This projector is your ticket to a cinematic adventure where every frame is a work of art, and every movie night is an unforgettable spectacle.
Great out-of-the-box picture quality with minimal calibration required.
Supports 120 FPS 4K gaming.
Cons
No 3D support.
Not native 4K.
Lacks dynamic tone mapping.
Sony VPL-XW5000ES vs Epson ls12000 Projector: Comparison Analysis:
Both the Sony VPL-XW5000ES and Epson LS12000 deliver exceptional 4K laser projector performance, making it challenging to pick a clear winner. However, based on our analysis, here’s why each projector might be the better choice for different scenarios:
Brightness:
Okay, let’s dive into the brightness battle between these titans of projection. The Epson LS12000 struts its stuff with an impressive 2700 lumens, and boy, does it light up the room like a supernova! This projector is your ticket to movie nights that refuse to be bound by the darkness. Think vibrant colors and crisp details even when your living room still has a touch of that evening sun. It’s the superhero cape your home theater deserves, ensuring you can host epic watch parties without dimming the lights.
But don’t underestimate the Sony VPL-XW5000ES with its 2000 lumens. It might not have the same luminary firepower as the Epson, but it’s like a precision laser in the world of projectors. In a dedicated home theater, where the darkness is your canvas, the Sony projector crafts visuals with breathtaking clarity. You’ll be diving into oceans of deep blacks and swimming through a sea of rich colors. While it might not be the sun, it’s the North Star guiding your cinematic journey in a carefully controlled environment.
In the end, it’s all about the setting and your cinema style. The Epson LS12000 is the spotlight that can shine anywhere, while the Sony VPL-XW5000ES is the artist’s brush, creating masterpiece visuals in a dimly lit sanctuary. Your choice – a dazzling supernova or a controlled masterpiece.
Throw Ratio:
Let’s talk about the throw ratio, shall we? Imagine you’re an artist, and your canvas is your projector screen. The Epson LS12000 sweeps onto the scene with a throw ratio range of 1.35:1 to 2.84:1 – it’s like having a palette of brushes to create your visual masterpiece. This projector offers flexibility on a grand scale, allowing you to fill your canvas with vivid imagery, whether your room is the size of a cozy studio or a sprawling art gallery. It’s like having the power to choose your canvas size and create an epic mural.
Now, the Sony VPL-XW5000ES, with its throw ratio range of 1.38:1 to 2.21:1, might have fewer brushes in its arsenal, but it’s all about precision. Imagine you’re sculpting with a chisel instead of a paintbrush; that’s Sony’s approach. In a controlled environment where every inch of your canvas is meticulously planned, this projector delivers pinpoint accuracy. It’s like crafting a detailed miniature, ensuring that every stroke of light is precisely where it should be. So, whether you’re recreating the Sistine Chapel or painting a cozy portrait, the Sony lets you do it with finesse.
In the realm of throw ratios, the Epson LS12000 offers versatility on a grand scale, while the Sony VPL-XW5000ES excels in precise, controlled projection. It’s the choice between painting with broad strokes or crafting a masterpiece with intricate details.
Projector Lens Shift:
Lens shift, my friends, is like the secret sauce that takes your cinematic experience to the next level. The Epson LS12000 waltzes onto the stage with a lens shift capability that’s as wide as a Broadway stage – horizontal +/- 96.30% and vertical +/- 47.10%. It’s like having a magician’s wand that can move the projector image up, down, left, right, or diagonally with finesse. Got a slightly off-center setup? No problem. Want to make sure your image lands just right on your screen? Consider it done. The LS12000’s lens shift is your backstage pass to perfect placement, ensuring your visuals hit the mark every time.
Now, let’s talk about the Sony VPL-XW5000ES, which offers a lens shift range of horizontal +/- 25% and vertical +/- 71%. It may not have the expansive stage of the Epson, but it’s got precision in its DNA. Think of it as a laser-guided sniper rifle for your visuals. In a dedicated home theater, where every inch of your screen matters, the Sony lets you fine-tune your projection with surgical precision. Whether you’re adjusting for a slightly tilted ceiling or aiming for that cinematic sweet spot, the VPL-XW5000ES has you covered, ensuring that your visuals are a work of art.
In the world of lens shift, it’s all about the stage size and the precision tools at your disposal. The Epson LS12000 offers versatility on a grand scale, perfect for adapting to different room setups. On the other hand, the Sony VPL-XW5000ES is the master of precision, ensuring that your visuals are a symphony of perfection in a controlled environment. It’s like choosing between a versatile Swiss army knife and a finely-tuned instrument – both excellent, depending on your needs.
Chipset:
Now, let’s talk tech at its core – the chipset. The Sony VPL-XW5000ES rolls out with a native 4K 0.61″ SXRD DLP chipset, and it’s like having a Ferrari engine under the hood. This native 4K beast pumps out visuals with the kind of precision that makes your jaw drop; every pixel is a work of art.
On the flip side, the Epson LS12000 opts for a 4-way pixel-shifting 0.74” 3LCD chipset, and it’s like a Swiss Army knife of projection. With its pixel-shifting magic, it conjures up a display that’s as close to native 4K as you can get, delivering crisp images and lifelike details without skipping a beat. It’s like having a versatile tool that can tackle any visual challenge with flair. In the battle of chipsets, it’s native 4K precision versus universal pixel-shifting magic, and both are here to steal the show.
Light Source:
Let’s talk about the heartbeat of these projectors – the light source. The Sony VPL-XW5000ES and the Epson LS12000 both embrace the power of a single laser, but there’s a twist.
The Epson comes prepared with a fixed yellow phosphor, adding an extra layer of stability to the mix. It’s like opting for a ninja in stealth mode; fewer moving parts mean less noise and fewer chances of anything going south during your movie night.
On the other hand, Sony’s laser shines with a blue core, sticking to the basics but offering precise visuals. In this cosmic duel, it’s a choice between the steadfast yellow phosphor and the pure blue laser, both ready to illuminate your cinematic universe.
Color:
Ah, the world of color – where your cinematic dreams burst to life! The Sony VPL-XW5000ES boasts a color gamut that covers a dazzling 95% of the DCI-P3 spectrum, akin to a painter’s palette overflowing with vivid hues. It’s like diving into a rainbow with every frame, ensuring that every shade, from the deepest blues to the brightest reds, is a visual symphony.
Meanwhile, the Epson LS12000 doesn’t fall far behind, offering a color gamut that embraces 90% of the DCI-P3 spectrum, like a refined selection of essential colors. In this showdown, it’s a battle of palettes – Sony’s wide spectrum versus Epson’s sophisticated selection, both ready to paint your screen with cinematic brilliance.
Contrast Ratio:
Let’s delve into the mesmerizing world of contrast, where every shadow and highlight tells a story. Sony VPL-XW5000ES strides in with a dynamic contrast ratio that seems to stretch to infinity, like gazing into the depths of a cosmic abyss. While not quite infinite, it’s a masterful illusion of contrast, offering a mesmerizing visual experience.
On the other hand, the Epson LS12000, with its impressive 1,250,000:1 contrast ratio, is like a deep-sea explorer, revealing intricate details in the darkest depths of your favorite movies. In this battle of contrast, it’s a choice between the captivating illusion of infinite contrast and the tangible, intricate details of the Epson. Both projectors aim to transport you to worlds where every shadow holds a secret.
Input Tag:
The Epson LS12000 boasts an impressively low input lag of 20 milliseconds, akin to having lightning-quick reflexes in the gaming arena. It’s like being the sharpshooter who never misses a shot.
Meanwhile, the Sony VPL-XW5000ES clocks in at 21 milliseconds, just a hair’s breadth behind, ensuring your gaming battles are nothing short of epic. In this contest of input lag, it’s like choosing between two esports champions, both lightning-fast and ready to elevate your gaming prowess. Whether you’re a casual player or a competitive pro, both projectors aim to keep you in the game without missing a beat.
Price:
The Sony VPL-XW5000ES strides in with a tag of $5,999.99, a premium investment that’s akin to reserving the best seat in a luxurious theater. It’s like choosing the finest champagne for a special celebration.
On the other hand, the Epson LS12000 brings a more budget-friendly option to the stage, with a price of $4,999.00, making it like discovering a hidden treasure chest of cinematic wonders that doesn’t dent your savings.
In this financial showdown, the Epson LS12000 emerges as the budget-friendly champion, offering remarkable value without compromising on the visual spectacle. So, if you’re looking to elevate your cinematic experience without emptying your pockets, the Epson LS12000 is the budget-friendly star of the show.
Conclusion:
Both the Sony VPL-XW5000ES and Epson LS12000 are remarkable projectors, each excelling in its own right. Your decision should be based on your specific requirements, whether it’s superior image quality or value for your home cinema setup. We hope this comparison has helped you make an informed choice for your cinematic experience. Thanks for reading, and happy projecting!
FAQs
Q1: Which projector is better for a dedicated home theater setup?
A: If you’re creating a dedicated home theater where controlled lighting and visual precision are paramount, the Sony VPL-XW5000ES is the top choice. Its native 4K chipset, exceptional contrast, and wide color gamut make it the artist’s tool for crafting visual masterpieces in a dimly lit sanctuary.
Q2: Can the Epson LS12000 handle well-lit rooms and larger screens?
A: Absolutely! The Epson LS12000’s remarkable brightness of 2700 lumens makes it a fantastic choice for rooms with higher ambient light levels or larger screen sizes. It’s like having a supernova in your home theater, ensuring vibrant colors and crisp details even in challenging lighting conditions.
Q3: Which projector is more budget-friendly?
A: The Epson LS12000 takes the crown as the budget-friendly option with a price tag of $4,999.00. It’s like discovering a hidden treasure chest of cinematic wonders without breaking the bank. If you want exceptional value for your home theater, the Epson is the star of the show.
Q4: Can I use these projectors for gaming?
A: Both projectors offer low input lag, with the Epson LS12000 at 20 ms and the Sony VPL-XW5000ES at 21 ms. This means they are suitable for gaming, ensuring a responsive experience. Whether you’re a casual gamer or a competitive player, both projectors can keep up with your gaming adventures.
Q5: Do these projectors have built-in streaming apps?
A: Unfortunately, neither the Sony VPL-XW5000ES nor the Epson LS12000 comes with built-in streaming apps. However, you can easily connect external streaming devices like a Roku, Apple TV, or Amazon Fire Stick to enjoy your favorite content.
You’ve finally done it! After months of saving and anticipation, you’ve got your hands on a shiny new projector. You’ve set it up in the perfect spot, secured it on the ideal mount, and now you’re ready to turn your space into a cinematic haven. But wait, you’re missing one crucial element – the list of movies! Installation was a breeze, and now it’s time to dive into the world of larger-than-life entertainment.
Here’s a selection of the 12 best movies to watch on your projector and you can also watch the movie on your own choice, ensuring that your investment is put to the best use possible:
Best Movies to Watch on Projector
The Dark Knight
Despicable me
Terminator 2: Judgement Day
Five Feet apart
Star Wars
Guardians of the Galaxy
La La Land
Extraction
Blair Witch Project
Jurassic Park
Interstellar
The Dark Knight:
When it comes to superhero movies, “The Dark Knight” stands out as an absolute must-watch. This film combines remarkable graphics, outstanding performances, and an unexpected storyline.
The visual spectacle and the gripping narrative are a treat for viewers of all ages and interests. To create the best home movie theater experience, dim the lights, and don’t forget to have some buttery movie theater popcorn to snack on.
Despicable Me:
While “Despicable Me” might seem like a familiar choice, watching this adorable and funny animated film on a projector can be a whole new experience. Gather your family and relive the antics of Gru and the Minions on the big screen. The humor and heartwarming moments are even more enchanting when projected.
Terminator 2: Judgment Day:
The Terminator franchise has some great movies, but “Terminator 2: Judgment Day” is often recommended for projector viewing.
This classic film, known for its well-crafted storyline and action sequences, looks even more impressive on a large projector screen. Give the trailer a try, and you’ll see why it’s a projector favorite.
Five Feet Apart:
If you’re drawn to romance films, “Five Feet Apart” is a hidden gem that deserves more attention. This movie offers a unique blend of romance, drama, and adventure, making it stand out from typical romantic films. Don’t let the ratings deter you; watching it on your projector with your loved one will make you appreciate its charm.
Star Wars:
The Star Wars franchise is a cinematic classic that transcends generations. Even if you’ve seen the movies before, watching them in your home theater can be a nostalgic and immersive experience.
Consider titles like “Star Wars: The Force Awakens,” “Star Wars: The Last Jedi,” “Return of the Jedi,” and “Rogue One” for an epic movie marathon on your projector.
Guardians of the Galaxy:
If you’re in the mood for a light-hearted and fun movie, “Guardians of the Galaxy” is a great choice. This film seamlessly blends action with humor and will keep you thrilled and smiling. It’s ideal for a family movie night, so be sure to enjoy it with your kids or save it for the upcoming Christmas holidays.
La La Land:
“La La Land” is a mesmerizing musical that has captivated audiences worldwide. While it’s a visual and auditory delight, remember to invest in additional speakers to fully appreciate the music.
Watching this on a projector with high-quality audio is an experience that will deepen your love for musicals.
Extraction:
“Extraction” is a relatively new action movie that’s perfect for projector viewing. Whether you’ve seen it or not, the adrenaline-pumping action and suspense are enhanced when projected on a big screen.
Gather your friends for an action-packed movie night, as this film is especially appealing to the adventurous side.
Blair Witch Project:
If you’re a horror enthusiast, the projector can take your viewing experience to another level. Start with “Blair Witch Project,” a groundbreaking found-footage horror film. Watching it in an outdoor setting can add an extra layer of spookiness to the experience. The immersive darkness and eerie atmosphere will have you on the edge of your seat.
Jurassic Park:
“Jurassic Park” is a cinematic masterpiece that brings dinosaurs back to life with groundbreaking special effects. The sheer scale and suspense of this film are truly appreciated on a projector. You’ll feel like you’re right there on Isla Nublar, surrounded by towering prehistoric creatures.
Interstellar:
“Interstellar” is a mind-bending science fiction film that explores the cosmos and the human spirit. Its stunning visuals and complex storytelling are ideal for projector viewing. The vastness of space and the emotional depth of the characters come to life in a way that’s impossible to replicate on a smaller screen.
So, there you have it, a well-rounded list of movies to enjoy on your new projector. Whether you prefer action, romance, or horror, these films are sure to deliver a memorable home theater experience. Grab some popcorn, dim the lights, and let the magic of the projector transport you into the world of cinema like never before. Happy viewing!
FAQs
Q: What type of projector is best for home theater use?
Answer: The best projector for home theater use typically depends on your specific needs and budget. However, for a great home theater experience, you should consider a Full HD (1080p) or 4K projector with a high lumen rating for brighter images.
Look for projectors with good contrast ratios and consider whether you want a DLP or LCD projector based on your preference for image quality. It’s also essential to choose a projector that suits your room size and layout.
Q: How can I optimize the image and sound quality of my projector for a better home theater experience?
Answer: To optimize image quality, ensure your projector is correctly aligned and focused. Use a high-quality screen or a smooth, white wall. Adjust the lighting in your room to reduce ambient light, and choose appropriate color settings on the projector.
For sound quality, invest in external speakers or a soundbar, as projector built-in speakers may not provide the best audio experience. Properly calibrate your audio system to create a balanced and immersive sound environment.
Q: What is the ideal screen size and viewing distance for a home theater projector setup?
Answer: The ideal screen size and viewing distance can vary based on personal preference and the projector’s specifications. However, a general rule of thumb is that your screen size should be around 100-120 inches for an immersive home theater experience. The viewing distance depends on screen size and resolution, but a distance of approximately 1.5 to 2.5 times the screen width usually works well for Full HD and 4K projectors.
Q: Can I connect streaming devices or gaming consoles to my home theater projector?
Answer: Yes, you can connect streaming devices and gaming consoles to your home theater projector. Most projectors have multiple input options, including HDMI, which is compatible with various devices like Blu-ray players, gaming consoles, streaming devices, and laptops. Simply connect your device using the appropriate cable, and you can enjoy streaming content or gaming on the big screen.
Q: Are there any maintenance tips to prolong the life of my home theater projector?
Answer: To extend the life of your home theater projector, it’s essential to keep it clean and well-ventilated. Regularly clean the projector’s filter or air intake to prevent overheating. Avoid blocking the ventilation, and ensure it’s placed in a dust-free environment.
Additionally, replace the projector lamp when it reaches the end of its lifespan, and handle the projector carefully to avoid physical damage during installation or maintenance. Regular maintenance and responsible usage can significantly prolong your projector’s life.
How to Get Rid of Vertical Lines on Projector | 8-Methods
Vertical lines on your projector can be a frustrating issue for anyone who enjoys watching movies or giving presentations. However, the good news is that you can often resolve this problem on your own without needing to call in a professional technician.
In this comprehensive guide, we’ll take you through a step-by-step process to help you get rid of those pesky vertical lines and get your projector working perfectly again.
Table of Contents
How to Get Rid of Vertical Lines on Projector | step-by-step process
1. Secure the Projector:
To begin addressing the issue of vertical lines on your projector, the first step is to ensure that the projector is securely positioned. This is important because loose or unstable placement can sometimes lead to image problems.
Hold the projector firmly in place and place your thumb on the top, about 2.5 to 3 inches behind the screen size dial. By gently pressing the projector from the top and simultaneously placing your hand at the bottom to apply pressure, you can help resolve the issue.
2. Observe Line Changes:
While you’re applying pressure to the projector, pay close attention to the vertical lines on the screen. This is a critical step because the lines may change or shift as pressure is applied. Observing these changes will help you determine if pressure can alleviate the issue.
3. Check Cable Connections:
Vertical lines can sometimes result from poorly connected cables. Before delving deeper into the troubleshooting process, unplug the cables connected to your projector and then securely plug them back in. This simple step can resolve the issue if loose or damaged cable connections were the problem.
4. Press from Top to Bottom:
Continuing to press the projector from top to bottom is often a key step in eliminating vertical lines. While applying pressure, closely monitor the lines on the screen. If you notice changes such as lines changing color, becoming fainter, or getting farther apart, it’s an indication that this method might solve the problem.
5. Reach the Main Board:
If the vertical lines persist after applying pressure and securing cable connections, it’s time to explore the main board. The main board is a critical component of the projector that controls various functions.
To access it, you may need to open up the projector and remove the main board cover. Be extremely cautious during this process as the main board is a sensitive and intricate component.
6. Gently Press the Main Board:
With the main board exposed, gently press it down. The main board can sometimes become loose, leading to display issues. By gently reseating it, you may eliminate any potential connectivity problems. It’s essential to exercise great care and precision during this step, as any mishandling could worsen the issue.
7. Check for Line Elimination:
After pressing the main board down, observe the screen to check if the vertical lines have disappeared. If there are no major issues with the main board, this step should help confirm whether it was the source of the problem.
8. Cleaning, Repair, or Replacement:
If the vertical lines persist despite your efforts, it’s time to consider cleaning, repairing, or replacing the main board. Cleaning the main board is a straightforward task and can help remove dust or debris that may be causing the problem.
However, for more complex issues or if the main board is damaged, it’s advisable to consult a professional technician who can diagnose and address the problem effectively. They may either repair the board or replace it with a new one, depending on the severity of the issue.
Conclusion
In summary, resolving the issue of vertical lines on your projector can often be a DIY task with the right approach. By applying pressure to the projector, securing cable connections, and inspecting the main board, you can eliminate those frustrating lines on your screen.
Remember to handle the main board with care and consult a professional if the problem persists. With these steps, you can get back to enjoying your movies and presentations hassle-free.
FAQs
Q: Why do vertical lines appear on my projector’s display?
A: Vertical lines on a projector’s display can result from various factors, including loose cable connections, pressure-related issues, or problems with the main board. It’s essential to troubleshoot each potential cause to determine the source of the problem.
Q: Is it safe to apply pressure to the projector to fix the vertical lines?
A: Yes, applying gentle pressure to the projector is often a safe and effective troubleshooting step. When done correctly, it can help reseat internal components or connectors that may be causing the issue. However, always exercise caution and avoid excessive force to prevent any damage.
Q: Can cleaning the main board resolve vertical lines on a projector?
A: Yes, cleaning the main board can help if the issue is caused by dust or debris interfering with the connections. Dust can accumulate over time and affect the performance of the main board. Cleaning it carefully may eliminate the problem.
Q: What should I do if vertical lines persist after trying the troubleshooting steps?
A: If the vertical lines on your projector’s display persist despite attempting the suggested troubleshooting steps, it’s advisable to contact a professional technician. They can diagnose the issue more comprehensively, perform repairs if necessary, or replace the main board if it’s damaged beyond repair.
Q: Can vertical lines be a symptom of a more serious projector problem?
A: Vertical lines can sometimes indicate underlying issues with your projector’s hardware. While the troubleshooting steps mentioned in the guide should resolve most cases, persistent lines may be a sign of a more significant problem. It’s crucial to address this promptly to ensure the longevity of your projector and the quality of your projections.
In today’s tech-driven era, a high-quality viewing experience is no longer a luxury but a necessity for many. Whether you’re indulging in a binge-watching session of your favorite series or delivering a compelling presentation, having a reliable projector can significantly enhance your experience. And the best part? Quality doesn’t have to come with a hefty price tag anymore. This year, there’s a range of exceptional projectors available that offer impressive performance without breaking the bank.
Our carefully curated list presents the top contenders in the realm of projectors under $500. Whether you’re a dedicated movie aficionado, a passionate gamer, or simply looking to elevate your home entertainment setup, we’ve found the best projector to bring you options that promise both affordability and excellence. From creating a cinematic experience in your living room to transforming your space into a captivating home theater, these projectors are designed to deliver optimal performance without exceeding your budget.
we explore the top picks that combine affordability with top-notch quality, ensuring that you get the most out of your viewing experience.
Our Picks for the Best Projectors under $500.
Now that you know what to look for, let’s look at our picks for the best home theater projector under $500 of 2025.
Our top choice is BenQ GV30 Portable LED Smart Projector, a cutting-edge addition to BenQ’s renowned projector lineup. Crafted with innovation and versatility in mind, this projector is set to revolutionize your viewing experience without breaking the bank. Designed as part of the second generation of BenQ’s GV series, the GV30 boasts exceptional features and specifications that make it a standout choice in the realm of projectors under $500.
Main Features / Technical Specifications:
High Definition Projection: The BenQ GV30 Portable LED Smart Projector offers 720p HD resolution, delivering a clear and immersive cinematic experience.
Bright and Vibrant Display: With a brightness of 300 ANSI lumens and optimized picture modes powered by CinematicColor technology, the GV30 ensures vibrant colors and crisp image quality.
Flexible Projection: Enjoy a laid-back movie experience with the GV30’s flexible wide projection angle, autofocus, and vertical keystone correction, allowing for projection from floor to ceiling.
2.1 Channel Audio with Extra Bass: The GV30 features a built-in 2.1 channel Bluetooth speaker with Extra Bass, comprising two midrange tweeters and a BW woofer, providing immersive surround sound.
Quick and Easy Setup: Setup is quick and hassle-free with adjustable 135-degree projection angle, auto-focus, and vertical keystone correction, ensuring optimal viewing experience in any environment.
Android TV Integration: Enjoy seamless access to a variety of streaming apps and content with the built-in Android TV platform, offering convenient entertainment options.
Long-lasting LED Light Source: Utilizing Digital Light Processing (DLP) LED technology, the GV30’s LED light source provides up to 20,000 hours of lamp life in normal mode and up to 30,000 hours in Eco mode.
Built-in Battery: The projector comes with a built-in battery that supports up to 2.5 hours of continuous playback, offering flexibility and portability for on-the-go entertainment.
Portable and Stylish Design: Weighing 5.07 lbs and housed in a stylish Heather Grey padded carrying case, the GV30 is designed for portability and convenience, ideal for travelers and outdoor use.
Versatile Connectivity: Connect wirelessly via Bluetooth or utilize the included QS01 ATV dongle for HDMI streaming, ensuring compatibility with a wide range of devices.
Brand: BenQ
Model Name: GV30
Projection Technology: DLP LED
Native Resolution: 1280×720 (720p HD)
Brightness (Manufacturer Claim): 300 ANSI Lumens
Contrast Ratio: 100,000:1
Speaker Type: Surround Sound
Connectivity Technology: Bluetooth
Special Features: Built-in Speaker, Portable, Digital Keystone Correction, Auto Focus, Google Assistant, Built-In Handle
Warranty: 3 years
Structure and Design:
The BenQ GV30 impresses with its sleek and compact design, making it an ideal companion for on-the-go entertainment. Weighing just 5.07 lbs, it’s lighter than its counterpart, the GS50, ensuring hassle-free portability. Additionally, its stylish Heather Grey padded carrying case adds a touch of sophistication while offering protection during travels.
Connectivity:
Seamlessly connect your devices to the GV30 with its Bluetooth technology, eliminating the need for tangled wires. Whether you’re streaming content from your smartphone or pairing it with external speakers, the GV30 ensures a hassle-free setup. Plus, with the included QS01 ATV dongle for HDMI streaming, you can enjoy a wide range of multimedia options with ease.
Image Quality:
Immerse yourself in stunning visuals with the GV30’s 720p HD resolution and 300 ANSI lumens brightness. From vibrant colors to crisp details, every scene comes to life, offering a cinematic experience in the comfort of your living room or backyard. Thanks to its flexible wide projection angle and vertical keystone correction, you can project images from virtually any angle with ease.
Pros
Flexibility in projection angle and autofocus for versatile usage.
Powerful 2.1 channel Bluetooth speaker with Extra Bass for immersive audio.
Android TV compatibility for access to a wide range of streaming services.
Long-lasting LED source with up to 20,000 hours of lamp life in normal mode.
Portable and lightweight design with a stylish carrying case for convenient transportation.
Cons
Built-in battery supports up to 2.5 hours of continuous playback, which may be insufficient for extended viewing sessions.
Verdict:
The BenQ GV30 Portable LED Smart Projector offers an unbeatable combination of affordability, portability, and performance, making it the best projector under $500 for budget-conscious consumers. With its impressive features, stylish design, and exceptional image quality, the GV30 is a must-have for anyone looking to elevate their home entertainment setup.
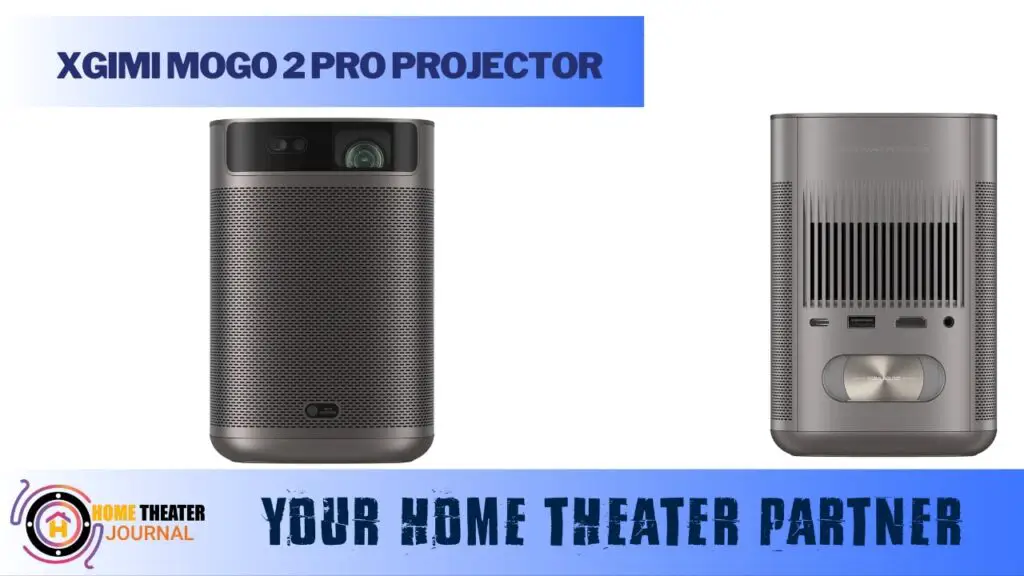
The XGIMI MoGo 2 Pro Portable Smart Projector, is our 2nd choice, a versatile and feature-packed device that promises an immersive viewing experience whether you’re at home or on the go. Priced at $599.00 ($476.00 on Amazon), this projector combines portability with impressive specifications, making it an excellent choice for those seeking a budget-friendly yet high-quality projection solution.
Main Features / Technical Specifications:
HDR10 compatibility for enhanced visual experience
Integrated Google Assistant for voice control and content search
Auto Keystone Correction and Intelligent Screen Alignment for effortless setup
Intelligent Obstacle Avoidance for smooth projection experience
Standalone Bluetooth speaker mode for versatility
External power banks support, enabling on-the-go usage
Built-in Chromecast for seamless streaming from Android devices
Hardware: The compact MoGo 2 Pro measures 6.33 inches x 4.25 inches x 4.68 inches (H x W x D) and weighs 2.42 lbs. It features a single HDMI 2.0 port, USB Type-C port, USB 2.0 port, AUX 3.5mm output port, and a transparent bass diaphragm. The unit includes a ¼” tripod socket for mounting convenience.
Color Reproduction: Offers up to 90% DCI-P3 color gamut coverage and D65 color temperature standard for vibrant and natural colors.
Brightness: Measured at 463 ANSI lumens, with various image modes for customizable brightness settings.
Sound Quality: Dual 8-watt speakers provide clear and loud audio, with HDMI ARC support for external audio devices.
Gaming:The MoGo 2 Pro features a Game mode for immersive gaming experiences, suitable for gaming on the go or in outdoor spaces.
Price: $476.00
Technology: DLP (0.23″ DMD)
Displayed Resolution: 1920×1080
Brightness (Manufacturer Claim): 400 ISO Lumens
Light Source: LED
Contrast: Not Listed
Zoom Lens Ratio: Fixed
Lens Shift: No
Lamp Life: 30,000 Hrs
Sound System: Dual 8 Watt Speakers
Weight: 2.42lb
Warranty: Two (2) Years
Structure and Design
The XGIMI MoGo 2 Pro boasts a Full HD (1920 x 1080) resolution, providing crisp and clear imagery for your entertainment needs. With a brightness of 458 ANSI lumens, this projector ensures vivid and vibrant visuals, making it suitable for various environments, from living rooms to outdoor movie nights. Its HDR10 compatibility further enhances the viewing experience, delivering stunning contrast and color accuracy.
Designed with convenience in mind, the MoGo 2 Pro features ISA 2.0 technology for seamless setup and operation. This intelligent screen adaptation technology automatically corrects keystone and focus, ensuring optimal image quality without the need for manual adjustments. Additionally, the projector supports intelligent obstacle avoidance, preventing disruptions caused by objects in the projection area.
Compact and lightweight, the MoGo 2 Pro is highly portable, measuring 6.33 inches x 4.25 inches x 4.68 inches and weighing just 2.42 lbs. Its sleek and modern design, complemented by a Sandstone-textured Mocha Gold color, adds a touch of elegance to any space. The projector features a user-friendly interface, with easy access to various settings and functions via the included remote control.
Connectivity
Equipped with multiple connectivity options, including HDMI 2.0, USB Type-C, and Bluetooth, the MoGo 2 Pro ensures seamless integration with a wide range of devices. Whether you’re streaming content from your smartphone, gaming console, or laptop, this projector offers versatility and flexibility to suit your needs.
Image Quality
Experience unparalleled image quality with the XGIMI MoGo 2 Pro Portable Smart Projector. Whether you’re transforming your living room into a home theater, binge-watching movies and dramas, or engaging in intense gaming sessions, this projector delivers exceptional visuals. With its Full HD resolution, vibrant colors, and dynamic contrast, every scene is rendered with stunning clarity and depth.
Immerse yourself in the action with lifelike imagery and seamless gameplay, thanks to the projector’s responsive performance and low input lag. Elevate your entertainment experience with the MoGo 2 Pro, the perfect companion for any viewing occasion.
Pros
High-resolution Full HD display.
Compact and portable design.
Easy setup and operation with ISA 2.0 technology.
Versatile connectivity options, including HDMI and Bluetooth.
Cons
Limited battery life (requires external power bank)
Verdict:
The XGIMI MoGo 2 Pro Portable Smart Projector offers an impressive combination of performance, portability, and affordability, making it an excellent choice for budget-conscious consumers. Best 1080p projector under 500 Full HD resolution, with advanced features, and sleek design, this projector delivers an exceptional viewing experience for both entertainment and professional use.
The AAXA M7 Portable LED Projector, a compact powerhouse that brings the immersive experience of world-class cinema technology right into the palm of your hand. Retailing at an affordable $488.00, this projector offers astounding brightness with its 1200 LED lumens, ensuring vibrant and crisp visuals even in challenging light conditions. Whether you’re a college student, a home entertainment enthusiast, or a frequent traveler, the AAXA M7 is your go-to solution for versatile projection needs.
Main Features / Technical Specifications:
Technology: Utilizes DLP (Digital Light Processing) technology with a single 0.33″ Texas Instruments DMD (Digital Micromirror Device) chipset.
Native Resolution: Offers full HD 1080p resolution (1920×1080 pixels).
Brightness: Claims a brightness of 1200 LED lumens, with a measured 626 ANSI Lumens.
Contrast Ratio: Provides a contrast ratio of 2000:1, ensuring clear differentiation between dark and light areas.
Lamp Life: Features a long-lasting LED lamp with an estimated lifespan of up to 30,000 hours in ECO mode, making it eco-friendly and cost-effective.
Portability: Weighs just under 3 lbs (2.99 lbs) and measures 7.3 x 6.4 x 1.85 inches, making it highly portable and suitable for on-the-go usage.
Battery Life: Equipped with a 15,000mAh rechargeable lithium-ion battery, providing up to 3 hours of runtime, and also functions as a power bank for charging other devices.
Connectivity: Offers various input options including HDMI, USB, USB-C, Composite AV, and Audio-Out ports, ensuring compatibility with multiple devices.
Media Playback: Features a built-in media player with support for USB and Micro-SD cards, enabling playback of video, audio, text, and photo files directly from external storage devices.
Built-in Speakers: Includes a premium 4-watt stereo speaker system, eliminating the need for external speakers and ensuring immersive audio experiences.
Versatility: Suitable for a wide range of applications including business presentations, home entertainment, outdoor use, camping, and gaming.
Remote Electric Focus: Offers convenient remote control for adjusting focus, ensuring crisp and clear projections.
Design: Boasts a sleek and compact design that fits nicely in laptop bags or briefcases, making it convenient for travel and outdoor use.
Price: $488.00
Technology: DLP (0.33″ DMD)
Native Resolution: 1080p (1920×1080)
Brightness (Manufacturer Claim): 1200 LED Lumens (626 ANSI Lumens measured)
Contrast: 2,000:1
Zoom Lens Ratio: Fixed
Lens Shift: No
Lamp Life: 20,000 hours
Weight: 2.99 lbs
Warranty: 1 Year
Brand: AAXA Technologies
Recommended Uses For Product: Camping
Special Feature: Pico, Speakers
Connectivity Technology: HDMI
Display Resolution: 1920 x 1080
Structure and Design:
The M7 features a sleek and compact design that fits effortlessly into your laptop bag or briefcase, making it perfect for business meetings, educational purposes, or casual entertainment gatherings. Its intuitive interface and remote electric focus offer convenient control over adjustments, ensuring a crisp and precise projection every time.
The AAXA M7 boasts a native resolution of 1080p, powered by a Quad Cast LED technology, delivering stunningly clear images up to 200 inches diagonally. With its 0.33-inch Texas Instruments DLP imager and 2000:1 contrast ratio, every detail is brought to life with exceptional clarity and depth.
Weighing just under 3 lbs and measuring 7.3 x 6.4 x 1.85 inches, the M7 is designed for maximum portability and versatility. Its built-in lithium-ion battery provides up to three hours of runtime in ECO mode, allowing you to enjoy uninterrupted entertainment or presentations on the go. Additionally, the projector doubles as a power bank to charge your devices, making it an indispensable companion for travel and outdoor activities.
Connectivity:
Equipped with an onboard media player, the M7 supports playback from various sources including USB and Micro-SD cards, eliminating the need for external devices. With HDMI, USB-C, and Composite AV ports, the M7 provides versatile connectivity options, allowing you to easily mirror or connect any device for hassle-free projection. Whether you’re delivering presentations with confidence or bringing the cinema experience to your living room or outdoor space, the M7 ensures seamless connectivity and superior performance.
Image Quality:
The AAXA M7 Portable LED Projector offers an exceptional visual experience across various settings, making it a versatile choice for home entertainment enthusiasts and on-the-go users alike. In a living room environment, the M7’s Full-HD resolution and impressive brightness transform any space into a cozy cinematic retreat.
Whether you’re watching movies, streaming Netflix, or hosting a gaming night, the M7’s vibrant colors and crisp projection ensure every detail is displayed with stunning clarity. Dark scenes retain depth and nuance, while bright moments dazzle with lifelike brightness, creating an immersive viewing experience that captivates audiences of all ages.
For those looking to elevate their home theater setup, the AAXA M7 delivers cinematic visuals that rival traditional projector systems. With its 1080p resolution and robust brightness, the M7 brings the magic of the big screen directly to your living room, allowing you to enjoy your favorite movies and shows in stunning detail. Whether you’re indulging in a movie marathon or hosting a movie night with friends, the M7’s exceptional image quality ensures every frame is displayed with breathtaking clarity, making it a must-have addition to any home entertainment setup.
Pros
Astoundingly bright with 1200 LED lumens.
Portable and versatile design.
Long-lasting battery life with power bank functionality.
Comprehensive connectivity options,
Crisp and vibrant Full-HD image quality
Built-in media player for PC-free playback
Cons
Speaker output may not be sufficient for large rooms or outdoor settings.
Verdict:
The AAXA M7 Portable LED Projector offers an exceptional combination of portability, versatility, and performance at an unbeatable price point.
Whether you’re looking for the best projector under $500 for your living room, home theater, or on-the-go entertainment needs, the M7 delivers unparalleled value and quality, making it a must-have for any multimedia enthusiast.
In today’s ever-evolving world of hybrid work and leisure, finding adaptable solutions that seamlessly transition between professional presentations and entertainment needs is crucial. Enter the Epson EpiqVision Flex CO-W01 Portable Projector, a versatile and affordable option priced at just $299.99. This compact powerhouse is designed to cater to the demands of modern hybrid lifestyles, offering exceptional image quality and portability.
Main Features / Technical Specifications:
Technology: Utilizes Epson’s 3LCD technology for precise color reproduction and sharp imagery.
Native Resolution: Offers WXGA (1280 × 800) native resolution for clear and detailed visuals.
Brightness: Delivers 3000 ISO lumens of brightness, ensuring outstanding image quality in various lighting conditions.
Contrast Ratio: Provides a high contrast ratio for clear differentiation between dark and light areas in the image.
Lamp Life: Features a long-lasting lamp with up to 6,000 hours of lifespan in standard mode and 12,000 hours in ECO mode, ensuring cost-effectiveness and durability.
Portability: Weighs 5.3 lbs and measures 11.6 x 3.4 x 8.3 inches, offering portability for easy transportation and setup in different locations.
Battery Life: Operates via AC power and does not include a built-in battery.
Connectivity: Offers versatile connectivity options including USB and HDMI ports for seamless integration with various devices.
Media Playback: Supports media playback from external devices such as USB drives and HDMI-connected devices.
Built-in Speakers: Includes a built-in 5-watt mono speaker for audio playback, providing decent sound quality.
Versatility:Ideal for a wide range of applications including business presentations, home entertainment, and gaming.
Remote Electric Focus:Does not offer remote electric focus feature.
Design: Features a sleek and compact design for easy portability and placement in different environments.
Price: $299.99
Technology: 3LCD
Displayed Resolution: WXGA (1280 x 800)
Brightness (Manufacturer Claim): 3000 ISO Lumens
Light Source: 188Watt UHE Lamp
Contrast: Unlisted
Zoom Lens Ratio: 1.35:1
Lens Shift: None
Lamp Life: 6,000 Hrs (12,000 Hrs ECO)
Sound System: 5-watt mono
Weight: 5.3 lb
Warranty: 1 Year
Brand: Epson
Structure and Design
Sleek and lightweight, the CO-W01 boasts a compact design, measuring 11.6 inches x 3.4 inches x 8.3 inches (W x H x D) and weighing only 5.3 lbs, making it easily portable and ideal for on-the-go use. The structure and design of the Epson EpiqVision Flex CO-W01 strike a perfect balance between form and function. Its minimalist yet practical design features a front-facing lens, integrated speaker, and conveniently placed controls on the top surface. This layout ensures easy access and operation, whether you’re setting up the projector for a business presentation or a movie night at home.
The compact chassis houses various ports, including HDMI and USB inputs, providing seamless connectivity to a wide range of devices such as laptops, streaming players, and gaming consoles. This versatility ensures compatibility with different setups, making the CO-W01 a convenient choice for various scenarios.
Connectivity
When it comes to connectivity, the CO-W01 offers a seamless experience, catering to both entertainment and professional needs. With HDMI and USB ports readily available, users can effortlessly connect their preferred devices, whether it’s a streaming player for enjoying movies or a laptop for delivering presentations.
Additionally, the inclusion of an HDMI ARC port enhances the audio experience by allowing direct connection to compatible audio devices. This ensures not only high-quality visuals but also immersive sound, elevating the overall viewing or presentation experience.
Image Quality
The image quality of the Epson EpiqVision Flex CO-W01 truly shines. Thanks to its advanced 3LCD technology and impressive brightness capabilities, the projector delivers stunning visuals with vibrant colors and sharp details.
Whether you’re showcasing intricate graphics for a professional presentation or immersing yourself in the world of movies with friends and family, the CO-W01 ensures a captivating experience. Its ability to maintain image quality even in ambient light conditions adds to its versatility, allowing for enjoyable viewing experiences in various environments. Overall, the CO-W01 excels in delivering exceptional image quality, making it a standout choice for both work and leisure purposes.
Pros
Exceptional image quality with 3000 ISO lumens of brightness
Compact and lightweight design for easy portability
Versatile connectivity options, including HDMI and USB
Built-in speaker for immersive audio experience
Advanced color correction technology for natural and vibrant colors
Cons
Limited adjustment options for keystone correction and focus
Verdict:
The Epson EpiqVision Flex CO-W01 Portable Projector offers exceptional value for money, combining impressive image quality, versatility, and portability in a sleek and affordable package.
If you’re a professional needing a reliable presentation tool or a cinephile looking for an immersive home theater experience, the CO-W01 delivers on all fronts, making it one of the best projectors for home theater on the market today.
The LG CineBeam PF510Q Portable Smart Projector, a compact yet powerful addition to LG’s lineup, priced attractively at $496. This versatile projector is designed to elevate your entertainment experience with its Full HD resolution and advanced features.
Main Features / Technical Specifications:
Technology: The LG CineBeam PF510Q Portable Smart Projector employs advanced DLP (Digital Light Processing) technology for precise color reproduction and crisp imagery.
Native Resolution: Offering Full HD resolution (1920 x 1080 pixels), this projector ensures clear and detailed visuals for an immersive viewing experience.
Brightness: With a brightness of 450 ANSI lumens, this projector delivers outstanding image quality in various lighting conditions, ensuring vibrant and sharp visuals.
Contrast Ratio: While the exact contrast ratio is not specified, the PF510Q provides a high contrast ratio, allowing for clear differentiation between dark and light areas in the image for enhanced visual clarity.
Lamp Life: The PF510Q features a long-lasting LED light source with a lifespan of up to 30,000 hours, ensuring cost-effectiveness and durability for prolonged usage.
Portability: Weighing just 2.2 lbs and measuring compactly, this projector offers exceptional portability, making it easy to transport and set up in different locations.
Battery Life: The PF510Q operates via AC power and does not include a built-in battery.
Connectivity: With versatile connectivity options including two HDMI inputs, a USB 2.0 Type-A connector, and a LAN port, seamless integration with various devices is ensured.
Media Playback: The projector supports media playback from external devices such as USB drives and HDMI-connected devices, offering versatility in content consumption.
Built-in Speakers: Equipped with a built-in 5W mono speaker, the PF510Q provides decent sound quality for audio playback, enhancing the overall viewing experience.
Versatility: Ideal for a wide range of applications including home entertainment, business presentations, and gaming, the PF510Q offers versatility to cater to different user needs.
Remote Electric Focus: The PF510Q does not offer remote electric focus feature.
Design: Featuring a sleek and compact design, the PF510Q is aesthetically pleasing and easy to place in various environments, adding to its portability and versatility.
Technology: DLP (Digital Light Processing)
Native Resolution: 1080p (1920×1080 pixels)
Brightness (Manufacturer Claim): 450 ANSI Lumens
Contrast Ratio: 150,000:1
Zoom Lens Ratio: Fixed
Lens Shift: No
Lamp Life: Up to 30,000 Hours
Weight: 2.2 lbs
Warranty: 1 Year
Special Feature: Portable
Connectivity Technology: Bluetooth
Display Resolution: 1920 x 1080 pixels
Display Resolution Maximum: 1920 x 1080 pixels
Structure and Design:
The LG CineBeam PF510Q boasts a sleek and portable design, making it easy to carry and set up anywhere you go. Its compact size allows for effortless transportation, transforming even the smallest spaces into immersive home theaters. Whether you’re in a cozy living room or enjoying outdoor movie nights, this projector adapts seamlessly to your environment.
Connectivity:
Equipped with webOS 22, the PF510Q provides easy access to a variety of streaming apps, including popular services like Prime Video, Netflix, YouTube, and Apple TV+. Additionally, it supports AirPlay 2 and HomeKit compatibility, enabling wireless control and content mirroring from iOS and MacOS devices without the need for an Apple TV.
With Screen Share functionality, you can effortlessly cast content from your Android devices and laptops onto a screen of up to 120 inches, enhancing the viewing experience for everyone.
Image Quality:
The PF510Q delivers stunning visuals with its Full HD resolution, offering crisp and clear images for an immersive cinematic experience. With up to 120 inches of display size, you can enjoy your favorite movies and games in high definition, whether you’re in a small study or a spacious media room.
The projector’s Auto Vertical Keystone feature automatically corrects screen trapezoidality, ensuring a perfectly aligned image even in non-horizontal setups.
Pros
Compact and portable design for easy transportation.
Wide range of connectivity options, including webOS 22, AirPlay 2, and Screen Share.
Impressive image quality with Full HD resolution and up to 120 inches of display size.
Cons
Does not offer remote.
Verdict:
The LG CineBeam PF510Q Portable Smart Projector offers an exceptional balance of portability and functionality, making it the perfect choice for anyone seeking an immersive entertainment experience on a budget.
With its impressive image quality, versatile connectivity options, and user-friendly design, it’s undoubtedly one of the best projectors under $500, ideal for both in-home use and outdoor gatherings.
6. VIEWSONIC PX701HDH – 1080p Home Theater Projector with 3500 Lumens and Powered USB
The PX701HDH, your ultimate 1080p Home Theater Projector boasts an impressive 3500 Lumens brightness and Powered USB connectivity for seamless entertainment experiences. Whether you’re indulging in gaming marathons, hosting movie nights, or streaming your favorite shows, this projector is your gateway to supersized entertainment right in the comfort of your own living room.
Main Features / Technical Specifications:
Versatile Connectivity: HDMI and USB ports for seamless connection with various devices.
Crisp Visuals: High brightness and contrast ratio for stunningly clear and vibrant images.
Long Lamp Life: Up to 20,000 hours of lamp operation for reduced maintenance costs.
Portable Design: Compact and lightweight for easy transportation and setup.
Powered USB: Convenient connection and power supply to compatible devices.
Brand: ViewSonic
Model: PX701HDH
Recommended Uses: Home Theater
Special Feature: Powered USB
Connectivity Technology: HDMI, USB
Display Resolution: Full HD (1920×1080 pixels)
Brightness: 3,500 ANSI lumens
Contrast Ratio: 12,000:1
Lamp Life: Up to 20,000 hours
Warranty: 3 years
Native Resolution: 1920 x 1080 pixels
Display Resolution Maximum: 1920 x 1080 pixels
Technology: DLP (Digital Light Processing)
Structure and Design:
With a sleek and portable design, the PX701HDH effortlessly blends into any living space. Its 1.1x optical zoom and vertical keystone adjustment ensure easy setup and installation, making it perfect for both impromptu gatherings and planned movie nights.
Connectivity:
The PX701HDH projector offers a comprehensive range of connectivity options, ensuring seamless integration with various devices for an enriched entertainment experience. With Dual HDMI ports, you can effortlessly connect gaming consoles, Blu-ray players, laptops, and more, allowing for versatile entertainment choices. Additionally, the inclusion of Powered USB A adds further convenience, enabling the use of wireless dongles like Google Chromecast, Roku Streaming Stick, and Amazon Fire TV Stick without the need for an external power source. This feature is particularly advantageous for streaming enthusiasts, providing easy access to popular streaming platforms such as Netflix, Hulu, and Disney+.
Furthermore, the projector’s compatibility with PCs, Macs, and mobile devices enhances its usability, making it suitable for both personal and professional applications. Whether you’re conducting presentations or enjoying multimedia content, the PX701HDH ensures a hassle-free connection experience, thanks to its flexible connectivity options.
Image Quality:
The PX701HDH excels in delivering superior image quality, elevating your viewing experience to new heights. Boasting a high brightness of 3500 Lumens, this projector ensures clear and vibrant images even in well-lit environments, making it ideal for both daytime and nighttime use. Whether you’re watching movies, playing games, or viewing presentations, you can expect sharp and detailed visuals that captivate your audience.
Moreover, the projector’s advanced Color technology offers a wide color gamut, resulting in stunningly accurate and lifelike colors. Whether you’re watching action-packed movies or immersive gaming scenes, every image is rendered with precision and clarity, enhancing your overall viewing enjoyment.
The inclusion of SuperColor™ Technology further enhances color reproduction, ensuring that every hue is rich and true to life. Additionally, the projector’s dynamic lamp control capabilities optimize brightness and contrast levels, resulting in deeper blacks and brighter whites for a more immersive viewing experience.
Overall, the PX701HDH sets a new standard for image quality, delivering unparalleled clarity, color accuracy, and contrast, making it the perfect choice for discerning enthusiasts seeking an immersive and cinematic viewing experience.
Pros
High brightness of 3500 Lumens for clear images even in brightly lit rooms.
Energy-saving SuperEco™ feature extends lamp life by up to 20,000 hours, reducing maintenance costs.
Cloud-based vColorTuner™ feature allows for customizable color profiles, enhancing viewing preferences.
Dual HDMI inputs and Powered USB A offer versatile connectivity options for gaming, streaming, and more.
10W speaker delivers immersive audio for an enhanced multimedia experience.
Cons
Input lag of 37ms may not be ideal for competitive gaming.
Verdict:
The PX701HDH is undeniably one of the best projectors for 2025, offering incredible value for its high brightness, versatile connectivity, and superior image quality. Whether you’re a gaming enthusiast, movie buff, or simply looking to elevate your home entertainment setup, this projector delivers on all fronts, making it a must-have for any in-home theater.
EPSON EX3280 3LCD XGA Projector, your ultimate solution for captivating presentations and immersive multimedia experiences. With its impressive brightness of 3,600 lumens and crisp XGA resolution, this projector is designed to impress, whether you’re delivering large-group presentations in well-lit rooms or enjoying movie nights in the comfort of your own home.
Main Features / Technical Specifications:
Crisp Image Quality: XGA resolution delivers clear text and images, suitable for presentations and videos.
True 3-Chip 3LCD Technology: Displays 100% of the RGB color signal for accurate color reproduction without rainbowing or color brightness issues.
Versatile Connectivity: HDMI port for easy connection to streaming devices like Fire TV, Apple TV, Roku, and Chromecast.
Easy Setup: Built-in speaker for quick audio and video setup out of the box.
Picture Skew Sensor: Automatically corrects vertical keystone to square the image.
Dynamic Contrast Ratio: Provides rich detail for graphs, images, and videos.
Warranty: Standard 1-year limited warranty with full-unit replacement and free technical phone support for the product’s lifespan.
Brand: Epson
Model: EX3280
Recommended Uses: Office, Home
Special Feature: Built-In Speaker
Connectivity Technology: HDMI
Display resolution: 1024 x 768 (XGA)
Brightness: 3,600 lumens color brightness, 3,600 lumens white brightness
Contrast Ratio: Up to 15,000:1
Technology: 3-Chip 3LCD
Structure and Design:
The EX3280 boasts a sleek and compact design, making it perfect for a variety of settings, from home offices to large conference rooms. Its built-in picture skew sensor automatically corrects the vertical keystone, ensuring a perfectly squared image every time, without the hassle of manual adjustments.
Connectivity:
The EPSON EX3280 projector offers versatile connectivity options, ensuring seamless integration with various devices for enhanced flexibility and convenience. With its HDMI port, this projector allows effortless connection to a wide range of streaming devices, including Fire TV, Apple TV, Roku, and Chromecast. This feature enables users to share diverse content, such as movies, TV shows, and presentations, making it ideal for both professional and entertainment purposes.
Moreover, the HDMI connectivity ensures high-quality audio and video transmission, delivering immersive viewing experiences with minimal hassle. Whether you’re conducting business presentations or enjoying multimedia content at home, the EX3280 makes it easy to connect and share content from multiple sources, enhancing productivity and entertainment value.
Image Quality:
The EPSON EX3280 projector excels in delivering exceptional image quality, thanks to its advanced technology and impressive specifications. Utilizing true 3-Chip 3LCD technology, this projector displays 100% of the RGB color signal for every frame, ensuring outstanding color accuracy without the distracting artifacts often associated with other projection technologies. This results in vibrant and lifelike images, making presentations, videos, and graphics appear crisp and engaging.
Additionally, with its XGA resolution, the EX3280 delivers sharp text and images, enhancing clarity and readability, particularly in business presentations and educational settings. The projector’s ability to maintain excellent color brightness further contributes to its image quality, ensuring consistent and accurate colors across various content types.
Furthermore, the EX3280 boasts an impressive dynamic contrast ratio of up to 15,000:1, providing crisp and detailed visuals with enhanced depth and dimensionality. Whether you’re displaying graphs, images, or videos, this projector delivers rich and immersive viewing experiences, captivating audiences and leaving a lasting impression.
Pros
Impressive brightness of 3,600 lumens for clear and detailed presentations, even in well-lit rooms.
Crisp XGA resolution delivers sharp text and images, perfect for presentations and video content.
Versatile connectivity options, including HDMI, allow for easy connection to streaming devices and other multimedia sources.
Automatic picture skew sensor ensures a perfectly squared image with minimal effort.
Cons
External speakers required.
Verdict
The EPSON EX3280 3LCD XGA Projector offers impressive brightness, crisp image quality, and versatile connectivity options, making it an excellent choice for both professional presentations and home entertainment. With its compact design and advanced features, this projector delivers exceptional value for money, making it one of the best budget projectors under $500.
Conclusion of Best Projectors Under $500
In conclusion, finding the best projector under $500 for various settings like the living room, home theater, gaming den, classroom, office, or simply for binge-watching movies and seasons on Netflix or other PlayStations. After the best reviews of several projectors, the Epson EpiqVision Flex CO-W01 and the ViewSonic PX701HDH stand out as top choices.
The CO-W01’s versatility and affordability make it ideal for modern hybrid lifestyles, seamlessly transitioning between professional presentations and entertainment needs. On the other hand, the PX701HDH offers impressive brightness, Full HD resolution, and Powered USB connectivity, making it perfect for immersive gaming sessions, movie nights, or streaming marathons.
Whether creating a cinematic experience in the living room, delivering impactful presentations in the office or classroom, or simply enjoying leisure time with friends and family, these projectors offer exceptional performance and values.
FAQs
Which projector is best for home use under $500?
For home use under $500, the Epson EpiqVision Flex CO-W01 and the ViewSonic PX701HDH are excellent choices. The CO-W01 offers versatility with its seamless transition between professional presentations and entertainment needs, while the PX701HDH impresses with its brightness, Full HD resolution, and Powered USB connectivity, making it perfect for immersive home theater experiences.
Can these projectors be used for gaming?
Yes, both the Epson EpiqVision Flex CO-W01 and the ViewSonic PX701HDH are suitable for gaming. The CO-W01 features a Game mode for immersive gaming experiences, while the PX701HDH offers impressive brightness and versatile connectivity options, making it ideal for gaming marathons in well-lit rooms or dimly lit gaming dens.
Are these projectors easy to set up and transport?
Yes, both projectors boast compact and lightweight designs, making them easy to set up and transport. The CO-W01 features intelligent screen adaptation technology for seamless setup and operation, while the PX701HDH offers a sleek and portable design with convenient connectivity options for hassle-free installation in various environments.
Do these projectors support multimedia playback?
Absolutely, both the Epson EpiqVision Flex CO-W01 and the ViewSonic PX701HDH support multimedia playback. The CO-W01 offers built-in Chromecast and external power bank support, enabling seamless streaming from Android devices and on-the-go usage, while the PX701HDH features versatile connectivity options, including HDMI and USB ports, for easy integration with various devices such as gaming consoles, Blu-ray players, and streaming sticks.
What is the warranty coverage for these projectors?
Both projectors come with standard warranty coverage. The Epson EpiqVision Flex CO-W01 offers a two-year warranty, providing peace of mind for extended usage, while the ViewSonic PX701HDH includes a three-year limited warranty with full-unit replacement and free technical phone support for the product’s lifespan, ensuring reliable performance and customer satisfaction.
Why is My Projector Green | Expert Solutions for a Clear Display
If you’re a proud owner of a projector, you’ve probably experienced the joys of large-screen entertainment. However, like any other electronic device, projectors can develop issues over time.
One common frustration for users is when their projector starts displaying an annoying green tint. But fear not, because in this post, we’ll delve into the reasons behind this issue and provide you with practical solutions to get your projector back to its original glory.
Table of Contents
Reasons Why Projectors Show Green Tint
Several factors can lead to your projector displaying an annoying green tint. Let’s explore these reasons:
Improperly Connected Cables:
Projectors rely on cables to carry video signals in three primary colors: red, green, and blue (RGB). If these cables are faulty or not correctly connected, they won’t transmit the signal properly, resulting in a greenish hue. Check for any damaged VGA and AV cables and ensure they are securely connected.
Incorrect Input Signal Setting:
Misconfigured input signals can be a culprit. Ensure that your projector’s settings match the input signal. Setting the projector to Auto or component mode in the signal menu can help resolve the issue. Sometimes, the green tint arises when the projector is set to RGB processing while receiving YPbPr or vice versa.
Stuck Color Wheel:
Projectors use a rotating color wheel to display various colors. When this wheel gets stuck on the green segment, your projector will stubbornly project everything in green. To fix this, you may need to open up your projector and replace the malfunctioning color wheel.
Aging Projector:
Over time, the internal components of your projector may begin to wear out. If your projector is quite old and changing the bulb doesn’t resolve the green screen issue, it might be time to consider investing in a new one.
Fixing Green Tint in LCD and DLP Projectors
For LCD and DLP projectors, proper maintenance is essential to avoid problems like green screens. Here are some steps to help you maintain these projectors:
Disassemble and Clean:
Carefully disassemble the projector, making sure to disconnect any wires. Avoid touching sensitive components like lenses and mirrors. Use a soft cloth and an air compressor with 15 to 20 PSI to clean the projector’s internals. After cleaning, your projector should work like new.
Seek Professional Help:
If you’re unsure about cleaning the projector, it’s advisable to consult a professional. Cleaning the projector without the necessary expertise can result in damage to other components.
Try Different Video Sources:
Test your projector with different video sources, such as computers, laptops, and smartphones, to see if the green tint issue persists. This can help you identify whether the problem lies with the projector or the input source.
Reset to Factory Default:
If you’re experiencing green tint issues, try resetting your projector to its factory default settings. This can often resolve configuration-related problems.
Prevent Overheating:
Overheating can lead to discoloration in LCD panels and DLP color wheels. Make sure the projector is adequately ventilated and the settings are configured to prevent overheating.
Check the Color Wheel:
If your projector is still displaying a green tint, inspect the color wheel to ensure it’s not stuck on one of the primary colors, like green. If it is, address the issue to restore the color balance.
Causes of Green Projector Screen
Now, let’s briefly recap the possible causes of a green projector screen:
1. Improperly Connected Cables:
Projectors use cables to transmit video signals in three primary colors: red, green, and blue (RGB). When these cables are not correctly connected or are damaged, they can’t transmit the signal effectively. As a result, the projector may display a greenish tint on the screen.
Solution: To address this issue, check all the cables connected to your projector. Ensure that they are securely plugged in and not damaged. If any cable is damaged, consider replacing it with a new one to restore proper signal transmission.
2. Faulty VGA Cord:
VGA (Video Graphics Array) cords are commonly used to connect projectors, especially portable ones. Over time, these cords can become damaged, bent, or loosened at the plug, leading to signal interference and a green tint on the screen.
Solution: To address this issue, inspect the VGA cord for any visible damage, especially at the plug ends. If you find any damage, consider replacing the VGA cord. Using a high-quality and well-maintained VGA cord can prevent this problem in the future.
3. Incorrect Input Signal Setting:
Many projectors have different input settings for various types of video signals, such as RGB and YPbPr. When the projector’s input signal setting doesn’t match the actual input signal, it can result in a greenish display. For instance, if the projector is set to RGB processing while receiving a YPbPr signal, it may produce a green tint.
Solution: Check your projector’s input signal settings and make sure they match the type of signal you are using. Setting the projector to Auto or component mode can often resolve this issue, as it allows the projector to automatically adjust to the incoming signal.
4. Stuck Color Wheel:
Some projectors use a rotating color wheel to display different colors. This wheel contains segments of red, blue, and green that are displayed sequentially. If the color wheel gets stuck on the green segment, your projector will continuously display everything in green, causing the green tint issue.
Solution: To address this problem, you may need to open up your projector (which should be done carefully) and inspect the color wheel. If you find it stuck on green, you may need to repair or replace the color wheel to restore the balance of colors in your projector’s display.
5. Old Projector:
Over time, projectors experience wear and tear, and their internal components may begin to lose functionality. This aging process can result in various issues, including a persistent green tint on the screen.
Solution: If your projector is considerably old and other troubleshooting steps, such as changing the bulb, haven’t resolved the green screen problem, it may be time to consider investing in a new projector. Newer models are likely to offer improved performance and reliability.
Tips:
To help you deal with a green projector screen effectively, here are some additional tips:
Regular Maintenance: Perform routine cleaning and maintenance to ensure your projector’s longevity and optimal performance.
Use Quality Cables: Invest in high-quality video cables to prevent issues related to cable connections.
Consult the Manual: Always refer to your projector’s user manual for specific troubleshooting and maintenance instructions.
Avoid Overheating: Ensure proper ventilation and avoid running your projector in extremely hot conditions.
Professional Assistance: If you’re unsure about any repair or maintenance procedure, seek professional help to avoid further damage.
Conclusion Why is My Projector Green
In conclusion, when faced with a green projector screen, don’t immediately assume it’s a major internal issue. Start by checking external components like cables and input settings.
With the right troubleshooting and maintenance, you can enjoy crisp, vibrant projections once again. Happy viewing!
FAQs
Q 1: Why is my projector screen suddenly displaying a green tint?
Answer: A sudden green tint on your projector screen can be attributed to various factors. It’s essential to check the following:
Ensure that your video cables (RGB) are correctly connected and not damaged.
Verify that your projector’s input signal settings match the type of signal you are using (e.g., RGB or YPbPr).
Check for any issues with the color wheel in your projector, which may be stuck on the green segment.
If your projector is old and has undergone significant wear and tear, it might be time to consider replacing it.
Q 2: How can I fix the green tint on my projector screen?
Answer: To resolve the green tint issue on your projector screen, consider these steps:
Check and ensure that all video cables are properly connected and in good condition.
Adjust the input signal settings on your projector to match the actual signal type.
Inspect the color wheel in your projector; if it’s stuck on the green segment, it might need repair or replacement.
If your projector is old and experiencing multiple issues, investing in a new one may be the most practical solution.
Q 3: Can I clean the color wheel to fix the green tint on my projector screen?
Answer: Cleaning the color wheel can be a delicate task and is typically not recommended for users without the necessary expertise. It’s easy to damage sensitive components when attempting to clean it. If the green tint is due to a stuck color wheel, it’s safer to consult a professional technician who can properly address the issue without causing further damage.
Q 4: How can I prevent my projector screen from turning green in the future?
Answer: To prevent a green projector screen in the future, you can take these precautions:
Regularly inspect and maintain your projector’s cables to ensure they are in good condition.
Use high-quality video cables to minimize the risk of cable-related issues.
Always check and configure your projector’s input signal settings to match the type of signal you are using.
Ensure that your projector is adequately ventilated and does not overheat, as overheating can lead to discoloration.
Q 5: What should I do if my projector is old and constantly displaying a green tint?
Answer: If your projector is old and persistently displays a green tint despite troubleshooting and maintenance efforts, it may be time to consider an upgrade. Projectors have a finite lifespan, and aging internal components can lead to multiple issues. Investing in a new projector will likely provide better performance and reliability for your projection needs.
What Is Projector Light Bleed? How Do You Fix It? [4 Methods]
Imagine settling in to enjoy an exciting game night on your projector, only to be annoyed by distracting light bleeding around the edges of the image. Thankfully, addressing projector light bleed is entirely possible. This guide will delve deep into the causes behind projector light bleed, offer comprehensive step-by-step solutions, and provide preventive measures to ensure your entertainment experiences remain immersive and unhindered.
Understanding Projector Light Bleed:
Projector light bleed, also known as the projector halo effect, refers to the unintended scattering of light around the periphery of a projected image. This phenomenon can significantly diminish image quality and viewer engagement. The good news is that by pinpointing the underlying causes and implementing practical solutions, you can eliminate this issue and enjoy crisp, uninterrupted visuals.
Causes and Detailed Solutions:
Wrong Projected Lens:
Cause:
One of the prime contributors to projector light bleed is an incorrect alignment of the projector lens. When the lens isn’t positioned accurately within its housing, it can scatter light beyond the intended image borders. This misalignment creates an unwanted halo effect, negatively impacting the projected visuals’ quality.
Solution:
Step 1: Examine Lens Alignment: Begin by inspecting the alignment of the projector lens within its housing. Ensure that it is appropriately centered and isn’t tilted or skewed.
Step 2: Manual Lens Adjustment: If the lens is misaligned, you can often manually correct its position. Refer to the projector’s manual to understand how to access and adjust the lens alignment.
Step 3: Check Projection Surface: Besides the lens itself, examining the projection surface is crucial. Ensure that it is flat and level. Any irregularities or curvature in the surface can contribute to image distortion and exacerbate light bleed.
Step 4: Use Proper Projection Screen: Consider using a high-quality projection screen to achieve the best results. This will help minimize light bleed and enhance the overall image quality and viewing experience.
Step 5: Wall Projection Considerations: If you’re projecting onto a wall, ensure the wall surface is suitable for projection. A flat, white wall with minimal texture is preferable to reduce the risk of light scattering.
Step 6: Perform Tests: After adjusting, test the projector by projecting an image onto the screen or wall. Observe the edges of the image for any signs of light bleed. If the issue persists, you may need to revisit the alignment and adjustments.
Keystone Correction:
Cause:
Keystone correction is a significant factor contributing to projector light bleed when the projector isn’t positioned perpendicular to the screen’s centerline. This misalignment results in keystoning, where the projected image appears skewed, bent, or displaced from its intended alignment. This distortion leads to light bleeding and compromises the overall image quality.
Solution:
Step 1:Understand Keystone Correction: It’s important to understand the keystone correction before addressing the issue. Keystone correction allows you to digitally adjust the shape of the projected image to counteract the effects of projector misalignment.
Step 2: Vertical Keystone Correction:
Step 2.1: Position the Projector: Start by ensuring the projector is perpendicular to the projection surface (screen or wall).
Step 2.2: Adjust the Vertical Angle: If the top or bottom of the image is wider than the other, it indicates keystone distortion. Use the projector’s keystone correction settings to make vertical adjustments.
Step 2.3: Downward Angle Adjustment: If the top is more comprehensive, adjust the vertical angle downward until the image appears rectilinear.
Step 2.4: Adjust Projector Height: If the image is too high, lower the projector’s height to align it with the screen’s centerline. Conversely, raise the projector if the image is too low.
Step 3: Horizontal Keystone Correction:
Step 3.1: Horizontal Alignment: Ensure that the projector’s lens is horizontally aligned with the center of the screen for a rectangular image.
Step 3.2: Correct Image Skew: If the image appears skewed, use the projector’s keystone correction settings to make horizontal adjustments.
Step 3.3: Rotation Adjustment: If the image is tilted, you can physically rotate the projector clockwise or counterclockwise until the picture becomes rectangular.
Step 4: Lens Shift and Remote Control: Some projectors offer advanced features like lens shift and remote-controlled keystone correction. These functionalities can make the alignment process smoother and more precise.
Step 5: Check for Image Quality: After making adjustments, assess the quality of the projected image. Inspect the edges for any signs of light bleed or distortion. Make necessary tweaks until the image appears clear and rectangular without any anomalies.
Step 6: Choose a Suitable Projection Screen: Select a suitable projection screen to complement your efforts in keystone correction. A high-quality screen with appropriate gain minimizes light scattering and produces a clearer image.
Inappropriate Screen:
Cause:
The choice of projection screen significantly affects the occurrence of projector light bleed. An inappropriate screen, whether of low quality or with unfavorable characteristics, can exacerbate the issue. Rough screen surfaces and inadequate light absorption contribute to scattered light and reduced image quality.
Solution:
Step 1: Screen Selection Criteria: Begin by understanding the characteristics of an appropriate projection screen. Look for screens designed to minimize light reflection and overspill, crucial in combating light bleed.
Step 2: Opt for High-Quality Screens:
Step 2.1: Research Screen Options: Explore various projection screen options available in the market. Look for those that prioritize reducing light reflection and providing optimal light diffusion.
Step 2.2: Gain Value: Check the gain value of the screen. A lower gain value minimizes light scattering and helps maintain image clarity.
Step 3: Dark-Colored Border: Opt for Dark Borders: Choose a screen with a dark-colored border. This serves as a visual frame for the projected image, minimizing the perception of light bleed at the screen edges.
Step 4: DIY Projection Screen: If you need to invest in a commercial projection screen, consider creating a DIY screen using suitable materials. White, reflective materials work well for this purpose.
Step 5: Screen Installation: Ensure that the projection screen is mounted on a flat surface. This prevents any distortions that could contribute to light bleed.
Step 6: Screen Maintenance: Regular Cleaning: Keep the projection screen clean and free from dust or debris. A clean screen ensures optimal light absorption and prevents unwanted light scattering.
Step 7: Experiment and Observe: Projection Tests: Conduct projection tests with different content after setting up the projection screen. Observe the edges of the projected image for any signs of light bleed.
Improper Contrast Ratio:
Cause:
One of the common culprits behind the halo effect or projector light bleed is an improper contrast ratio. A contrast ratio represents the difference in brightness between the brightest and darkest parts of an image. When this ratio is imbalanced, it leads to variations in brightness levels across the projected image, resulting in light scattering and diminished image quality.
Solution:
Step 1: Understanding Contrast Ratio: Familiarize yourself with the concept of contrast ratio. It’s a measure of the difference between the brightest white and the darkest black that a projector can produce.
Step 2: Access Projector Settings: Access the contrast and brightness adjustment settings using your projector’s remote control or menu.
Step 3: Balancing Contrast and Brightness:
Step 3.1: Begin by adjusting the contrast setting. Gradually increase or decrease it while observing the impact on the image.
Step 3.2: Proceed to adjust the brightness setting similarly. Strive for a balance where neither the bright areas are excessively glaring nor the dark areas are overly dim.
Step 4: Testing Different Content: Project various types of content, including scenes with diverse lighting conditions. This helps ensure that the adjusted contrast ratio remains well-balanced across different scenarios.
Step 5: Avoid Extreme Settings: Steer clear of setting the contrast or brightness to extreme levels. Extreme settings can lead to further issues like light scattering and image distortion.
Step 6: Comparative Assessment: Display content with high contrast, such as scenes containing both dark and bright elements. Compare the image quality to ascertain that neither the dark areas appear excessively shadowy nor the bright areas appear unnaturally intense.
Step 7: User Manual Reference: Consult your projector’s user manual for recommended or optimal contrast and brightness settings. This can provide valuable guidance in finding suitable starting points.
Note: If the solutions provided do not effectively resolve the issue of projector light bleed, seeking professional assistance is recommended. Expert audiovisual technicians can accurately diagnose and address complex factors contributing to the problem, ensuring optimal projection quality and an immersive viewing experience.
What Methods Are Effective in Preventing Projector Light Bleed?
Preventing projector light bleed entails implementing strategies to ensure a superior projection experience. Here are the essential steps to preempt this issue:
Projector Placement: Thoughtfully position the projector at an optimal distance from the screen to sidestep light bleed onto neighboring surfaces. Leverage the projector’s lens zoom and throw ratio adjustments to attain the desired image size sans overspill.
Screen Material: Invest in a top-notch projection screen to curtail light reflection and diffusion. Opt for a screen with a suitable gain value to regulate projection angles and forestall unwarranted light dispersion.
Screen Size: Choose a screen size that aligns with your projector’s capabilities and the intended viewing area. Avoid employing an oversized screen about the projector’s luminosity, which could result in light bleed.
Ambient Light Control: Diminish ambient illumination within the viewing area by adjusting room lights or using blackout curtains. This establishes a dimmer backdrop, allowing the projected image to shine without seepage onto undesirable surfaces.
Masking and Bezel: Apply masking techniques or introduce a bezel around the screen to visually delineate the projected image from the encompassing surfaces. This reduces the perception of spillage and heightens the overall viewing satisfaction.
Projection Mapping: Consider projection mapping methods that meticulously map the projection onto specific surfaces instead of a single screen. This technique furnishes greater command over the image’s positioning, thereby minimizing the likelihood of excessive spillover.
By effectively executing these tactics, you can preempt projector light bleed and guarantee that your projected content emerges crisply, immersively, and free from uninvited light scattering.
Conclusion:
By comprehending the root causes of projector light bleed and applying the detailed step-by-step solutions provided, you’re well-equipped to ensure a seamless and captivating entertainment experience. If you encounter persistent challenges, seeking expert guidance will optimize your projector’s performance. Through the proactive measures outlined here, you’ll create an environment primed for enjoyable movie nights and gaming sessions, free from the distractions of light bleed.
FAQs
Q1: Why is my projector showing red?
A1: If your projector lamp is flashing red, check for input signal mismatches or configuration errors. Examine your VGA cable for damage affecting color output. Also, inspect the projector screen for discoloration contributing to the red tint.
Q2: What causes projector discoloration?
A2: Projector discoloration can result from aging, discolored prisms, or dust buildup. This can lead to one color dominating the image. Dust, lamp issues, and optical misalignment can contribute. Regular maintenance and cleaning are essential to prevent such discoloration.
Q3: Does wall color affect the projector?
A3: Yes, wall color impacts projector image quality. Grey walls are optimal as they balance contrast and light absorption. Similarly, a color closer to gray than white is recommended for optimal sharpness and video quality for a projector screen.
Q4: Is projector light bleed normal?
A4: No, projector light bleed is not normal. It’s an unintended side effect causing light scattering around image edges. It compromises contrast ratio and overall image quality. Manufacturers aim to minimize light bleed, and users seek solutions to mitigate this issue.
Q5: How can I fix projector light bleed?
A5: Fixing projector light bleed involves aligning the lens correctly, correcting the keystone, using an appropriate screen, and balancing the contrast ratio. Check lens alignment and keystone correction. Choose a quality screen with suitable gain. Adjust contrast and brightness for optimal results.
Why is My Projector Screen Blue? Unveiling the Causes and Solutions
Have you ever fired up your projector, eagerly anticipating an evening of cinematic bliss, only to be greeted by a perplexing blue screen?
Don’t fret; this issue isn’t as daunting as it may seem. You can resolve it yourself without the need for professional intervention. The key to solving the enigma lies in understanding its causes. Let’s unravel the mystery of the blue projector screen.
Table of Contents
What’s Behind the Blue Screen?
1. Improper Cable Connection:
One of the primary reasons your projector screen turns blue is due to improperly connected cables. Just like a jigsaw puzzle, every piece must fit snugly, or the picture won’t be complete. In this case, the blue screen is the projector’s way of telling you that something’s amiss with the connection.
2. Incorrect Source Selection:
The second common culprit is selecting the wrong source. Think of your projector as a detective searching for clues to the right signal. If it’s given the wrong lead, it might end up showing a blue screen, symbolizing its confusion.
What to Do When Your Projector Screen Turns Blue:
1. Stay Calm:
First and foremost, don’t panic. The blue screen issue is a minor hiccup and can be fixed in no time. Take a deep breath and follow these steps.
2. Check Cable Connections:
Begin by inspecting all the cable connections. Ensure that each cable is properly connected to the right ports. It’s easy to make a mistake in the heat of the moment, and this could be the root cause of the problem.
3. Source Selection:
If checking the cables doesn’t resolve the issue, grab your projector’s remote control. Look for the menu button and press it. Navigate through the menu using the arrow buttons until you find the source selection option. Make sure the correct source is selected.
4. Experiment with Inputs:
Sometimes, your projector may be set to an input source that isn’t actively transmitting a signal. Experiment by selecting different inputs, such as HDMI, VGA, or component, until you find the one that works.
5. Reboot the System:
If all else fails, try rebooting both your projector and the connected devices, such as your laptop or DVD player. This can refresh the connection and often resolves the issue.
Tips to Prevent Future Blue Screen Mysteries:
Label your cables: To avoid confusion in the future, label your cables according to their purpose. This simple step can save you a lot of trouble.
Keep an eye on the source: Double-check your source selection before turning on your projector. This extra moment of attention can save you from the blue screen surprise.
Update firmware: Sometimes, projector firmware updates can resolve compatibility issues and prevent blue screen incidents.
Invest in quality cables: High-quality cables are less likely to give you connectivity problems. It’s a wise investment for a seamless viewing experience.
Conclusion:
In conclusion, the blue projector screen is not a daunting issue to tackle. It’s often caused by simple mishaps, like improperly connected cables or a mix-up in source selection.
By following the steps mentioned above and implementing the tips to prevent future mishaps, you can enjoy your cinematic experiences without any unexpected blue interruptions. So, next time you see that blue screen, don’t panic, take a deep breath, and become the projector detective to uncover the solution.
FAQs | Why is My Projector Screen Blue
Q1: Why did my projector screen suddenly turn blue?
A1: Your projector screen turned blue due to one of two common reasons. The most likely cause is improperly connected cables. If they aren’t plugged in correctly, your projector can’t receive the signal it needs, resulting in a blue screen. The second reason could be an incorrect source selection, where your projector is looking for the signal in the wrong place.
Q2: What should I do when I see a blue projector screen?
A2: Don’t panic; it’s a fixable issue. First, check your cable connections to ensure they are properly seated in the correct ports. If the problem persists, use your projector’s remote control to access the menu, navigate to the source selection option, and make sure you’ve chosen the right source. These steps should resolve the blue screen problem.
Q3: How can I prevent my projector screen from turning blue in the future?
A3: To prevent future occurrences, label your cables to avoid confusion, double-check your source selection before turning on the projector, keep your firmware up to date, and invest in high-quality cables. These measures can help ensure a trouble-free viewing experience.
Q4: What if the blue screen issue persists even after checking cables and source selection?
A4: If the problem persists, try experimenting with different input sources, such as HDMI, VGA, or component. Rebooting both your projector and the connected devices can also refresh the connection and resolve the issue. If none of these steps work, consult your projector’s user manual or contact customer support for further assistance.
Q5: Can a firmware update fix the blue screen issue on my projector?
A5: Yes, sometimes a firmware update can resolve compatibility issues that lead to a blue screen. Check the manufacturer’s website or your projector’s documentation for information on how to update the firmware. It’s a good practice to keep your projector’s software up to date to avoid such issues.
Can You Use a Projector on Popcorn Ceiling: Enhancing Viewing Experience
Projectors are commonly used on flat, white surfaces for optimal viewing experiences. However, projecting content onto a popcorn ceiling while lounging on a bed can offer a unique and immersive experience. This article delves into the feasibility and challenges of using projectors on popcorn ceilings, providing insights on mitigating potential issues for a better viewing encounter.
Can You Use a Projector on Popcorn Ceiling?
While projectors are best suited for smooth surfaces, they can be used on popcorn ceilings. However, the textured nature of popcorn ceilings can lead to image distortion, reduced brightness, and uneven projection due to the texture’s irregularities. Harsh shadows might also be cast, necessitating the use of soft lighting. Proper projector positioning, color adjustment, focus and zoom calibration, and a projector screen can alleviate these problems and enhance the viewing experience.
Challenges and Solutions:
Using a projector on a popcorn ceiling does come with specific challenges:
Image Distortion and Unevenness: The textured surface of popcorn ceilings can lead to distorted and unevenly projected images. Positioning the projector perpendicular to the viewing area can minimize this distortion.
Reduced Brightness: The texture of the ceiling scatters and diffuses light, resulting in reduced perceived brightness. Opting for a projector with higher brightness can compensate for this effect.
Harsh Shadows: Popcorn ceilings’ unique light reflection properties can create harsh shadows. Supplementing with soft lighting sources helps mitigate this issue.
Popcorn Ceiling Projector – How To Use It?
To make the most of using a projector on a popcorn ceiling, follow these steps:
Proper Positioning: Mount the projector as high as possible to minimize exposure to the textured surface.
Adjust Focus and Zoom: Calibrate focus and zoom settings to achieve the clearest image possible.
Projector Screen: If feasible, use a projector screen for a smoother projection surface and improved image quality. Alternatively, a white wall or poster board can be used.
Lens Cleaning: Regularly clean the projector lens to avoid hazy or distorted images caused by dust and debris.
Are projectors compatible with textured walls?
Projectors on Textured Walls: Projecting on textured walls presents challenges due to the uneven surface. The texture can lead to image distortion, graininess, and light diffusion, reducing image quality. The irregularities in the wall’s surface can scatter and refract light, causing inconsistencies in brightness and sharpness.
Positioning Matters: Proper positioning of the projector is crucial to combat these issues. Placing the projector perpendicular to the viewing area helps minimize distortion caused by the wall’s texture. Adjusting the projector’s angle and distance from the wall can also assist in achieving a more accurate and clear image.
Brighter is Better: Opt for a projector with higher brightness (measured in lumens) to counteract the light diffusion caused by the textured wall. A projector with more excellent brightness can maintain a vibrant image even in light scattering.
Impact of Wall Color: The textured wall’s color can also impact image quality. Light-colored walls like light yellow, pink, blue, or green tend to have higher reflectivity. This aids in maintaining a brighter image despite the texture. However, darker textured walls can lead to a loss of detail and vibrancy, particularly in darker scenes.
Use of Projector Screens: A projector screen is highly recommended for a more optimal projection experience on textured walls. A projector screen provides a flat and smooth surface, reducing the impact of the wall’s texture on image quality. However, if a projector screen is unavailable, a white wall or a large sheet of white poster board can be alternatives.
Does a projector’s color matter?
Yes, a projector’s color does matter, but in a slightly different context than you might expect. When referring to A projector’s color, it generally relates to its color accuracy and ability to reproduce accurate and vibrant colors in the projected image.
Here’s why a projector’s color accuracy matters:
Color Accuracy: A high-quality projector should be able to reproduce colors accurately as intended by the content creators. This is important for various applications, including movies, presentations, gaming, and more. Accurate colors contribute to a more immersive and true-to-life visual experience.
Vibrancy and Contrast: Color accuracy also impacts the vibrancy and contrast of the image. If a projector can reproduce colors accurately, it can result in dull or washed-out images with good contrast. On the other hand, a projector with good color accuracy can deliver more vibrant and dynamic visuals.
Professional Applications: In professional settings such as graphic design, video editing, and medical imaging, accurate color representation is critical. Projectors used for these purposes must adhere to specific color standards to ensure accurate content representation.
Color Modes and Calibration: Many projectors offer different color modes optimized for different scenarios, such as cinema mode, presentation mode, or sRGB mode for accurate color reproduction. Projectors often have calibration settings that allow users to fine-tune color settings for optimal performance.
Content Quality: A projector’s color accuracy can also impact the perception of content quality. If colors appear inaccurate or unnatural, it can detract from the overall viewing experience and distract viewers from the content.
Which lighting is best for popcorn ceilings?
When choosing lighting for rooms with popcorn ceilings, it’s important to consider options that complement the unique texture while providing adequate illumination. Popcorn ceilings can create distinct lighting challenges due to their uneven surface and potential for casting harsh shadows. Here are some lighting options that work well with popcorn ceilings:
Soft or Frosted Light Bulbs: Soft or frosted light bulbs help diffuse light and reduce the intensity of shadows. These bulbs create a gentle and even illumination that can help minimize the harshness of the popcorn texture.
Table Lamps and Floor Lamps: Lamps with shades that diffuse light can provide soft and indirect illumination. Placing table lamps and floor lamps strategically around the room can help create a cozy and inviting atmosphere while reducing shadows.
Wall Sconces: Wall sconces can be installed on the walls to direct light upwards or downwards, avoiding direct illumination on the popcorn ceiling. This indirect lighting can add a warm ambiance to the room.
Pot Lights or Recessed Lights: Pot or recessed lights can be installed in the ceiling to provide even lighting without creating harsh shadows. These lights are sleek and can blend seamlessly with the ceiling’s appearance.
Track Lighting: Track lighting allows you to direct multiple light sources towards specific areas of the room. With adjustable fixtures, you can control the direction of light to avoid casting shadows on the ceiling.
Dimmer Switches: Installing dimmer switches with your chosen light fixtures provides the flexibility to adjust light intensity according to your needs. Dimming the lights slightly can help soften the overall illumination and enhance the popcorn ceiling’s texture.
Natural Light: Maximize natural light during the daytime. Natural light creates a soft and pleasant atmosphere without directly interacting with the popcorn texture.
Wall Washers: Wall washer lights are designed to wash the walls with light, which can indirectly illuminate the ceiling. This can create a diffused, gentle glow that complements the popcorn texture.
When selecting lighting for a room with a popcorn ceiling, consider the overall aesthetic you want to achieve and the functionality of the space. It’s essential to balance providing sufficient illumination and creating a comfortable and visually appealing environment that works harmoniously with the texture of the ceiling.
Disadvantages of Using a Projector on a Popcorn Ceiling:
While using a projector on a popcorn ceiling can be an intriguing idea, there are notable disadvantages:
Image Quality: The texture of the popcorn ceiling can cause distortion and unevenness in the projected image, particularly towards the edges. This can lead to a less sharp and clear picture.
Reflectivity: Popcorn ceilings may not reflect light as efficiently as flat surfaces, resulting in a less crisp and bright image.
Shadows and Throw Distance: The unique way popcorn ceilings reflect light can create harsh shadows. Additionally, the considerable distance from the floor to the ceiling may require finding a high location for the projector, especially for smaller projected images.
Conclusion:
A projector on a popcorn ceiling is possible, albeit with some challenges. The texture of the ceiling can impact image quality, but strategic positioning, proper adjustments, and supplemental lighting can significantly improve the viewing experience. While textured walls present similar challenges, choosing the right projector and considering wall color can help achieve satisfactory results. Remember that a projector screen or alternative projection surface can enhance outcomes and viewing quality.
FAQ’s
Can I use a projector on a popcorn ceiling?
Yes, you can use a projector on a popcorn ceiling. However, the texture of the ceiling can cause challenges such as image distortion, reduced brightness, and uneven projection. To optimize the experience, ensure proper projector positioning, use soft lighting, and consider a projector screen for improved image quality.
Can projectors be used on textured walls?
Yes, projectors can be used on textured walls. However, the uneven surface can lead to issues like distorted images and reduced brightness. Positioning the projector accurately, choosing a brighter projector, and using a projector screen can help mitigate these challenges and improve the projection quality.
Does the color of the wall matter for a projector?
Yes, wall color matters for a projector. Light-colored walls such as light yellow, pink, blue, or green can help maintain a brighter image due to higher reflectivity. Darker walls might lead to a loss of detail and vibrancy. Choosing a projector screen or a smooth white wall as a projection surface can also impact image quality.
What lighting is best for popcorn ceilings?
The best lighting for popcorn ceilings includes options that create a soft and even glow while minimizing harsh shadows. Soft or frosted light bulbs, table lamps, floor lamps, and recessed lights can work well. Wall sconces and dimmer switches also help achieve a balanced and inviting atmosphere.
Does a projector’s color matter?
Yes, a projector’s color accuracy matters. Color accuracy affects how accurately the projector reproduces colors in the projected image. Accurate colors contribute to a vibrant and immersive visual experience. Projectors with good color accuracy provide better vibrancy, contrast, and overall image quality, making them suitable for various applications, including entertainment and professional use.
Epson 4050 vs 5050: Choosing the Ideal Projector for Your Needs
Projectors have become essential for offices, institutions, and various settings in the modern age. When selecting the right projector, Epson offers a range of options catering to different requirements. The Epson 4050 and 5050 are popular choices among these options. Let’s delve into a detailed comparison of the two projectors to make an informed decision.
Premium Pick
Epson Pro Cinema 4050 4K PRO
Affordability: The Epson 4050 is more budget-friendly, making it an attractive option for those seeking a cost-effective projector.
Lightweight: Weighing 24.3 lbs, the Epson 4050 is lighter, making it easier to move and set up.
Good Brightness: With 2400 lumens of brightness, the Epson 4050 delivers clear and vibrant images suitable for various settings.
Decent Contrast: While not as high as the 5050, the 4050’s 200,000:1 contrast ratio still provides satisfactory visual depth.
Identical Color Space and Distance: Both projectors share the same color space coverage and projection distance, ensuring consistent image quality.
Introducing the Epson 4050 projector – a window to a world of cinematic wonders and technological marvels. This remarkable device transcends the ordinary and invites you to step into a realm where entertainment knows no bounds. Imagine the thrill of experiencing your favorite movies, sports events, and video games in a larger-than-life format right in the comfort of your own space.
The Epson 4050 isn’t just a projector; it’s an immersive experience waiting to happen. With its state-of-the-art 4K PRO-UHD technology, it paints a canvas of lifelike colours and vivid details that will leave you spellbound. Its high dynamic range (HDR) support ensures that every image is a masterpiece with exceptional contrast and clarity.
But the magic doesn’t stop there. The Epson 4050 also boasts an impressively sound system that envelops you in rich, clear audio, turning your living room into a bona fide home theater. Whether you’re a cinephile, a gamer, or a sports enthusiast, this projector will redefine your entertainment experience, making it larger, more vibrant, and more unforgettable than ever. Welcome to the future of home entertainment with the Epson 4050 projector – where your screen comes alive, and every moment is a journey worth taking.
Epson 4050: Features and Specifications
It is an affordable option for those on a budget.
4K resolution for sharp and detailed images.
Good color accuracy with 100% coverage of 3D DCI-P3 color space.
Suitable for various setups: front, rear, or ceiling mount.
Manual vertical keystone correction of ±30 degrees.
Decent contrast ratio of 200,000:1 for satisfactory image depth.
Lightweight design for enhanced portability.
2400 lumens of brightness for clear and vibrant projections.
Suitable for presentations, movies, and gaming.
Compatible with HDR10 content for improved dynamic range.
Behold the Epson Home Cinema 5050UB 4K PRO-UHD 3-Chip Projector in resplendent white – a true marvel here to redefine your concept of home entertainment. It’s not just a projector; it’s an invitation to embark on a cinematic journey that will leave you breathless. Imagine transforming your living room into a world-class theater, where the boundaries between reality and the screen blur into an electrifying fusion of sights and sounds.
This projector is a beacon of innovation, combining the brilliance of 4K PRO-UHD technology with the awe-inspiring power of High Dynamic Range (HDR). The result? It is an unparalleled visual feast where colours pop with life, details are precisely etched, and contrast reaches new depths. Whether watching your favourite films, engaging in epic gaming adventures, or cheering on your sports heroes, the Epson Home Cinema 5050UB ensures every moment unfolds with astonishing clarity and vibrancy.
But it doesn’t stop at visuals. This projector boasts an immersive audio experience that pulls you into the heart of the action, making you feel every explosion, cheer, and whispered dialogue. It’s the perfect fusion of art and technology, where entertainment transcends mere screens and becomes an unforgettable, larger-than-life spectacle. Say hello to the future of home cinema – the Epson Home Cinema 5050UB, a true masterpiece in white that’s ready to make your every viewing moment extraordinary.
Epson 5050 Projector: Features and Specifications
Premium option with advanced features.
4K resolution for exceptional image clarity.
High color accuracy with 100% coverage of 3D DCI-P3 color space.
Versatile installation: front, rear, or ceiling mount.
Manual vertical keystone correction of ±30 degrees.
Impressive contrast ratio of 1,000,000:1 for vibrant visuals.
Enhanced brightness of 2600 lumens for precise projections in various environments.
Ideal for home theaters and gaming setups.
HDR10 and HLG compatibility for improved dynamic range.
High Contrast Ratio: The 5050 boasts an impressive 1,000,000:1 contrast ratio, leading to more vibrant colors and deeper blacks.
Brighter Projection: With 2600 lumens, the 5050’s more brilliant output ensures clear and vivid projections even in well-lit environments.
Superior Visual Quality: High brightness and contrast combination provides exceptional visual quality and immersive experiences.
Enhanced Performance: The 5050 is a high-performance projector suitable for demanding applications, including gaming and home theater.
Identical Color Space and Distance: Like the 4050, the 5050 offers the same color space coverage and projection distance for consistent quality.
Epson 5050UB Projector of Cons
Higher Price: The Epson 5050 comes with a higher price tag, making it a premium option that might only fit some budgets.
Slightly Heavier: Weighing 24.7 lbs, the 5050 is marginally heavier than the 4050, potentially affecting portability.
Epson Pro Cinema 4050 vs 5050UB Projector: A Comprehensive Analysis
Brightness:
Brightness is a crucial factor in determining projected content’s clarity and visibility. The Epson 4050 boasts a peak brightness of 2400 lumens, ensuring a clear image projection. However, in a direct comparison, the Epson 5050 outshines with a brightness of 2600 lumens. The higher brightness 5050 translates to a superior viewing experience, ensuring sharp and vibrant projections.
Verdict: The Epson 5050 leads in brightness, offering improved projection quality.
Contrast Ratio:
The contrast ratio is vital for capturing the nuances of images and videos. The Epson 4050 presents a contrast ratio of 200,000:1, delivering decent contrast performance. However, the Epson 5050 takes a significant leap forward with an impressive contrast ratio of 1,000,000:1. This substantial contrast ratio empowers the 5050 to produce visuals with enhanced depth and rich tones.
Verdict: The Epson 5050 wins in the contrast ratio category, promising visually striking content.
Connectivity:
The Epson 4050 and 5050 projectors have various connectivity options to ensure compatibility with multiple devices and sources.
1. HDMI Ports: These projectors feature multiple HDMI ports that connect various devices, such as laptops, gaming consoles, Blu-ray players, and streaming devices. HDMI ports are essential for transmitting high-definition audio and video signals.
2. USB Ports: Both models include USB ports for multiple purposes. They can connect USB flash drives or external hard drives to directly display content, such as images, videos, and presentations.
3. Ethernet Port: An Ethernet port is available on both projectors, allowing for a wired network connection. This can be useful for firmware updates, networked presentations, and accessing online content.
4. RS-232C Port: These projectors are equipped with an RS-232C port, which is used for control and automation purposes. It enables remote management and control of the projector using compatible control systems.
5. Trigger Out: Both models offer a trigger output port that can be used to synchronize the projector with other compatible equipment, such as motorized screens or curtains.
6. Audio Out: Both projectors have an audio output, which is particularly useful if you connect the projector to external audio systems like speakers or amplifiers.
7. Wireless Connectivity (Optional): Some versions of these projectors might offer optional wireless connectivity modules, allowing you to connect wirelessly to your devices. This can enhance flexibility and reduce cable clutter.
These connectivity options ensure that the Epson 4050 and 5050 projectors can seamlessly integrate into a variety of setups, whether it’s for business presentations, home theater experiences, or gaming sessions. Before purchasing, check the specific connectivity options in the model you’re considering to ensure it meets your requirements.
Dimension and Weight:
Projector size and weight are essential considerations, especially for setups where portability matters. The Epson 4050 and 5050 share the exact dimensions: 20 inches in width, 17.7 inches in depth, and 7.6 inches in height. This uniformity simplifies the choice of projector mounts. In terms of weight, the Epson 4050 is marginally lighter at 24.3 lbs, while the Epson 5050 weighs around 24.7 lbs.
Verdict: The projectors have identical dimensions, but the Epson 5050 is slightly heavier.
Color Space and Projection Distance:
Color space directly impacts the range of colors a projector can reproduce, while the projection distance affects image quality. The Epson 4050 and 5050 offer 100% 3D DCI-P3 color space coverage, ensuring exceptional color accuracy. Additionally, they share a projection distance of 10 meters, delivering sharp images within this range.
Verdict: The Epson 4050 and 5050 offer identical color space and projection distance capabilities.
Cost Range:
Pricing is a significant factor influencing the decision-making process. The Epson 4050 comes at a budget-friendly price of $2399, making it an attractive option for those seeking affordability. Conversely, the Epson 5050 commands a higher price of approximately $2999, justifying its cost with superior performance.
Verdict: Regarding price, the Epson 4050 is the more cost-effective choice.
Final Verdict:
Choosing between the Epson 4050 and 5050 depends on your specific needs. The Epson 4050 offers a compelling option if you prioritize affordability and portability. On the other hand, if performance is paramount and you’re willing to invest in a higher-end model, the Epson 5050 is the superior choice with its brighter projection and exceptional contrast ratio.
FAQs
Does the Epson 5050UB support Dolby Vision?
Answer: No, the Epson 5050UB does not support Dolby Vision. However, it supports other HDR formats like HDR10 and HLG, which enhance the projected content’s dynamic range and color depth. It’s important to note that while Dolby Vision is not supported, the projector still delivers impressive visual quality through its other HDR capabilities.
Can these projectors achieve 4K at 120Hz?
Answer: Yes, both the Epson 4050 and 5050 projectors can achieve 4K resolution at 120Hz. This level of performance is particularly beneficial for gaming and applications that demand higher frame rates for smoother visuals and more immersive experiences.
Does Dolby Vision support HDR?
Answer: Yes, Dolby Vision is a form of high dynamic range (HDR) that offers advanced enhancements to the visual quality of content. Dolby Vision-enabled devices, such as TVs and some projectors, can reproduce a broader range of colors, higher contrast, and increased detail, resulting in a more captivating and lifelike viewing experience.
What is the difference in visual performance between the Epson 4050 and 5050?
Answer: The main differences in visual performance between the Epson 4050 and 5050 lie in brightness and contrast. The Epson 5050 offers higher brightness (2600 lumens) and a significantly improved contrast ratio (1,000,000:1) compared to the Epson 4050 (2400 lumens, 200,000:1). This means that the Epson 5050 can deliver brighter, more vibrant images with deeper blacks and more striking visual tones.
Which projector is suitable for home theater setups?
Answer: If you’re aiming for an impressive home theater setup, the Epson 5050 is the better choice due to its superior visual performance. Its higher brightness, exceptional contrast ratio, and compatibility with HDR formats make it ideal for creating a cinematic viewing experience in your home. While it comes at a higher price point, the enhanced performance justifies the investment for home theater enthusiasts.
How to Mount a Projector Screen Without Drilling | 5-Methods
When it comes to mounting a projector screen, many of us cringe at the thought of drilling holes in our walls. We want to enjoy the immersive experience of a projector screen without causing permanent damage.
Luckily, there are several ingenious ways to achieve this goal without a single drill hole. In this guide, we will explore five fantastic methods to mount a projector screen without drilling.
If you’re looking for a secure and non-invasive way to mount your projector screen, projector screen stands are a fantastic choice. These stands are designed explicitly for this purpose and offer an excellent alternative to wall mounting.
How to Mount with a Projector Screen Stand:
Start by selecting a projector stand that suits your screen’s size and weight. These stands come in various styles, so choose the one that best fits your needs.
Read the user manual carefully to understand how to set up the stand. Typically, no technical expertise is required, making this a user-friendly option.
Follow the instructions to mount your projector screen onto the stand securely. These stands are versatile and adjustable, ensuring your screen is at the perfect viewing height.
Enjoy your projector screen without any damage to your walls, and easily relocate it if needed.
Hanging strips are a versatile and cost-effective solution for mounting various items on your walls. While they are commonly used for hanging pictures, paintings, and mirrors, they can also be an economical temporary fix for mounting a projector screen.
How to Mount with Hanging Strips:
Find a clean area on your wall that hasn’t been treated with household cleaners. To ensure a secure hold, clean the area with rubbing alcohol.
Unpack and separate the hanging strips. These typically come in pairs, with one strip to attach to the wall and the other to the projector screen.
Attach one strip to the wall, press it for about 30 seconds, and allow it to adhere for an hour as per the instructions provided.
Once the strip is secure, attach the corresponding strip to your projector screen. Make sure it aligns correctly with the wall strip.
Carefully mount your projector screen, ensuring it’s level and properly attached.
For those with exposed brick walls, brick clamps provide an excellent solution to mount a projector screen without drilling. This method is both affordable and effective.
How to Mount with Brick Clamps:
Measure the depth of the mortar on your brick wall and select brick clamps that are compatible with your wall.
Carefully follow the provided instructions for hanging the brick clamps. Keep in mind that not all brick clamps are the same, so specific steps may vary.
Once the brick clamps are securely in place, mount your projector screen with confidence.
While a bit more expensive than other options, mounting your projector screen on a cork wall not only provides a secure foundation but also adds a touch of warmth and style to your living space.
How to Mount on a Cork Wall:
Start by installing the cork wall using adhesive liquid. This creates a unique and practical backdrop for your projector screen.
Measure your projector’s dimensions and mark the points on the cork wall where you want to mount it.
Install screws and nails in the marked areas to create a secure mounting point for your projector screen.
Carefully mount your projector screen on the cork wall, which not only ensures stability but also enhances the aesthetics of your room.
If you lack the technical knowledge or equipment to hang a projector screen, investing in floor-standing options, such as legs or an easel, can be an excellent alternative. These options don’t require wall mounting and are especially convenient for DIY projector setups.
How to Mount with Floor Standing:
If you choose legs, simply adjust the bolts on the legs to securely mount the projector screen in your desired location.
Alternatively, opt for an easel, which provides a stable frame to hold your projector screen. Adjust the easel’s frame to ensure a secure and safe fit for your screen.
The floor-standing options offer the flexibility to move your projector screen without hassle, making them ideal for various setups and scenarios.
Conclusion
In conclusion, mounting a projector screen without drilling is not only possible but also quite straightforward. By exploring creative alternatives like projector screen stands, hanging strips, brick clamps, cork walls, or floor-standing options, you can enjoy the benefits of a projector screen without permanent wall damage.
Whether you prioritize mobility, style, or cost-efficiency, there is a non-invasive solution for everyone. So go ahead, choose the method that suits your needs, and start enjoying the big screen experience in your home, worry-free.
FAQs | How to Mount a Projector Screen Without Drilling
1. Can I use hanging strips to mount a projector screen on any wall?
Answer: Hanging strips are best used on clean, untreated walls. However, they may not be suitable for textured or porous surfaces. Ensure the wall is compatible with the adhesive properties of hanging strips before use.
2. Are projector screen stands adjustable to fit different screen sizes?
Answer: Yes, projector screen stands are typically designed to be adjustable to accommodate various screen sizes. It’s essential to select a stand that can support the weight and dimensions of your projector screen.
3. Can cork walls be installed by homeowners, or do I need a professional for this method?
Answer: Cork walls can be installed by homeowners. You will need adhesive liquid, proper measurements, and basic DIY skills. However, if you’re uncertain about your ability to install it correctly, consulting a professional is a good idea.
4. Do brick clamps leave any permanent marks or damage on exposed brick walls?
Answer: Brick clamps are designed not to leave permanent marks or damage on exposed brick walls. They are a safe and effective way to mount a projector screen without drilling while preserving the integrity of the brick surface.
5. How much space do I need for floor-standing options like legs or an easel to mount a projector screen?
Answer: Floor-standing options like legs or an easel require more space compared to wall-mounted solutions. You should allocate enough space for the screen’s dimensions and the floor-standing apparatus, ensuring it doesn’t obstruct the viewing area.
Epson 1060 vs 1080 Projector: Which One is better?
Epson is a well-respected brand in the world of projectors, known for producing reliable and high-quality devices suitable for various purposes. In the realm of home theater, their Home Cinema range offers a plethora of options to cater to the needs of home theater enthusiasts, all within reasonable price ranges.
Two projectors that have garnered significant attention within this range are the Epson Home Cinema 1060 and 1080. While they share many similarities, there are key differences that can help you determine which one suits your home cinema setup best.
I’m not just providing you with the difference between these two projectors. I’m also providing the projector review of which one is best for your home theater system keep reading this post.
Table of Contents
Premium Pick
Epson Home Cinema 1060
Affordable, offering great value.
Portable and lightweight.
Decent brightness and contrast.
Suitable for both presentations and home theater.
Quick Corner technology for easy image adjustment.
The Epson Home Cinema 1060 is a versatile projector that combines portability, ease of use, and impressive image quality. It’s compact enough to be easily carried in a bag, making it a great choice for on-the-go presentations or movie nights at home.
Features and Specifications:
Brand
Epson
Recommended Uses For Product
Gaming
Special Feature
Built In Speaker, Portable
Connectivity Technology
HDMI
Display resolution
1920 x 1080
This projector serves a dual purpose by delivering crisp presentations during the day and creating a cinematic experience in the evening. It employs 3LCD technology, offering high color brightness and a wide color gamut, resulting in stunning HD images with remarkable color accuracy. Additionally, it comes equipped with several useful features that enhance the overall viewing experience without compromising image quality.
Pros
Affordable, offering great value.
Portable and lightweight.
Decent brightness and contrast.
Suitable for both presentations and home theater.
Quick Corner technology for easy image adjustment.
Cons
Slightly lower brightness compared to the 1080 model.
Epson Home Cinema 1080 3-chip 3LCD 1080p Projector, 3400 lumens Color & White Brightness
Considered an upgraded version of the 1060, the Epson Home Cinema 3lcd 1080p projector boasts enhanced features and state-of-the-art projection technology. It delivers high-resolution visuals with true 3-chip 3LCD technology and exceptional color brightness and provides a hassle-free setup process with fast processing capabilities.
Features and Specifications:
Brand
Epson
Recommended Uses For Product
Home Cinema, Gaming
Special Feature
Built-In Speaker, Digital Keystone Correction
Connectivity Technology
USB, HDMI, 3.5mm Jack
Display resolution
1920 x 1080
The Epson cinema 1080 3lcd provides a larger-than-life viewing experience in your home theater. It offers high contrast ratios and brightness, ensuring sharp and vivid visuals even in dark or dimly lit environments. Its stylish design, impressive picture quality, and wide range of features make it a versatile choice for various spaces and home theater.
Pros
Enhanced brightness and contrast for stunning visuals.
Extended lamp lifes for long-term use.
High-quality Full HD resolution.
Built-in picture skew sensor for image perfection.
Ideal for immersive home theater experiences.
Cons
Higher price Than Epson 1060
Epson home cinema 1060 vs 1080: Which Beat the Battle?
Let’s delve deeper into the key differences between the Epson 1060 and Epson 1080:
Brightness:
The Epson 1060 and Epson 1080 projectors offer notable distinctions in terms of brightness. The Epson 1060 boasts 3100 color brightness and 3100 white brightness, rendering it well-suited for moderate lighting conditions.
In contrast, the Epson 1080 steps up the game with 3400 color brightness and 3400 white brightness, making it a crucial choice for areas with ambient lighting. This variance ensures that the Epson 1080 can deliver brighter and more vibrant visuals, which can be a game-changer for a captivating home theater experience.
Contrast:
When it comes to contrast ratios, these projectors continue to distinguish themselves. The Epson 1060 offers a commendable 15000:1 contrast ratio, ensuring vivid and detailed projection with rich blacks and bright whites.
On the other hand, the Epson 1080 elevates the viewing experience with a 16000:1 contrast ratio. This small but noticeable improvement results in sharper, clearer, and crisper images, making it particularly appealing for cinephiles and those seeking top-notch image quality.
Screen Size:
Both projectors excel in screen size capabilities, providing a cinematic experience in your own space. The Epson 1060 impressively projects images up to 300 inches, offering visuals up to 25 times larger than a typical 60-inch flat panel.
Meanwhile, the Epson 1080 takes it a step further, displaying high-resolution 1080p pictures up to 320 inches on any blank screen or wall. This larger-than-life viewing experience makes the Epson 1080 ideal for those aiming for a truly immersive home theater setup.
Lamp Life:
Lamp life is a critical factor when considering the longevity of your projector. The Epson 1060 employs an LED light source with a service lifespan of 4500-7500 hours, dependent on usage mode and brightness level. It provides reliable performance for several years, even with regular usage.
In contrast, the Epson 1080 offers an extended lamp lifes ranging from 6000-12000 hours. This remarkable longevity ensures that the Epson 1080 can serve as a centerpiece in your entertainment setup for years to come, making it a wise investment.
Image Adjustment:
Image adjustment features are essential for achieving the perfect picture quality. The Epson 1060 employs Quick Corner technology, enabling users to adjust corners and project a perfectly square picture easily.
Meanwhile, the Epson 1080 goes further with a built-in picture skew sensor. This sensor analyzes image alignment and automatically adjusts keystone to eliminate fuzzy edges and distortions. This feature simplifies setup and fine-tuning, ensuring a consistently high-quality viewing experience.
Weight:
Portability can be a key consideration, particularly for those wanting to move their projector between rooms or take it on the go. The Epson 1060 excels in this department, being lightweight and compact, measuring 11.9 x 9.8 x 3.4 inches and weighing a mere 5.6 pounds.
It’s easily transportable and fits comfortably in a bag. Meanwhile, the Epson 1080, while still relatively portable, is slightly larger at 14.57 x 14.96 x 7.87 inches and weighs 8.2 pounds. It remains a convenient option for various projection needs but may require a bit more effort when transporting.
Price:
Price is often a crucial factor when making a purchasing decision. The Epson 1060 is available at a reasonable price point, offering a solid range of features and excellent projection quality for its cost.
In contrast, the Epson 1080 comes at a slightly higher price due to its advanced features and upgrades. Potential buyers will need to weigh the added benefits against the increased cost to determine if the Epson 1080 fits their budget and requirements.
Which One is Better?
Both the Epson 1060 and 1080 offer impressive performance and similar functions. The Epson 1080 is an upgraded version of the 1060, featuring higher brightness, contrast, and lamp lifes. However, the price difference between the two models exceeds $700 for these upgrades.
The increase in brightness and contrast may not be significantly noticeable for everyone. Therefore, if you can live without these upgrades, the Epson 1060, available for $600, might be the more economical choice.
Both projectors share important features such as 1080p resolution, 3LCD, 3-chip Projection Technology, a built-in speaker, and compatibility with popular streaming devices like Chromecast, Roku, Apple TV, and Amazon Fire TV.
FAQs
What is the main difference between the Epson 1060 and Epson 1080 projectors?
Answer: The main difference is in brightness and contrast. The Epson 1080 offers higher brightness and a superior contrast ratio, resulting in brighter and more detailed visuals for a premium home theater experience.
Can I use these projectors for presentations as well as home theater?
Answer: Yes, the Epson 1060 and Epson 1080 are versatile projectors suitable for presentations and home theater use, making them ideal for dual-purpose setups.
What is the lamp life of these projectors, and how often will I need to replace the lamp?
Answer: The Epson 1060 has a lamp life ranging from 4500 to 7500 hours, while the Epson 1080 offers an extended lamp lifes ranging from 6000 to 12000 hours. Actual replacement frequency depends on usage patterns, but these lamps can last several years.
Do these projectors support wireless connectivity with streaming devices?
Answer: Yes, both the Epson 1060 laser projector and Epson 1080 support versatile connectivity and are compatible with popular streaming devices like Chromecast, Roku, Apple TV, and Amazon Fire TV, offering seamless wireless streaming options.
Are these projectors suitable for rooms with ambient lighting, or do they require complete darkness?
Answer: While the Epson 1080’s enhanced brightness is better equipped for areas with ambient lighting, the Epson 1060 can still perform well in moderate lighting conditions. However, for the best cinematic experience, minimizing ambient light is recommended for both models.
How to Safely Use a Projector with Ceiling Fan: Tips and Considerations
When it comes to Hanging projectors on ceilings, it’s a common practice, but sometimes limited space presents challenges, especially when a ceiling fan is also in the equation. This article delves into the details of safely using a projector alongside a ceiling fan, discussing potential compatibility issues, advantages, disadvantages, and essential tips to ensure a successful setup.
Can You Use a Projector with Ceiling Fan?
Indeed, you can use a projector with a ceiling fan, but it’s essential to exercise caution and consider potential drawbacks. Placing a projector on a ceiling fan is not typically recommended due to image obstruction caused by fan blades and possible wind interference affecting the projection quality. However, some innovative solutions suit specific preferences, like hologram fan projectors or mounting the projector beside the fan.
Pros of Using a Projector with a Ceiling Fan:
Opting for a ceiling-mounted projector offers several advantages, much like any ceiling-mounted setup.
Space-saving Elegance: Ceiling-mounted projectors save valuable floor space and provide a clean, sophisticated look to your space, be it a home theater or presentation area.
Protection from Damage: Ceiling mounting keeps the projector out of reach of pets and children, minimizing the risk of accidental damage.
Professional Appearance: A ceiling-mounted setup imparts your room a polished and organized appearance.
Cons of Using a Projector with a Ceiling Fan:
Similar to using a projector on a popcorn ceiling, it has disadvantages.
Fan Interference: Ceiling fans can cast shadows or disrupt light paths, affecting the projection quality and viewing experience.
Compatibility Challenges: Using a projector and a ceiling fan might lead to conflicts due to the fan’s vibrations potentially affecting the projector’s alignment and stability.
Cable Management Complexity: Ceiling-mounted projectors necessitate additional wiring, posing challenges for both aesthetics and safety.
Ceiling and Fan Suitability: Not all ceilings or ceiling fans are suitable for projector mounting. Ceiling material, structure, and fan design must be assessed to ensure proper installation and functionality.
How to Use a Projector with a Ceiling Fan:
Tips for a Successful Setup To ensure a safe and effective projector-ceiling fan setup, follow these steps:
Compatibility Check: Verify compatibility between the projector, ceiling mount, and your specific ceiling fan design. Ensure the projector can be properly positioned and the ceiling mount can securely attach to your ceiling.
Opt for the Right Projector: Choose a projector with a shorter throw distance if the ceiling fan is in the way. This allows for optimal projector placement closer to the screen.
Select a Suitable Location: Choose a ceiling spot that facilitates proper projector setup and minimizes any interference with the ceiling fan. Maintain sufficient space between the projector and fan blades to prevent obstruction.
Correctly Mount the Projector: Follow the manufacturer’s instructions to install the ceiling mount securely. Confirm its capacity to support the projector’s weight and ensure it’s firmly fixed to the ceiling.
Properly Install the Projector: Attach the projector to the ceiling mount following the on-screen instructions. Verify secure fastening and optimal positioning for ideal projection angles, ensuring stability.
Adjust Projection Angle: Employ adjustments on the ceiling mount to fine-tune the projection angle and alignment, reducing distortion and fan-related obstacles.
Configure Projector Settings: Post-installation, adjust projector settings such as focus, zoom, and keystone correction to optimize image quality and alignment.
Manage Cables: Handle cables connecting the projector to power, video sources, and audio devices carefully. Conceal or secure cables for an organized and safe setup.
Test and Calibrate: After installation, power on the projector and assess the image to ensure proper functioning. Adjust focus, keystone correction, and other settings for optimal results.
Alternative Solutions:
Consider these alternatives to manage space effectively:
Ceiling Hugger Fan: Opt for a ceiling hugger fan designed to mount closer to the ceiling, creating space for your projector setup.
Quality Projector Screen: Use a projector screen engineered to reflect light evenly, enhancing image quality by reducing glare and light bleeding.
Common Mistake Avoid When Using a Projector with a Ceiling Fan
While setting up a projector alongside a ceiling fan can offer unique advantages, it’s crucial to be aware of the most common mistake people make in this scenario. Avoiding this mistake can help you ensure a seamless and effective projector setup without compromising on the performance of either the projector or the ceiling fan.
Neglecting Fan Blade Clearance
One of the most prevalent errors individuals make when using a projector with a ceiling fan is paying attention to the clearance between the fan blades and the projector’s light path. This oversight can lead to two main issues:
Obstructed Image:
The moving blades can cast shadows on the projection surface if the projector is not positioned with adequate clearance from the fan blades. This obstructs parts of the image and reduces the overall quality of the projection. This can be especially noticeable during scenes with bright backgrounds or fast-moving action.
Interference with Airflow:
Placing the projector too close to the fan can disrupt the airflow produced by the fan. This can lead to uneven projector cooling and cause overheating over extended periods. Additionally, the wind from the fan can cause the projected image to flutter or sway, negatively impacting the viewing experience.
Prevention and Solution: Proper Placement and Measurement
To avoid falling into the trap of neglecting fan blade clearance, take the following steps:
Measure and Plan:
Before mounting the projector, carefully measure the dimensions of the projector and the ceiling fan. Factor in the fan’s range of motion, ensuring that the blades do not intersect the projector’s light path. This measurement will guide you in determining the appropriate distance between the projector and the fan.
Follow Manufacturer Guidelines:
Consult the projector’s and ceiling fan’s manufacturer guidelines for recommended clearances. These guidelines often provide specific measurements or distance ranges that should be maintained between the two.
Test Before Final Mounting:
Before finalizing the installation, temporarily position the projector where you intend to mount it and run the fan at various speeds. Observe any shadows or image disruptions caused by the fan blades. Make necessary adjustments to achieve a shadow-free and stable projection.
Opt for Adjustability:
Choose a projector mount with adjustable angles and extension arms if possible. This flexibility allows you to fine-tune the projector’s position to ensure optimal clearance from the fan blades.
By prioritizing proper planning and measurement, you can easily prevent the mistake of neglecting fan blade clearance. This attention to detail will result in a visually pleasing and smoothly functioning projector setup that coexists harmoniously with your ceiling fan, enhancing your overall entertainment or presentation experience.
Conclusion
In conclusion, utilizing a projector with a ceiling fan is feasible but demands careful consideration. The potential challenges and risks should be weighed against the benefits. Following the outlined guidelines and considering alternative solutions can lead to a successful projector setup that coexists harmoniously with your ceiling fan. Your space can boast both functionality and aesthetics without compromising safety or performance.
FAQ’s
Can I Mount a Projector on a Ceiling Fan?
Answer: While mounting a projector on a ceiling fan is possible, it’s generally not recommended due to potential complications. Fan blades can obstruct the projector’s light path and disrupt the image quality. Additionally, the fan’s airflow might interfere with the projection. If you’re determined to proceed, use a specialized mount designed for this purpose and exercise caution.
What Are the Advantages of Ceiling-Mounted Projectors?
Answer: Ceiling-mounted projectors offer multiple benefits, including space-saving elegance, protection from damage by keeping it out of reach, and a polished appearance. They can help you optimize room aesthetics and create a professional atmosphere, making them popular home theater and presentation choices.
How Can Ceiling Fans Affect Projector Image Quality?
Answer: Ceiling fans can adversely impact projector image quality in two main ways. First, the fan’s blades can cast shadows onto the projection surface, disrupting the image. Second, the airflow produced by the fan might cause the projected image to flutter or sway, diminishing the viewing experience. Proper placement and clearance are essential to mitigate these effects.
Can a Ceiling Fan and Projector Be Used Simultaneously?
Answer: Using a ceiling fan and a projector simultaneously can pose compatibility challenges. The fan’s vibrations and movement may affect the projector’s stability and alignment. This interference can lead to suboptimal image quality and performance. Consider adjusting fan settings or using the projector during fan-off periods to avoid conflicts.
How Can I Ensure Proper Clearance Between the Projector and Fan Blades?
Answer: To ensure proper clearance, measure the projector’s and the fan’s dimensions, factoring in the fan’s range of motion. Consult manufacturer guidelines for recommended clearances. Test the setup before final mounting by temporarily positioning the projector and observing for shadows or disruptions caused by the fan blades. Adjust the projector’s position to achieve optimal clearance and a stable projection.
Best Projectors Under $100 For 2025 | Affordable Home Cinema
Welcome to our ultimate guide to the best and cheapest projectors of 2025! Are you in search of an affordable yet high-quality projector that won’t empty your wallet? Look no further! Whether you’re decking out your living room for movie nights, setting up a home theater, enhancing your gaming experience, or needing a portable solution for classroom or office presentations, we’ve got the best projector according to your needs.
In this article, we’ll explore the top options for projectors under $100, ensuring you get the most bang for your buck. From mini projectors to versatile models suitable for various environments, we’ll help you find the perfect fit for your needs. Let’s embark on this journey to discover the best projector under $100 that ticks all the boxes for quality, performance, and affordability!
Introducing the ZDK 2025 Newest Mini Projector with Wifi and Bluetooth 12000L, the ultimate companion for your indoor and outdoor entertainment needs. This portable powerhouse combines cutting-edge technology with convenience, delivering stunning visuals and immersive sound in a compact design. Whether you’re hosting movie nights in your living room, gaming with friends, or enjoying outdoor gatherings, this projector is sure to elevate your experience to new heights.
Main Features / Technical Specifications:
Brand: ZDK
Recommended Uses For Product: Indoor/Outdoor
Special Feature: Built-in Speakers
Connectivity Technology: USB
Display Resolution: 1920 x 1080 (Full HD)
Dual-band WiFi (2.4G+5G) and Bluetooth connectivity for fast and stable wireless connections.
Bluetooth 5.0 chip enables seamless connection with various Bluetooth speakers/headphones.
Native Resolution: Native 1080P resolution for crisp and detailed image quality.
Brightness: Remarkable 12000 lumens brightness for clear visuals even in well-lit environments.
Contrast Ratio: Dynamic contrast ratio of 20000:1 for enhanced color depth and realism.
Long Bulb Life: Equipped with an energy-saving LED light source for extended projector lifespan.
Massive Display: Supports up to a massive 200-inch screen size for a cinematic viewing experience.
Zoom Function: Remote-controlled zoom function allows adjustment of image size from 100% to 50%.
Wide Compatibility: Supports HDMI, USB, and 3.5mm headphone interfaces for versatile connectivity with various devices such as TV Stick, iPhone, Android phone, gaming consoles, etc.
Warranty: Comes with a worry-free 2-year warranty for peace of mind.
Item Weight: 2.92 pounds
Product Dimensions: 7.3 x 5.1 x 4.7 inches
Structure and Design:
Compact yet powerful, the ZDK projector boasts a sleek and portable design, making it ideal for home theaters, gaming rooms, backyard gatherings, and more. The advanced cooling fan and energy-saving LED light source ensure long-lasting performance.
Connectivity
One of the standout features of the ZDK 2025 Newest Mini Projector is its versatile connectivity options. With built-in 2.4G+5G Dual-band Wifi and Bluetooth 5.0, this projector offers lightning-fast and stable connections. Whether you’re streaming content from your phone, tablet, or laptop, the dual-band Wifi ensures smooth transmission with minimal lag or buffering.
Additionally, the projector comes equipped with HDMI, USB, and headphone interfaces, providing you with a wide range of options to connect your favorite devices. From TV sticks to gaming consoles, you can easily hook up your preferred media sources for an immersive viewing experience.
The zoom function adds another layer of convenience, allowing you to adjust the image size seamlessly to fit your space and preferences. Whether you’re projecting onto a small screen or a massive 200-inch display, you’ll have full control over the viewing experience.
Image Quality
When it comes to image quality, the ZDK projector truly shines. With native 1080P resolution and an impressive 12000 lumens brightness, it delivers stunning visuals that bring your content to life. Whether you’re watching movies, playing games, or giving presentations, you’ll be amazed by the clarity and detail this projector offers.
The high-refraction 6-layer glass lens ensures vibrant colors and sharp contrast, creating a cinematic experience in the comfort of your own home. From rich blacks to vivid hues, every detail is rendered with precision and accuracy, immersing you in the action on screen.
The projector’s dynamic contrast ratio of 20000:1 further enhances the viewing experience, ensuring deep blacks and bright whites for a truly lifelike image. Whether you’re watching a thrilling action movie or exploring a colorful animated world, you’ll appreciate the depth and realism that this projector delivers.
Pros
Fast and stable connectivity with 5G WiFi and Bluetooth 5.0
Native 1080P resolution and 12000 lumens brightness for immersive viewing
Portable and compact design ideal for indoor and outdoor use
Versatile connectivity options including HDMI, USB, and headphone interfaces
Massive 200-inch display with zoom function for customizable viewing experiences
Cons
HDMI adapter and TV Stick not included
Verdict:
The ZDK 2025 Newest Mini Projector with Wifi and Bluetooth 12000L is a game-changer in the world of affordable projectors.
With its stunning image quality, versatile connectivity options, and compact design, it’s the perfect choice for anyone looking to enhance their home entertainment setup. Whether you’re watching movies, playing games, or giving presentations, this projector delivers exceptional performance at the cheapest price.
2. HAPPRUN Projector • Native 1080P Bluetooth Projector
Elevate your home entertainment experience with the HAPPRUN Native 1080P Bluetooth Projector. Boasting impressive features like native Full HD resolution, Bluetooth connectivity, and a 100-inch screen, this portable outdoor movie projector is designed to deliver exceptional visuals and immersive sound.
Whether you’re hosting movie nights, gaming sessions, or outdoor gatherings, the HAPPRUN projector promises to take your viewing experience to the next level.
Main Features / Technical Specifications:
Brand: HAPPRUN
Recommended Uses For Product: Indoor/Outdoor
Bluetooth 5.1 & Built-in Speaker
4K Support
Native Full HD 1080P
100” Projection Screen Included Zoom 50%–100%
Connectivity Technology: Bluetooth, USB, HDMI, 3.5mm Jack
Display resolution: 1920 x 1080 (Full HD)
Brightness: Excellent 9500 lumens brightness for clear and vibrant images
Contrast Ratio: High dynamic contrast ratio of 10000:1 for enhanced image depth
Keystone Correction: ±15° Keystone Correction for easy screen adjustment
Bluetooth 5.1 Function & HiFi Stereo Speaker: Built-in powerful dual speakers and Bluetooth 5.1 chip for superior sound quality and seamless audio connectivity
Multimedia Compatibility: Equipped with HDMI, USBx2, AV, and 3.5mm headphone jack, compatible with various devices including Fire TV Stick, Roku, DVD, Laptop, USB, Computer, Headphone, External Speaker, iPhone Android, iPad, PS5, etc.
Screen Size: Supports projection sizes from 40 to 200 inches, offering versatile viewing options
Portable Design: Compact and lightweight design for easy transportation and setup
Included Accessories:
100” Projection Screen
HDMI Cable
AV Cable
Power Cord
Remote Control
User Manual
Structure and Design:
The HAPPRUN projector is designed with portability and convenience in mind. With its compact size and lightweight build, it’s easy to take this projector with you wherever you go. The included 100-inch screen ensures that you can enjoy a cinematic experience right out of the box, making it perfect for indoor and outdoor use alike.
Connectivity:
The HAPPRUN Native 1080P Bluetooth Projector excels in connectivity, offering a range of options to seamlessly integrate with your devices. Whether you prefer wireless streaming or traditional wired connections, this projector has you covered. With Bluetooth 5.1 functionality, you can easily pair your audio devices for immersive sound without the hassle of tangled cables. While Bluetooth doesn’t support direct connection with smartphones, it’s perfect for linking up with external speakers or headphones for an enhanced audio experience.
In addition to Bluetooth, the projector features HDMI, USB, and 3.5mm jack ports, providing versatility and compatibility with a wide array of devices. Whether you’re connecting a gaming console, streaming stick, or laptop, you can enjoy hassle-free setup and seamless connectivity. This versatility makes it ideal for various applications, from hosting movie nights to giving presentations or gaming sessions. With the HAPPRUN projector, you can easily switch between different sources and enjoy your favorite content with ease.
Image Quality:
When it comes to image quality, the HAPPRUN projector truly shines, delivering stunning visuals that bring your content to life. With native 1080P Full HD resolution, you can expect crisp details and vibrant colors that enhance your viewing experience. Whether you’re watching movies, playing games, or viewing photos, every scene is rendered with exceptional clarity and realism. The projector’s impressive 9500 lumens brightness ensures that your images are bright and clear, even in well-lit environments or outdoor settings.
Furthermore, the projector boasts a high dynamic contrast ratio of 10000:1, resulting in deeper blacks and brighter whites for enhanced depth and dimensionality. This contrast ratio ensures that you can enjoy a more immersive viewing experience with greater detail and clarity. Plus, with a projection display ranging from 40 to 200 inches and ±15° keystone correction, you have the flexibility to adjust the screen size and position to suit your preferences. Whether you’re projecting onto a wall or using the included 100-inch screen, the HAPPRUN projector delivers exceptional image quality that will impress even the most discerning viewers.
Pros
Native Full HD resolution for sharp and clear images.
Bluetooth 5.1 connectivity for wireless audio streaming.
Portable design with included 100-inch screen for easy setup.
Powerful built-in speakers and HiFi stereo sound for immersive audio experience.
Cons
Additional equipment like a TV stick may be required for certain connectivity options.
Verdict:
The HAPPRUN Native 1080P Bluetooth Projector offers a perfect blend of portability, performance, and convenience. With its native Full HD resolution, Bluetooth connectivity, and included 100-inch screen, it’s an excellent choice for anyone looking to enhance their home entertainment setup.
Whether you’re watching movies indoors or hosting outdoor movie nights, this projector delivers exceptional quality and versatility at an affordable price.
3. AuKing Projector • 2025 Upgraded Mini Projector
Experience the ultimate home theater experience with the AuKing 2025 Upgraded Mini Projector. This compact yet powerful projector is designed to bring your favorite movies, TV shows, and gaming sessions to life with stunning Full HD 1080P resolution.
With versatile connectivity options and advanced features like zoom and keystone correction, the AuKing projector is perfect for both indoor and outdoor use, providing an immersive viewing experience for the whole family.
Main Features / Technical Specifications:
Brand: AuKing
Recommended Uses For Product: Indoor/Outdoor
1080P Full HD resolution for clear and sharp detailed images
Portable design for easy transport and setup
Zoom functionality allows for adjustment between 50% to 100% for flexible screen sizes
Keystone correction ensures a perfectly rectangular image even when the projector is angled
Lightweight construction for convenient portability
Maximum 200″ projection size for an immersive viewing experience
Built-in speakers for loud and crystal-clear sound quality
Connectivity Technology: HDMI, USB, VGA, AV, Smartphone, TV Box, Laptop
Display Resolution: 1920 x 1080
Latest 1080p Full HD resolution supported for accurate color reproduction and vibrant viewing effects.
Large 200-inch projection screen size for an immersive viewing experience, with a projection distance ranging from 3.6ft to 16.4ft.
Long bulb life of up to 55,000 hours due to a powerful cooling system that effectively dissipates heat.
Advanced noise reduction technology reduces fan noise by 80%, providing a quieter viewing environment.
Dual stereo speakers built-in for loud and crystal-clear sound quality.
Multiple device connections including HDMI, VGA, AV, and USB interfaces for versatile multimedia playback options.
Portable design makes it suitable for various applications such as watching videos, sharing photos, and enjoying sports matches.
Comes with a 2-year warranty and 100% satisfaction guarantee from the AuKing team.
Item Weight: 2.87 pounds
Product Dimensions: 7.95 x 6.3 x 2.91 inches
Item Model Number: M8-F
Color: White
Speaker Type: Built-In
Structure and Design:
The AuKing projector boasts a sleek and compact design, making it easy to transport and set up anywhere. Whether you’re hosting movie nights in the living room or enjoying outdoor gatherings with friends, this portable projector is the perfect companion. Plus, with a maximum projection size of 200 inches and a projection distance of up to 16.4 feet, you can create an immersive viewing experience in any space.
Connectivity:
Equipped with HDMI, USB, VGA, and AV interfaces, the AuKing projector offers seamless connectivity with a wide range of devices. Whether you’re streaming content from your smartphone, connecting a laptop or gaming console, or playing videos from a USB drive, you can easily access your favorite media with this versatile projector. Please note that when connecting with a phone, an extra HDMI adapter may be required, and certain streaming apps like Netflix and Hulu can only be accessed via TV Stick or Roku due to copyright restrictions.
Image Quality:
The AuKing projector revolutionizes your home cinema experience with its exceptional image quality. Featuring native Full HD 1080P resolution, this projector brings razor-sharp clarity and stunning detail to every frame, ensuring that you catch every subtle expression and breathtaking landscape with unparalleled clarity. Whether you’re diving into the latest blockbuster action flick or immersing yourself in a captivating drama, the AuKing projector delivers vibrant colors and lifelike visuals that transport you right into the heart of the story.
Moreover, with its advanced color reproduction technology, the AuKing projector faithfully reproduces every hue and shade, creating a vivid and immersive viewing experience. From deep blacks to vibrant reds, every color pops off the screen with breathtaking realism, pulling you deeper into the world of your favorite movies and TV shows. Combined with its expansive maximum projection size of 200 inches, this projector transforms your living room into a bona fide home theater, allowing you to enjoy the ultimate cinematic experience from the comfort of your own home.
Pros
Native Full HD resolution for sharp and detailed images.
Portable and lightweight design for easy transportation.
Versatile connectivity options including HDMI, USB, VGA, and AV.
Powerful cooling system extends lamp life up to 55,000 hours.
Advanced noise reduction technology reduces fan noise by 80%.
Cons
Certain streaming apps like Netflix and Hulu can only be accessed via TV Stick or Roku.
Verdict:
The AuKing 2025 Upgraded Mini Projector is a top choice for anyone seeking an affordable and versatile home theater projector under $100 for 2025. With its Full HD resolution, advanced connectivity options, and compact design, it offers exceptional value for money.
Whether you’re watching movies indoors or hosting outdoor movie nights, this projector delivers a truly immersive viewing experience that will impress even the most discerning cinephiles.
4. TMY Mini Projector, Upgraded 9500 Lumens Bluetooth Projector with 100″ Screen
Step into the world of immersive entertainment with the TMY Mini Projector, an upgraded marvel that promises to revolutionize your viewing experience. Boasting 9500 lumens of brightness and compatibility with a range of devices, this portable projector is the ideal companion for indoor and outdoor use, whether you’re hosting a movie night or giving a presentation.
Main Features / Technical Specifications:
Brand: TMY
Recommended Uses For Product: Entertainment, TV Stick, Home Cinema, Laptop, Smartphone, Movie, Indoor Outdoor, Surround Sound System, Gaming
Built-In Speaker
Portable
Digital Keystone Correction
Lightweight
Built-In Cooling System
Connectivity Technology: HDMI, Bluetooth, AV, USB, SD, 3.5mm Jack
Display Resolution: 1920 x 1080 (Full HD)
Brightness: Upgraded 9500 lumens brightness for clear and vibrant images
Native Resolution: Native 720P resolution (1280×720) with 1080P Full HD support
Bluetooth Function: Built-in Bluetooth 5.1 technology for faster and more stable audio synchronization, allowing wireless connection with Bluetooth speakers or headphones
Portable Projection Screen Included: Includes a 100″ projection screen for convenient setup of your own home theater anywhere
Projection Size: Minimal display area of 32” to a maximum 220” image with projection distances between 1.5-6m
Aspect Ratio: 4:3/16:9
Contrast Ratio: 5000:1
Lamp Lifetime: 60,000 hours
Extensive Connection Availability: Built-in HDMI, VGA, AV, USB, 3.5mm headphone port & TF card slot, compatible with various input sources including TV Stick/Box, Game Consoles, PCs, Smartphones, Tablets, Laptops, DVD players, TF cards, and USB flash drives
Dimensions: 7.48 x 3.78 x 2.83 inches
Item Weight: 3.42 pounds
Structure and Design:
The TMY Mini Projector is designed with portability and convenience in mind. Compact and lightweight, it’s easy to transport and set up anywhere, making it perfect for both indoor and outdoor use. The included 100″ projection screen adds to its versatility, allowing you to create your own home theater experience wherever you go. Plus, with its built-in cooling system and digital keystone correction, you can enjoy hours of uninterrupted entertainment without worrying about overheating or distorted images.
Connectivity:
Equipped with HDMI, Bluetooth, AV, USB, SD, and 3.5mm jack connectivity options, the TMY Mini Projector offers seamless compatibility with a wide range of devices. Whether you’re streaming content from your smartphone, connecting a TV stick, or playing videos from a USB drive, you can easily access your favorite media with this versatile projector. Please note that while Bluetooth allows for easy pairing with audio devices, it does not support connection with smartphones.
Image Quality:
Experience stunning visuals with the TMY Mini Projector’s upgraded 9500 lumens of brightness and native 720P resolution with support for 1080P Full HD. The latest 3LCD color calibrating technology ensures that every color detail is accurately reproduced, resulting in a dynamic and vibrant projected image quality.
From vivid colors to crisp details, every scene comes to life with unparalleled clarity and realism, allowing you to immerse yourself in your favorite movies, TV shows, and video games like never before.
Pros
High brightness and native 720P resolution with support for 1080P Full HD.
Portable design with included 100″ projection screen for easy setup.
Built-in Bluetooth for wireless audio streaming.
Versatile connectivity options including HDMI, USB, and AV.
Digital keystone correction for distortion-free images.
Cons
Additional equipment required for certain connectivity options.
Verdict:
The TMY Mini Projector offers impressive features and versatility at an affordable price point, making it a top choice of portable projectors for 2025.
With its upgraded image quality, convenient connectivity options, and portable design, it’s the perfect choice for anyone looking to elevate their home entertainment experience. Whether you’re watching movies indoors or hosting outdoor gatherings, this projector delivers exceptional performance and value.
5. [Electric-Focus] 5G WiFi Bluetooth Projector, TOPTRO TR23
Experience the ultimate in-home entertainment with the [Electric-Focus] 5G WiFi Bluetooth Projector, TOPTRO TR23 Mini Projector. This cutting-edge device is designed to elevate your viewing experience with its advanced features and unparalleled performance.
Whether you’re hosting a movie night, gaming with friends, or delivering a presentation, the TR23 projector delivers stunning visuals and immersive sound for a truly cinematic experience.
Main Features / Technical Specifications:
Brand: TOPTRO
Recommended Uses For Product: Home theater, Gaming, Education, Conference, Outdoor movie
Electric-Focus & 4D/4P Correction: Quick and convenient electric focus with 4D/4P keystone correction for easy image adjustment
Fully Sealed Optical Machine Design: Prevents dust pollution, yellowing, black dots, and light leakage issues for improved image stability
Ultra-fast 5G/2.4G WiFi & 5.2 Bluetooth: Advanced WiFi chip for stable and fast transmission, plus Bluetooth 5.2 for easy connection with Bluetooth devices
Shocking Stereo Sound & Professional After-Sales: Customized large sound cavity for 360-degree stereo surround sound, backed by 1-year money-back guarantee and 3-Year repair, lifetime technical support
Dimensions: 6.18 x 5.19 x 6.88 inches
Item Weight: 4.02 pounds
What’s in the box:
1* TR23 Projector
1* Power Cord
1* HDMI Cable
1* Remote Control
1* Cleaning Cloth
Structure and Design:
The TOPTRO TR23 Mini Projector boasts a sleek and modern design, with a compact form factor that makes it ideal for both indoor and outdoor use. Its fully sealed optical machine design prevents dust pollution and ensures long-lasting image quality, while the electric-focus feature allows for quick and easy adjustments to achieve a sharp image. Plus, with 4D/4P Keystone Correction, you can easily correct any distortion and achieve a perfect rectangular image, even when the projector is placed at an angle.
Connectivity:
Equipped with WiFi, Bluetooth, HDMI, USB, and 3.5mm audio connectivity options, the TR23 projector offers seamless compatibility with a wide range of devices. Whether you’re streaming content from your smartphone, connecting a gaming console, or presenting from a laptop, you can easily connect and enjoy your favorite media with this versatile projector. Plus, with support for 5G WiFi and Bluetooth 5.2, you can enjoy fast and stable connections without lag or freezing.
Image Quality:
With its impressive 15000 lumens of brightness and support for Full HD 1080P resolution, the TOPTRO TR23 projector delivers stunning visuals with outstanding clarity and detail.
The 20000:1 contrast ratio ensures vivid, saturated images with deep blacks and vibrant colors, while the 360-degree stereo surround sound provides an immersive audio experience. Whether you’re watching movies, playing games, or giving a presentation, the TR23 projector delivers exceptional image quality and sound performance for an unforgettable viewing experience.
Pros
Electric-focus and 4D/4P Keystone Correction for easy image adjustments.
Ultra-fast 5G WiFi and Bluetooth 5.2 for stable and reliable connectivity.
Stunning image quality with 15000 lumens of brightness and Full HD 1080P resolution.
360-degree stereo surround sound for immersive audio experience.
Cons
Bluetooth does not support connection with smartphones to play video.
Verdict:
The [Electric-Focus] 5G WiFi Bluetooth Projector, TOPTRO TR23 Mini Projector, is a top-of-the-line device that offers exceptional performance and versatility. With its advanced features, stunning image quality, and immersive sound, it’s the perfect choice for creating a personalized home theater experience.
Whether you’re watching movies, gaming, or giving presentations, the TR23 projector delivers unparalleled performance and reliability, making it a must-have for any entertainment enthusiast.
6. Mini Projector 4K 1080P Support • Portable Projector WiFi6
Elevate your movie nights and presentations with the Mini Projector 4K 1080P Support from Magcubic. This portable projector boasts advanced features like 180° rotatability, Android 11 operating system, and 4K support, making it a versatile and powerful entertainment device for both indoor and outdoor use. Whether you’re hosting a backyard movie night or delivering a business presentation, this smart projector offers exceptional performance and convenience.
Features and Specifications:
Brand: Magcubic
Recommended Uses For Product: Indoor/Outdoor
Voltage: 110~220V
Support 4K
Automatic horizontal key correction
Android 11
Wi-Fi connection 6
720p Full HD
Contrast Ratio: 10000:1
Bluetooth 5.0
High-fidelity speakers
4-point trapezoidal correction
Mirror screen
Connectivity Technology: Wireless
Display Resolution: 1280 x 720
180°Rotatable Phone Projector & 200” Giant Screen: Enjoy the flexibility of pointing the projector in various directions, including the ceiling, for a comfortable viewing experience. Produces clear images on screens from 40 to 200”.
Android 11 & Built-in dual band WiFi 6: Offers seamless online video streaming with ultra-fast 5G+2.4G WiFi 6 connectivity. No need for additional TV boxes, making it ideal for outdoor events.
BT 5.0 & Speaker: Built-in 5W stereo speakers provide powerful sound, eliminating the need for external speakers. Supports stable connection with various Bluetooth devices.
8000 Lumens & 4K Support & Auto Horizontal Trapezoid Correction: Delivers impressive picture quality with 720P Full HD Native resolution and 1080P 4K support. Offers auto horizontal keystone correction and manual trapezoidal correction for easy setup.
Portable Size & Long Life & Satisfied Warranty: Compact design for easy portability. Long lamp life of up to 50,000 hours. Backed by a 2-year product replacement warranty and 100% satisfaction guarantee.
Supports Miracast, Airplay, DLNA for screen mirroring
Powered by ARM Mali-G31 MP2 GPU for high-quality graphics
Built-in HiFi Speaker and BT 5.0 for improved sound quality and connectivity
Projection size of 40″-200″ with manual adjustment
Multi-device connection with built-in HD, AV, USB, and 3.5mm headphone port
Compatible with Android 11.0 and Google Play Store for access to over 4000 apps
Dimensions: 4.7 x 4.7 x 13 inches
Item Weight: 1.81 pounds
Structure and Design:
The Mag Cubic Mini Projector features a compact and lightweight design, making it easy to carry and set up anywhere. Its unique 180° rotatable design allows you to point the projector in various directions, including the ceiling, for versatile viewing options. Plus, with a projection size of 40″ to 200″ and a projection distance of 4.9ft to 18.4ft, you can enjoy a cinematic experience in any room or outdoor space.
Connectivity:
Equipped with built-in dual-band WiFi 6 and Bluetooth 5.0, this projector offers seamless connectivity for streaming content from your smartphone, tablet, or other devices. The Android 11 operating system allows you to access thousands of apps from the Google Play Store, eliminating the need for additional streaming devices. Plus, with built-in HD, AV, USB, and 3.5mm headphone ports, you can easily connect a variety of devices for multimedia playback.
Image Quality:
The Magcubic Mini Projector 4K 1080P Support offers outstanding image quality with its 720p Full HD native resolution, 1080P 4K support, and impressive brightness of 8000 lumens. With a contrast ratio of 10000:1, it ensures vibrant colors, deep blacks, and bright whites for a captivating home cinema experience.
Featuring auto horizontal keystone correction and manual trapezoidal correction, the projector delivers distortion-free images, while its advanced connectivity options, including Wi-Fi 6 and Bluetooth 5.0, enable seamless streaming from various devices. With built-in hi-fi speakers and access to over 4000 apps via Android 11.0, it offers versatility and convenience, making it the perfect choice for creating a personal home theater indoors or outdoors.
Pros
180° rotatable design for versatile viewing options.
Android 11 operating system with access to thousands of apps.
Built-in dual-band WiFi 6 and Bluetooth 5.0 for seamless connectivity.
Stunning image quality with 720p Full HD native resolution and 1080P 4K support.
Compact and lightweight design for easy portability.
Cons
The storage capacity of the projector is low.
Verdict:
The Mini Projector 4K 1080P Support from Magcubic offers impressive features and performance at an affordable price point. With its versatile design, advanced connectivity options, and stunning image quality, this smart projector is a great choice for anyone looking to enhance their home entertainment experience.
Whether you’re watching movies, playing games, or giving presentations, the Magcubic Mini Projector delivers outstanding performance and convenience, making it a top contender in its class.
Conclusion of Best Projectors Under $100
The budget-friendly projectors, the options under $100 offer remarkable value and versatility. Whether it’s the vivid 1080p resolution of the AuKing Projector or the advanced connectivity features of the TOPTRO TR23 Mini Projector, each device caters to specific preferences and needs, ensuring an immersive viewing experience for home theater enthusiasts and casual users alike. With features like Bluetooth connectivity, dust-proof designs, and compact portability, these projectors redefine affordability without compromising on quality or functionality.
From indoor entertainment to outdoor movie nights, these projectors deliver impressive performance across various settings. Whether you’re seeking a compact solution for a cozy living room setup or a versatile device for gaming, classroom presentations, or office use, the best projectors under $100 for 2025 offer a perfect blend of affordability, functionality, and quality, making them indispensable companions for modern entertainment needs.
FAQs
What are the key factors to consider when choosing a projector under $100?
When selecting a projector in this price range, it’s essential to consider factors like resolution, brightness, connectivity options, and additional features such as keystone correction and built-in speakers. Look for a balance between these features to ensure a satisfactory viewing experience.
Can projectors under $100 provide adequate image quality?
Yes, while projectors in this price range may not offer the same level of image quality as higher-end models, many still provide decent resolution and brightness for home entertainment purposes. Factors such as room lighting conditions and screen size also play a role in determining the perceived image quality.
Are projectors under $100 suitable for outdoor use?
Yes, several projectors under $100 are designed for both indoor and outdoor use. Look for features like portability, battery operation, and compatibility with external devices to ensure smooth outdoor movie nights or gaming sessions.
What connectivity options are available in projectors under $100?
Projectors in this price range typically offer a range of connectivity options, including HDMI, USB, AV, and sometimes Bluetooth or Wi-Fi. These options allow you to connect various devices such as smartphones, laptops, gaming consoles, and streaming sticks for seamless media playback.
How durable are projectors under $100?
While projectors under $100 may not have the same build quality or longevity as higher-priced models, many still offer reliable performance with proper care and maintenance. Look for projectors with durable construction, adequate cooling systems, and decent warranty coverage for added peace of mind.
Stepping into a movie theater is like entering a realm of visual enchantment, where captivating stories come to life on the big screen. Have you ever wondered about the wizardry behind those crystal-clear images and vibrant colors that transport audiences into different worlds?
It all boils down to the exceptional projectors that movie theaters use to deliver an immersive cinematic experience. In this exploration, we’ll unveil the secrets behind the curtains and delve into the fascinating world of movie theater projectors.
Table of Contents
Movie Theater Projectors:
Movie theaters have undergone a digital revolution, and with it, the projectors have evolved to meet the demands of new digital formats. Unlike the early days of film reels, theaters now exclusively use Digital Cinema Projectors (DCPs), marking a departure from traditional analog methods.
Commercial-Grade Projectors:
The projectors employed by movie theaters are not your run-of-the-mill devices found in offices or homes. These are heavyweight champions designed for the grand stage of cinema. Commercial-grade projectors are larger, heavier, and built to deliver exceptional performance in large auditoriums.
Technologies Used in DCPs:
Two prominent technologies, Digital Light Processing (DLP) and Silicon Crystal Reflective Display (SXRD), take the lead in powering DCPs.
Digital Light Processing (DLP):
DLP projectors utilize millions of silicon micromirrors, each contributing to the creation of a razor-sharp image. These projectors employ large lamps with high brightness, splitting light into the spectrum’s colors, projecting onto the correct mirror, and combining separate beams to form a unified, high-quality image on the big screen.
Silicon Crystal Reflective Display (SXRD):
SXRD technology divides the light beam into separate colors, falling onto a reflective surface embedded with silicon crystals. This process results in the production of a 4K resolution pixel, making it an ideal choice for movie projectors with high image quality demands.
Features of Movie Theater Projectors:
Movie theater projectors come equipped with a set of remarkable features, setting them apart from their counterparts intended for home or office use.
Brightness:
With an astounding brightness of around 25,000 lumens, movie theater projectors outshine standard models by approximately 22,000 lumens. This high brightness ensures that even those seated in the last row can enjoy clear and detailed visuals.
Resolution:
While regular projectors may offer 1080p resolution, movie theater projectors boast a higher 4K resolution. This increase in resolution enhances image quality, providing audiences with a visually stunning experience.
Screen Size:
Movie theater projectors project onto colossal screens, reaching sizes of up to 100 feet. This ensures that everyone in the audience can enjoy an expansive and clear view of the cinematic masterpiece.
Contrast Ratio:
Movie theater projectors boast an impressive contrast ratio, reaching up to 6000:1. This term, contrast ratio, signifies the disparity between the deepest blacks and the brightest whites a projector can display. The greater this difference, the more striking and lively the colors appear on the screen.
In simpler terms, contrast is the key to delineating the nuances between black and white shades. A heightened contrast ratio translates to a more vivid and dynamic display, enriching the visual experience. This enhancement becomes particularly crucial in cinema settings, where a captivating interplay of light and shadow contributes to the overall immersion.
High Frame Rate:
Maintaining a high frame rate is crucial for a smooth transition of frames in a movie. Movie theater projectors achieve this, ensuring a seamless and immersive cinematic experience.
Cooling System:
Theater projectors tackle the heat generated by large lamps with a liquified cooling system and fans. This prevents overheating of the equipment, making them unsuitable for home use due to their unique cooling requirements.
Price:
Understandably, the price tag of movie theater projectors is higher than that of regular projectors. Ranging from $10,000 to $80,000, the cost reflects the large size and expensive components essential for delivering top-notch cinematic experiences.
Weight:
Portable yet substantial, movie theater projectors weigh around 140 kilograms, a testament to the size and components packed within. Their weight is justified by the need for durability and performance in a professional cinema setting.
Other Special Features:
Exclusive features like web control interfaces and automation capabilities set movie theater projectors apart. Operators can seamlessly control the projector remotely, scheduling events and sequences to enhance the cinematic experience.
Brands Manufacturing Movie Theater Projectors
Meeting the stringent standards set by the Digital Cinema Initiative (DCI) is no small feat. Only four brands – Barco, Christie, NEC, and Sony – have managed to provide the required picture quality assurance.
Barco, Christie, and NEC: These brands incorporate DLP technology into their projectors, ensuring high-quality visuals that meet industry standards.
Sony: Utilizing SXRD technology, Sony stands as a formidable player in the movie projector market, offering 4K resolution and impeccable picture quality.
Conclusion:
In conclusion, the mesmerizing visuals that grace the screens of movie theaters are made possible by specialized Digital Cinema Projectors. With technologies like DLP and SXRD, these high-end projectors deliver sharp, vibrant, and immersive images at 2K or 4K resolutions.
Movie theaters entrust brands like Barco, Christie, NEC, and Sony to provide the pinnacle of visual experiences. The magic of cinema begins with the flicker of light from these powerful projectors, creating an unforgettable journey for audiences worldwide.
FAQs | What Kind Of Projectors Do Movie Theaters Use?
1. What technologies are commonly used in movie theater projectors?
Answer: Movie theater projectors primarily leverage two key technologies: Digital Light Processing (DLP) and Silicon Crystal Reflective Display (SXRD). DLP utilizes silicon micro mirrors to create a sharp image, while SXRD employs a reflective surface with silicon crystals to produce high-resolution pixels, especially in 4K projectors.
2. Why do movie theater projectors have higher brightness than regular projectors?
Answer: Movie theater projectors boast an astonishing brightness of around 25,000 lumens, significantly higher than the approximately 3,000 lumens found in standard projectors. This heightened brightness is essential for large auditoriums, ensuring that even those seated at the back have a clear and detailed view of the visuals on the expansive screen.
3. How do movie theater projectors handle heat generated by large lamps?
Answer: The large lamps used in movie theater projectors generate substantial heat. To combat this, theater projectors incorporate a liquified cooling system along with fans. This ensures that the equipment does not overheat during prolonged usage, maintaining optimal performance throughout the screening.
4. What is the contrast ratio in movie theater projectors, and why is it important?
Answer: Movie theater projectors typically feature an enhanced contrast ratio of up to 6000:1. Contrast ratio represents the difference between black and white levels on the screen. A higher contrast ratio results in more vibrant colors mixed with deep blacks, enhancing the overall visual appeal of the on-screen content.
5. Why are movie theater projectors not recommended for home use?
Answer: Movie theater projectors are designed for professional cinema settings and come with unique features like a liquified cooling system, high brightness, and automation capabilities.
These projectors, weighing around 140 kilograms, are tailored for the demands of large auditoriums, making them impractical and unnecessary for typical home usage where smaller, lighter, and less expensive projectors are more suitable.
How to Project Image onto the Canvas Without Projector? | 5-Methods
Embarking on a journey of artistic expression often involves translating visions onto a canvas. While projectors offer a convenient means to enlarge images for detailed rendering, not every artist has the luxury of owning one. This guide unveils various creative and budget-friendly methods for projecting images onto a canvas without relying on a projector.
Table of Contents
How To Project Image With Lightbox Method:
The lightbox method is a classic technique that artists have employed for decades to transfer images onto canvases with precision and ease. A lightbox is essentially an illuminated box featuring a glass pane on top. While traditional lightboxes may be too small for larger canvases, this method can be adapted by printing an enlarged copy of the reference image.
Materials Needed:
Lightbox
Enlarged printout of the reference image
Canvas
Pencil or fine-tip marker
Eraser (optional)
Paints or other preferred artistic medium
The Lightbox Method | Step-by-Step Guide:
Print an Enlarged Copy: Begin by printing a scaled-up version of the reference image. This can be done using graphic design software or by taking the image to a printing service that offers size customization.
Set Up the Lightbox: Place the printed image on the glass pane of the lightbox. Ensure that the lightbox is in a position where you can comfortably trace the image onto the canvas.
Turn on the Light Source: Activate the light source within the lightbox. The illumination will make the lines of the image visible through the paper, allowing you to trace with accuracy.
Trace the Outlines: With the lightbox providing a clear view of the reference image, start tracing the outlines onto the canvas. Pay close attention to details and nuances in the image, capturing them accurately in your traced lines.
Replicate and Refine: Once the initial tracing is complete, you can replicate the drawing on the canvas. This method allows for multiple redraws and refinements, enabling artists to enhance their skills and experiment with different variations of the same image.
The lightbox method is particularly effective when precision and detail are crucial in the artistic process. It provides a controlled environment for tracing, eliminating the guesswork associated with freehand replication. While traditional lightboxes may have limitations regarding canvas size, the adaptation of printing an enlarged image makes this method accessible for artists working on larger surfaces.
Advantage:
The lightbox method allows for precise tracing of intricate details from the reference image onto the canvas, ensuring accuracy in reproducing complex compositions.
While traditional lightboxes may be smaller, the method is adaptable. Enlarged prints can be used for tracing, offering flexibility in transferring images to canvases of various sizes.
The ability to replicate and refine drawings multiple times on the lightbox serves as a valuable training tool for artists, enhancing their skills and techniques.
How To Project Image With DIY Projector:
For artists on a budget or those who enjoy a hands-on approach to their craft, the DIY Projector method provides an innovative and cost-effective solution for projecting images onto a canvas without the need for a professional projector. By utilizing common household items, this method allows for creativity to flourish without breaking the bank.
Materials Required:
Phone or Flashlight.
Magnifying Glass.
Cardboard.
Mirror.
Matte Black Paper.
Scissors, Tape, or Glue.
DIY Projector | Step-by-Step Guide:
Cut a Window in the Cardboard: Begin by cutting a window in the cardboard, ensuring it is on the larger side. This window will be the frame through which the image will be projected.
Attach the Magnifying Glass: Position the magnifying glass over the window in the cardboard, securing it in place using tape or glue. Ensure that the magnifying side is facing inward towards the cardboard.
Insert the Mirror: Place a small mirror within the cardboard structure, angled to redirect the light from the phone or flashlight towards the magnifying glass.
Create a Light-Tight Enclosure: Cover the sides of the cardboard structure with matte black paper, creating a light-tight enclosure. This step is crucial for enhancing the contrast of the projected image.
Place the Phone or Flashlight: Position the phone or flashlight behind the magnifying glass, ensuring that the light source is directed towards the mirror and subsequently through the magnifying glass.
Project the Image: With the DIY projector assembled, place the reference printout or image in the window of the cardboard. Turn on the flashlight or use the phone’s torch function. The magnifying glass will project a fairly magnified or enlarged image onto the canvas or wall.
Advantage:
Creating a DIY projector is a cost-effective alternative, making image projection accessible to artists on a budget.
Artists can customize the size and design of their DIY projector based on the canvas dimensions and personal preferences.
The required materials, such as a phone, magnifying glass, and cardboard, are commonly found at home, making the DIY projector method easily accessible.
How To Project Image With Grids for Precision:
When it comes to achieving precision and accuracy in transferring images onto a canvas without a projector, the Grids method proves to be a meticulous and reliable technique. This manual approach involves creating a grid on both the reference image and the canvas, allowing artists to break down complex compositions into manageable sections for detailed reproduction.
Materials Required:
Canvas
Reference Image
Ruler
Pencil
Eraser
Painter’s Tape (Optional)
Work Surface
Printout of Reference Image
Grids for Precision | Step-by-Step Guide:
Select a Canvas with Similar Ratio: Begin by choosing a canvas that shares a similar aspect ratio with the reference photo. This ensures that the proportions remain consistent during the transfer process.
Draw One-Inch Squares on the Canvas: Using a ruler and a pencil, draw a grid of one-inch squares on the canvas. The number of squares will depend on the complexity and size of the reference image.
Draw a Corresponding Grid on the Reference Photo: Replicate the grid pattern on the reference photo, ensuring that the squares align with those on the canvas. This step requires patience and precision, as accuracy is crucial for a successful transfer.
Fill Each Square on the Canvas: Focus on one square at a time. Examine the content within each square of the reference photo and reproduce it in the corresponding square on the canvas. This methodical approach ensures that no details are overlooked.
Continue Section by Section: Progress through the grid sections systematically, replicating the details from the reference image onto the canvas. This step-by-step process allows for better control and accuracy in capturing the entire composition.
Refine and Connect Grid Sections: Once all grid sections are filled, step back and assess the overall continuity of the artwork. Begin refining and connecting the individual sections to create a cohesive and seamless representation of the reference image.
Advantage:
Grids provide a systematic approach, ensuring precision and accuracy in transferring images onto the canvas, particularly beneficial for detailed compositions.
The method is scalable to accommodate different canvas sizes, allowing artists to adapt the size of grid squares based on the level of detail in the reference image.
Drawing grids requires attention to detail, contributing to skill development and enhancing an artist’s observational abilities.
How To Project Image With Transfer Paper Technique:
The Transfer Paper Technique offers artists a straightforward and effective method to transfer images onto a canvas without the need for a projector. This approach employs transfer paper, which is readily available and easy to use. The technique allows for precise tracing of images onto the canvas, making it an ideal choice for artists seeking accuracy and convenience in their creative process.
Materials Required:
Canvas
Reference Image
Transfer Paper
Printout of Reference Image
Tape
Pencil or Pen
Eraser
Transfer Paper Technique | Step-by-Step Guide:
Prepare the Canvas: Ensure the canvas is clean, primed, and ready for the transferred image.
Select and Print the Reference Image: Choose a reference image and print a clear copy in the desired size.
Position the Reference Image: Tape the reference image to the canvas in the desired location. Ensure it stays in place during the transfer process.
Place the Transfer Paper: Position the transfer paper with the graphite-coated side facing down onto the canvas. Align it with the reference image.
Secure Both Layers: Tape the transfer paper to the canvas, securing both the reference image and the transfer paper in place.
Trace the Image: Using a pencil or pen, trace the outlines of the reference image onto the canvas. Apply moderate pressure to transfer the graphite from the paper to the canvas.
Check the Transfer: After tracing, carefully lift one corner of the transfer paper to check the transferred image. Ensure that all desired details have been successfully transferred.
Complete the Tracing: Continue tracing the entire image until all necessary details are transferred onto the canvas.
Remove Transfer Paper and Reference Image: Once tracing is complete, carefully remove the transfer paper and the reference image from the canvas.
Refine and Complete: Review the transferred image on the canvas and refine any areas that may require adjustments. Complete the artwork with additional detailing and color as needed.
Advantage:
The transfer paper technique offers a precise and detailed transfer of images onto the canvas, capturing intricate details with accuracy.
This method is user-friendly and suitable for artists of various skill levels, providing a straightforward approach to image transfer.
Transfer paper works well with different surfaces, offering versatility for various artistic projects beyond canvas.
How To Project Image With Window Projection:
Window Projection is a simple and budget-friendly method for transferring images onto a canvas. This technique utilizes natural light, such as daylight or sunlight, to project the image onto the canvas, eliminating the need for a projector. It’s a versatile approach, especially suitable for larger canvases, and requires minimal materials.
Materials Required:
Canvas
Reference Image
Thin Canvas Paper (Optional)
Tape
Pencil or Pen
Window Projection |Step-by-Step Guide:
Prepare the Canvas: Ensure the canvas is clean, primed, and ready for the transferred image.
Select and Print the Reference Image: Choose a reference image and print a clear copy in the desired size.
Tape the Reference Image: Tape the reference image to the window, ensuring it stays in place during the tracing process.
Place the Canvas Paper: If using a thinner canvas paper, tape it to the window on the opposite side of the reference image. This allows more sunlight to pass through and makes tracing easier.
Position the Canvas: Place the canvas on a stable surface, directly opposite the taped reference image. Ensure that it receives ample sunlight or daylight.
Trace the Image: Using a pencil or pen, trace the outlines of the reference image onto the canvas paper. The natural light passing through the window will project the image onto the canvas.
Adjust for Visibility: If necessary, adjust the position of the canvas or reference image to improve visibility and clarity during the tracing process.
Complete the Tracing: Continue tracing until the entire image is transferred onto the canvas paper.
Remove Canvas from the Window: Carefully detach the canvas from the window, ensuring that the traced image remains intact.
Refine and Complete: Review the transferred image on the canvas paper, refining details or adding additional elements as needed to complete your artwork.
Advantage:
Window projection is a budget-friendly method, utilizing natural light and requiring minimal materials for image transfer.
The method is adaptable to various canvas sizes, making it versatile for different artistic projects.
Window projection is accessible to artists of all skill levels, requiring only basic materials and utilizing natural light.
Conclusion:
While the use of dedicated projectors guarantees optimal results, these budget-friendly alternatives can aid artists in honing their skills and bringing their visions to life. From the traditional lightbox method to the ingenuity of a DIY projector, each technique offers a unique approach to image projection without the need for a costly investment.
Artists can experiment with these methods based on their preferences and available resources. Whether tracing with precision using grids or enjoying the simplicity of natural light through a window, the key is to find a technique that resonates with the individual artist’s style and vision.
By embracing these creative alternatives, artists can break free from the constraints of expensive equipment and focus on unleashing their creativity onto the canvas, one traced image at a time.
FAQs | How to Project Image onto the Canvas Without Projector
Q1: What alternative methods are there for projecting images onto a canvas without using a projector?
A1: There are several alternative methods that artists can use for image projection without a projector. These include the Lightbox Method, DIY Projector, Grids Method, Transfer Paper Technique, and Window Projection.
Q2: How does the Lightbox Method contribute to precision and versatility in image transfer?
A2: The Lightbox Method excels in providing precision by allowing artists to trace intricate details from a reference image onto the canvas. It is versatile as it can accommodate different canvas sizes by using enlarged prints for tracing.
Q3: What makes the DIY Projector a cost-effective and customizable option for artists?
A3: The DIY Projector is cost-effective as it involves creating a projector using everyday items. It’s customizable, allowing artists to tailor the size and design of the DIY projector based on their canvas dimensions and preferences.
Q4: How does the Grids Method contribute to precision, scalability, and skill development in image transfer?
A4: The Grids Method ensures precision by breaking down complex compositions into manageable sections. It is scalable, allowing artists to adapt the size of grid squares based on canvas dimensions. This method also contributes to skill development through attention to detail.
Q5: What advantages does the Transfer Paper Technique offer in terms of precision, ease of use, and versatility?
A5: The Transfer Paper Technique provides precision by allowing for detailed tracing onto the canvas. It is user-friendly, suitable for artists of varying skill levels due to its straightforward approach. Additionally, it is versatile as transfer paper works well with various surfaces beyond canvas.
Epson LS800 vs Formovie Theater: A UST Projector Showdown
In the ever-evolving world of home entertainment, the battle between projection and flat screens continues to rage. But the latest contender in this arena, the ultra-short throw projector, is shaking things up.
These sleek and innovative devices, often dubbed “laser TVs,” are designed to dazzle with stunning 4K HDR images, no matter the lighting conditions.
Today, we’re putting two of the top players head-to-head in an epic showdown: the Epson LS800 vs Formovie Theater. So, which one will emerge victorious in the battle of 4K giants?
We are not just providing you with the difference between Epson LS800 and Formovie Theater. But also provide you buying guide and projector review. Keep reading.
Table of Contents
Premium Pick
Epson LS800
Boasts an unmatched 4,000 lumens for exceptional brightness.
Delivers remarkable contrast for stunning visuals.
Sits extremely close to the screen, offering an immersive view experience.
In the world of home entertainment, the Epson LS800 projector review stands as a beacon of brilliance. This ultra-short-throw (UST) projector takes your viewing experience to a whole new level, offering remarkable features and specifications that will leave you captivated.
With a focus on delivering unparalleled brightness and quality, the LS800 promises to transform your living space into a cinematic haven. Let’s delve into the exceptional features and specifications that make the Epson epiqvision ultra ls800 4k projector a must-have for any home theater enthusiast.
Features and Specifications:
1. Brightest UST Projector: The ultra short throw ust LS800 projector boasts an impressive 4,000 ANSI lumens, making it the brightest UST projector on the market. No matter the lighting conditions, this projector ensures a stunning and vivid image, immersing you in a world of vibrant visuals.
2. Incredible Contrast: The LS800 excels in contrast, providing sharp distinctions between light and dark areas on the screen. This contrast enhancement contributes to a more immersive and visually striking experience.
3. Proximity to Screen: One of the standout features is its throw ratio of 0.17:1, allowing the LS800 to sit remarkably close to the screen. This closeness intensifies the immersive viewing experience and offers flexibility in placement.
4. Ideal for Gaming: Gamers will appreciate the LS800’s low input lag of just 16.7 ms, making it one of the best UST projectors for gaming. Enjoy responsive and lag-free gameplay on a large screen.
5. ALR Projector Screen Convenience: Epson takes convenience seriously, offering the LS800 bundled with an ambient light-rejecting (ALR) projector screen. This option ensures an optimal viewing experience in various lighting conditions.
6. Quality Built-In Speakers: The LS800 4k projector comes equipped with (x2) 20W Yamaha speakers, providing good sound quality for those moments when you don’t want to rely on external audio systems.
7. Color Gamut and Calibration: While the LS800 offers an excellent overall experience, it’s worth noting that its color gamut capabilities are slightly less than some similarly priced projectors. Additionally, it lacks Grayscale, Gamma, and Color Management adjustments for advanced calibration.
8. Enhanced Bundles: Epson enhances the value of the LS800 by offering it bundled with either a 100-inch or 120-inch ALR screen. This all-in-one package makes setting up your home theater a breeze.
9. Design and Aesthetics: The LS800 is available in both black and white casings, allowing you to choose the one that complements your home decor.
10. Connectivity: With three HDMI ports, the LS800 offers flexible connectivity options for your various media devices.
The epson epiqvision ultra ls800 is an exceptional UST projector that excels in brightness, contrast, and gaming performance. Its ability to sit close to the screen and be bundled with an ALR screen enhances its convenience.
While it may have some limitations in color gamut and calibration options, the LS800 delivers a captivating viewing experience that’s hard to match. Whether you’re a cinephile or a gaming enthusiast, the LS800 brings the magic of the big screen right into your living room.
Pros
Boasts an unmatched 4,000 ansi lumens for exceptional brightness.
Delivers remarkable contrast for stunning visuals.
Sits extremely close to the screen, offering an immersive view experience.
Ideal for gaming with low input lag.
Cons
The color gamut is slightly less impressive compared to some similarly priced projectors.
Formovie Theater 4K Ultra Short Throw Projector 2800 Lumen Triple Laser UST with Dolby Vision Laser TV
The Formovie Theater is your gateway to a transcendent home entertainment experience. This exceptional ultra-short-throw (UST) projector offers a perfect balance of affordability and top-notch specifications, promising to redefine your cinematic adventures.
Let’s explore the impressive features and specifications that make the Formovie Theater an exciting addition to any home theater setup.
Features and Specifications:
1. Exceptional Price-Performance Ratio: Priced at just $2,899.00, the Formovie Theater offers an incredible value proposition, delivering exceptional performance for its cost.
2. High Lumen Output: With its advanced RGB triple laser light source, the Formovie Theater ensures consistently bright and vivid visuals, enhancing your overall viewing experience.
3. Out-of-the-Box Color Brilliance: This projector comes calibrated to provide vibrant and accurate colors right from the start, ensuring that you enjoy content exactly as it was intended.
4. Superior Built-In Soundbar: The Formovie Theater boasts an exceptional built-in soundbar featuring Full-range speakers and Tweeters with a total output of 30W, thanks to Bowers & Wilkins technology. This elevates your audio experience to match the stunning visuals.
5. Embrace Dolby Vision: With support for Dolby Vision, the Formovie Theater enriches your HDR content, delivering unmatched quality and detail for your favorite movies and shows.
6. Immersive Screen Size: Like its counterpart, the Formovie Theater can project an impressive 150-inch screen, bringing a true cinematic feel to your home entertainment.
The Formovie Theater is a game-changer in the world of UST projectors, offering remarkable value for its cost, outstanding color performance, and exceptional audio quality.
With support for Dolby Vision and the ability to project a large screen, it creates an immersive viewing experience that’s hard to match. Whether you’re a movie enthusiast or a tech aficionado, the Formovie Theater is your key to a world of captivating home entertainment.
Pros
Exceptional value for the cost, offering competitive pricing.
Impressive lumen output and color calibration for vivid visuals.
Outstanding built-in soundbar with Bowers & Wilkins technology.
Support for Dolby Vision enhances HDR content quality.
Capable of projecting an immersive 150-inch screen.
Cons
Fan noise may be noticeable in quieter view environments.
Epson LS800 vs Formovie Theater: Battle
Brightness:
When it comes to brightness, the LS800 ultra short throw takes the lead with a whopping 4,000 lumens, making it the brightest ultra-short-throw projector on the market. This remarkable luminance ensures a stunning and vivid image even in well-lit rooms.
On the other hand, the Formovie Theater, while still impressively bright at 2,800 lumens, can’t quite match the Epson in this aspect. So, if you’re looking for a single laser TV that shines in any lighting conditions, the LS800 is the clear choice.
Throw Ratio:
The Epson LS800 ultra short throw excels in throw ratio as well, with a ratio of 0.17:1, meaning it can sit even closer to the screen compared to other ultra-short-throw projectors. This proximity enhances the immersive viewing experience and gives you more flexibility in placement.
The Formovie Theater, with a throw ratio of 0.23:1, sits a bit farther from the screen. If space is a concern, the Epson LS800’s shorter distance is a notable advantage.
Chipset:
In the chipset category, the LS800 ultra short throw employs a 3LCD chipset, which results in a brighter output and, more importantly, avoids the rainbow effect, a common issue in DLP projectors.
In contrast, the Formovie Theater utilizes a 0.47″ DLP chip, offering a sharp image but not entirely eliminating the rainbow effect. For those who prioritize a smooth and artifact-free view experience, the LS800 with its 3LCD chipset is the preferred choice.
Light Source:
The Formovie Theater brings a game-changer with its ALPD® 4.0 RGB+ triple laser light source, providing outstanding color performance and black levels.
This triple laser design gives it a substantial advantage over the single blue laser of the LS800. If you’re looking for richer colors and deeper blacks, the Formovie Theater’s advanced light source technology makes it a top contender.
Color:
When it comes to color, the Formovie Theater once again shines with its 113% DCI-P3 color gamut, surpassing the LS800’s 77% DCI-P3.
The wider color gamut of the Formovie Theater ensures more vibrant and accurate colors, resulting in a visually striking image. If color accuracy is a priority for your viewing experience, the Formovie Theater takes the lead.
Image Size:
Both the LS800 and the Formovie Theater can create an impressive 150-inch screen, offering a cinematic feel for your home entertainment. In this regard, they are evenly matched, allowing you to enjoy a large and immersive view experience.
ALR Projector Screen:
The ultra-short throw projector offers the convenience of coming bundled with an ambient light-rejecting (ALR) projector screen, available in 100 or 120 inches.
In contrast, the Formovie Theater requires you to purchase the projector screen separately. If you prefer an all-in-one solution, the LS800 with its bundled ALR screen is a convenient choice.
Input Lag:
Gaming enthusiasts will appreciate the LS800’s lower input lag at 16.7 ms, making it one of the best ultra-short-throw projectors for gaming.
The Formovie Theater, with an input lag of 41.9 ms, lags behind in this department. If low input lag is a critical factor for your gaming experience, the Epson LS800 is the superior choice.
Audio:
The Formovie Theater boasts the best built-in soundbar among ultra-short-throw projectors, featuring Full-range speakers and Tweeters with a total output of 30W by Bowers & Wilkins.
In contrast, the Epson Ultra LS800 Ultra Short Throw projector offers (x2) 20W Yamaha speakers, providing good sound quality but not quite on par with the Formovie. If exceptional built-in audio is essential, the Formovie Theater has the upper hand.
Price:
The Formovie Theater impresses with a very competitive price tag at $2,899.00, given its outstanding performance.
The Epson EpiqVision Ultra LS800 Ultra Short Throw projector, while priced at $2,799.99, still offers excellent value, especially when bundled with a projector screen.
If budget considerations are a priority, the Formovie Theater provides an enticing offer.
Conclusion
In the epic showdown between the Epson LS800 and the Formovie Theater, the decision ultimately comes down to your specific needs and preferences. If you prioritize brightness, throw ratio, and the avoidance of the rainbow effect, the LS800 is the best choice.
However, if you seek superior color performance, advanced light source technology, and remarkable built-in audio, the Formovie Theater emerges as the winner. Additionally, the Formovie Theater offers an attractive price point, making it an excellent value proposition.
So, when making your decision between these two top-notch ultra-short-throw projectors, consider your priorities and enjoy a fantastic home theater experience with either choice.
Which one is best between formovie theater vs epson ls800?
When it comes to the choice between the Formovie Theater and the Epson LS800, it’s important to acknowledge that both 4K ultra-short-throw projectors are outstanding options on the market. Regardless of which one you opt for, you’re in for a fantastic home theater experience. However, after a thorough head-to-head comparison, the Formovie Theater emerges as the reigning champion.
Why You Should Buy The Formovie Theater:
The Formovie Theater truly distinguishes itself as one of the top-tier ultra-short-throw projectors available today. Its affordability, combined with its impressive specifications, makes it a formidable competitor in the world of laser TVs. Offering a broader color gamut, deep black levels, and superior contrast, it delivers an image that’s nothing short of breathtaking.
Moreover, it provides extensive calibration options, granting you full control over the picture to tailor it to your preferences. Let’s not forget the Formovie Theater’s exceptional built-in soundbar, delivering rich and powerful audio that enhances the overall view experience.
Why You Should Buy The LS800:
Epson’s LS800 offers several compelling reasons to opt for it over the Formovie Theater. Notably brighter, it can create a more vivid image even in challenging lighting conditions. Its ability to sit closer to the screen provides an immersive view experience, and the availability of both black and white casings caters to various aesthetics.
If you’re a gaming enthusiast or concerned about the rainbow effect, the LS800 is the ideal choice. Furthermore, it can be bundled with an ambient light-rejecting screen, adding extra value to the package. Epson, a well-established brand in the projector industry, brings a reputation for high-quality devices, while Formovie is still in the process of building its name.
FAQs
Q: Which projector offers better brightness between the LS800 and Formovie Theater?
Answer: The LS800 laser projector is brighter, boasting 4,000 ANSI lumens compared to the Formovie Theater’s 2,800 lumens. The LS800 excels in maintaining a vivid image in various lighting conditions, making it a better choice for dark room viewing.
Q: Can I adjust colors and picture settings on both projectors?
Answer: The Formovie Theater offers extensive color calibration options, allowing users to fine-tune colors and picture settings to their preferences. The LS800, while excellent overall, has fewer advanced calibration options.
Q: Which projector is better for gaming, the Epson LS800 or Formovie Theater?
Answer: The Epson LS800 has a lower input lag of 16.7 ms, making it more ideal for gaming compared to the Formovie Theater, which has an input lag of 41.9 ms. If gaming performance is a priority, the LS800 is the better choice.
Q: Do both projectors support Dolby Vision for HDR content?
Answer: The Formovie Theater supports Dolby Vision, enriching HDR content quality, while the Epson LS800 does not support Dolby Vision but offers HDR capability. If Dolby Vision is crucial for your view experience, the Formovie Theater is the recommended option.
Q: What is the price difference between the Epson LS800 and Formovie Theater?
Answer: The Formovie Theater is priced at $2,899.00, offering exceptional value for its specifications. On the other hand, the Epson LS800 is priced at $2,799.99, providing excellent brightness and gaming features but at a slightly higher cost.
Are you looking to transform your living space into a cozy yet sophisticated home theater? Consider the allure of mounting a projector screen above your fireplace. Not only does it optimize space in smaller rooms, but it also adds a touch of elegance to your entertainment area. However, before diving into this installation project, it’s crucial to understand the process, risks, and safety measures involved to ensure a seamless and enjoyable viewing experience.
Table of Contents
Can You Put A Projector Screen Above Fireplace?
Absolutely! Mounting a projector screen above a fireplace is entirely feasible, but it requires careful consideration of various factors. While it offers numerous benefits, such as maximizing space and creating a focal point, there are inherent risks associated with this setup. However, by taking appropriate precautions and following recommended guidelines, you can mitigate these risks and create a safe and functional entertainment space.
The Risks Of Putting a Projector Screen Above a Fireplace
While the idea of mounting a projector screen above your fireplace may seem enticing, it’s crucial to be aware of the potential risks involved. Understanding these risks will help you make informed decisions and take necessary precautions to ensure the safety and longevity of your equipment.
1. Heat Damage
One of the primary concerns of placing a projector screen above a fireplace is the risk of heat damage. Fireplaces naturally emit heat, and if the screen is positioned too close, it may sustain damage over time. Prolonged exposure to heat can cause the screen material to warp, discolor, or even melt, rendering it ineffective and compromising image quality.
2. Image Distortion
The heat generated by the fireplace can create air currents or hotspots in the vicinity, leading to image distortion on the projector screen. These fluctuations in air temperature can result in a hazy or distorted image, affecting your viewing experience. Additionally, the performance of the projector itself may be impacted, leading to decreased color accuracy and image clarity.
3. Reduced Projector Lifespan
Exposing the projector to high temperatures from the fireplace can accelerate thermal degradation of internal components, potentially reducing its lifespan. Over time, this may result in decreased performance or premature failure of the projector. It’s essential to keep the projector within its recommended operating temperature range to ensure optimal performance and longevity.
4. Safety Hazards
Placing a projector screen above a fireplace also poses safety hazards, particularly if proper precautions are not taken. The risk of fire may increase if the projector or its cables come into contact with hot objects or if the screen is positioned too close to the fireplace. To mitigate these risks, adequate airflow and suitable safety equipment, such as heat shields or mantel-mounted deflectors, should be utilized.
5. Accumulation of Smoke and Soot
Fireplaces can emit smoke and soot particles into the air, which may accumulate on the projector screen if it is positioned nearby. This can result in a cloudy or dirty screen surface, diminishing image clarity and requiring frequent cleaning to maintain optimal viewing conditions.
6. Warping
The heat from the fireplace can cause the screen material to warp or deform, resulting in an uneven surface that compromises image quality. Additionally, warping may make it challenging to achieve a flat, smooth projection surface, detracting from the overall viewing experience.
7. Limited Viewing Angle
Placing the projector screen above the fireplace may impact the viewing angle for the audience, particularly if the screen’s height and placement are not adjusted accordingly. It’s essential to ensure that everyone has a comfortable and unobstructed view of the screen to enhance the viewing experience.
8. Interference with Fireplace Use
Installing a projector screen above the fireplace may interfere with its intended use, making it difficult to maintain or enjoy the warmth and ambiance of a fire. Adjustments may be required every time the fireplace is in use, potentially disrupting the overall viewing experience.
By being mindful of these risks and taking appropriate precautions, you can safely enjoy the benefits of a projector screen above your fireplace while minimizing potential hazards. Prioritizing safety and proper installation practices will ensure a seamless and enjoyable home theater experience for years to come.
How To Put A Projector Screen Above A Fireplace?
Embarking on the journey to install a projector screen above your fireplace requires careful planning and execution to ensure safety, functionality, and aesthetic appeal. Follow these step-by-step guidelines to successfully mount your projector screen in this unique location:
1. Choose the Correct Screen:
Begin by selecting the right projector screen for your space. Consider factors such as room size, viewing distance, and ambient light conditions. Opt for an ambient light rejecting (ALR) screen if your room receives natural light, as it helps improve image clarity and contrast. Additionally, ensure the screen size complements the dimensions of your room and fireplace area for an immersive viewing experience.
2. Securely Mount the Screen:
Once you’ve chosen the projector screen, it’s crucial to securely mount it above the fireplace. Use heavy-duty brackets or mounts that are compatible with your screen’s weight and dimensions. Locate and anchor the brackets to wall studs or ceiling joists to ensure stability and safety. Follow the manufacturer’s instructions carefully for proper installation, and ensure the screen is positioned at a safe distance from the fireplace to prevent heat damage.
3. Position the Projector:
Next, position the projector to achieve optimal image quality on the screen. Consider factors such as throw distance and angle, as specified by the projector manufacturer. Ensure the projector is placed at the correct height and angle to produce a crisp, bright image on the screen. Adjust the projector as needed to achieve the desired viewing experience, keeping in mind the audience’s seating arrangement and viewing angles.
4. Avoid Fireplace Usage with Screen Down:
It’s essential to avoid using the fireplace while the projector screen is lowered or in use. Operating the fireplace with the screen down can expose the screen to excessive heat, increasing the risk of damage or fire hazards. Retract or raise the projection screen whenever the fireplace is in use to ensure safety and prevent heat-related issues.
5. Consider Adding a Shelf or Mantle:
For added protection and aesthetics, consider installing a shelf or mantle between the fireplace and the projector screen. This provides a barrier against heat and helps shield the screen and other electronics from potential damage. Ensure there is sufficient space between the shelf or mantle and the screen to allow for adequate airflow and heat dissipation.
6. Ensure Proper Ventilation and Airflow:
Maintain adequate ventilation and airflow around the projector screen and fireplace area to prevent heat buildup and ensure optimal performance. Avoid blocking vents or obstructing airflow pathways, as this can lead to overheating and potential damage to electronic components.
Conclusion
While installing a projector screen above a fireplace presents its challenges, it can significantly enhance your home theater experience when done correctly. By understanding the risks involved and following recommended guidelines, you can create a visually stunning and functional entertainment space that you’ll enjoy for years to come.
So, why wait? Elevate your home theater experience today by installing a projector screen above your fireplace and immerse yourself in the magic of cinema from the comfort of your own home.
FAQs
Is it safe to mount a projector screen above a fireplace?
While it is possible to mount a projector screen above a fireplace, it’s crucial to take safety precautions. Ensure proper ventilation, maintain a safe distance between the screen and fireplace to prevent heat damage, and use suitable mounting hardware to secure the screen.
What type of projector screen is best for this setup?
The best type of projector screen depends on factors such as room size, ambient light conditions, and personal preferences. Consider options like standard screens or ambient light rejecting (ALR) screens, especially if your room receives natural light.
How should I position the projector for optimal performance?
Position the projector according to manufacturer recommendations, considering factors such as throw distance and angle. Aim for a crisp and bright image on the screen, ensuring that the projector is placed at the correct height and angle for optimal viewing.
Can I use the fireplace while the projector screen is down?
It’s generally advised to retract or raise the projector screen when using the fireplace to prevent heat damage. Operating the fireplace with the screen down can expose the screen to excessive heat, increasing the risk of damage or fire hazards.
What precautions should I take to protect the projector screen and equipment?
To protect the projector screen and other equipment, consider adding a shelf or mantle between the fireplace and the screen for added protection and aesthetics. Regularly clean the screen to maintain optimal image clarity, and ensure proper airflow to prevent overheating.
Best Projector Calibration Tools | Achieve Visual Precision and Cinema-Quality Images
Are you tired of those fuzzy, washed-out images on your projector screen? Don’t fret! You can achieve cinema-quality picture and color precision with the right equipment and a little know-how. Welcome to the world of projector calibration, where we delve into the tools that can transform your viewing experience.
Table of Contents
Why Calibration Matters
Before diving into the best projector calibration tools, let’s understand why calibration is crucial. Projector color calibration is like fine-tuning an instrument. It ensures your projector displays colors, brightness, and sharpness as accurately as possible. To embark on this journey to visual perfection, you’ll need the following tools:
Projector Calibration Tool: This nifty gadget is your Swiss Army knife for calibrating your projector. It measures light, color levels, brightness, and sharpness. Many color meters are available in the market designed for this purpose.
Tripod: Your trusty tripod acts as the loyal assistant, holding the sensor device at the right height and distance from the projector screen.
Windows Laptop: A reliable Windows laptop serves as the bridge between your projector and sensor device. It also hosts the calibration software necessary for the magic to happen.
Projector Calibration Software: Think of this as your wizard’s spellbook. Quality calibration tools adjust brightness, color, and contrast with finesse.
What is a colorimeter? The Role of a Colorimeter
A key player in the calibration process is the colorimeter. This device is in front of your projector screen, serving as the eyes that analyze and optimize colors. When coupled with the right software, it plugs into your laptop’s USB port and works its magic. These nifty gadgets typically have four holes to measure the four primary colors: Red, Blue, Green, and Yellow.
While they have limitations, such as a limited selection of color filters, colorimeters are a cost-effective and straightforward solution for home calibration, offering satisfying results.
1. Datacolor SpyderX Elite – Your Ultimate Visual Upgrade
You’re about to start a movie night, the lights dimmed, the popcorn’s ready, but your projector’s colors are all over the place. Enter the Datacolor SpyderX Elite, the superhero of display calibration. Let’s dive into what makes it so exceptional and how it can elevate your visual experience.
Precision Perfected:
The SpyderX Elite isn’t just a calibration tool; it’s a gateway to color perfection. It offers unparalleled control over your color management workflow. What does that mean for you? It means you’re in the driver’s seat regarding color precision, accuracy, and low-light capabilities. No more squinting at poorly calibrated images. This little marvel does it swiftly, delivering precise color calibration in just a few minutes.
Cutting-Edge Colorimeter Technology:
Behind the scenes, Datacolor has been hard at work, and the SpyderX Elite is the culmination of their efforts. It boasts a lens-based color engine technology that’s the stuff of calibration dreams. This means it can accurately measure color, white balance, and shadow detail. The secret sauce? Higher light sensitivity and advanced sensors ensure your screen’s colors are as true-to-life as possible.
User-Friendly Magic:
Now, let’s talk about user-friendliness. You don’t need a Ph.D. in color science to use this gadget. The SpyderX Elite’s software is as intuitive as they come. It’s like having a personal calibration assistant. You’ve got options like “One-click Calibration” for those who want quick fixes, “Step-by-step Assistant” for curious minds, and “Expert Console” for calibration aficionados. No matter your level of expertise, you’ll be on your way to a calibrated display in no time.
Adapting to Your Environment:
Ever noticed how the same projector can look different depending on the lighting in the room? That’s where the built-in ambient light sensor in the SpyderX Elite comes into play. It’s your silent lighting technician, measuring the room’s light and making real-time adjustments to your projector’s brightness and contrast. With five ambient light settings, your visuals will always be spot-on, whether it’s a sunny day or a cozy evening.
Before-and-After Visual Delight: Who doesn’t love a good before-and-after transformation? You can witness the magic in action with the SpyderX Elite’s “Spyderproof” function. A single click, and you’ll see a side-by-side comparison of your display before and after calibration. It’s like a makeover for your projector, turning it from dull and lackluster to vibrant and stunning. It’s not just calibration; it’s a visual revelation.
Are you on a quest for the ultimate color accuracy in your displays, be it monitors or projectors? Enter the X-Rite i1 Display Pro, the maestro of color perfection. In this review, we’ll journey through its impressive features, advanced technology, and potential to take your visual experience to new heights.
The Pursuit of Color Excellence:
X-Rite doesn’t make empty promises. They boldly claim to deliver the highest level of color accuracy for all screens, including the elusive realm of projectors. So, if you’re a color perfectionist, this tool is your trusted companion.
Advanced Technology Under the Hood:
The i1 Display Pro isn’t just another calibration tool; it’s a powerhouse of advanced technology. With a multitude of user modes, it caters to both the color enthusiasts and those who simply want results. Advanced filters, optical systems, and lightning-fast measurement speeds ensure your displays are properly profiled and calibrated for stunning visuals.
i1Profiler Color Management Software:
The crown jewel of this package is the i1Profiler Color Management Software. It’s a versatile Swiss Army knife for calibration. In Basic mode, you have predefined options for a quick calibration fix, perfect for those in a hurry. But if you’re a true aficionado seeking perfection, the Advanced mode offers user-defined options for intricate profiling and calibration. You’re in control of the magic.
Ambient Light Smart Control:
Would your display adapt to changing lighting conditions? The i1 Display Pro grants that wish. Its Ambient Light Smart Control automatically adjusts light levels or alerts you as lighting conditions shift. Your display becomes a chameleon, ensuring you always view your content at its best, regardless of the room’s lighting.
Unmatched Compatibility:
The i1 Display Pro is a versatile artist. It plays nice with various display and projection technologies, including LED, Plasma, RG Phosphor, OLED, and Wide Gamut. No matter your display type, it’s your trusty calibration companion.
Future-Proof Calibration:
In a world of ever-evolving technology, knowing that the i1 Display Pro is future-proof is reassuring. It’s continually upgraded to calibrate and support the latest display technologies. So, whether you’re working with today’s displays or tomorrow’s innovations, this tool has you covered.
Pros
PANTONE Spot Color optimization
Lightning-fast measurements
Video color standards
Automatic Display Control
Future-proof calibration
Cons
Complex user interface
3. Datacolor Spyder5PRO – Designed for Serious Photographers and Designers (S5P100)
The Datacolor Spyder5PRO, originally designed for serious photographers and designers, has carved a niche in ensuring advanced color accuracy for laptop and desktop displays.
While its primary focus is on monitor calibration, this review will explore its potential application in the realm of projector calibration, a critical aspect for enthusiasts and professionals seeking optimal color representation in their projected visuals.
Compact and Portable:
The Spyder5PRO is equipped with next-generation technology, featuring a compact and portable colorimeter. Its dual-purpose lens cap and counterweight, coupled with the industry’s only patented 7-detector optical engine, promise improved tonal response.
Room Light Monitoring:
With an integrated room light sensor, the Spyder5PRO continually measures ambient light levels, providing alerts and allowing users to modify calibration settings or adjust room lighting for optimal color accuracy during projector calibration.
True Color Accuracy:
The Spyder5PRO creates unique color profiles for each monitor, adjusting brightness based on room lighting. This functionality extends to projectors, ensuring accurate representation of colors in both on-screen visuals and printed outputs.
Fast and Easy Calibration:
The software’s user-friendly interface, complemented by an interactive help feature, guides users through a quick and efficient calibration process. This is particularly beneficial for those diving into projector calibration without delving deep into color management theory.
Display Analysis:
The Spyder5PRO’s Display Analysis feature provides insights into the characteristics of your display, essential for color-reliable work. This can be extended to projectors, allowing users to assess color, brightness, contrast, gamut, tone response, and white point across multiple devices.
Pros
User-Friendly Calibration Software
Integrated Room Light Monitoring
Accurate Color Representation for Projectors
Cons
Limited Projector-Specific Features
Display Analysis May Lack Depth for Projectors
How to Calibrate a Projector
Now that you have your tools, here’s a step-by-step guide to calibrating your projector:
Positioning the Colorimeter: Place the sensor device in front of the projector, about a foot away from the unit, and in the middle of the screen. Ensure all lights are off for accurate readings.
Connection With the Laptop: Connect the color meter and projector to your laptop.
Install Calibration Software: Make sure your laptop has calibration software installed. Choose from free options like HCFR and LightSpace DPS or invest in a paid tool for advanced features.
Presets: Configure settings like gamma level and screen size depending on the software.
Start the Calibration Process: Initiate the calibration process, which should take just a few minutes. Save the calibration settings, and voilà – enjoy the enhanced image quality!
Conclusion
Transform your movie nights into visual masterpieces with the Datacolor SpyderX Elite – your ticket to unparalleled precision and before-and-after wizardry. The X-Rite i1 Display Pro joins the scene, promising lightning-fast measurements and future-proof color perfection across screens, including projectors.
For a compact yet powerful option, the Datacolor Spyder5PRO ensures swift and efficient projector calibration with its room light monitoring and true color accuracy. Step into the world of calibration, where every click elevates your viewing experience.
FAQs of Projector Calibration Tool
Q1: Why is projector calibration important?
A1: Projector calibration is crucial because it ensures that your projector displays colors, brightness, and sharpness as accurately as possible. It transforms fuzzy and washed-out images into high-quality, cinema-like visuals.
Q2: What tools do I need for projector calibration?
A2: You’ll need a Projector Calibration Tool, a tripod to position it correctly, a Windows laptop to host calibration software, and Projector Calibration Software to make the necessary adjustments.
Q3: What is a colorimeter, and why is it essential for calibration?
A3: A colorimeter is a device that measures colors and plays a vital role in projector calibration. It analyzes and optimizes colors on your screen. When paired with the right software, it helps achieve accurate color reproduction.
Q4: What are the advantages of the Datacolor SpyderX Elite for calibration?
A4: The Datacolor SpyderX Elite offers extensive calibration options, advanced colorimeter technology, intuitive software, ambient light monitoring, and before-and-after analysis. It’s a user-friendly tool that provides precise calibration.
Q5: What are the standout features of the X-Rite i1 Display Pro for calibration?
A5: The X-Rite i1 Display Pro boasts advanced technology, lightning-fast measurements, versatile i1Profiler software, ambient light smart control, and compatibility with various display technologies. It’s a tool for color perfectionists.
How To Reset NEC Projector Lamp without Remote | Step-by-Step Guide
Resetting the lamp on a NEC projector without a remote may seem like a daunting task, but fear not – it’s entirely doable, and I’m here to guide you through the process.
NEC projectors are indeed marvels of technology, but they require some TLC, including occasional lamp resets. So, let’s embark on this journey of resetting your NEC projector’s lamp without a remote.
Table of Contents
How To Reset NEC Projector Lamp without Remote
Power Up the Projector
Access the Menu
Navigate to the “Default” Option
Submenu Unveiled
Lamp Hours or Hour Meter
Clear the History
Wait for the Magic
Exit the Menu
1. Power Up the Projector:
To begin, ensure your NEC projector is powered on and in a functional state. It’s crucial that it’s running before you attempt to reset the lamp.
2. Access the Menu:
Your trusty projector will have a control panel or buttons for navigation. What you need to do now is locate the “Menu” button and press it. This button opens up a treasure chest of options and settings on the projector’s screen.
3. Navigate to the “Default” Option:
Once inside the menu, scroll down through the options until you find “Default.” This is the gateway to resetting your lamp timer.
4. Submenu Unveiled:
Upon selecting the “Default” option, patiently wait for the submenu to grace your projector’s screen. This submenu is where the magic happens.
5. Lamp Hours or Hour Meter:
Within this submenu, you’ll want to find an option related to either “Lamp Hours” or “Hour Meter.” This is where the projector keeps track of how long your lamp has been burning bright.
6. Clear the History:
Highlight the “Lamp Hours” or “Hour Meter” option and select it. You should find an option to clear or reset the lamp timer. Go ahead and confirm your selection and initiate the history-clearing process.
7. Wait for the Magic:
After you’ve given the command to reset the lamp timer, sit back and relax for a few moments. The projector will work its internal wizardry, and you’ll likely see a message on the screen confirming that the reset is complete.
8. Exit the Menu:
Your task is almost complete. Navigate down to the “ESC” or “Exit” option in the menu and select it. This is your cue to gracefully exit the menu, returning you to the projector’s main screen, now with a freshly reset lamp timer.
Great job! You’ve successfully reset the lamp timer on your NEC projector without needing a remote control.
However, do keep in mind that the menu options and their locations may vary depending on the specific model of your NEC projector. Some projectors might feature a “Reset Lamp” or “Reset Lamp Hours” option instead of “Lamp Hours” or “Hour Meter.” Don’t let this confuse you; the end goal is the same – to clear the history of your lamp’s usage.
What do you need to do before resetting?
Before you embark on this journey, there are a couple of key points to remember:
1. Operational Projector:
Your NEC projector needs to be up and running before you initiate the lamp reset. It won’t work if the projector is turned off.
2. Timing Is Everything:
Reset the lamp timer only when the lamp is either expired or displaying signs of failure. Look out for indicators such as warning lights, lamp failure, or poor color quality. This is the signal that it’s time to replace and reset the lamp.
3. New Lamp Installed:
The resetting procedure should ideally be performed after you’ve replaced the lamp with a new one. It ensures that the timer accurately reflects the new lamp’s usage.
Conclusion
In summary, resetting the lamp timer on your NEC projector without a remote is a straightforward process, as long as you follow the steps mentioned above.
Turn on your projector, access the menu, locate the lamp hours or hour meter option, clear the history, and you’re good to go. Happy projecting!
FAQs
1. How often should I reset the lamp timer on my NEC projector?
The lamp timer on your NEC projector should be reset only when the lamp is either expired or displaying signs of failure. Look for indicators such as warning lights, lamp failure, or poor color quality. Typically, this happens when you replace the lamp with a new one.
2. Can I reset the lamp timer on my NEC projector while it’s turned off?
No, you should reset the lamp timer when the projector is turned on and in a functional state. It won’t work if the projector is turned off or in standby mode.
3. What if my NEC projector model has different menu options for lamp timer reset?
NEC projector models may have variations in their menu options. Some may feature “Reset Lamp,” “Reset Lamp Hours,” or “Lamp Hours,” while others may have “Hour Meter.” Regardless of the specific option, the goal is the same – to clear the history of the lamp’s usage.
4. How do I know when it’s time to reset the lamp timer on my NEC projector?
It’s time to reset the lamp timer when you notice warning lights, lamp failure, or a decrease in color quality during projector operation. These are signs that the lamp has reached the end of its useful life and should be replaced.
5. Can I reset the lamp timer on my NEC projector using the projector’s remote control?
Yes, you can often reset the lamp timer using the projector’s remote control if it’s available and compatible with your model. Check your projector’s user manual for instructions specific to your remote control.
Epson 4010 vs 5050UB: 8 Main Difference. Best Comparison!
In immersive home theater experiences, the Epson 4010 and 5050UB are prime contenders. Though they share a near-identical exterior, these models hold distinct differences that set them apart. Beneath their shared features lie nuanced disparities that warrant careful consideration. This comparison aims to shed light on the strengths and uniqueness of each projector to aid in making an informed decision.
Affordable Excellence Priced under $2000, the Epson 4010 offers unparalleled value for ardent home theater enthusiasts.
If your pursuit is a projector that embraces 4K UHD sources, your search concludes here. Incorporating 3LCD technology ensures immunity to rainbow artifacts and color brightness discrepancies. An evolution of the HC 4000, the 4010 elevates brightness and contrast to 2400 lumens and 200,000:1, facilitating sharp, high-contrast images.
This prowess is complemented by outstanding color accuracy. Equipped with full 10-bit HDR3 color processing and the True 3-Chip design, it encompasses the entirety of the DCI-P3 color space, yielding exceptional visual performance.
Ease of image alignment is facilitated by a 2.1x zoom, 47% vertical lens shift, and 0.096% horizontal lens shift.
Feature And Specifications:
Resolution: 4K Enhancement technology provides a stunning visual experience by utilizing pixel-shifting to enhance Full HD content to near-4K quality.
Brightness: With a brightness of 2400 lumens, the Epson 4010 ensures vibrant and clear images, even in well-lit environments.
Contrast Ratio: Boasting a contrast ratio of 200,000:1, the projector delivers enhanced depth and detail in both bright and dark scenes.
Color Depth: The Epson 4010 supports 12-bit color depth for SDR and 10-bit for HDR content, ensuring accurate and lifelike color reproduction.
HDR Support: High Dynamic Range (HDR) capabilities allow for improved light and dark details, enhancing the overall visual experience.
Connectivity: The projector features HDMI and USB ports, enabling seamless connection to various multimedia devices.
Image Adjustment: Manual zoom and lens shift options (2.1x zoom, 47% vertical lens shift, 0.096% horizontal lens shift) provide flexibility in positioning and alignment.
Dimensions and Weight: The projector measures 20.5″ x 17.7″ x 6.7″ and weighs 24.7 lbs.
Specifications:
Brightness: 2400 lumens
Throw Ratio: 1.35 – 2.84
Light Source: 250W UHE
Input Lag: 28ms
Price: $1,799.00
The Epson Home Cinema 4010 is not just a projector; it’s your ticket to cinematic bliss. With 4K Enhancement technology, a wide color gamut, exceptional contrast, and flexible installation options, it’s like having a personal cinema in your home. This projector is your gateway to a world where every frame is a work of art, and every movie night is a breathtaking journey.
Pros
Affordable and budget-friendly price
Good Color Accuracy
Flexibility in Image Adjustment
Immunity to Rainbow Artifacts
Decent Brightness
Cons
HDR Limitations
Epson Home Cinema 5050UB 4K PRO-UHD 3-Chip Projector with HDR,White
The Enhanced Experience The Epson 5050UB marks a substantial advancement in resolution enhancement, color accuracy, brightness, and image processing.
This projector’s fidelity in reproducing images as intended is unparalleled. The assurance of superb overall picture quality is fortified by its 4K enhancement technology.
Beyond this, its high native image contrast is a gateway to richly detailed dark shadows and vibrant highlights. The projector excels in displaying dark scenes while preserving true black.
Accurate colors are assured, bolstered by a wider color gamut that covers the complete P3/BT.2020 color range.
Including ample lens shift and motorized zoom empowers viewers to achieve image adjustments without displacing the projector’s position. Suited for permanent installations, these features guarantee a well-proportioned picture.
Feature And Specifications:
Resolution: Like the 4010, the Epson 5050UB utilizes 4K Enhancement technology for a stunning visual output.
Brightness: With a brightness of 2600 lumens, the projector ensures captivating visuals even in challenging lighting conditions.
Contrast Ratio: The Epson 5050UB boasts an impressive contrast ratio of 1,000,000:1, enabling vivid and immersive visuals with enhanced depth.
Color Depth: Supporting 12-bit color depth for both SDR and HDR content, the projector promises accurate and vibrant color representation.
HDR Support: The projector supports HDR content and also offers HLG capabilities for even brighter highlights and improved color rendering.
HDR Adjustments: Advanced HDR adjustments with a 16-step slider allow for precise fine-tuning of tone mapping for optimal HDR viewing.
Connectivity: Equipped with multiple HDMI ports, USB, Mini USB, LAN, and more, the projector provides comprehensive connectivity options.
Image Adjustment: Motorized zoom and lens shift capabilities and ample lens shift options simplify image alignment and adjustment.
Dimensions and Weight: Similar to the 4010, the Epson 5050UB measures 20.5″ x 17.7″ x 7.6″ and weighs 24.7 lbs.
Specifications:
Brightness: 2600 lumens
Throw Ratio: 1.35 – 2.84
Light Source: 250W UHE
Input Lag: 28ms
Price: $2,999.00
The Epson Home Cinema 5050UB is more than just a projector; it’s your personal ticket to cinematic immersion. With true 4K Enhancement technology, a vast color gamut, incredible contrast, and adaptable installation options, it’s like having a front-row seat to a world where every frame is a visual masterpiece, and every movie night is an unforgettable journey.
Pros
Premium Visual Quality
Advanced HDR
Enhanced Color Accuracy
Motorized Lens Shift
Cons
Higher Price
Epson Home Cinema 4010 vs Epson Home Cinema 5050UB: A Detailed Comparison
The divergence between the Epson 4010 and 5050UB transcends mere cosmetic variances. While similarities abound, noteworthy distinctions define these models.
Epson 5050UB surges ahead with heightened overall brightness and a dynamic contrast ratio.
Both projectors boast solid color accuracy, but it’s the 5050UB that claims the throne with its 12-bit color depth for both SDR and HDR content.
Furthermore, these models feature slightly varied connectivity ports to accommodate multimedia devices—the Epson 4010 stands acclaimed as an affordable, budget-friendly UHD projector.
Contrast Ratio:
Elevating the Visual Quality Contrast ratio enhances video quality by augmenting the disparity between deep blacks and radiant whites.
Verdict: The Epson 5050UB takes the lead with an impressive 1,000,000 contrast ratio, coupled with Epson’s exclusive UltraBlack technology. This innovation employs proprietary polarizing filters to amplify contrast and achieve darker black levels.
Brightness:
Illuminating Brilliance: With 2400 lumens of brightness, the 4010 delivers consistent light output across its varied modes.
The ANSI lumen might fluctuate depending on settings and modes, particularly between high-power and ECO modes.
In contrast, the Epson 5050 edges past with 2600 lumens of brightness. The significance of these additional lumens in projecting a notably brighter image defies conventional belief.
Moreover, the manual iris control furnishes superior brightness management across viewing modes.
Dimensions and Weight:
When considering the physical attributes of both the Epson 4010 and the Epson 5050UB, you’ll find remarkable similarities. Epson 4010 shares dimensions of 20.5 inches in width, 17.7 inches in depth, and 6.7 inches in height. There are minor differences in Epson 5050UB, which shares dimensions of 20.5 inches in width, 17.7 inches in depth, and 7.6 inches in height. This uniformity in size indicates that both projectors are designed to occupy a comparable amount of space in your home theater setup.
In terms of weight, Both models scale at 24.7 pounds. While the difference in weight is marginal, it may play a role in installation and portability considerations.
Verdict: The decision between the Epson 4010 and 5050UB hinges on your budget and desire for top-tier visual quality.
HDR:
Enriching Visual Depth Both the 4010 and the 5050UB are primed to harness the benefits of High Dynamic Range (HDR), capturing intricate details in light and shadow.
Verdict: The Epson 5050UB supports HDR and incorporates HLG capabilities. This translates to brighter highlights, heightened impact, and refined color representation.
HDR Adjustments: Fine-Tuning the Experience
The Epson 4010 features four distinct HDR settings, each calibrated to enhance overall image brightness.
Conversely, the Epson 5050UB elevates the HDR experience with a 16-step slider for nuanced adjustments. This refinement empowers users to fine-tune the tone map for HDR content. Furthermore, dedicated remote controls facilitate seamless adjustment, culminating in a finely tuned cinematic experience.
Color Depth:
Radiant Color Realism The Epson 4010 delivers 12-bit color depth for SDR and 10-bit HDR. However, its HDR capacity is confined to 4K/24 Hz signals with 10-bit.
In contrast, the Epson 5050UB guarantees superior color accuracy, boasting 12-bit color depth for both SDR and HDR content. Notably, it supports HDR at 4K/60 Hz.
Connectivity:
The Gateway to Multimedia Integration The Epson 4010 incorporates 1x HDMI (HDCP 2.2), 1x HDMI (HDCP 1.4), USB Type A, and 1x USB (for wireless and firmware).
On the other hand, the Epson 5050UB provides enhanced connectivity with 2x HDMI 2.0 (HDCP 2.2), USB Type A, 1x USB, 1x Mini USB, LAN (RJ45), and 1x Computer/D-sub ports. This expansive array ensures versatile integration with multimedia devices.
Image Comparison:
A Quest for Superiority Post-calibration, both models yield comparably exceptional picture quality. However, the distinction becomes pronounced in darker scenes, where the 5050UB gains an edge due to its formidable contrast ratio and innovative Ultra-Black technology.
In this comparison, Epson undoubtedly emerges as the victor in picture quality, albeit by a marginal margin. The projector delivers deeper blacks, heightened shadow detail, and enhanced contrast, thereby facilitating the discernment of finer intricacies.
The Verdict: Balancing Cost and Quality While the Epson 5050UB emerges as the definitive winner, the question of value looms large. Given the striking similarity between these models, with only marginal variations, prospective buyers must weigh the costs and benefits.
Verdict:
The Epson 5050UB offers superior attributes, particularly for detailed projections with optimized dark scenes. However, those seeking near-identical picture quality and cost-effectiveness will find solace in the Epson 4010, available under $2000.
Parity reigns between these models when considering aspects such as setup, installation, brightness for both 2D and 3D viewing, projection screen size, weight, and image adjustment functions.
Paying a premium of over $3000 for marginal upgrades might not align with everyone’s preferences. Aspiring for graphically rich projections with fine-tuned optimizations for darker scenes may warrant the investment in the 5050UB, ensuring a gratifying viewing experience.
FAQs
1. What is the main difference between the Epson 4010 and the Epson 5050UB?
The main difference lies in their performance and features. While both offer 4K enhancement technology, the Epson 5050UB stands out with its higher brightness (2600 lumens), superior contrast ratio (1,000,000:1), and advanced HDR adjustments. The Epson 4010, on the other hand, offers solid performance at a more budget-friendly price.
2. Are there notable differences in image adjustment capabilities?
Yes, both projectors offer image adjustment features, but the Epson 5050UB has an advantage with its motorized zoom and lens shift options. This allows for effortless image adjustment without moving the projector, providing added convenience during setup.
3. Which projector offers better color accuracy?
Both projectors offer impressive color accuracy, but the Epson 5050UB takes it a step further with its 12-bit color depth for both SDR and HDR content. This produces more vibrant and lifelike color representation, especially in high-definition and HDR content.
4. What are the benefits of HDR support in these projectors?
Both projectors support High Dynamic Range (HDR), which enhances the visual experience by showcasing a broader range of light and dark details. The Epson 5050UB, however, goes a step further with HLG capabilities, promising even brighter highlights and improved color accuracy in HDR content.
5. Which projector is more suitable for those on a budget?
If you’re looking for an affordable option without compromising on quality, the Epson 4010 is a solid choice. It provides a commendable performance, 4K enhancement, and good color accuracy at a budget-friendly price point.
Epson LS12000 vs 5050UB Projector: Best Comparison Review
Selecting the right projector amidst the myriad options available can be challenging. Epson, known for its quality projectors, offers the LS12000 and 5050UB models, each with unique features. This article provides a comprehensive comparison of these two projectors, assisting you in making an informed decision tailored to your requirements.
Premium Pick
Epson Pro Cinema LS12000
4K resolution for incredibly sharp visuals.
Higher color brightness (2,700 lumens) for vibrant colors.
Impressive contrast ratio (1,200,000:1) for dynamic images.
Introducing the Epson Pro Cinema LS12000, the pinnacle of cinematic innovation! Immerse yourself in the extraordinary 4K PRO-UHD Laser Projector, a true technological masterpiece that redefines home entertainment. Step into a world where your visual experience transcends boundaries, delivering unparalleled clarity, color vibrancy, and contrast. Elevate your movie nights and transform your living space into a cinematic haven with the Epson LS12000, a projector that goes beyond expectations and opens the door to a new era of visual excellence!
Features and Specifications:
???? 4K PRO-UHD Laser Precision: Immerse yourself in the brilliance of genuine 4K Ultra HD resolution, where every pixel shines with breathtaking clarity and detail.
???? Laser-Sharp Precision: Experience the future of projection technology with a high-performance laser light source, ensuring dazzling brightness and color accuracy.
???? Mind-Blowing Lumens: Illuminate your screen with an impressive 2,800 lumens of color and white brightness, ensuring vibrant and dynamic visuals in any lighting conditions.
???? HDR10 and HLG Support: Enjoy your favorite content in High Dynamic Range, with support for both HDR10 and Hybrid Log-Gamma (HLG), bringing out the finest details and lifelike colors.
???? Unprecedented Contrast: Dive into the depths of darkness with an incredible contrast ratio, creating rich, velvety blacks and exquisite shadow detail.
???? Advanced Lens Adjustments: Achieve the perfect setup with motorized lens adjustments, including zoom, focus, and lens shift, ensuring effortless installation.
???? Versatile Lens Shift Range: With a vertical lens shift of ±94% and a horizontal shift of ±50%, you have the flexibility to place your projector wherever it suits your space best.
???? Multiple HDMI Ports: Seamlessly connect all your devices with multiple HDMI ports, including one supporting 18 Gbps for pristine 4K HDR playback.
???? Super-Resolution and Detail Enhancement: Elevate your content with Epson’s cutting-edge image processing, revealing every nuance and subtlety in your movies and games.
???? 16-Element Glass Lens: Revel in unparalleled image quality, thanks to Epson’s precision-engineered lens that ensures razor-sharp visuals.
The Epson Pro Cinema LS12000 4K PRO-UHD Laser Projector isn’t just a projector; it’s a transformative experience that transports you to a realm of visual brilliance. Brace yourself for a cinematic journey where every frame is a work of art, and your home emerges as the ultimate hub of unparalleled entertainment!
Pros
4K resolution for incredibly sharp visuals.
Higher color brightness (2,700 lumens) for vibrant colors.
Impressive contrast ratio (1,200,000:1) for dynamic images.
Long-lasting laser light source.
Lower input lag (20-39ms) for gaming.
Supports HDR with wider color gamut.
Quiet operation (30 dB / 22 dB)
Cons
Lacks UltraBlack technology for improved contrast.
Ladies and gentlemen, feast your eyes on the Epson Home Cinema 5050UB, the ultimate gateway to a world of cinematic wonder! Prepare to be dazzled as you embark on a journey into the heart of 4K PRO-UHD perfection. This projector is not just a piece of tech; it’s a portal to an immersive, larger-than-life entertainment experience that will leave you spellbound. Say goodbye to ordinary movie nights and hello to a new era of home theater magic with the Epson 5050UB – where every frame is a masterpiece and every moment is pure cinematic bliss!
Feature and Specifications:
???? 4K PRO-UHD Resolution: Experience the magic of 4K Ultra HD, rendering your favorite films and content with remarkable clarity and detail.
???? 3LCD Technology: Revel in lifelike colors and brightness, thanks to Epson’s innovative 3LCD tech, ensuring a rainbow-free, smooth viewing experience.
???? 2,600 Lumens Brilliance: Illuminate your screen with dazzling color and white brightness, making every scene pop, even in well-lit rooms.
???? HDR Support: Enjoy movies and shows in High Dynamic Range, supporting both HDR10 and HLG for striking contrast and vivid colors.
???? Incredible Contrast: Delve into deep, inky blacks and exquisite shadow detail thanks to an astonishing contrast ratio of up to 1,000,000:1.
???? Versatile Lens Options: Achieve the perfect setup with motorized zoom, focus, and lens shift, effortlessly adapting to your room’s configuration.
???? Wide Lens Shift Range: With vertical lens shift at ±96% and horizontal shift at ±47%, installation becomes hassle-free, allowing you to place the projector where it suits you best.
???? Multiple HDMI Ports: Connect your devices with ease using multiple HDMI ports, including one supporting 18 Gbps for pristine 4K HDR playback.
???? Super-Resolution & Detail Enhancement: Elevate your content with Epson’s advanced image processing, revealing every subtle nuance in your movies and games.
???? 16-Element Glass Lens: Immerse yourself in picture-perfect quality, thanks to Epson’s precision-engineered lens for razor-sharp imagery.
The Epson Home Cinema 5050UB 4K PRO-UHD Projector is your ticket to a cinematic adventure in the comfort of your own home. Prepare for an unparalleled visual journey where each frame is a masterpiece, and your living room becomes the epicenter of entertainment! ????????
Pros
More budget-friendly option.
Full HD 3D support for an immersive experience.
Incorporates UltraBlack technology for enhanced contrast.
Features a pixel-shift processor for 4K content.
Acceptable lamp life (3,500 hours / 5,000 hours in Eco Mode).
Supports HDR for improved visuals.
Cons
Lower resolution (Full HD) compared to LS12000.
Slightly lower color brightness (2,600 lumens).
Epson LS12000 vs 5050UB projector: 14 Major Differences
The LS12000 and 5050UB are both compelling choices, and understanding their differences will help you make an informed decision.
Resolution:
The LS12000 boasts an impressive 4K resolution (3840 x 2160), delivering incredibly sharp images with high visual clarity. In contrast, the 5050UB provides Full HD resolution (1920 x 1080), delivering good detail but falling short of the LS12000’s 4K capabilities.
Image Brightness:
With 2500 ANSI lumens, the LS12000 offers ample brightness for various settings. The 5050UB has a slightly higher brightness of 2600 ANSI lumens, making it suitable for well-lit environments.
Color Brightness:
The LS12000 offers a color brightness of 2700 lumens, resulting in vibrant colors. The 5050UB, at 2600 lumens, also performs well in this aspect. However, the LS12000 maintains a slight edge regarding color vibrancy and accuracy.
Connectivity:
Both the LS12000 and 5050UB offer a range of connectivity options to ensure seamless integration with various devices and content sources.
LS12000 Connectivity: The LS12000 comes equipped with a comprehensive set of connectivity options:
HDMI Ports: It features multiple HDMI ports, allowing you to connect various devices such as gaming consoles, Blu-ray players, laptops, and streaming devices.
USB Ports: USB ports enable you to secure external storage devices for playing media files directly from USB drives.
Ethernet Port: The LS12000 includes an Ethernet port for wired network connectivity, which can be helpful for firmware updates and online content streaming.
Wireless Connectivity: This projector supports wireless connectivity through Wi-Fi, enabling you to mirror your smartphone or laptop screen wirelessly easily.
Analog Inputs: The projector also offers analog inputs, such as VGA and component video, which can be handy for connecting older devices.
Audio Output: An audio output allows you to connect external speakers or sound systems for an enhanced audio experience.
5050UB Connectivity: Similar to the LS12000, the 5050UB provides various connectivity options:
HDMI Ports: Multiple HDMI ports are available for connecting various devices, ensuring versatility in your setup.
USB Ports: USB connectivity lets you play media files directly from USB storage devices.
Ethernet Port: The 5050UB includes an Ethernet port for wired network connectivity, facilitating firmware updates and online streaming.
Wireless Connectivity: Wi-Fi support enables wireless screen mirroring and content streaming.
Contrast Ratio:
The LS12000’s impressive 1,200,000:1 contrast ratio ensures dynamic visuals with deep blacks and bright whites. The 5050UB, with a contrast ratio of 1,000,000:1, also offers excellent contrast performance, albeit slightly lower than the LS12000.
HDR Support:
Both projectors support HDR technology, enhancing visuals through expanded color ranges and improved contrast. The LS12000’s wider color gamut results in more accurate and lifelike HDR reproduction.
Light Source:
Utilizing a laser light source, the LS12000 offers higher brightness output and durability. On the other hand, the 5050UB employs a 250W UHE bulb, providing brightness but with a shorter lifespan.
UltraBlack Technology:
While the LS12000 lacks UltraBlack technology, the 5050UB incorporates it. This technology enhances contrast by minimizing light leakage, resulting in deeper blacks and improved image quality.
Pixel-Shift Processor:
The LS12000 lacks a dedicated pixel-shift processor, but it employs techniques for sharpness. The 5050UB features a pixel-shift processor for enhanced detail and supports 4K content.
Input Lag:
Both projectors offer low input lag suitable for gaming. The LS12000 offers input lag between 20 and 39 milliseconds, while the 5050UB provides 22.5 to 28 milliseconds.
3D Mode:
The 5050UB supports Full HD 3D content, whereas the LS12000 lacks 3D capabilities.
Audible Noise:
Both projectors operate quietly, with the LS12000 producing 30 dB (normal mode) and 22 dB (Eco mode). The 5050UB generates 31 dB (normal mode) and 20 dB (Eco mode).
Lamp Life:
Thanks to its laser phosphor light source, the LS12000 boasts an impressive 20,000-hour lamp life. In comparison, the 5050UB relies on a 250W UHE bulb, offering a lamp life of 3,500 hours (or 5,000 hours in Eco Mode).
Price:
The LS12000 is a premium option priced at $3999.99, while the 5050UB is more budget-friendly at $2,511.22.
Final Verdict:
The LS12000 excels in image quality, longevity, and light output. Conversely, the 5050UB offers a more budget-conscious choice and includes 3D capabilities. The choice between the two depends on your budget and preferences.
FAQs
What is the difference between static and dynamic screen contrast?
Answer: Static contrast measures simultaneous brightness range, while dynamic contrast measures brightness changes over time. Dynamic contrast can adjust brightness based on content, potentially introducing slight lag.
What is the ideal screen contrast level?
Answer: For normal lighting conditions, a contrast level between 60-70% is recommended. However, the best contrast varies based on the content you’re viewing.
Does dynamic contrast impact input lag?
Answer: Yes, dynamic contrast can increase input lag. Rapid adjustments in brightness caused by dynamic contrast can lead to a minor lag in displaying images.
Is the LS12000 or 5050UB better for image quality?
Answer: The LS12000 offers superior image quality due to its 4K resolution, higher color brightness, and impressive contrast ratio. It’s an excellent choice for those seeking top-tier visuals.
Which projector is more budget-friendly?
Answer: The 5050UB is the more budget-friendly option with a price of $2,511.22, making it a great choice for those looking for a balance between cost and performance.