How to Recone a Subwoofer | DIY Guide for Improved Sound Quality
A powerful subwoofer is essential to any car’s sound system, regardless of its type. Subwoofers can hit some pretty low frequencies when they are brand new. However, they lose their ability to deliver the same sound as they age. Subwoofers’ performance decreases over time due to wear and tear. Your subwoofer’s limits are closer to being reached the louder and more often, you crank up the bass.
Subwoofer cones are highly susceptible to fatigue, making them one of the most crucial parts. Your sub can develop cracks and splits due to constant use and abuse. Subwoofers are unable to move air effectively once this occurs. If you continue using it, you will only exacerbate the damage caused by your fatigued subwoofer.
External objects can physically damage a subwoofer by piercing the cone and eventually rendering it useless due to physical damage. A damaged cone can be repaired by various methods, fortunately. Take your old, tired speaker to an audio doctor in your area for a little tune-up to see if it will work any better. If you would like a more accessible and cheaper method to recone your subwoofer, here is a guide:
Reconing
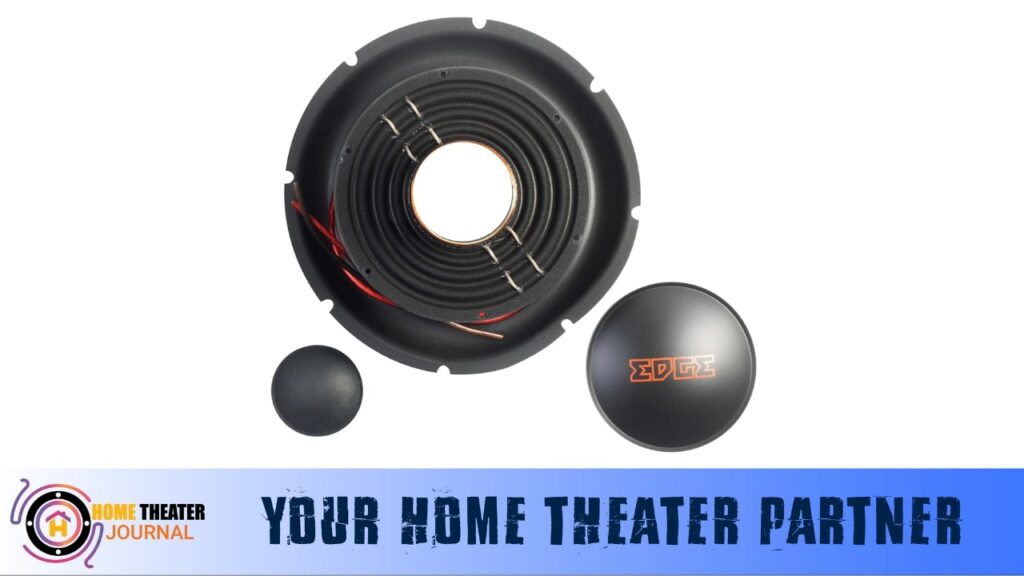
Subwoofer damage can be repaired through a simple process called reconing (except for damage to the magnet, frame, and enclosure). There are several steps involved in this process, but it essentially entails removing all the moving parts of a subwoofer, such as a cone and surround, spider, lead wires, voice coil, cone and surround, and moving parts. A subwoofer can be reconed in several different ways.
Buying a complete kit for re-coning is the first method of re-coning. The prices for these kits can range from low to high. A more involved method would be to strip your subwoofer, requiring you to do more work on the machine. You must decide which is best for you based on your budget, experience, and time. A complete DIY guide to reconditioning your fatigued subwoofer is provided below.
How to Recone a Subwoofer | What You’ll Need

Here are some tools you might need to help smooth the dismantling process:
- Buy a new soldering iron
- Use a Phillips bit to drill
- Gel for stripping aircraft paint
- Glue that rubberized
- Screwdriver
- Blade or knife
- An Acetone bottle
The subwoofer needs to be stripped.
Make sure your subwoofer is disconnected from the battery by removing the sides of the trunk or panel where it is installed. Take the woofer out of the enclosure and place it on a work table with your Phillips screwdriver.
It is also essential to eliminate all dirt, junk, and debris as soon as possible to move on smoothly to the next step. You can clear your view and diagnose problems by wiping down spider landings and surrounding units with acetone.
How to Recone a Subwoofer
Step 1: Gather Materials and Prepare:
- Collect all the necessary tools and replacement parts.
- Set up a clean and well-ventilated workspace.
Step 2: Remove Old Components:
- Use a blade to cut and remove the old cone, spider, and coils from the subwoofer.
Step 3: Clean the Basket and Frame:
- Thoroughly clean the basket and frame using acetone to remove old glue residues.
Step 4: Prepare for Bonding:
- Ensure all parts are clean, as clean parts make for better bonds.
Step 5: Insert Spacers:
- Insert spacers and slide them through the former, ensuring a snug fit without damaging it.
Step 6: Secure Spider:
- Confirm that the spider is firmly attached to the spacers before proceeding.
Step 7: Solder Tinsel Leads:
- Use a soldering iron to desolder the old tinsel leads and solder the new ones in place.
Step 8: Place Gap Spacers:
- Once tinsel leads are in place, position gap spacers as needed.
Step 9: Attach the Cone:
- Position the new cone, making sure it is flush against the top lip of the basket and snugly seated against the raised lip.
Step 10: Stick Surround to Basket:
- Apply adhesive to the edges of the basket and attach the surround over the top of the cone.
Step 11: Apply Even Pressure:
- Place several books on top of the frame to evenly press down the surrounds, ensuring a great, airtight bond.
Step 12: Allow for Drying Time:
- Let the subwoofer dry for a couple of days, allowing the adhesive to set properly.
Step 13: Test the Subwoofer:
- After the subwoofer has dried, you should be able to hear the difference in sound quality between the new and old components.
Step 14: Reinstall Subwoofers:
- Place the reconed subwoofers back into their enclosures, ensuring they are securely mounted.
Step 15: Test Sound Output:
- Put the car back on the road and test the sound to ensure that the reconed subwoofer is functioning correctly and producing the desired sound.
Following these step-by-step instructions will guide you through the process of reconing your subwoofer and improving its performance.
Common Mistakes to Avoid When Reconing a Subwoofer
While reconing a subwoofer can be a rewarding DIY project, people can make several common mistakes during the process. Here are some of the most frequent mistakes:
- Lack of Patience and Rushing: Reconing requires precision and attention to detail. Rushing through the process can lead to misalignments, poor glue bonding, and other issues that could affect the subwoofer’s performance.
- Inadequate Cleaning: To ensure good glue bonding, thoroughly clean the subwoofer’s frame, basket, and other components before applying new adhesive. Any residual old glue or debris can hinder the new components from adhering properly.
- Improper Glue Application: Applying adhesive incorrectly or unevenly during the reconing process can lead to air leaks and compromised performance. It’s essential to use the right type of adhesive and to apply it evenly to ensure a strong and airtight bond.
- Neglecting Alignment: Incorrectly aligning the voice coil, spider, and cone can lead to poor movement and distortion when using the subwoofer. Proper alignment is crucial for optimal performance.
- Overstretching Surrounds: Stretching the surrounds too much during installation can lead to an imbalanced suspension, affecting the subwoofer’s performance and longevity. It’s important to be gentle when positioning the surroundings.
- Incorrect Wiring: Reattaching the voice coil wires improperly or crossing them can result in short circuits or poor electrical connections, affecting the subwoofer’s functionality.
- Need for Drying Time: Rushing to reinstall the subwoofer before fully dries the adhesive can result in poor bonding and misalignments. Giving the reconed subwoofer adequate drying time is crucial.
- Ignoring Manufacturer Guidelines: Every subwoofer model may have specific reconing guidelines provided by the manufacturer. Ignoring these guidelines or not using recommended replacement parts can lead to suboptimal performance.
- Using Wrong Parts or Tools: Using incorrect replacement parts, adhesives, or tools can lead to problems during the reconing process. Ensuring you’re using the right components for your subwoofer model is essential.
- Inadequate Testing: Please test the reconed subwoofer thoroughly before final installation can lead to disappointment when you realize there are still issues with the sound quality or performance.
Conclusion
Consider reconing and repairing your equipment before replacing your entire sound system. There’s a good chance you’ll save some money. In addition, a well-repaired speaker functions just like a brand-new subwoofer. Get your unit serviced by a professional to avoid getting your hands dirty.
FAQs
1. What is reconing, and why must I do it?
Reconing is the process of repairing a subwoofer by replacing its components like the cone, voice coil, spider, and surround. Over time, subwoofers can experience wear and tear, leading to decreased performance. Reconing can restore your subwoofer’s sound quality without replacing the entire unit.
2. Can I recone any subwoofer, or are there limitations?
Reconing is generally feasible for most subwoofers, but it’s crucial to consider the subwoofer’s design, size, and compatibility of replacement parts. Some subwoofers may have proprietary components that aren’t readily available, making reconing more challenging. Refer to manufacturer guidelines or consult experts to determine if your subwoofer is suitable for reconing.
3. Is reconing a DIY-friendly task, or should I seek professional help?
Reconing can be a complex DIY project that requires precision and patience. If you’re experienced with electronics, mechanics, and adhesive work, you can recone a subwoofer. However, if you need more clarification on any step or need more tools, seeking professional assistance is recommended to ensure the best results.
4. What are some common mistakes to avoid during the reconing process?
Common mistakes include inadequate cleaning before applying new adhesive, improper alignment of components, stretching surrounds too much, using incorrect adhesives or replacement parts, and not giving the reconed subwoofer sufficient drying time. Ignoring manufacturer guidelines and skipping testing after reconing can also lead to issues.
5. Will reconing my subwoofer make it perform like new?
While reconing can significantly improve a subwoofer’s performance, managing expectations is important. Reconing can restore much of the original sound quality. Still, factors like the quality of replacement parts, the precision of the reconing process, and the overall condition of the subwoofer will influence the final results. If done correctly, reconing can extend the lifespan and improve your subwoofer’s sound.

Author: Baqarrasheed
I know all about home theater items! I have been doing this for more than three years now. I am good with things like sound systems, TVs, projectors, and all that cool entertainment gear. I like to help folks by testing and talking about these gadgets on Hometheaterjournal. I want to make sure everyone can create an awesome entertainment setup at home without any confusion.
I write the creative content for HometheaterJournal.


